Gluten-Free Fruit Scones
This post contains affiliate links. Please read my disclosures.

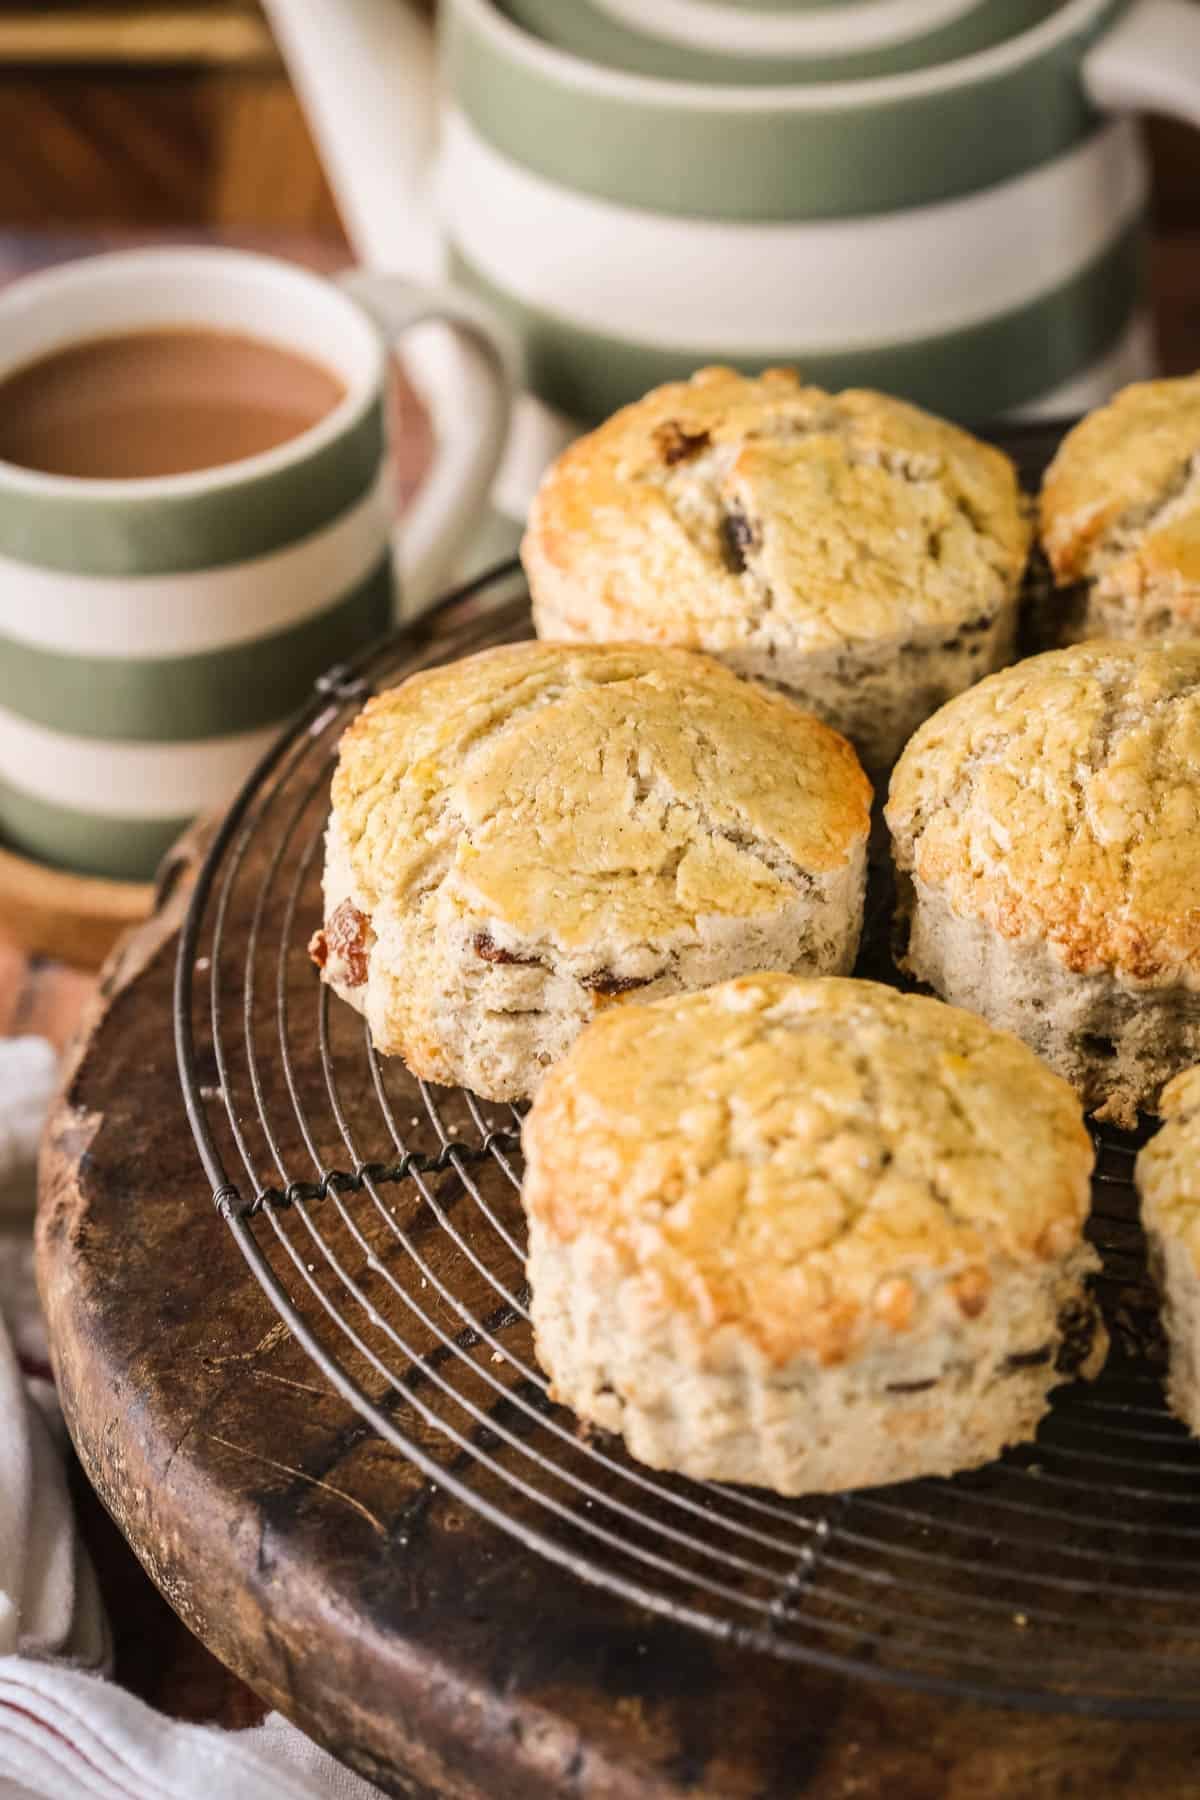
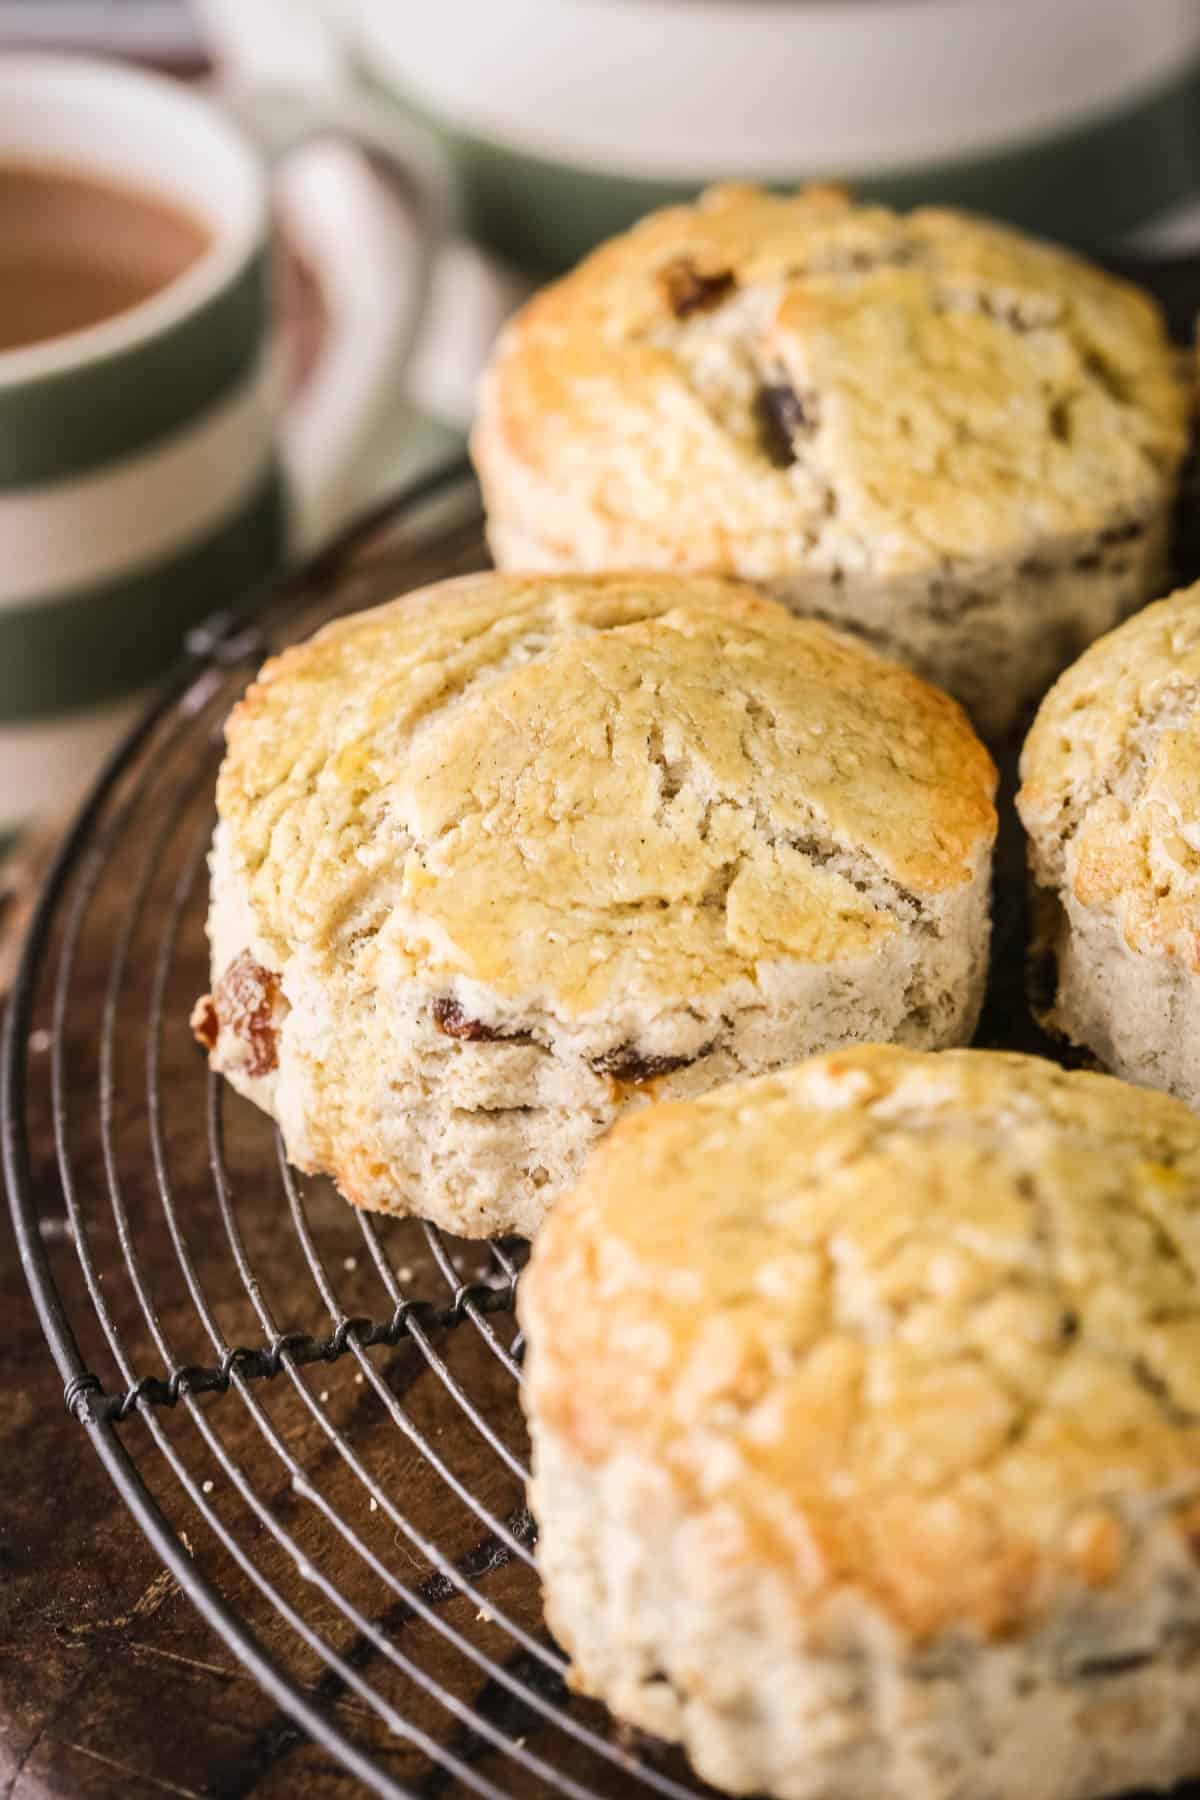
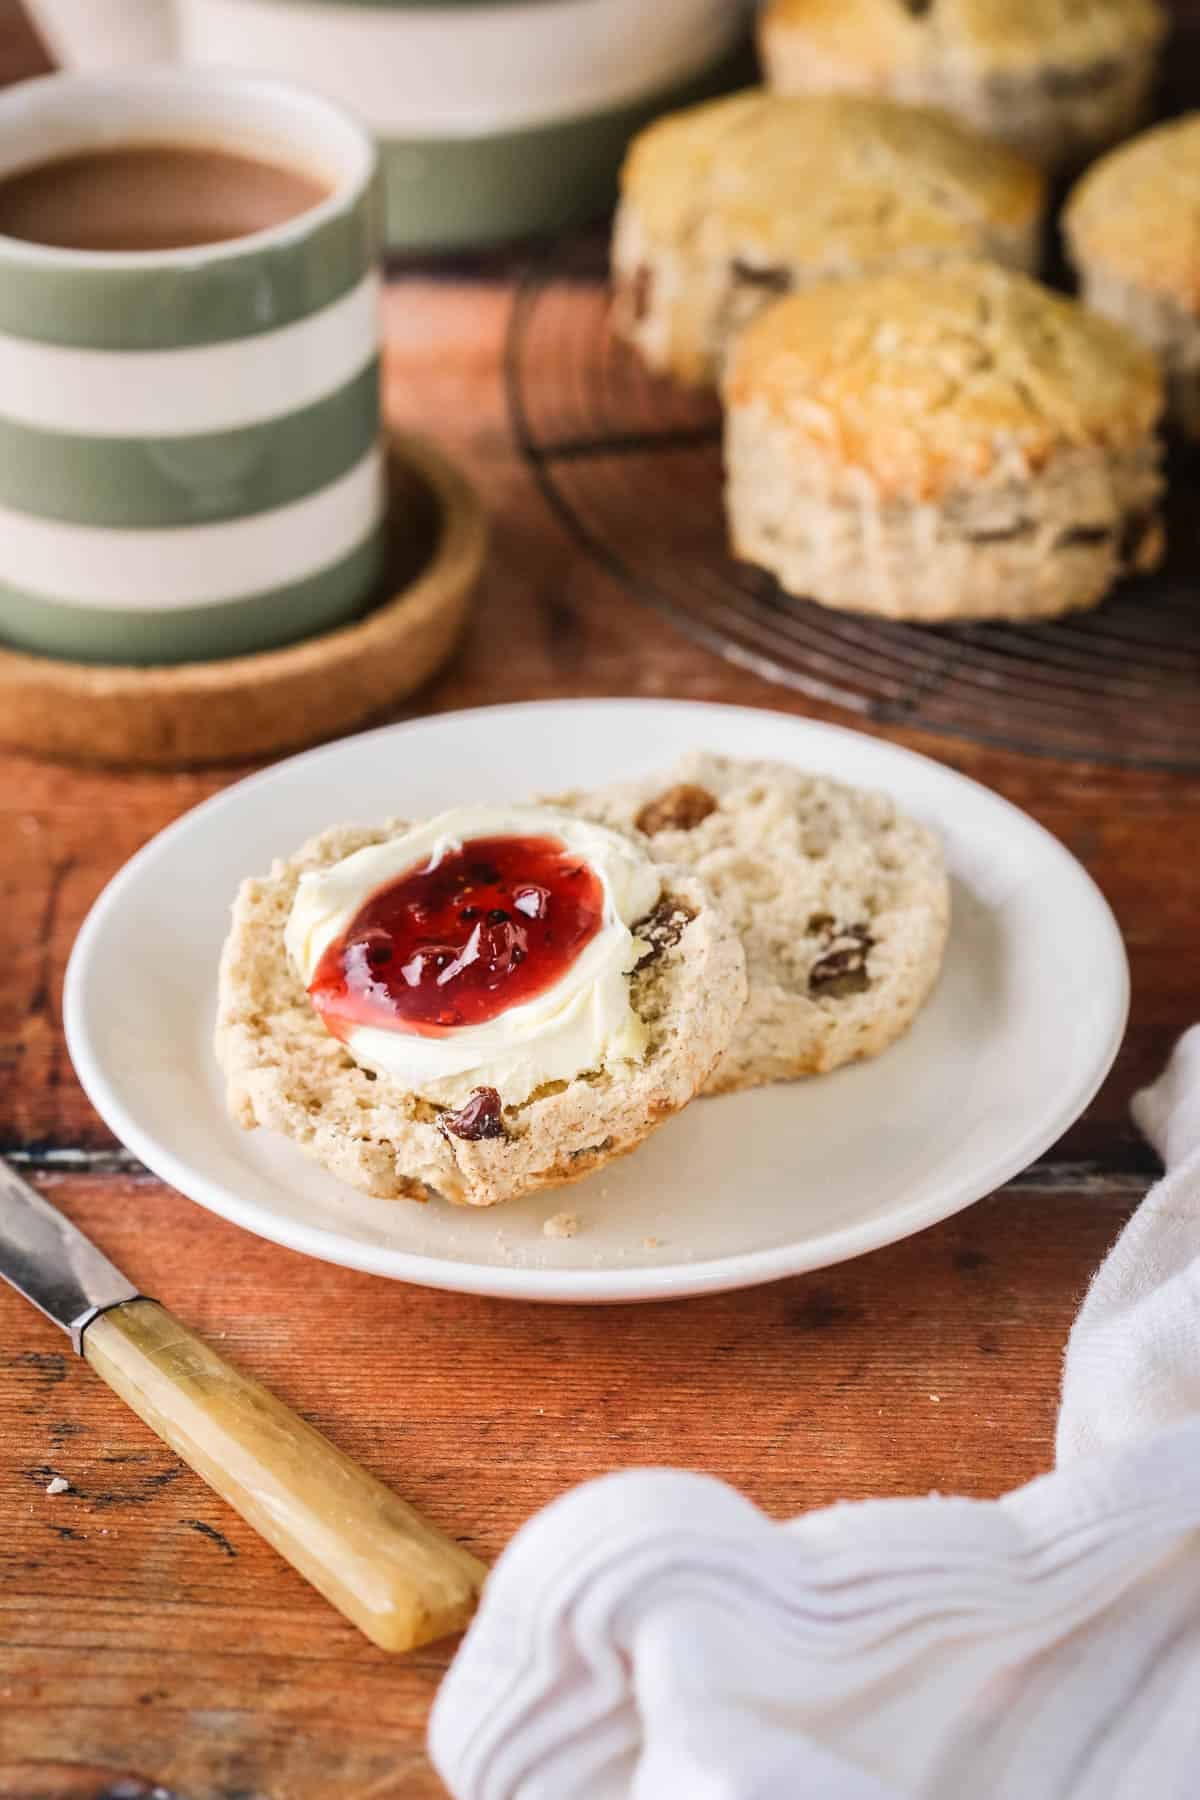
These Gluten-Free Fruit Scones are buttery, soft and fluffy and perfect for afternoon tea with homemade jam and clotted cream.
If you’ve ever tried to make gluten-free scones using a regular gluten-free flour then you’ve probably been disappointed by crumbly, dry, dense and even gummy scones.
It should be such an easy task, after all there’s only self-raising flour, butter, sugar and milk in a regular scone recipe. However, I always find that these simple recipes are the hardest to convert to gluten-free (see shortbread!). That’s because these recipes rely so much on the hard work of gluten to make them work.
The lack of elastic gluten affects both the rise and the texture of the scones and so to mimic the hard work that the gluten does we need to really balance out our gluten-free flours so that the scones can rise, keep their moisture in tact and basically not fall apart. Plus, obviously, taste good!
The commercial gluten-free plain flour doesn’t have enough nuance in the flour blend to provide a strong backbone to the recipe. It is often lacking in starches (provide binding power and softness) and will often include rice flour which leads to sandy dry results. To plaster over the defects these flour blends often recommend the use of xanthan gum which can tenderise a recipe.
However, I choose not to use xanthan gum and instead focus on getting our flour blend right in the first place. Selecting the right flours with enough starch in the recipe can lead to higher scones that retain moisture and have a light tender crumb.
I look towards my successful bread recipes for my gluten-free flour inspiration and use a blend of sorghum flour, potato starch and tapioca starch to get a good rise and neutral flavour whilst also providing the right soft and tender fluffy texture.
Then to really seal the deal I turn to psyllium husk to add that little bit of extra bounce and softness so the resulting scones are not too dense.
These scones are studded with juicy sultanas and taste delicious fresh out of the oven with a slathering of rich clotted cream and fruity homemade jam.
Why You’ll Love These Gluten-Free Fruit Scones
- Soft and fluffy texture. No gumminess.
- They don’t fall apart and crumble thanks to the good balance of starches in the gluten-free flour blend and the use of psyllium husk for perfect texture.
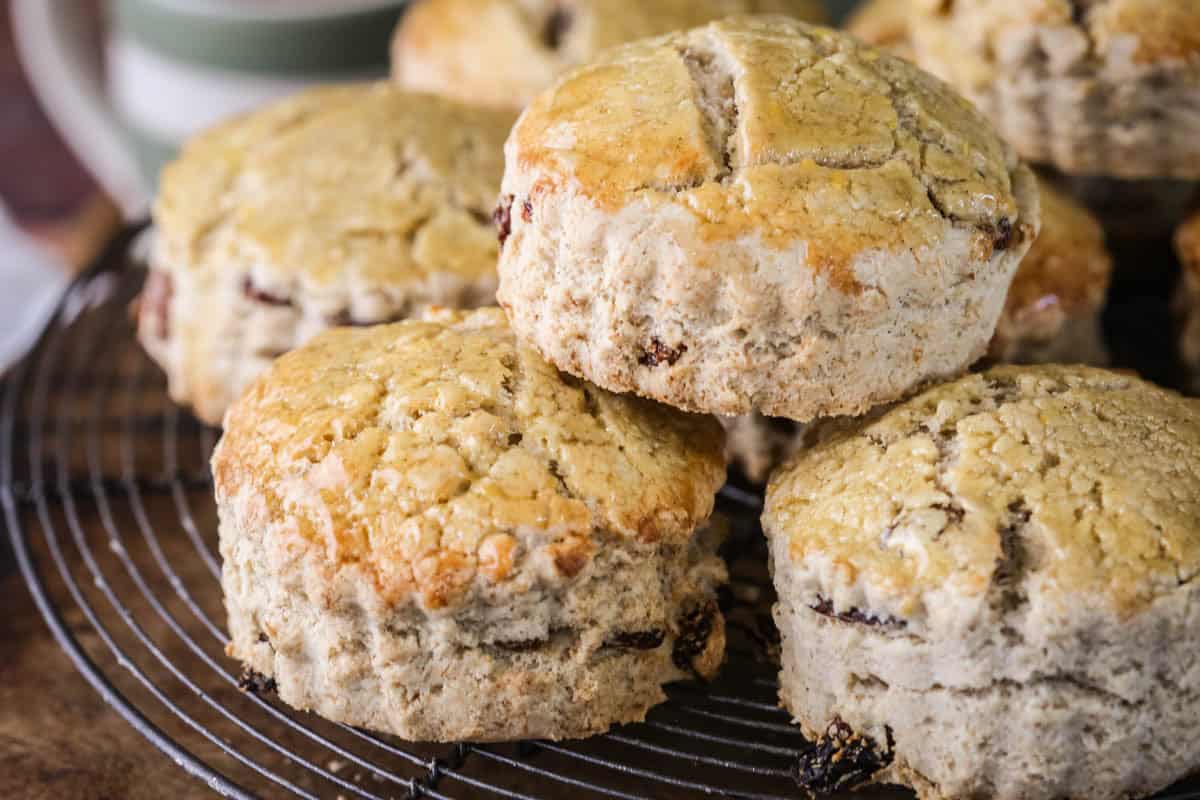
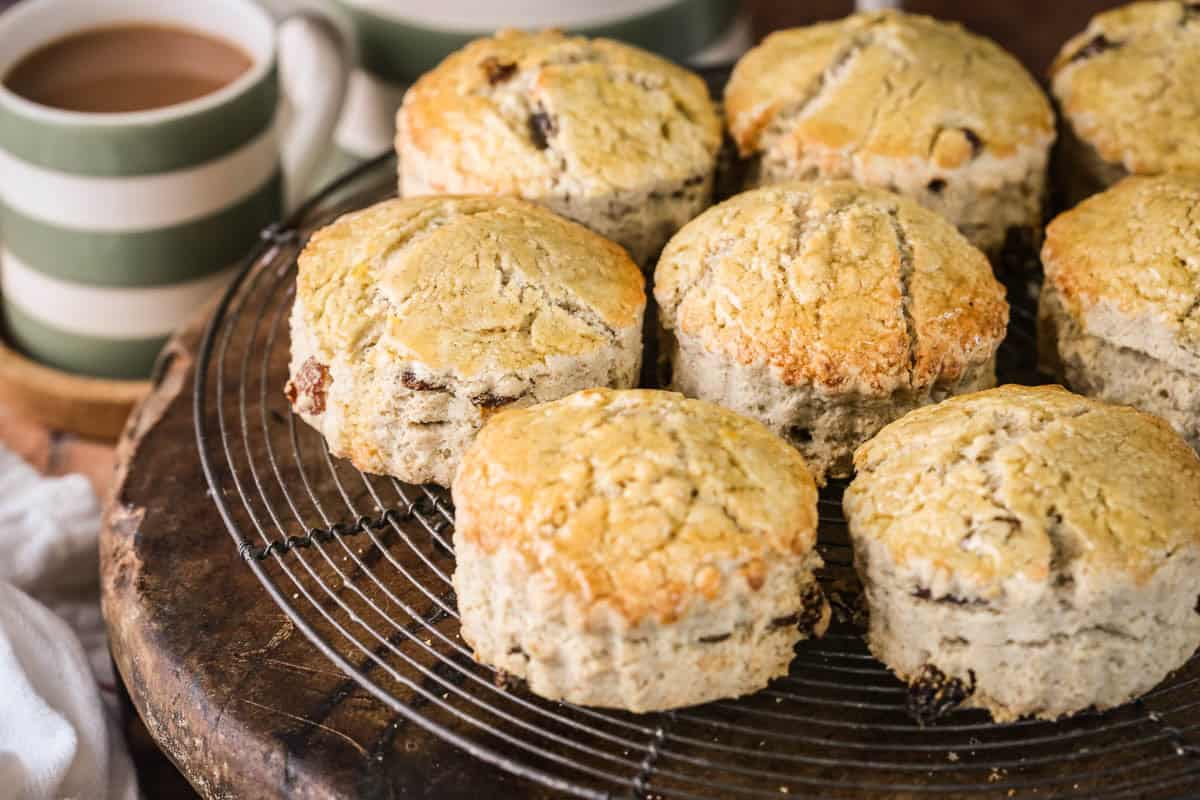
- Keep their tall height when baking.
- Beautifully golden.
- Juicy sultanas.
- No xanthan gum.
Watch the Video
Sometimes it helps to see a visual of what I'm talking about. So watch the video to see what it looks like to make your Gluten-Free Fruit Scones.
Ingredients Needed
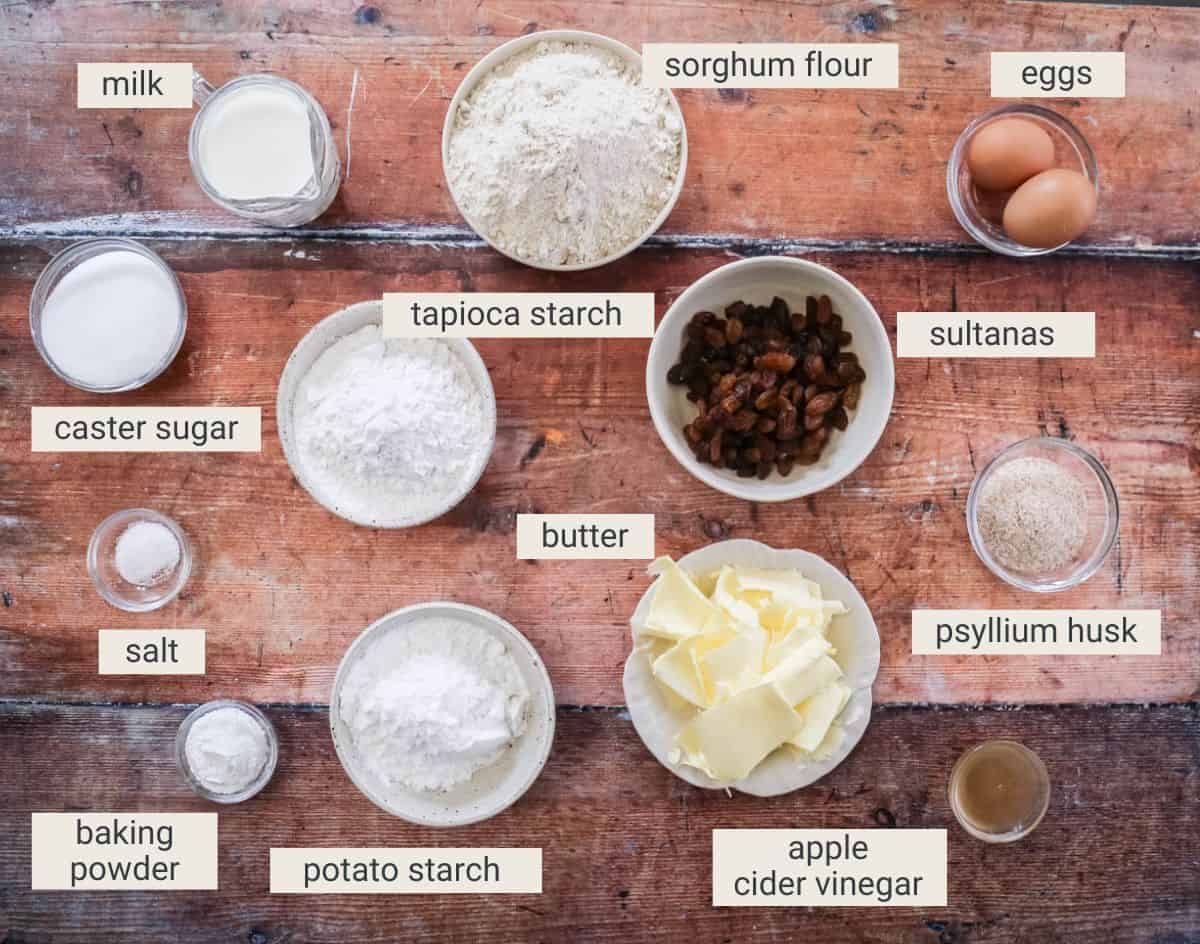
Psyllium husk. This ingredient is high in fibre which you can source from health food shops. It works as an excellent binding agent in this recipe and gives the scones loaf a softness and elasticity. Do note, you want to buy the whole husk, not ground.
Milk. The milk is stirred into the psyllium husk to create a gel which helps to bind the scones together. It also add moisture and extra protein for a tender crumb. I use whole milk for the best texture and flavour.
Sorghum Flour. This is a wholegrain flour which will give our loaf a lovely fluffy tender crumb and a gentle neutral taste.
Tapioca Starch. This is a starchy flour which will add a lightness to your scones and will help to bind the ingredients.
Potato Starch. This starchy white flour has great binding properties which will give your scones a lovely structure. It is a very fine powdery flour and will give them a great lightness. When added to water and heat the potato starch expands quickly so will make for tall and fluffy results.
Sultanas. These are the classic choice for a good fruity scone. However, you can swap for your favourite dried fruit, raisins, currants, dried cranberries, mixed peel or diced apricots or glacé cherries are all delicious. You can use a mix of all of the above if you’d like to go wild.
Butter. We use a good unsalted butter. Fat is needed in the recipe to soften the scones and flavour. It needs to be cold straight from the fridge for the best texture to your scones.
Caster sugar. It’s a fine white baking sugar available in the UK. Regular white granulated sugar can be substituted.
Eggs. This recipe uses medium size, about 60g each with shell (50g each without shell). These are often classified as large eggs in the US. I recommend weighing your eggs to ensure the correct amount.
Baking powder. A leavening agent which causes the cake to rise and become light and fluffy. Do check your baking powder is gluten-free before use.
Apple cider vinegar. The acidity of the vinegar helps to keep the scones soft.
Salt. Essential for tasty scones. I always use kosher salt in my baking which has a gentle flavour.
How To Make Gluten-Free Fruit Scones
For full recipe instructions go to the recipe card at the end of this post.
Whisk the psyllium husk with the milk and rest for ten minutes to form a thick gel.
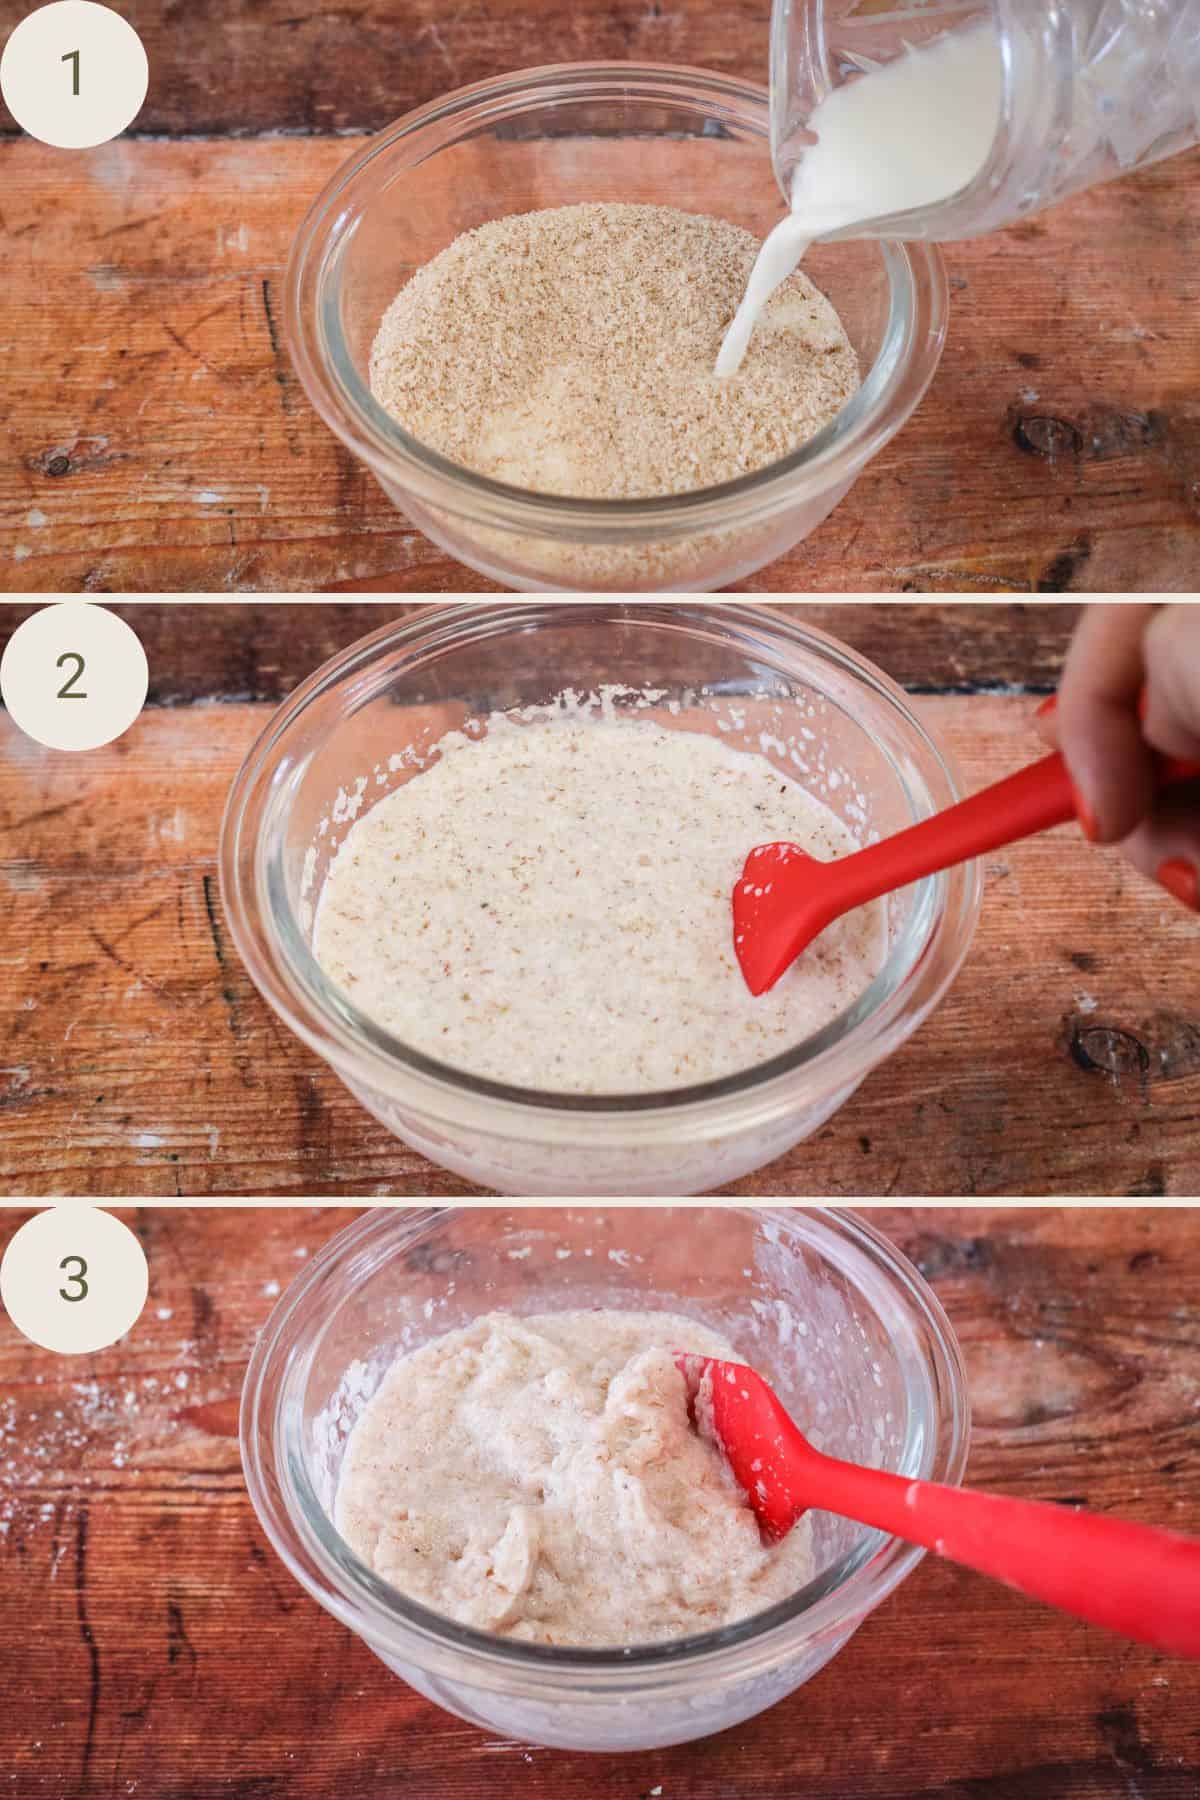
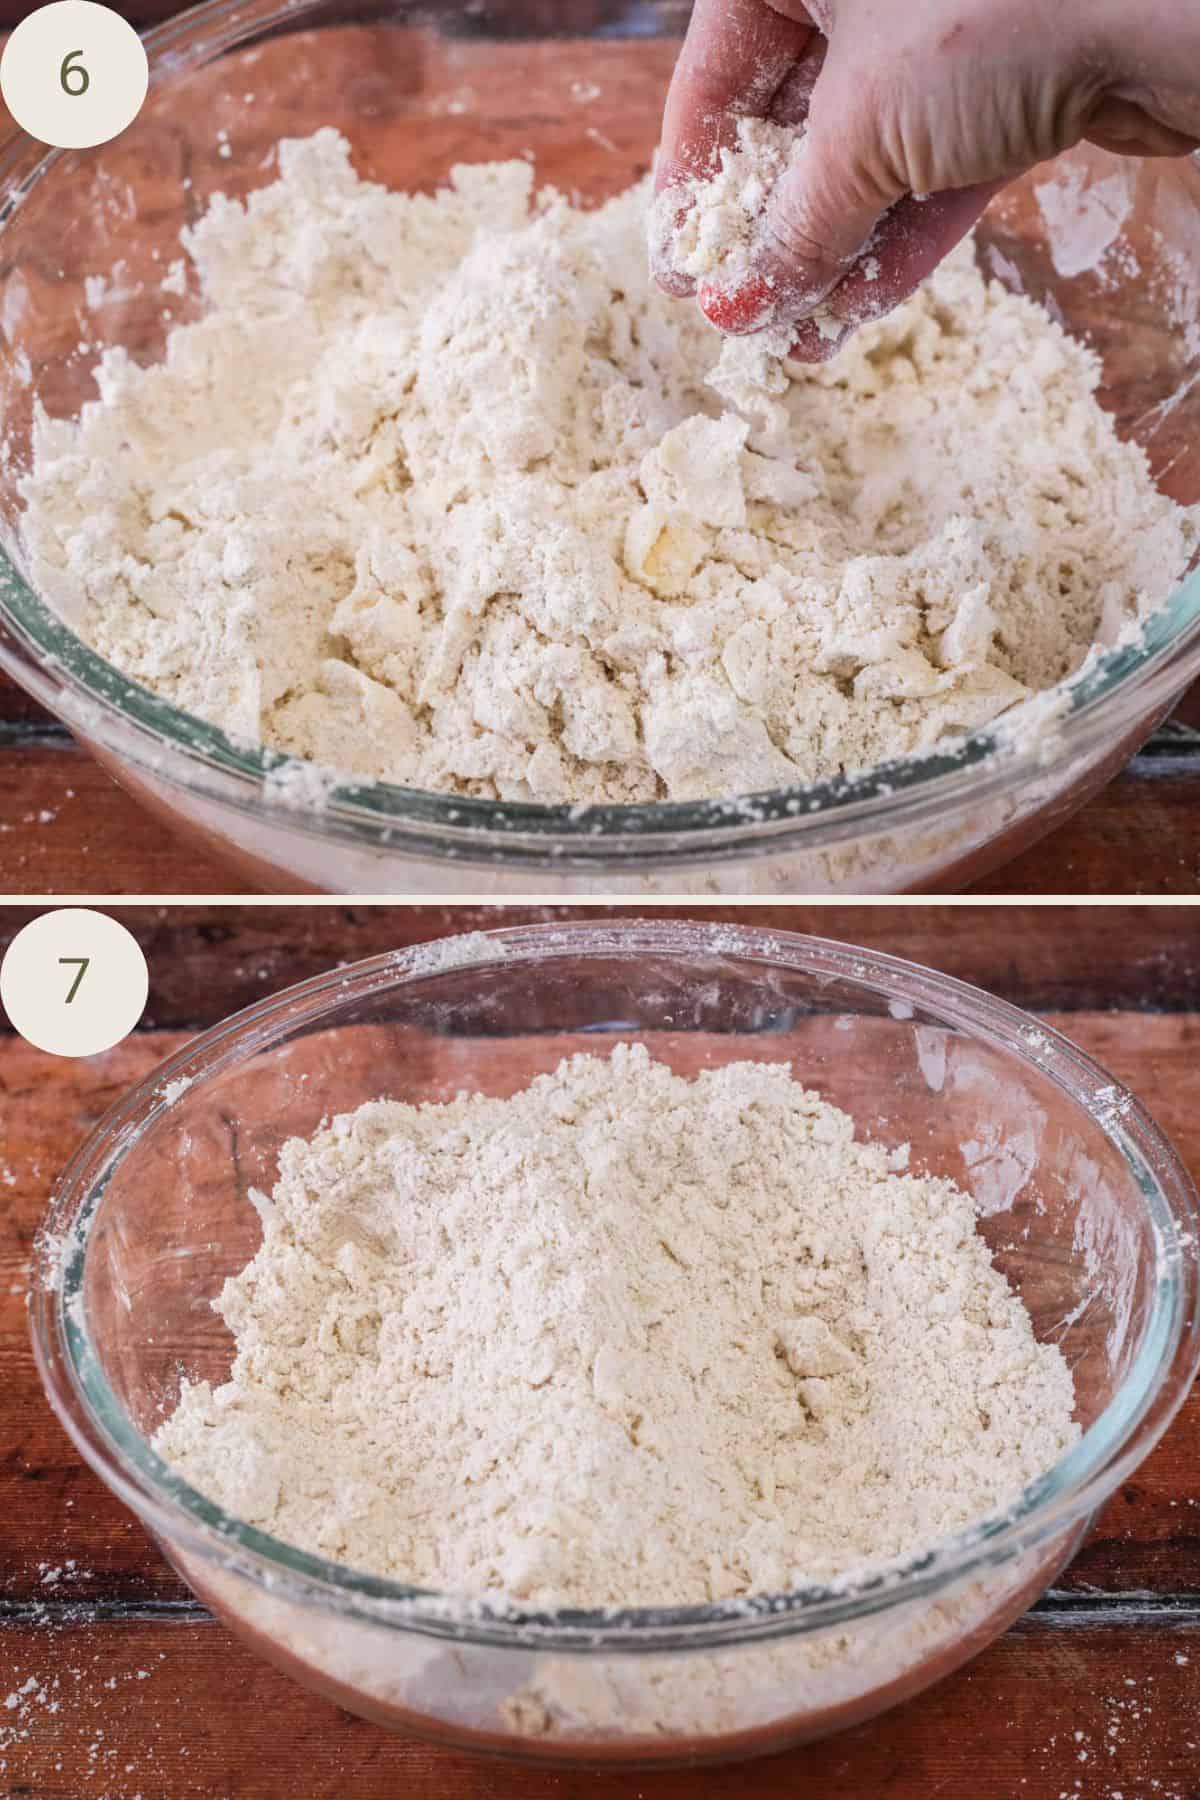
Whisk the flours together in a large mixing bowl and peel the hard cold butter directly into the flour mixture.

Rub the flour and butter together to create rough breadcrumbs.
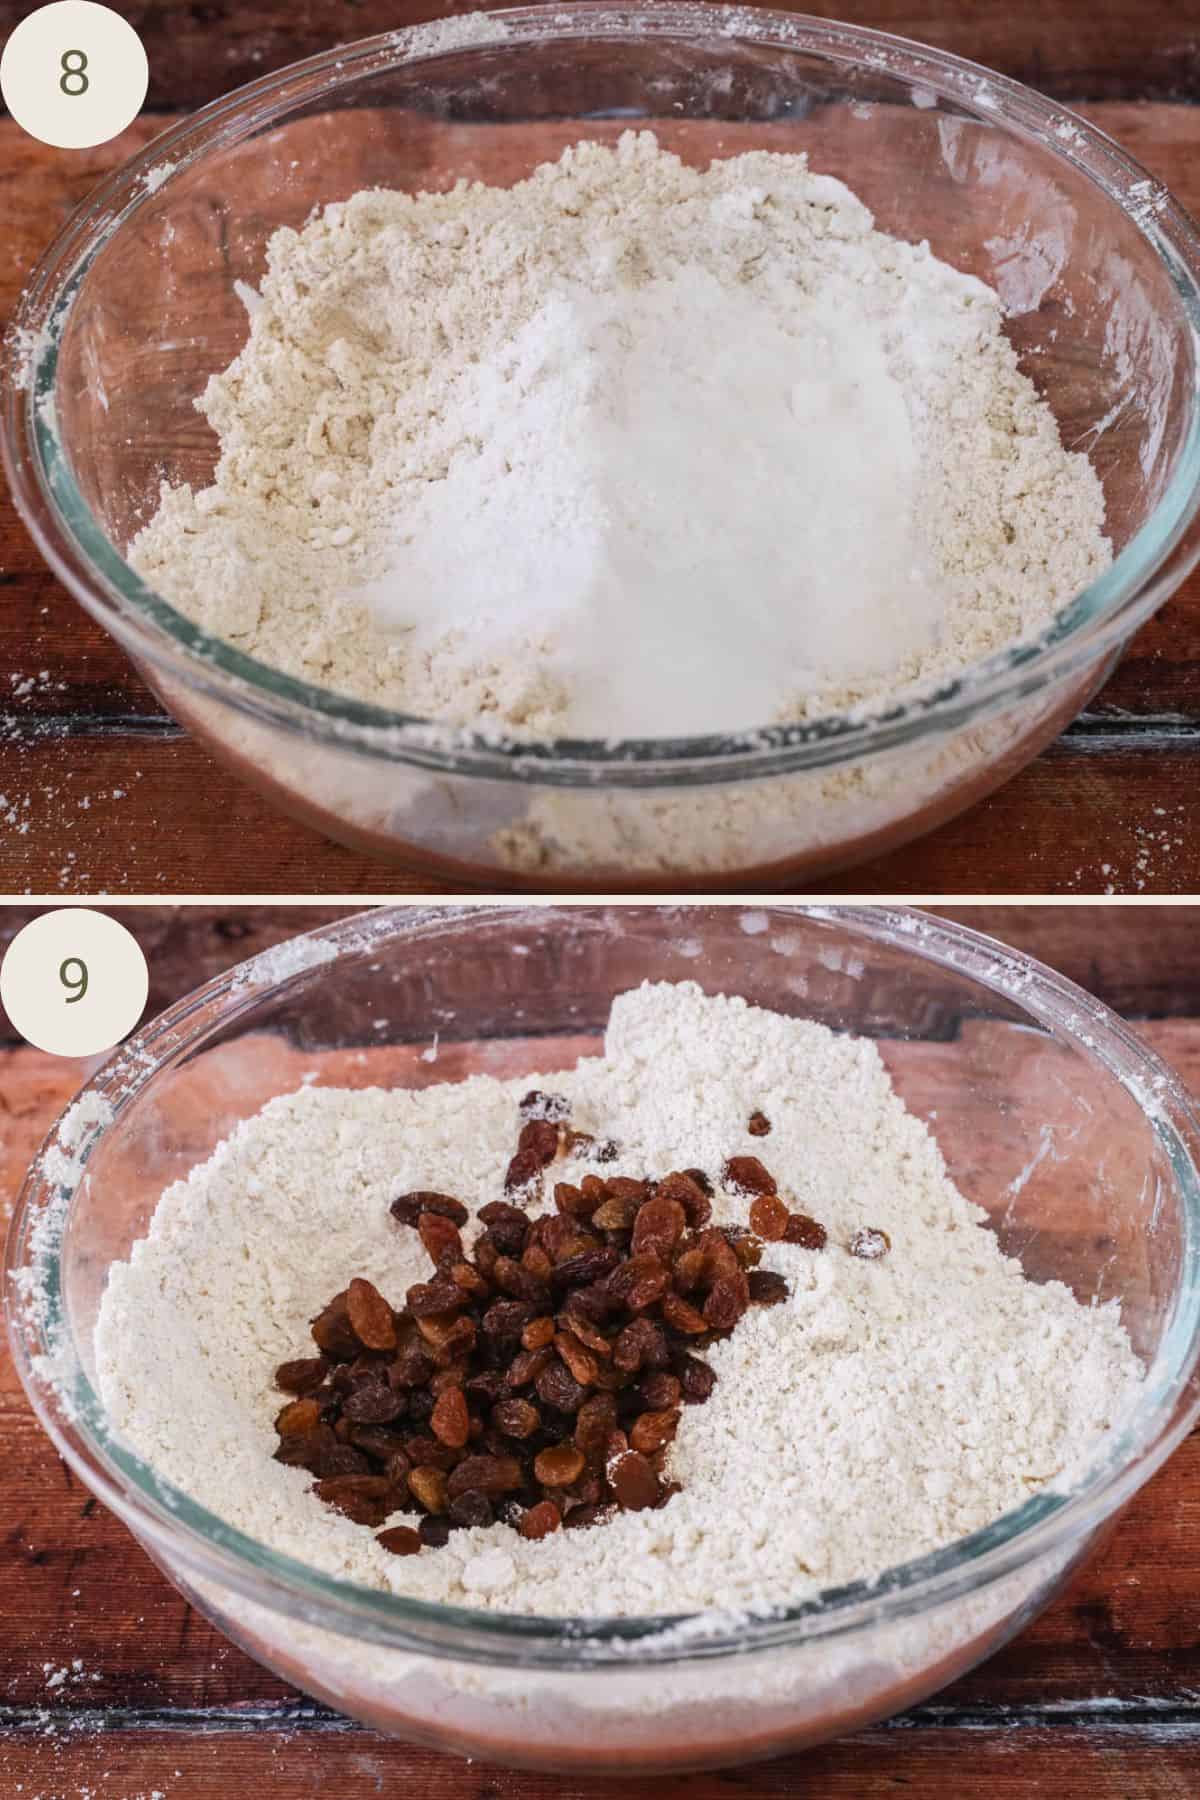
Add sugar, baking powder and salt and mix well. Stir in the sultanas.
Make a well in the centre of the dry ingredients and pour in the whisked eggs, followed by the apple cider vinegar and psyllium husk gel.
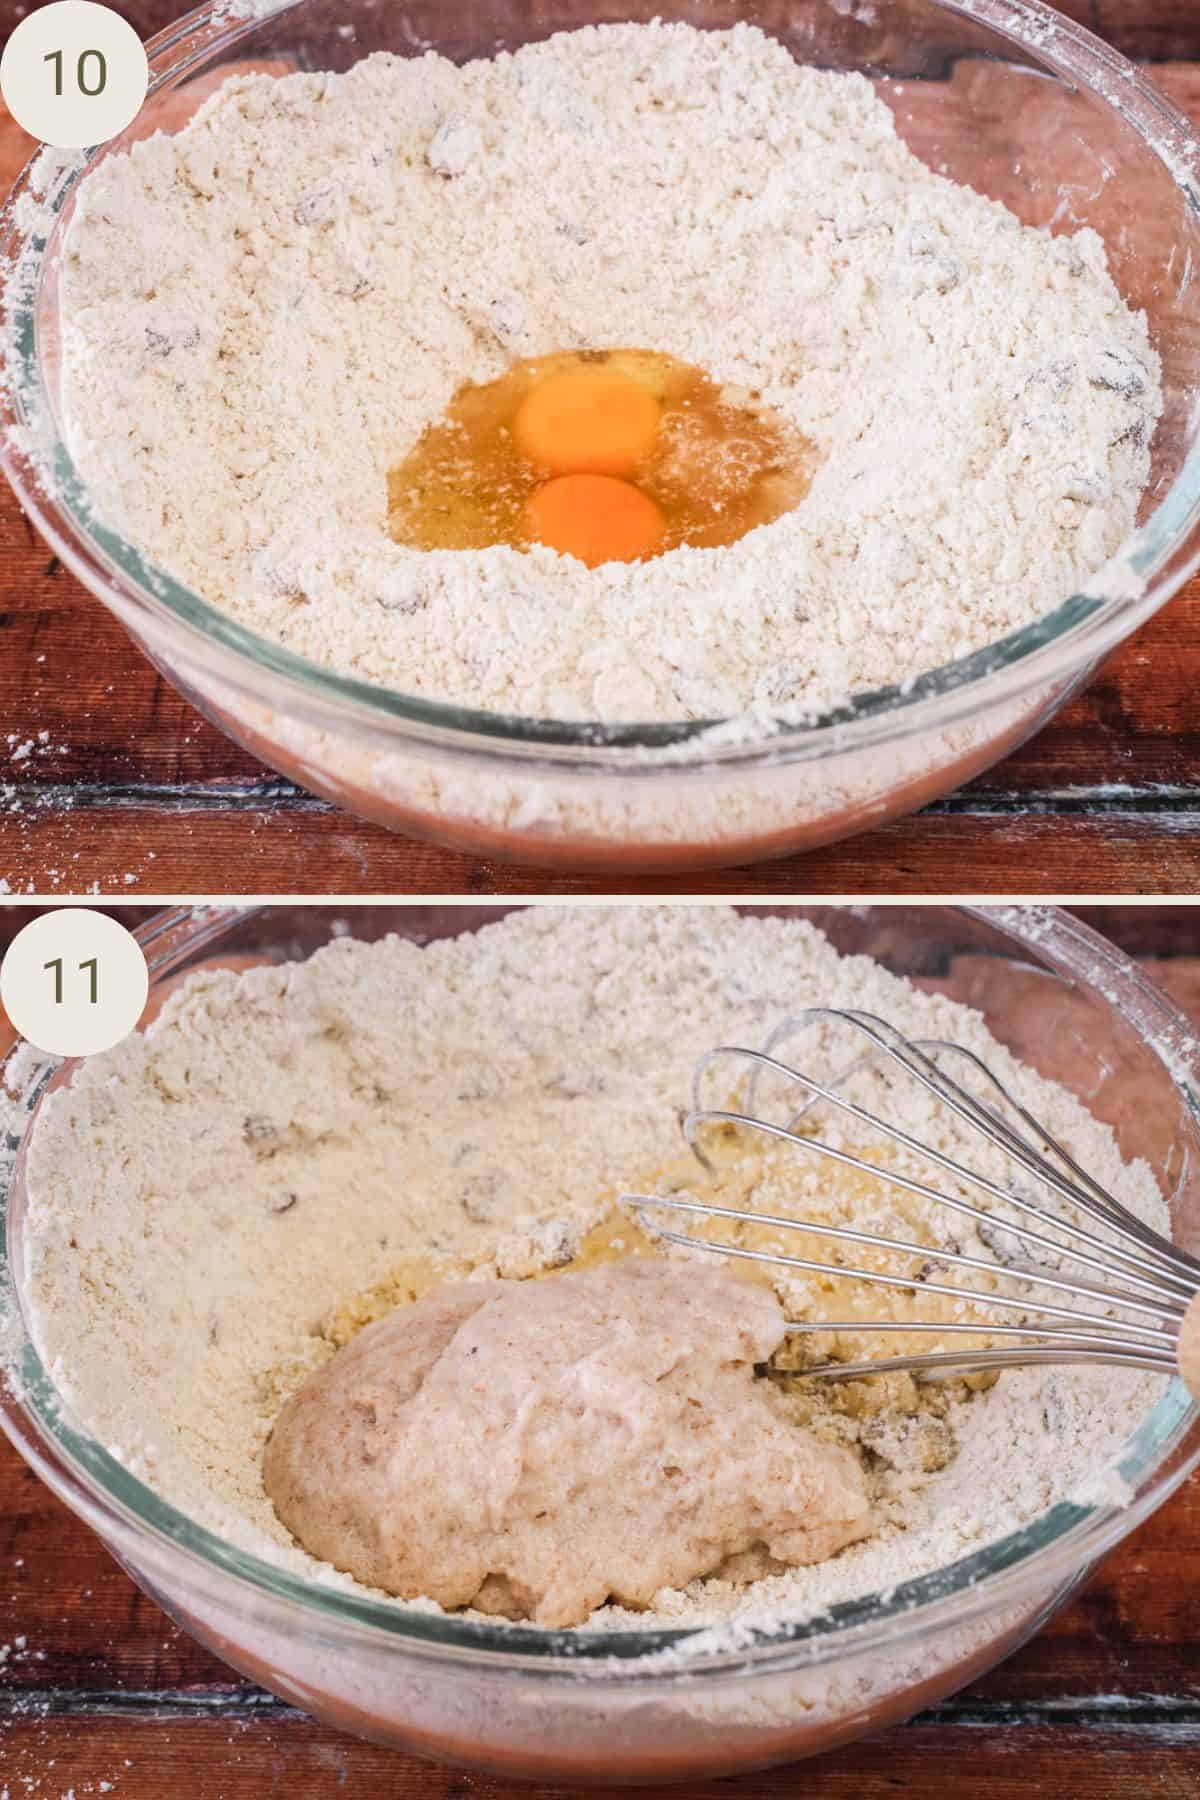
Mix the wet ingredients in until a soft dough forms. Tip out onto a clean work surface to finish bringing the dough together.
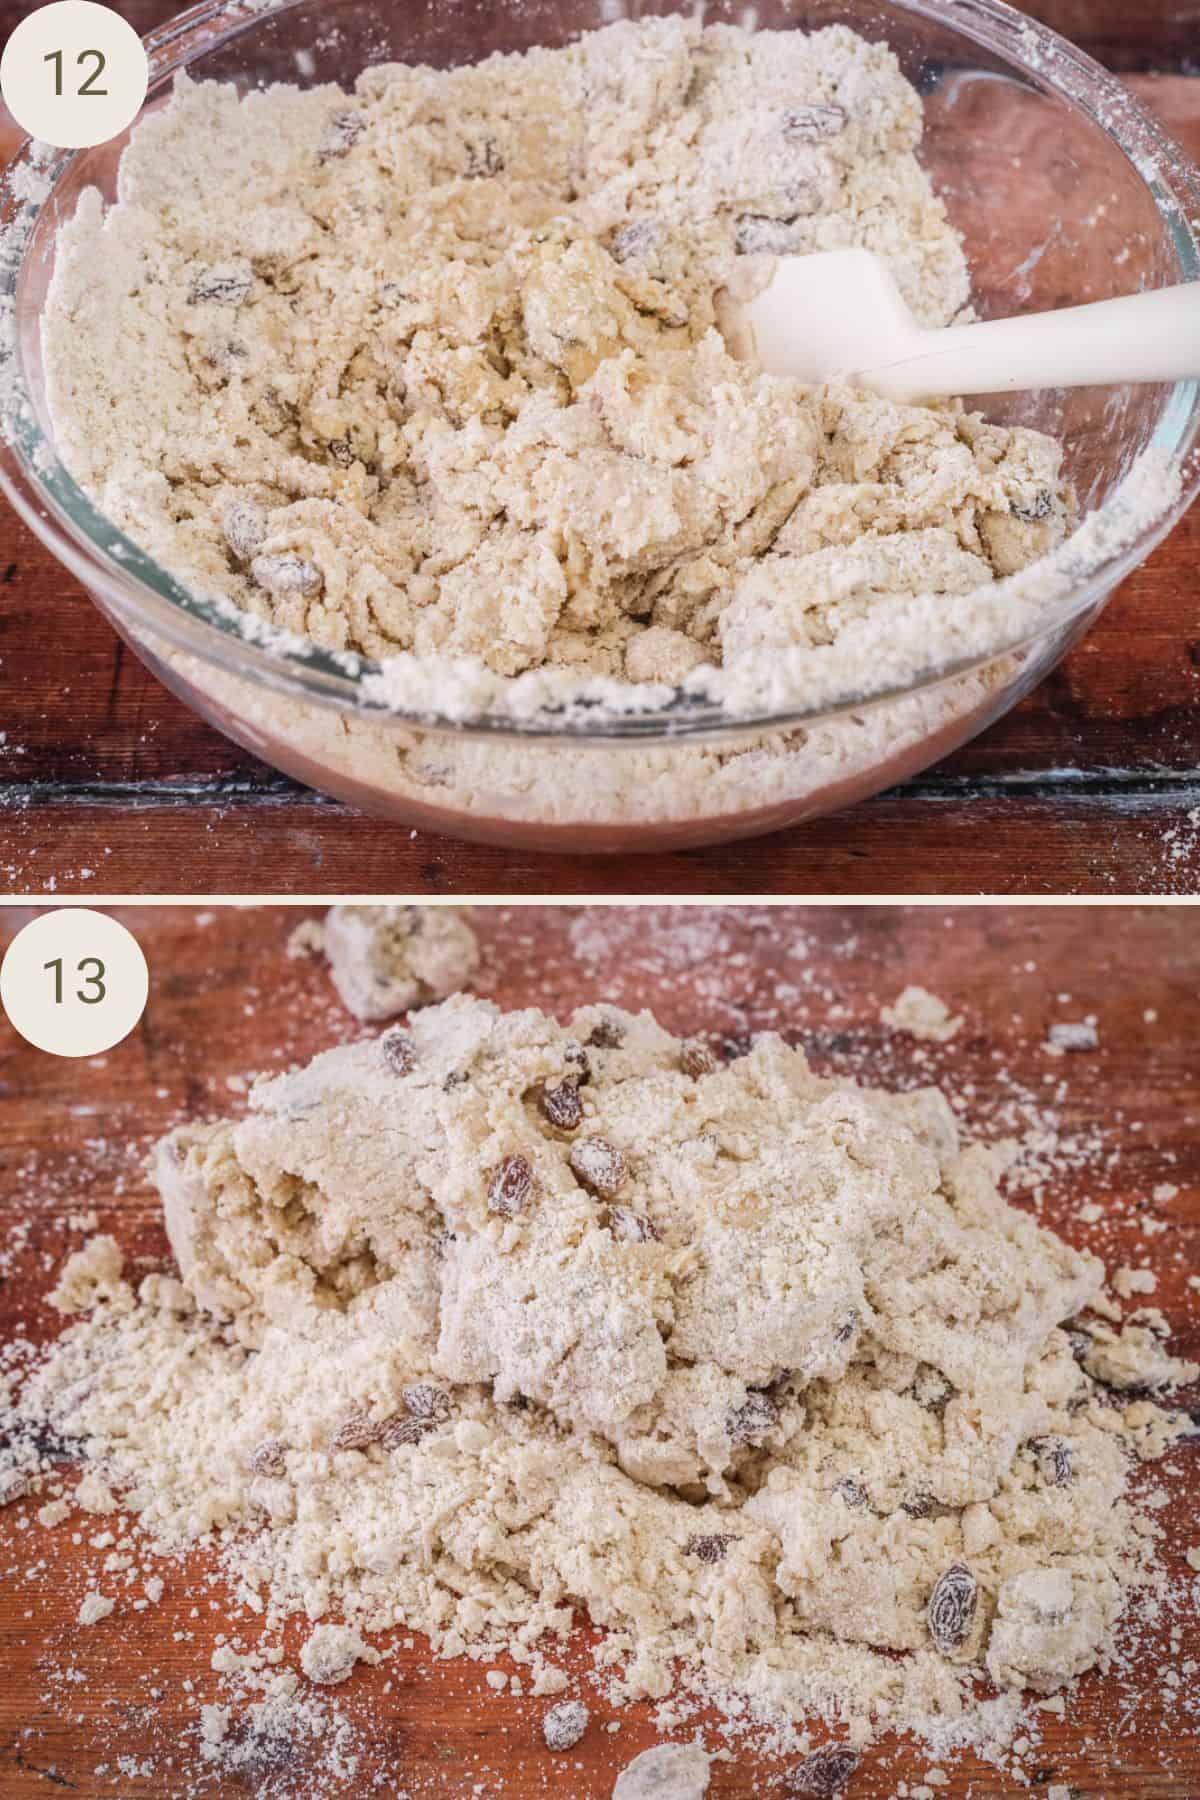
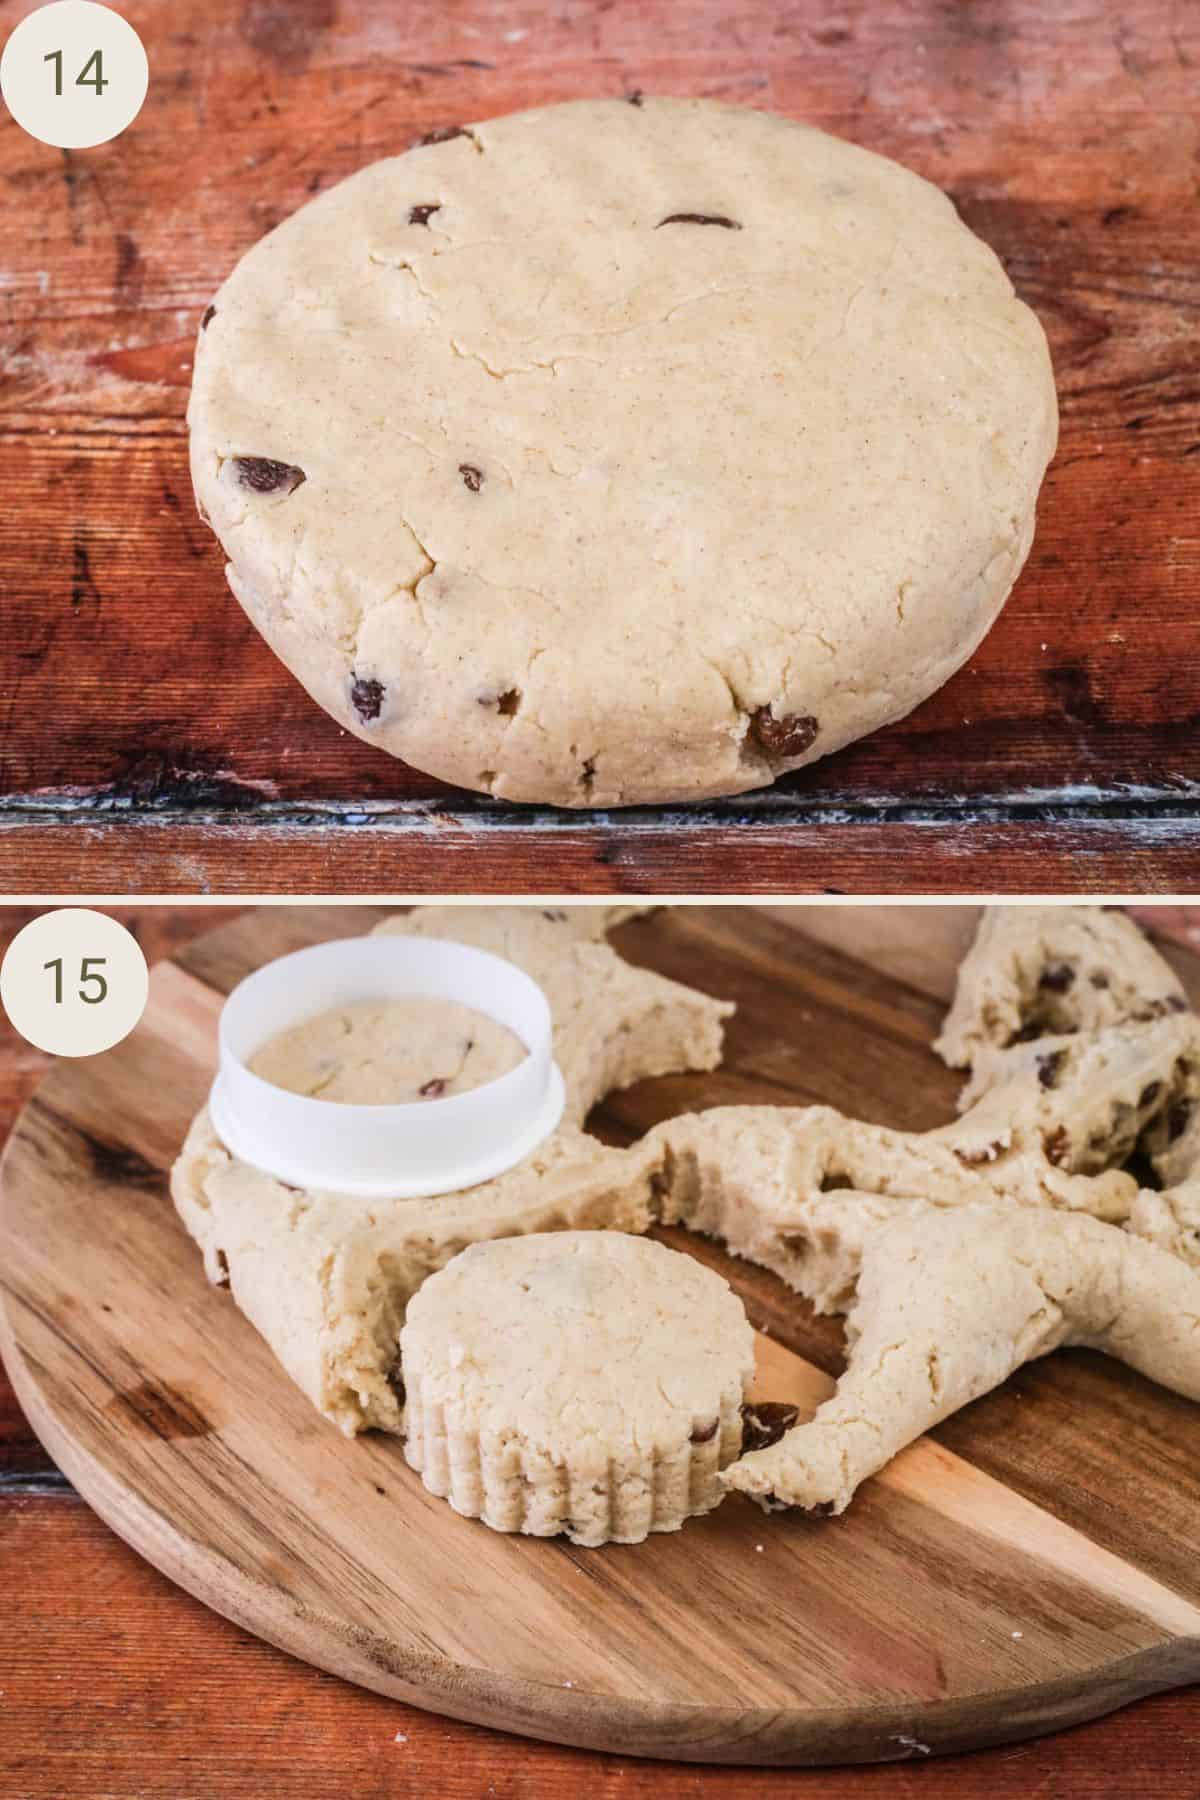
Bring the dough together with your hands until it is no longer sticky. Press the dough out into an even round 1- 1 ¼ inch thick. Cut out the scones using 7cm round of fluted cutter.
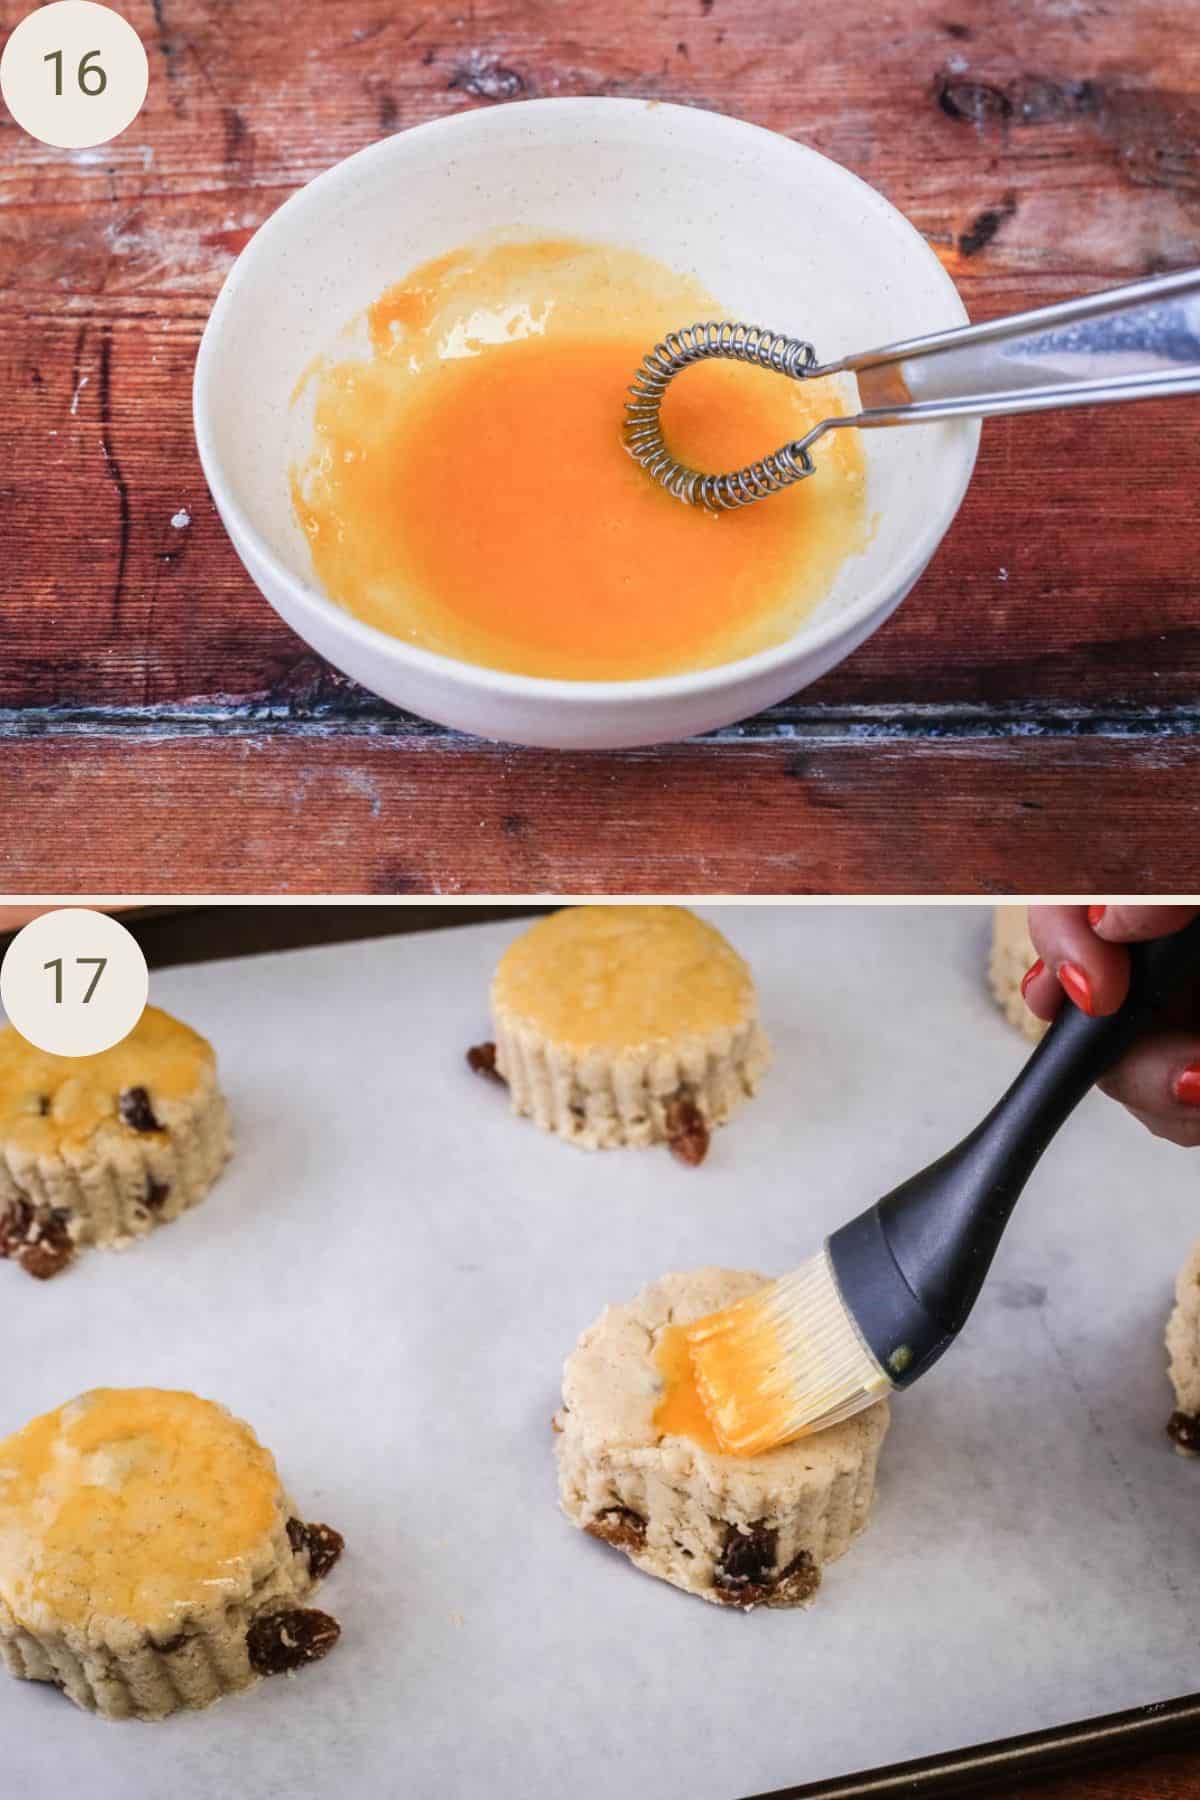
Whisk egg yolk and caster sugar together to create a baking glaze. Brush each scone with the glaze.
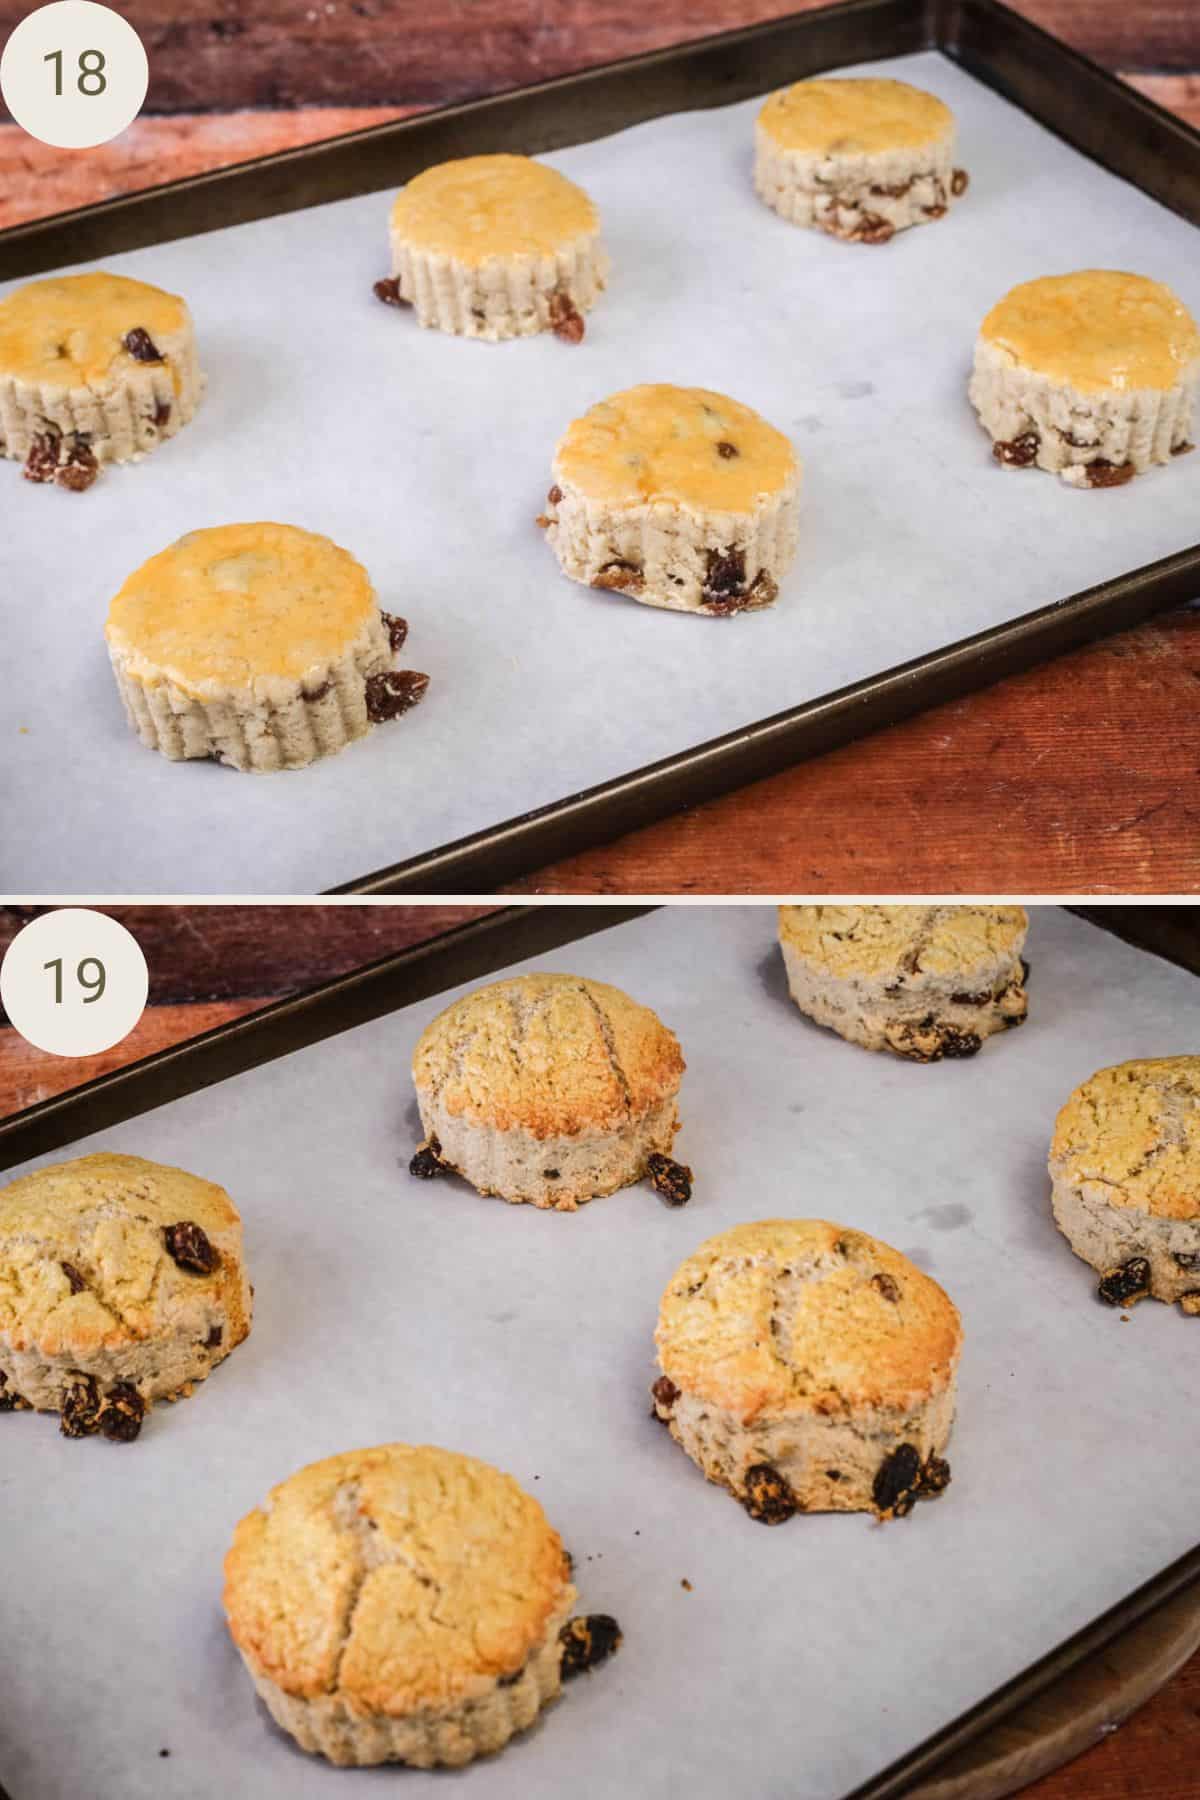
Bake the scones in batches of six per baking tray in the pre-heated oven for 20 minutes until golden.
Tips & Troubleshooting
If your sultanas are less juicy than you’d like soak them in fresh orange juice for 1-2 hours to plump up.
I suggest using a vegetable peeler to create very thin slices of butter which you peel directly into the flour mixture. This means it will take moments to rub into the flour leaving the butter still cold to produce a lovely true scone texture.
If it’s very warm in your kitchen you could also freeze your butter before peeling.
If your dough is feeling a little dry and not coming together quite as smoothly as you would like then wet your hands with cold water. This should be enough moisture to finish the dough. It end result shouldn’t be sticky to work with.
Smooth the dough on a clean work surface, rolling it around to soften out any cracks.
Make sure the dough has as smooth a surface as you can before cutting which will help to avoid a cracking surface (although I’ve found this can’t be avoided totally). The dough should also have an even surface so your scones are not wonky.
Push the cutter into the dough firmly, don’t twist the cutter but remove the excess dough from around the cutter and lightly shake the cutter so the scone drops gently out.
Brush the scones lightly with the pre-baking glaze, it shouldn’t run down the sides of the scones as this will mean the scones bake unevenly.
You can brush your baked scones with warmed up runny apricot jam for a really glossy finished look.
Make Ahead
I really suggest eating these scones within 24 hours of baking. Like any scones, whether gluten-free or not, they get stale quickly.
For this reason I don’t recommend baking the scones ahead of time unless you are freezing them.
Freezing
However, you could freeze the scones about two hours after baking, just after they cool completely. Flash freeze on a single layer on a baking tray for 6 hours, before transferring to a freezer bag or airtight container.
You can re-heat your gluten-free scones directly from the freezer and actually this is the best way to retain the texture. Place on a lined baking tray into an oven pre-heated to 190°C / 170°C fan assisted / gas mark 5 / 375°F. Heat for 10-15 minutes until warmed through.
Avoid the microwave at all costs. This will make gummy scones which is exactly what we want to prevent in gluten-free baking.
FAQs
You need to use a good amount of liquid, here we achieve that by using milk and two eggs. The addition of psyllium husk helps the soft texture, as does the starches in the gluten-free flour blend.
This recipe doesn’t use xanthan gum (in fact not a single of my 500 gluten-free recipes on this website uses xanthan gum). Instead we focus on the right blend of gluten-free flours to gain our texture. A little psyllium husk here is added for extra bounce and elasticity.
This recipe has only been tested with psyllium husk which adds elasticity to the dough. If you need to avoid psyllium husk I have this recipe for gluten-free scones which doesn’t include it and still garners delicious results.
These gluten-free scones are not dry as they use plenty of butter, milk and eggs in the recipe. The starches in the gluten-free flour blend and the extra psyllium husk help retain moisture.
Gluten-free scones will not rise as high as regular scones as we’re missing gluten which means we don’t get that elastic protein network. Cut your scones between 1 inch- 1 ¼ inches for a good sized scone. I wouldn’t recommend cutting any thicker as the scones can retain a bit too much moisture and get a little gummy. Adding the potato starch, eggs, apple cider vinegar will all help the scones to get as high as they can.
I haven’t tested this recipe with a plant-based butter but as soon as I have a dairy-free scone recipe I’ll link it here.
I recommend patting the dough down to about 3cm thickness (1 – 1¼ inches) before cutting with a 7cm (2½ inches) round or fluted cutter.
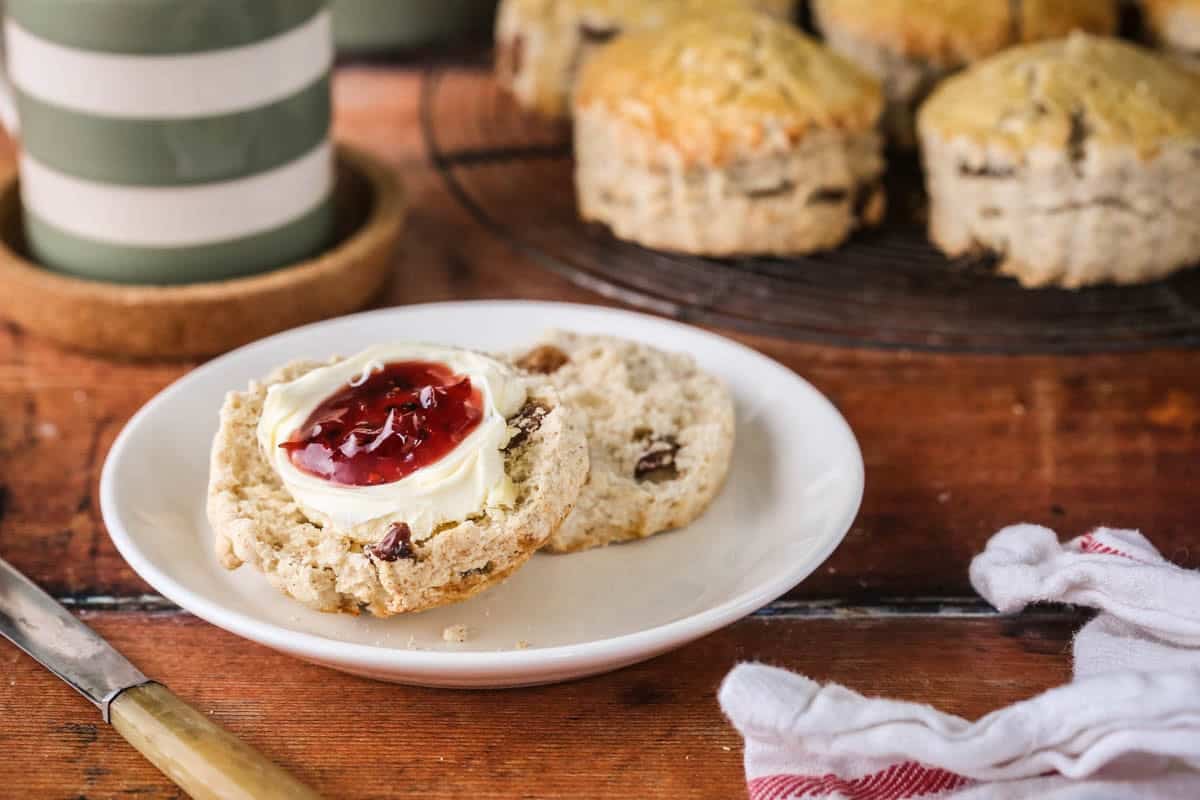
How to Serve Gluten-Free Fruit Scones
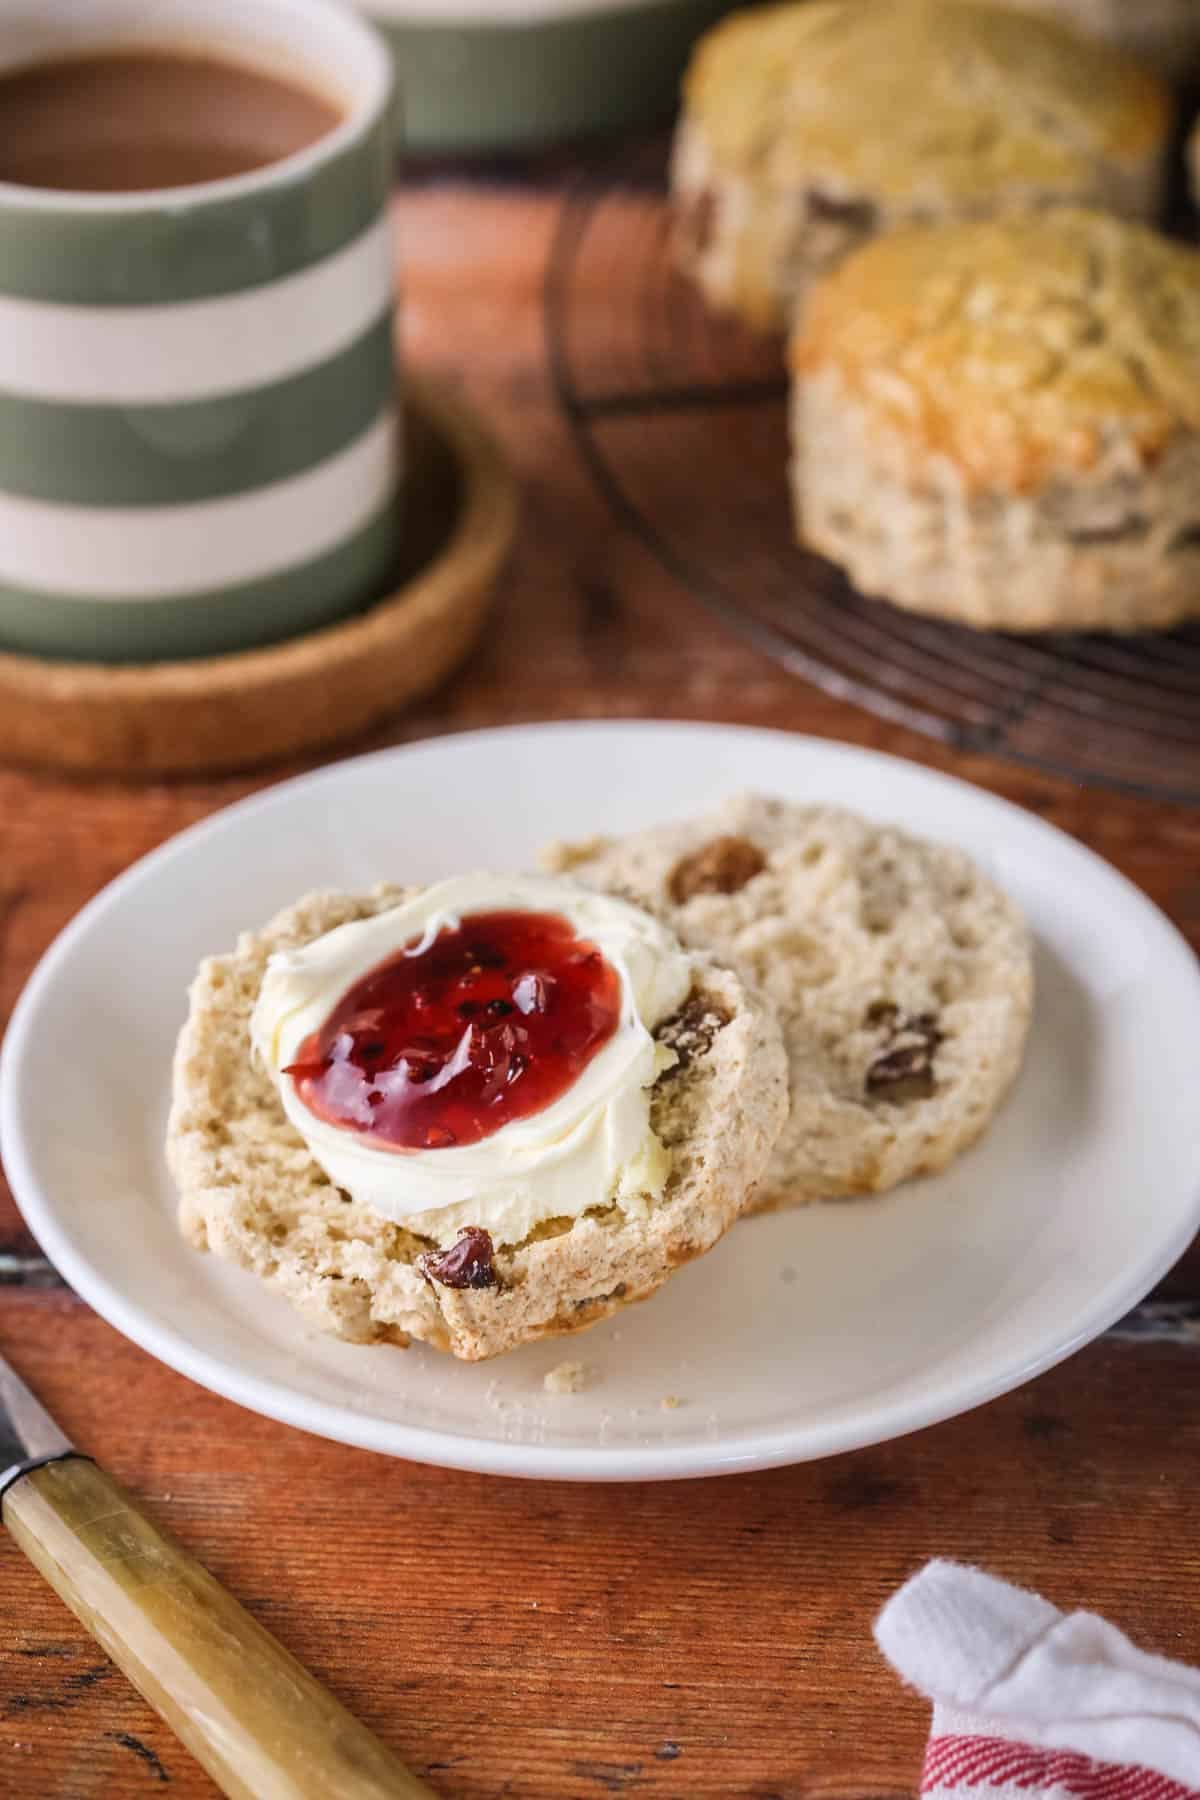
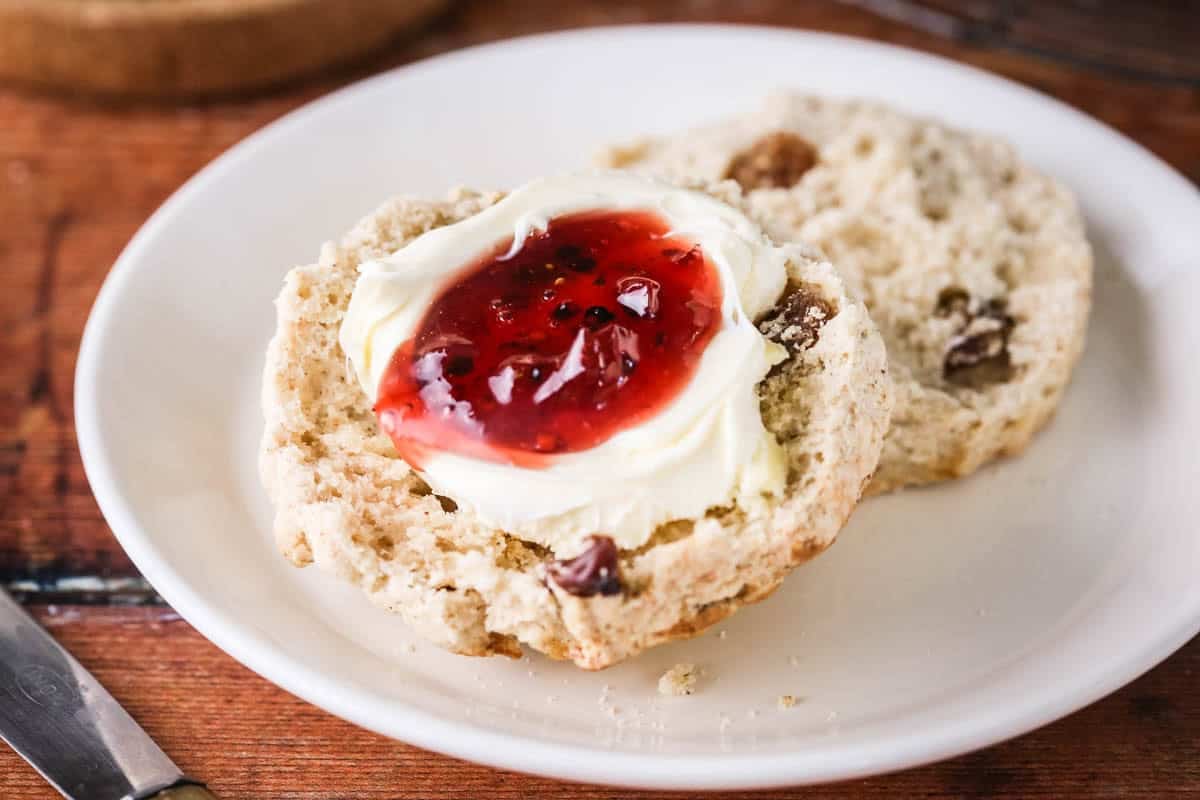
Is there a better way of serving fruit scones than as part of a traditional cream tea? The only other accessories you’ll need are a pot of hot tea served in the best tea set you have, clotted cream (whipped double cream is okay at a push if clotted cream is not accessible to you) and homemade jam.
Of course any good quality jam is fine but if you want to push the boat out then I used to run a jam business and these are my own classic jam recipes:
- Strawberry Redcurrant Jam
- Easy Seedless Raspberry Jam
- Wild Blackberry Lime Jam
- Or if you’re looking for something a bit more Autumnal than Pumpkin Jam is amazing with these scones.
Recipe Variations
Spiced Fruit Scones. If you’re near Christmas or Easter then adding a teaspoon of mixed spice to the dough makes them taste very festive.
Vanilla Glazed Scones. Adding a teaspoon of vanilla extract to the dough and then icing the finished scones with an easy glaze of 180g icing sugar, 1½ - 2½ tablespoons milk and ¾ teaspoon vanilla extract. Whisk together and drizzle over your scones.
Citrus Spiked Scones. Adding the zest of a lemon or an orange (or half and half) gives a lovely burst of fruity flavour.
More Gluten-Free Scone Recipes You’ll Love
Classic Gluten-Free Scones, made without xanthan gum, are tall and fluffy with a tender buttermilk crumb.
Gluten-Free Cheese Scones are the real deal and made with buttermilk for the best texture. Brilliantly portable for picnics and essential for afternoon tea with a deeply cheesy savoury flavour.
Gluten-Free Apple Scones are slightly spiced and sweetened with a drizzle of honey.
Enter your email below to get this recipe sent to your inbox plus get new recipes, baking tips, and updates.

Gluten-Free Fruit Scones
Ingredients
- 200 g milk
- 15 g psyllium husk
- 270 g sorghum flour
- 150 g tapioca starch
- 140 g potato starch
- ½ teaspoon salt
- 115 g unsalted butter - cold
- 70 g caster sugar
- 115 g sultanas
- 1 tablespoon baking powder
- 2 eggs
- 2 teaspoons apple cider vinegar
Glaze
- 1 egg yolk
- 1 teaspoon caster sugar
Instructions
- Pre-heat the oven to 190°C / 170°C fan assisted / gas mark 5 / 375°F.
- Line two large baking trays with baking parchment
- Add the psyllium husk into a small bowl and whisk in the milk until combined. Place aside for 10 minutes as the mixture turns to a thick gel consistency.
- Whisk the flours together in a large mixing bowl.
- Peel the hard cold butter directly into the flour mixture.
- Rub the flour and butter together to create rough breadcrumbs.
- Add the sugar, baking powder and salt and mix well.
- Stir in the sultanas.
- Make a well in the centre of the dry ingredients and pour in the whisked eggs, followed by the apple cider vinegar and psyllium husk gel.
- Mix the wet ingredients into the dry ingredients first with a silicone or wooden spoon to combine. Switch to using your hands when the spoon is no longer adequate and bring together until a loose dough starts to form.
- Turn the loose dough out onto a clean work surface and finish bringing the dough together until it is no longer sticky. Smooth out into a large ball.
- Press the dough out into an even round, 3cm (1- 1¼ inches) thick.
- Press out circles of dough using a 7cm (2 ½ inches) fluted or round cutter. You will need to re-roll and re-pat the dough to use up all of the dough which should be enough for 12 scones.
- After you have cut out six scones then arrange those
- onto one of the lined baking trays.
- Whisk the egg yolk with the caster sugar for the baking glaze then brush over each of these six scones.
- Place the baking tray in the middle of the pre-heated oven and bake for 20 minutes.
- Whilst those scones are baking you can cut out the scones from the rest of the dough. There should be a further six which you can arrange on the second baking tray.
- Once the first batch of scones are out of the oven then you can glaze and bake the second batch.
- Allow the scones to rest for five minutes on the baking tray before transferring to a cooling rack to cool completely.

Hi Georgina,
I have just taken the scones out the oven, they look great! I have had try of one, yummy, however there is a slightly grainy texture which I think is the Sorghum, should I wish to try to replace the sorghum with an other. What do you suggest? Otherwise I have the generic gluten free flour recipe I have already made maybe replace the flours with this and give it a go?
Hi Justin, yes some brands of sorghum are grainier than others. You can try swapping out some of it for buckwheat flour which would reduce that texture. I wouldn't recommend swapping out all of it (unless you love the flavour of buckwheat) as it can get quite overpowering.