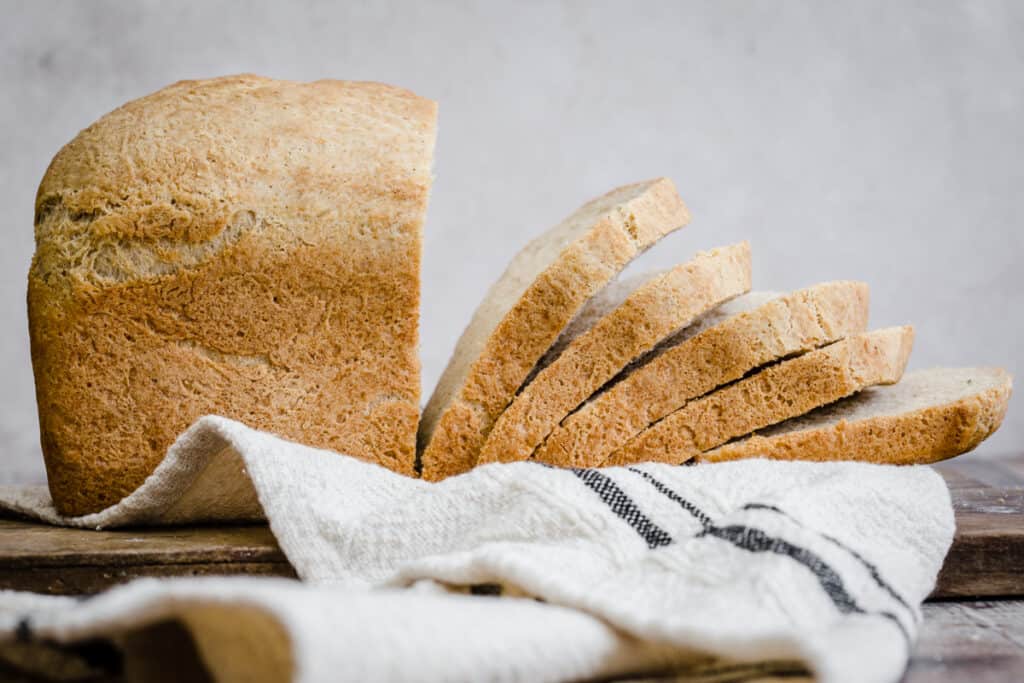
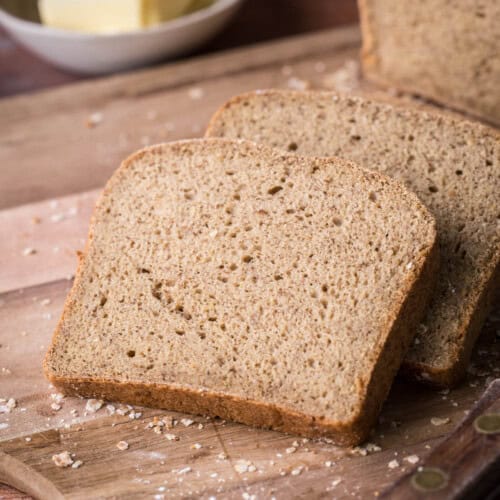
Gluten-Free White Sandwich Bread
This post contains affiliate links. Please read my disclosures.
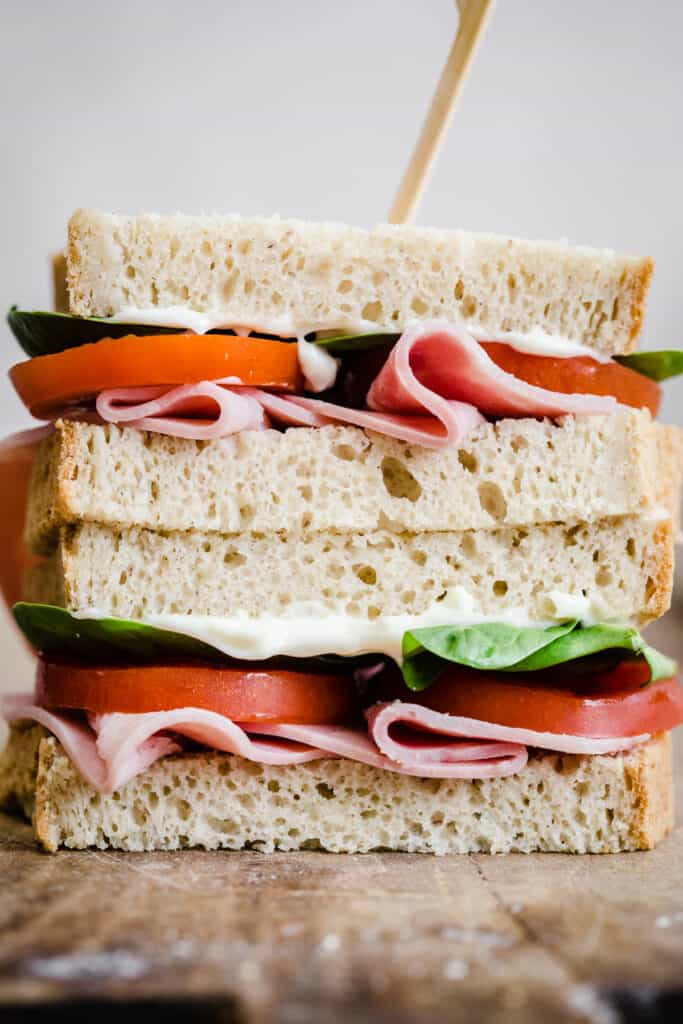
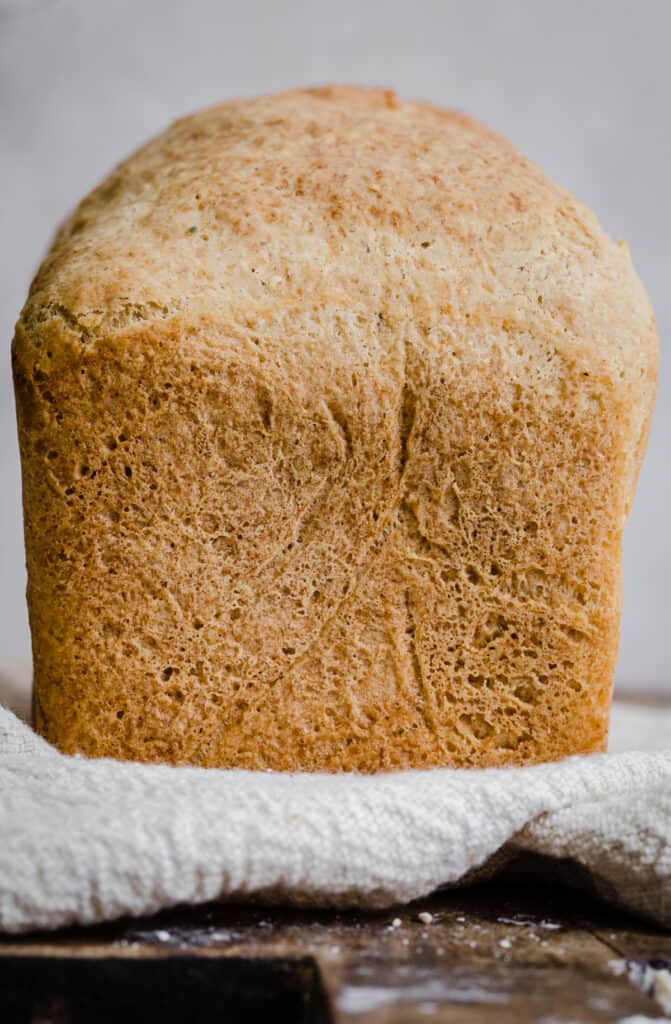
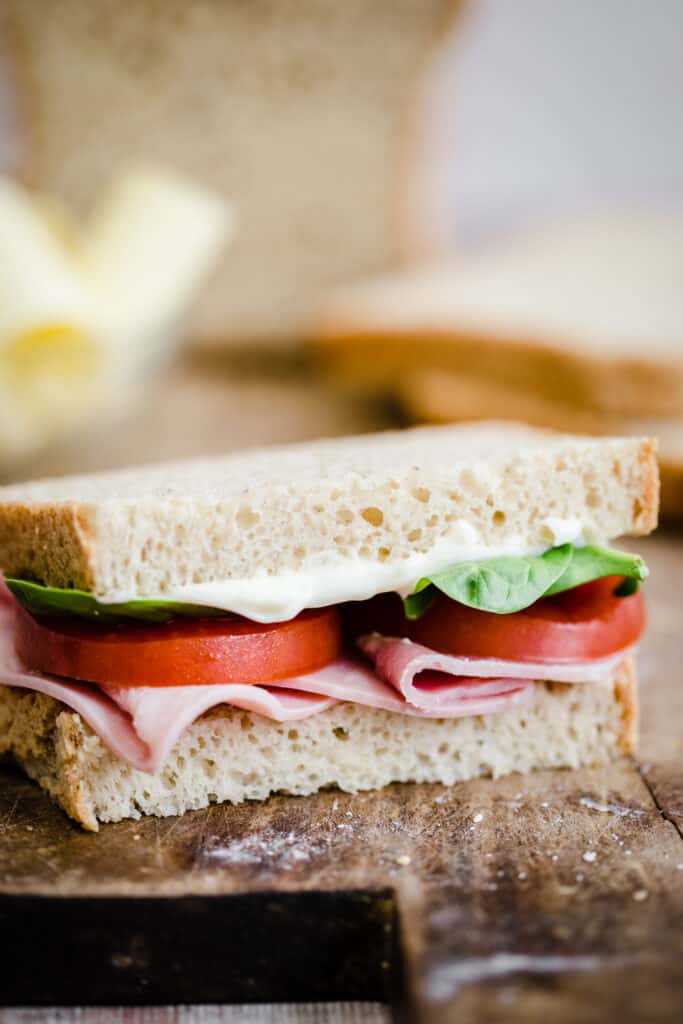
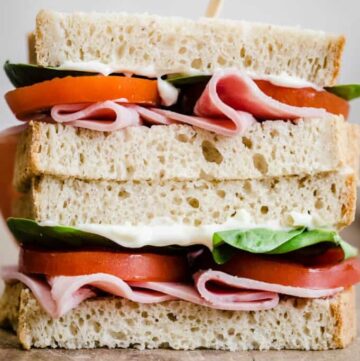
An easy everyday gluten-free white bread can seem like an impossible ask. Well this Gluten-Free White Sandwich Bread is the answer to all your bread cravings. It’s an incredibly easy bread made with instant yeast, no xanthan gum, it’s rice-free, there is no kneading and only requires one prove. The results are a deliciously tasty and soft loaf with a lovely golden crust. With a few simple swaps you can also make a delicious gluten-free vegan white bread.
Baking gluten-free white bread can seem complicated and daunting, even if you are a seasoned baker and especially if you are familiar with the regular bread making process.
In gluten-free bread recipes there may be the odd unfamiliar ingredient, you may think vital steps are being missed and the ingredient list may be slightly longer than you are used to.
Well, I am here to take you through the whole process. I will be breaking down each step and will introduce you to each ingredient to explain exactly why they have been chosen for this recipe and what their role is in the process.
My hope is that you will soon realise that baking a successful gluten-free sandwich bread can be easy, foolproof and will give you deliciously tasty, soft and fluffy results that can be eaten everyday and at any time of day.
Why You’ll Love These Gluten-Free Bread Recipe
- The bread dough is quick to come together. You can use a stand mixer but it’s not necessary.
- This is also a rice-free gluten-free bread.
- The dough only needs one rise and I’ll share my tips on guaranteeing a sky high loaf.
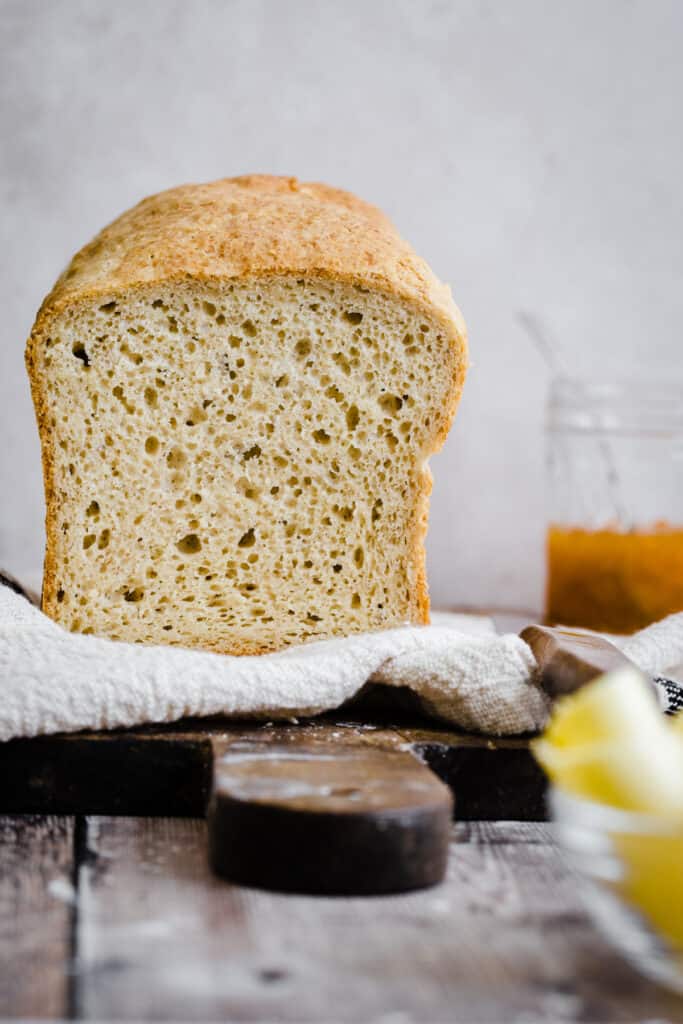
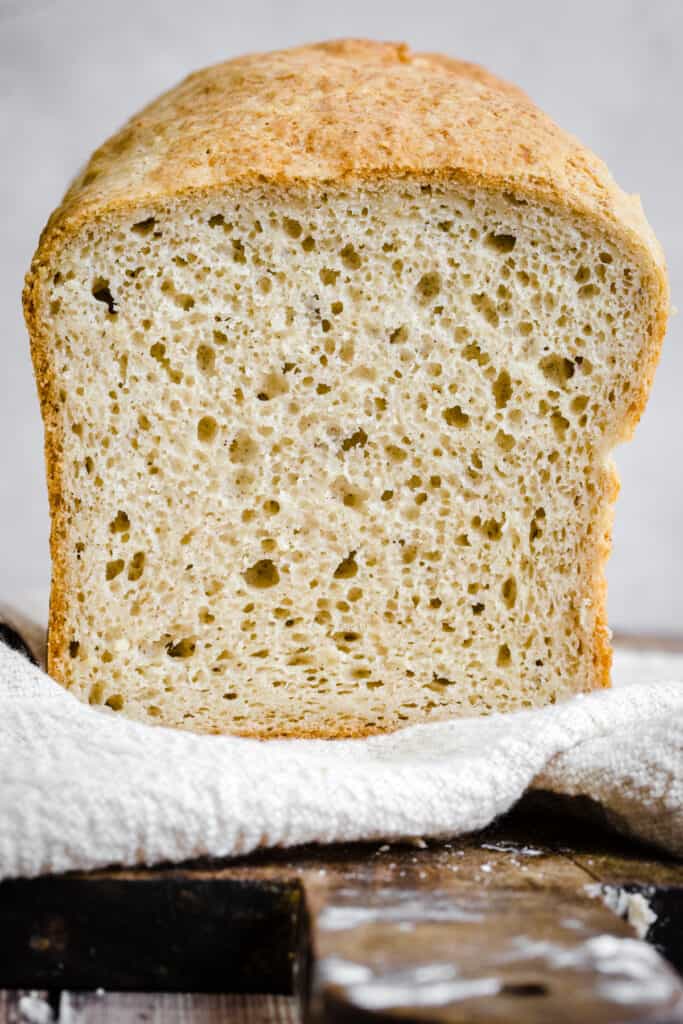
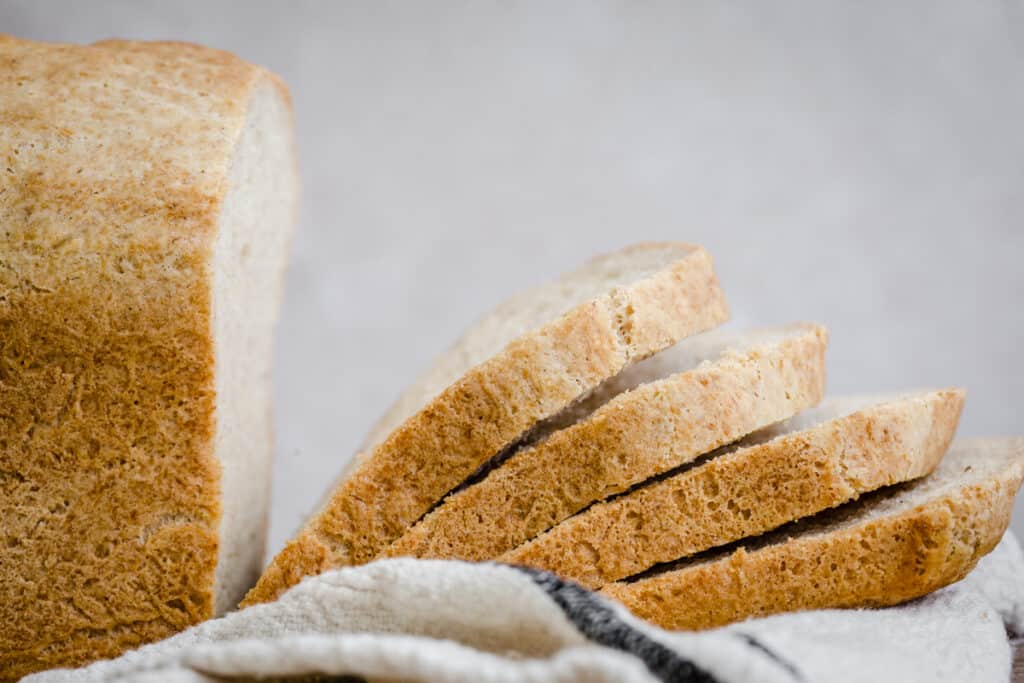
- This gluten-free sandwich bread has a soft texture, lovely open crumb and not too crusty crust.
- Delicious taste that is both neutral in flavour but not in any way bland.
- This recipe can easily be made vegan.
- No xanthan gum needed so perfect if you are intolerant to gums.
Watch The Video
How To Make Gluten-Free Bread Without Xanthan Gum
The omnipresence of xanthan gum in gluten-free bread baking can be frustrating if you are intolerant or need to avoid gums.
READ MORE >>> Why I don't bake with xanthan gum
I’m here to tell you happily that you do not need xanthan gum to produce a delicious gluten-free white bread loaf with an elastic dough, lovely oven spring and a light soft fluffy crumb. So what do we use instead?
- Gluten-free flours. We choose starchy flours that are that will give great structure to our bread.
- Psyllium husk. This is an ingredient which you might not be as familiar with but it’s hugely popular in gluten-free baking as it creates a strong elastic gel when mixed with water which will give softness and bounce to you bread. It’s incredibly simple to use, easy to source and is an invaluable ingredient in this bread.
- Egg whites. Strengthens the bread and adds more elasticity to the dough.
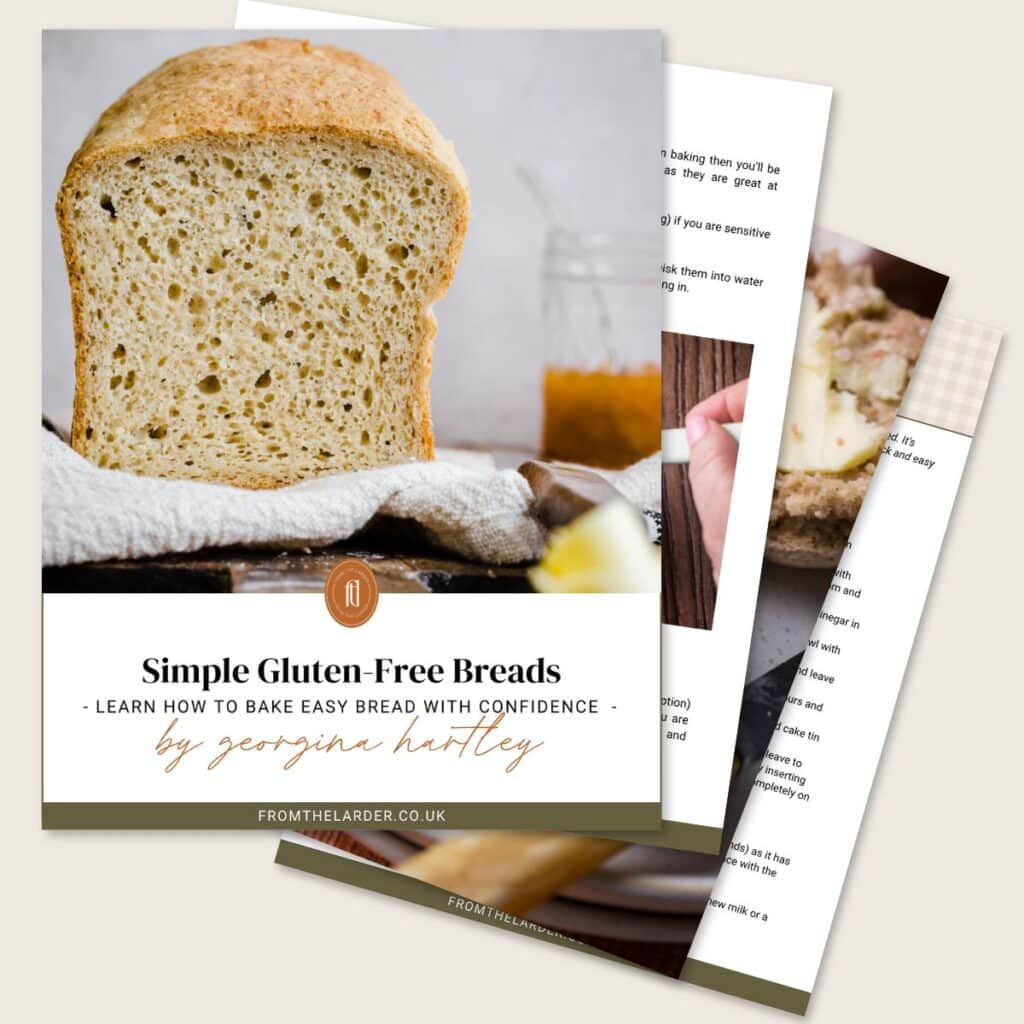
Bake Gluten-Free Bread with Confidence
Discover easy, reliable recipes for soft, wholesome gluten-free breads. No complicated techniques, just great results every time. Tips, techniques, comprehensive ingredients and equipment info.
Ingredients Needed
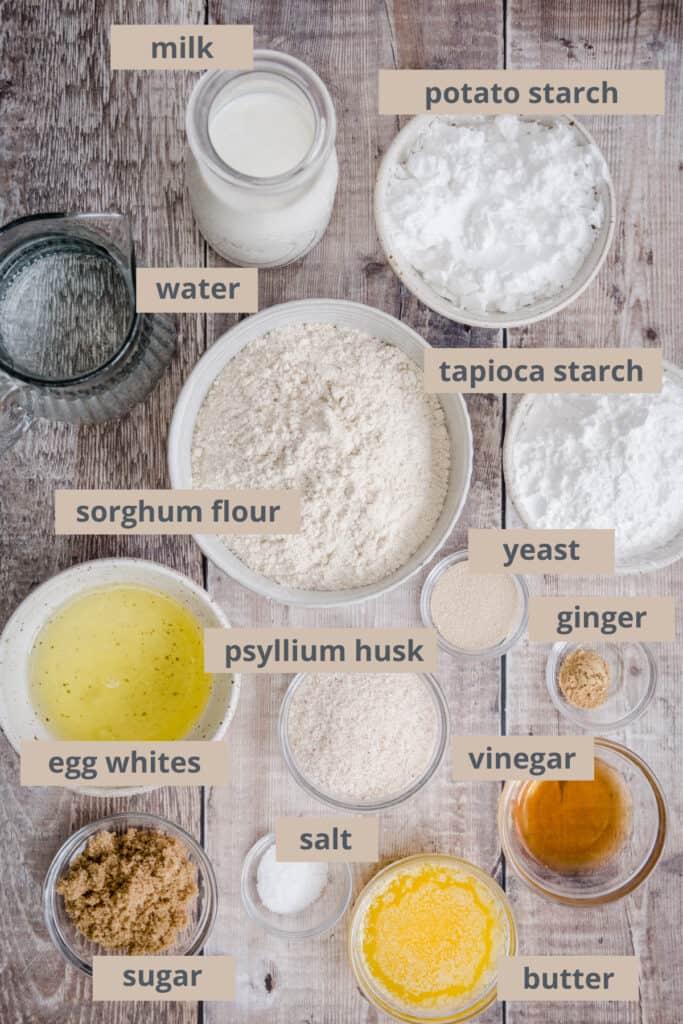
Active dry yeast. This recipe uses a quick dry active yeast. Make sure it is gluten-free though, it’s surprising how many brands are not. Also, check the expiry date. The yeast should be from a freshly opened packet (or at least one that hasn’t been hanging around for a couple of months in your cupboard).
Milk. We mix our dry yeast initially with warm milk. Milk adds vital protein to the bread to help it rise and also softens the crust. Make sure the milk is at the right temperature to activate the yeast (between 100-115 F / 38-46C). Too cold and the yeast won’t wake up and too warm and it will kill it. I recommend using a digital thermometer if you have one.
Sugar. Sugar is mixed with the dry yeast to feed and activate it when you are initially adding it to the milk. It also keeps the bread soft and helps it to brown. Brown sugar is chosen for flavour.
Psyllium husk. This ingredient is high in fibre which you can source from health food shops. It works as an excellent binding agent in this recipe and gives the finished loaf a softness and elasticity. Do note, this recipes uses whole psyllium husk, not ground.
Sorghum flour. This is a wholegrain flour which will give our loaf a lovely fluffy light crumb and a gentle neutral taste. READ MORE >>> The Ultimate Guide to Sorghum Flour
Potato starch. This starchy white flour has great binding properties which will give your bread a lovely structure. It is a very fine powdery flour and will give your sandwich loaf a great lightness. It’s great for breads as when added to water and heat the potato starch expands quickly so will make for a tall and fluffy loaf.
Tapioca starch. This is another starchy flour which will add a lightness to your bread and will help to bind the ingredients. It is especially useful as it browns well so will give an excellent golden crust to your loaf. READ MORE >>> The Ultimate Guide to Tapioca Starch
Butter. We use a good unsalted butter. Fat is needed in the recipe to soften the loaf and butter is chosen for a deliciously rich flavour. You can substitute with a mild olive oil or a plant based butter.
Apple cider vinegar. The acidity of the vinegar helps to keep the bread soft and to preserve the loaf. Use a good brand of apple cider vinegar that includes the mother for delicious flavour complexity.
Egg whites. They add elasticity to the bread and help the ingredients to bind together. You can substitute for aquafaba for a vegan bread without any discernible difference.
Ground ginger. Sounds a bit odd, right? But ginger helps to activate the yeast and aid in a sky-high loaf. You only need about ½ teaspoon so the flavour can’t be detected in the finished loaf.
Salt. Essential for a tasty bread. Don’t underestimate the amount the recipe requires, without it you could have a bland loaf.
Gluten-Free Flour Substitutions
I do not recommend using an all-purpose gluten-free flour blend instead of the flours suggested in the ingredients list as it will alter the finished results of the bread. However, you can swap the sorghum flour for oat flour or buckwheat flour if you need to.
How To Make White Sandwich Bread
For full recipe instructions go to the recipe card at the end of this post.
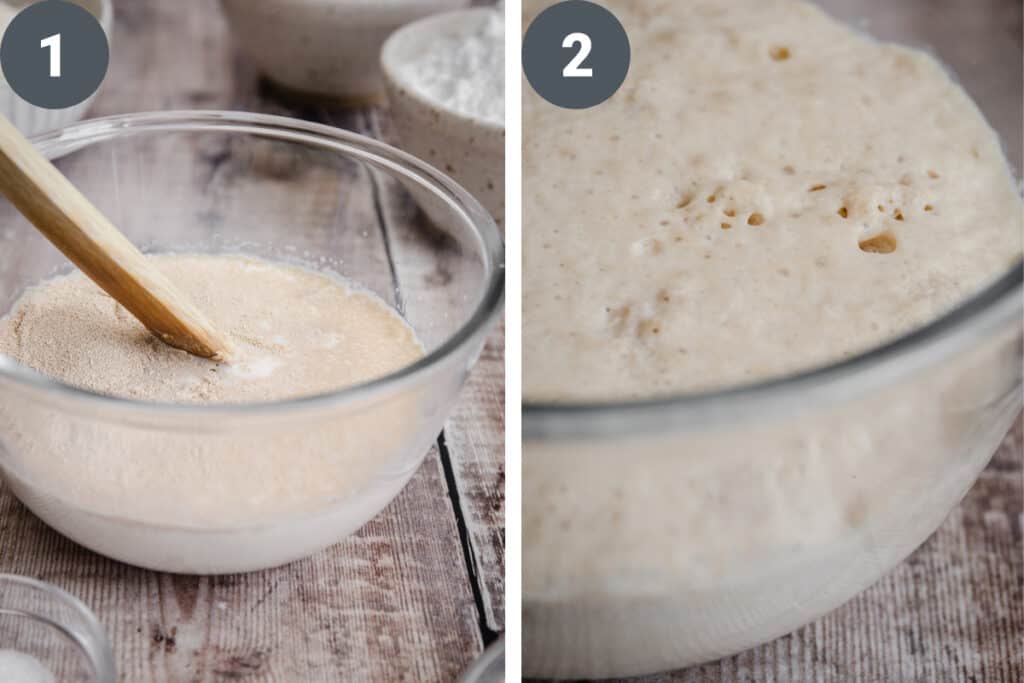
1&2) Yeast. Mix the yeast with warm milk and sugar and let stand for 10 minutes to activate.
TIP. Use a glass bowl and a wooden stirrer, like the end of a wooden spoon or a chopstick, to stir the yeast. Sometimes it can react to metal which will affect the yeast’s activation.
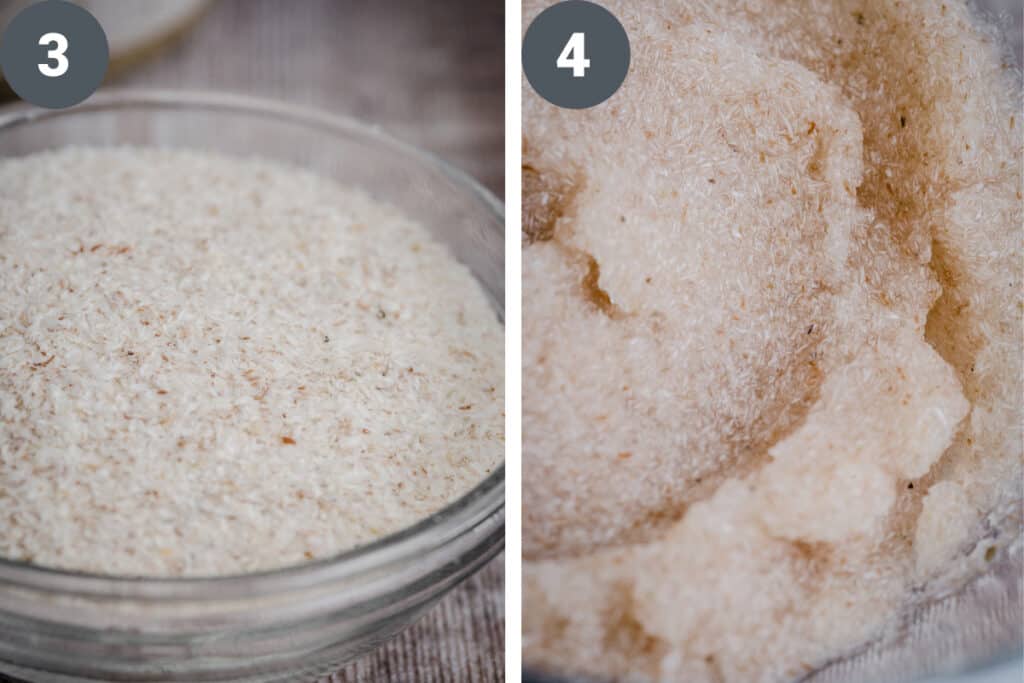
3&4) Psyllium husk. Mix with the water then let stand for 2-4 minutes to form a gel.
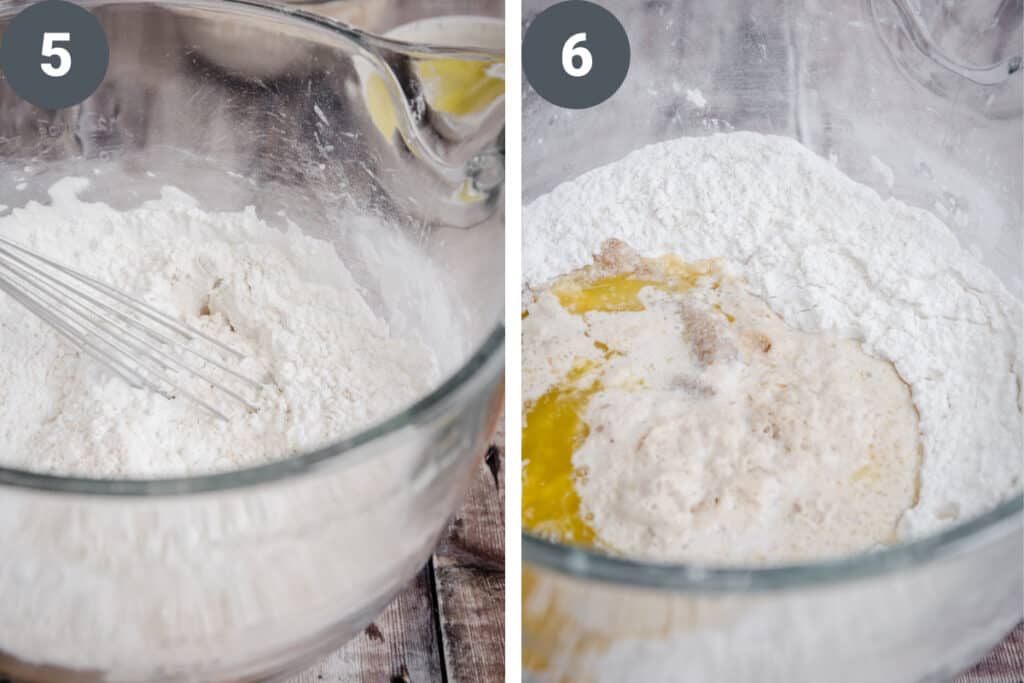
5) Dry ingredients. Mix the sorghum flour with the tapioca starch, potato starch, ground ginger and salt.
TIP. To make sure the dry ingredients are really well combined you can sift them together.
6) Mix. Beat together all the ingredients. Start with the dry ingredients then add the yeast mixture, psyllium gel, melted butter, apple cider vinegar and egg whites. Beat for at least 5 minutes to make sure everything is well combined.
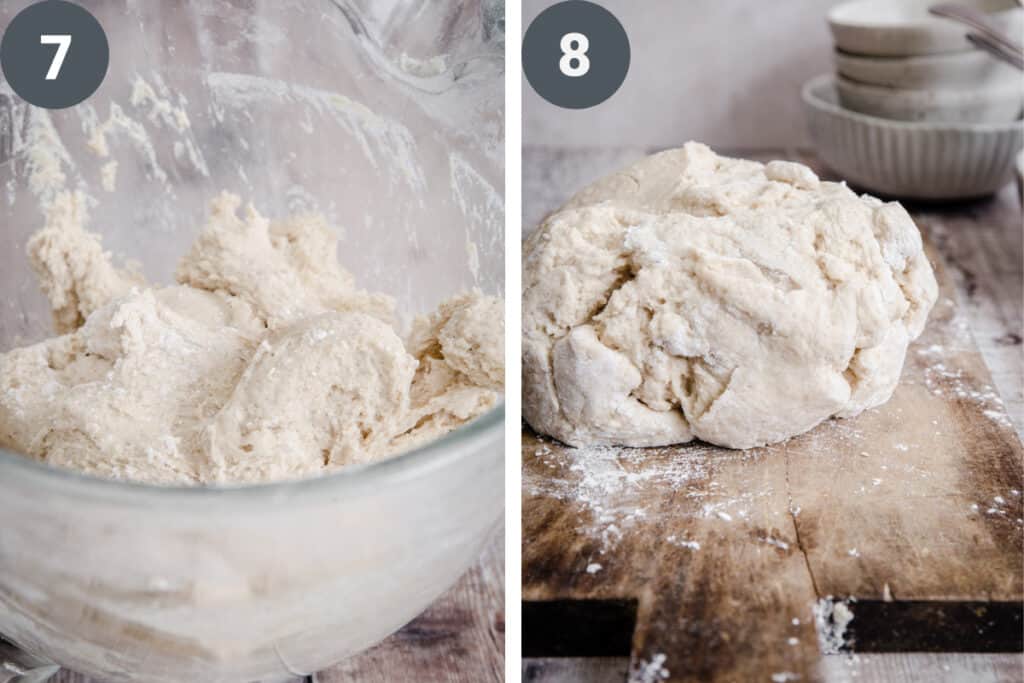
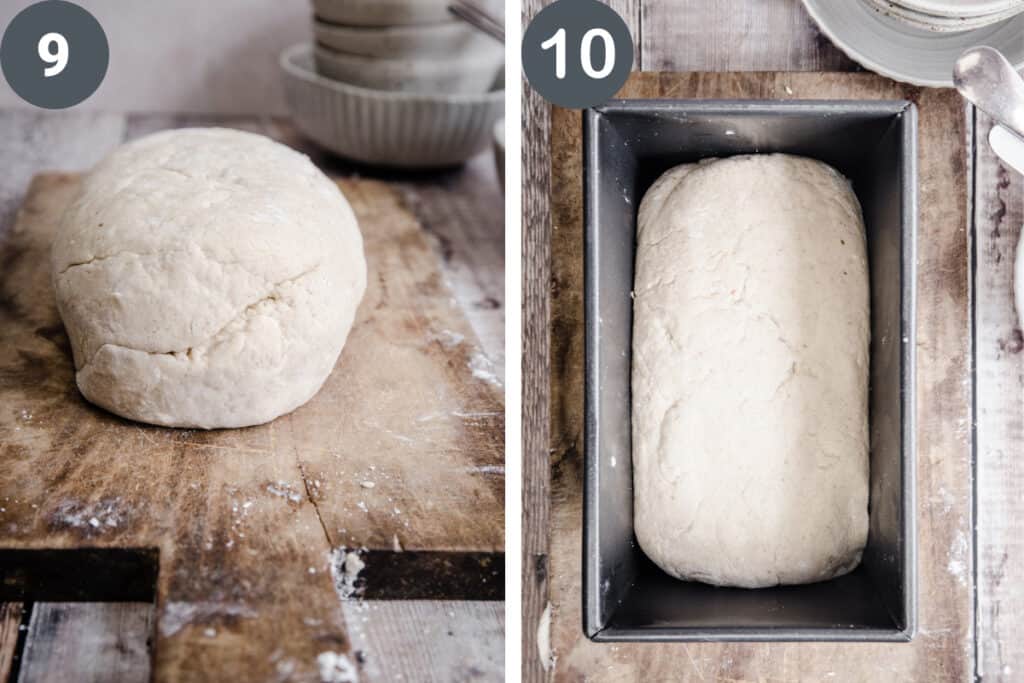
7&8) Shape. With floured hands form the dough into a log shape and place in a greased loaf tin.
TIP. Make sure the surface of the dough is lovely and smooth in the tin, any lumps, bumps or cracks will show up in the baked bread. Now is the time to make it look good.
9&10) Prove. Place the loaf tin in a warm damp place for 1 hour to rise.
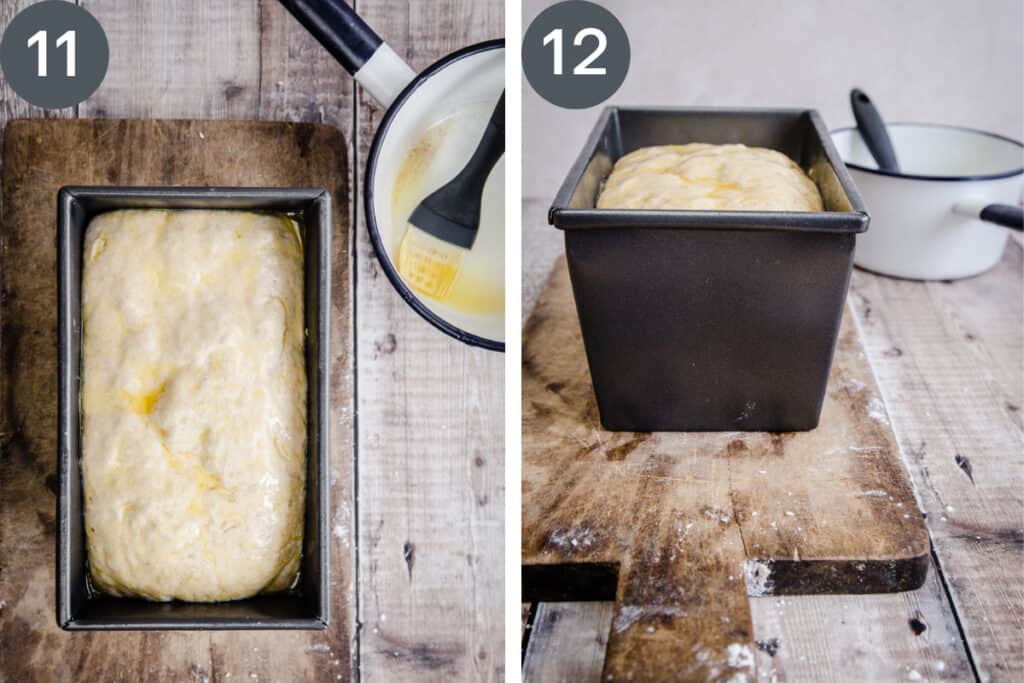
11&12) Bake. Brush the surface of the risen bread with melted butter then bake for 50 minutes.
13) Cool. Turn the bread out and cool on a wire rack.
Troubleshooting: My bread won’t rise
There are a couple of factors which may affect the rise of your loaf:
- Yeast. The first thing to do is to check expiry of your yeast. However, even if it is within its expiry it still could be dead. You will know your yeast is alive and well if once it has been added to the milk and sugar the surface is thick, frothy and bubbly. It’s active and ready to use. If the yeast just floats on top of the milk without any change to its appearance then you will need to open a new packet of yeast.
- The Prove. The other issue which might be preventing your bread from rising is how you are proving it.
How To Prove Your Bread
Your yeast might be good and strong but it will only reach its full potential if your bread is given the right environment for proving. And this is:
Warm and slightly damp.
Great places to prove your bread are:
- Utility room – with the tumble dryer on.
- Kitchen counter – on a warm summer’s day with a damp cloth draped over the top of the bowl.
- Bread proving drawer of the oven.
- Boiler room
⭐️Ultimate Proving Tip
If you can’t find a decent place in your house then the following method gives consistent results every time:
Place your bread in the middle shelf of the oven (switched off). Slide a roasting dish filled with just boiled water onto the bottom of the oven, then shut the door. The steam of the water will help activate the yeast in the bread and the oven will provide a warm yet damp environment for a successful prove.
FAQs
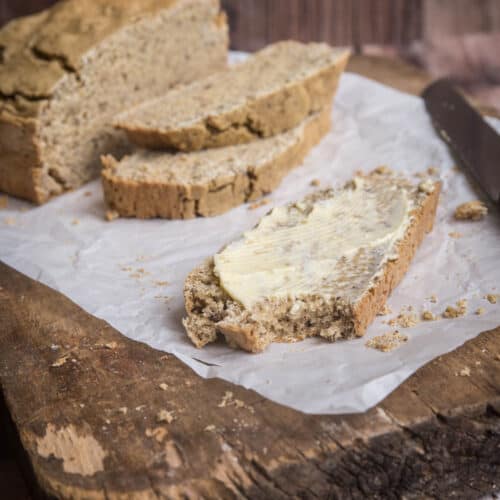
This bread is really best eaten within 24 hours. Any longer it starts to harden. However it is still great for toast for up to 3 days.
You can store your bread in a bread tin with the cut side of the loaf facing down. The crust acts as a shield to the outside environment. Or you can store in aluminium foil or wrapped in baking parchment.
If you don’t eat all of the loaf within the first day then another option is to freeze it.
Allow the bread to cool completely. You can freeze the bread whole but I prefer to freeze in slices. Double wrap well in cling film and aluminium foil to avoid freezer burn.
You can use the frozen slices straight from the freezer into the toaster, or you can leave to defrost overnight on the kitchen counter.
With a few simple switches you can easily make a vegan loaf using this recipe. There is no difference in the two versions at all.
Whole milk - you can switch for your favourite non-dairy milk. Almond milk or cashew milk work best.
Butter - you can use either a plant based butter or just olive oil, but if you use the latter you lose the rich buttery taste (it still has a lovely flavour though).
Egg whites – swap the egg whites for 130g aquafaba.
This loaf is baked in a large 3lb loaf tin. The dimensions are 13 x 12 x 21.5 cm; 685 grams.
More Gluten-Free Bread Recipes You’ll Love
Enter your email below to get this recipe sent to your inbox plus get new recipes, baking tips, and updates.
Gluten-Free White Sandwich Bread
Ingredients
- 7 g active dried yeast
- 220 ml whole milk
- 25 g light soft brown sugar
- 30 g psyllium husk - not ground
- 200 ml water
- 3 teaspoons apple cider vinegar
- 240 g sorghum flour
- 160 g potato starch
- 160 g tapioca starch + a little extra for dusting
- ½ teaspoon ground ginger
- 1 teaspoon kosher salt
- 65 g unsalted butter - melted and cooled slightly + 15g extra (for brushing over the top)
- 4 egg whites - medium eggs
Instructions
- Warm the milk to between 100-115 F / 38-46°C . Then pour into a medium sized glass bowl and stir in the yeast and brown sugar. Rest for 10 minutes until the surface is looking thick and bubbly.
- Stir the water and psyllium husk together in a medium sized bowl until combined. Allow to stand for 2-4 minutes until it forms a gel.
- Whisk the sorghum flour together with the potato starch, tapioca starch, ground ginger and salt in a large mixing bowl or a stand mixer.
- Add the yeast and milk mixture, psyllium gel, apple cider vinegar, cooled melted butter and egg whites.
- Beat together for about 5 minutes until the dough is well combined but still a little sticky to the touch.
- Dust hands with extra tapioca starch and scrape the dough out of the mixer.
- Place on a work surface and roll and shape the dough together into a smooth log shape.
- Place the dough carefully into a lightly greased 3lb loaf tin.
- Place the tin somewhere damp and warm to prove for 1 hour (see notes on proving).
- After the dough has been proving for 50 minutes turn the oven onto 190°C /170°C fan assisted oven / gas mark 5.
- Melt the butter for brushing over the top of the loaf.
- Once the dough has been proving for an hour it should have risen by ⅓, just reaching the top of the tin. Brush the surface with the melted butter then place in the oven to bake for 50 minutes. The loaf is baked when golden brown.
- Remove from the oven and take the bread out of the tin straightaway to cool on a wire rack. Allow to cool completely before cutting.
Video
Notes
- Flours. This recipe hasn’t been tested with any flour substitutions. However an alternative to the sorghum flour is oat flour. An alternative to the tapioca starch or potato starch is arrowroot (although both flours should not be substituted for arrowroot).
- Psyllium husk. This recipe has not been tested with any alternatives.
- Whole milk. Swap for almond milk or cashew milk for a vegan or dairy-free loaf.
- Egg whites. The eggs whites used are 30g each so 120g total in egg whites.
- Butter. Swap for olive oil for a vegan or dairy-free loaf.

Delicious and easy to understand directions! The hardest part was waiting for the loaf to cool! I baked it in a Pullman loaf pan without the lid. This will be my go to recipe for gf sandwich bread!
Thank you Susan - I'm so happy you enjoyed your bread!
I really want to give this recipe a try, however, I can not use potato starch due to an allergy. Would buckwheat be a good substitute for that or is there something else I could use in place of it? Tha k you for your time and recipes.
Hi Sarah, you need to swap a starch for another starch so buckwheat wouldn't be the right choice as it isn't a starchy flour. I have a free gluten-free flour cheatsheet which lists all the flour in categories so you can check. I haven't actually tried swapping in the potato starch in this particular recipe. However, you could try cassava flour. It has a slightly different make-up so the recipe won't be exactly the same but should still produce a good bread.
This is my go to gluten free bread. I made a few errors along the way and you do need to follow the recipe exactly. It freezes really well so I always have bread ready for toasting. I have recommended you to a small restaurant that has just opened in Ludlow as the chef makes his own bread but needs help with gluten free breads.
I'm so happy the bread is working out for you. Thank you for the recommendation! I love Ludlow - I've been there many times as its my maiden name.
Georgina, this bread is amazing!
I have been looking for a lectin-free bread recipe that looks and taste like real bread, and uses sorghum flour as the primary flour. I followed your recipe exactly: weighing the flours in grams, activating the yeast, and proving the loaf in the oven with a pan of hot water. It looked beautiful coming out of the oven and it was so hard waiting for the loaf to cool before I sliced it. Tasting the first bite reminded me of the homemade (wheat) bread my mother made some 50 years ago. And the ingredients are clean - no rice, no almond flour, no xanthan gum, and just a little sugar to feed the yeast. I am truly grateful you have shared this recipe and I will experimenting with mix-ins (garlic & herbs, dill & onion, cheddar chunks) when I make this in the future. Thank you, Michael - Kansas, USA
You are very welcome Michael - I'm so happy you enjoyed the bread and I'd love to hear about some of your experimentations too when you try them.
I have been following you for several years but only recently got serious about making my own gf products, specifically bread. My favorite bread (which was 3 Bakers Ancient Grains here in the U.S.) is not being stocked consistently. So I tried a few others that have been in the stores for years and they had not improved at all! I made this recipe yesterday and it is wonderful! I used 2 whole eggs and 1 egg white instead of 4 egg whites. I am so happy! I am now going to make my own breads using your recipes! Sherry from Hillsboro, Ohio, US.
Thanks so much Sherry, I'm thrilled you enjoyed the recipe and that it's helping you to make you own delicious homemade bread. Happy baking!
Mine tuned out dry, crumbly and tasted sour. Not sure what i did wrong
Hi Christina, how disappointing for you. Let's talk through it. I have to ask the initial questions, did you change anything at all about the recipe - any of the ingredients, the method, have you re-read through the recipe again and double checked you followed it exactly as written? Did you manage to follow the images on my website and did any of your stages differ from the images?
Can the yeast that doesn't need to be activated( the yeast that is added straightinto dry ingredients) be used instead as I am finding it hard to source.
I have only tried using that type of yeast I'm afraid so I can't guarantee the results. Also you will need to bear in mind the fact that you would be taking out some of the liquid content so you might need to adjust the recipe for that too.
Hi Georgina,
Made this loaf for the very first time. It turned out well. Nice texture, didn't sink in the middle like some loaves do. As we grow and grind our own ginger powder, it is much stronger than bougtht ginger powder so will be leaving it out next time, as you could taste the ginger in the bread.
I was wondering if you could use 2 whole eggs instead of 4 egg whites, or would that affect the texture?
Including the egg yolks does change the flavour and texture of the bread - as it becomes richer. I didn't like it for my sandwich bread but you can certainly experiment according to your own tastes.
I would like to make this recipe in to dinner rolls. Anything I should do differently; shaping, proufing, baking?
I'm working on a dinner rolls version of this recipe so will update you on the right method asap!
Absolutely brilliant recipe! I didnt have any potato starch so I ordered some, and actually used cornflour. It worked perfectly and my loaf looks just like yours. The bread tastes like bread! Pretty hard to achieve with Gluten free! Amazing. I didn't have a 3lb tin so just used my 2lb one. Please could you tell me how tall your loaf is? Just wondering if the tin height made any difference to the bake. (Length and width were the same) The proof tip is brilliant as well, the loaf rose beautifully and did not sink back down or have a 'flying crust'. Thanks so much, it's such a delight to have nice bread again!
I'm so happy you have enjoyed this bread. Gosh I don't know how much the bread actually measures in height - but the dimensions of the tin are 13 x 12 x 21.5 cm.
Hi Georgina. Your bread looks lovely. I've attempted it twice with a slight adjustment to the temperature. My mum in law is a baker and told me to lower the temperature to 140 celcius. I cooked it for 1 hrs 20 mins and it was undercooked. It was well risen. The yeast look activated.
Is it ok to leave the yeast activated for 5 minutes longer?
The dough seemed overly sticky. It was really sticking to my fingers. Can you give me advice please?
I really recommend baking the bread at the temperature given in the original recipe for the best results. If you leave the yeast too long once it is activated it starts to lose its activation - 5 minutes should be okay but keep an eye to make sure the bubbles aren't depleting. The dough gets less sticky as it gets kneaded, although you can dust your hands with a little flour (potato starch or tapioca starch) to help with the kneading.
I have emailed you so I could send photos to show you the tin i used and photo of the bread. Third time trying and it is still undercooked.
I've responded to your email but I'll repeat it here as well in case anyone else is having the same issue. Those photos of the baked bread you sent me are very helpful and the 'flying crust' indicates a proofing issue. It looks like from your results that the bread dough rose too quickly and for too long. There isn't a set time for how long bread should rise, as it depends on the temperature of your kitchen, although I have given the guidelines I always use but your kitchen is different to mine. If it's too warm, the dough may rise too fast, so it will be ready to bake sooner. The bread isn't technically underbaked as overproofing can cause the dough to collapse, leading to a dense texture at the bottom of the loaf.
Does the white sandwich loaf work in a bread machine?
I personally haven't tried it yet but I'll make sure to asap and report back as it's been a question I've been asked a lot lately. I know others have had success with it in a bread machine but I will put a note on this recipe as soon as I have tried it.
Hi Georgia. I am curious to find out how your test with the bread machine went and if there were any tweaks that you needed to make to your recipe.
I am in the middle of developing a bread recipe specifically for the bread machine as the recipe does need to be tweaked quite a bit. It will be available in my bread ebook available at the end of September.
Is there a way to make this without psyllium husk? I'm allergic to it.
I haven't tested this recipe with a substitute for the psyllium husk unfortunately.
Hi, is it possible to make this in a bread machine? I have a Gluten free setting.
Hello, I want to make this bread recipe to use in a similar recipe to your bread and butter desert bread pudding for Christmas Eve, but I am not sure how big a 3-pound tin is? My largest bread pan is 23.5 cm x 13cm x 7.5cm. From what I can gather searching online, I believe my pan to be a 1.25 pound (US pound) loaf tin. What are the dimensions of your 3 pound tin so I can attempt to find the appropriate sized tin before the holiday? Or do you think I could divide the dough between two tins with ok results? Many thanks for your time to answer. Merry Christmas and Happy New Year! -Amanda
The actual pan I use has these measurements: 13 x 12 x 21.5 cm; 685 Grams. I know people have baked this recipe in all sorts of pans, I couldn't give you exact baking times but you could bake in two smaller pans.
Georgina, I made three of your recipes between yesterday and today, and I am floored! This recipe was a bit of work but the end result was totally worth it! Thank you!
Thank you for leaving your feedback - I'm thrilled you are having such great successes with these recipes!
Hello, I have just baked this bread for the first time. It is a fantastic recipe. It tastes like bread!!! My other attempts at gf bread have not at all. I found the tip about checking the yeast invaluable (one lot thrown away) and also checked temp of bread with thermometer, until got 99 degrees C. Thank you 🙂
You are welcome! I'm so happy you are enjoying the bread.