Easy Seedless Raspberry Jam
This post contains affiliate links. Please read my disclosures.

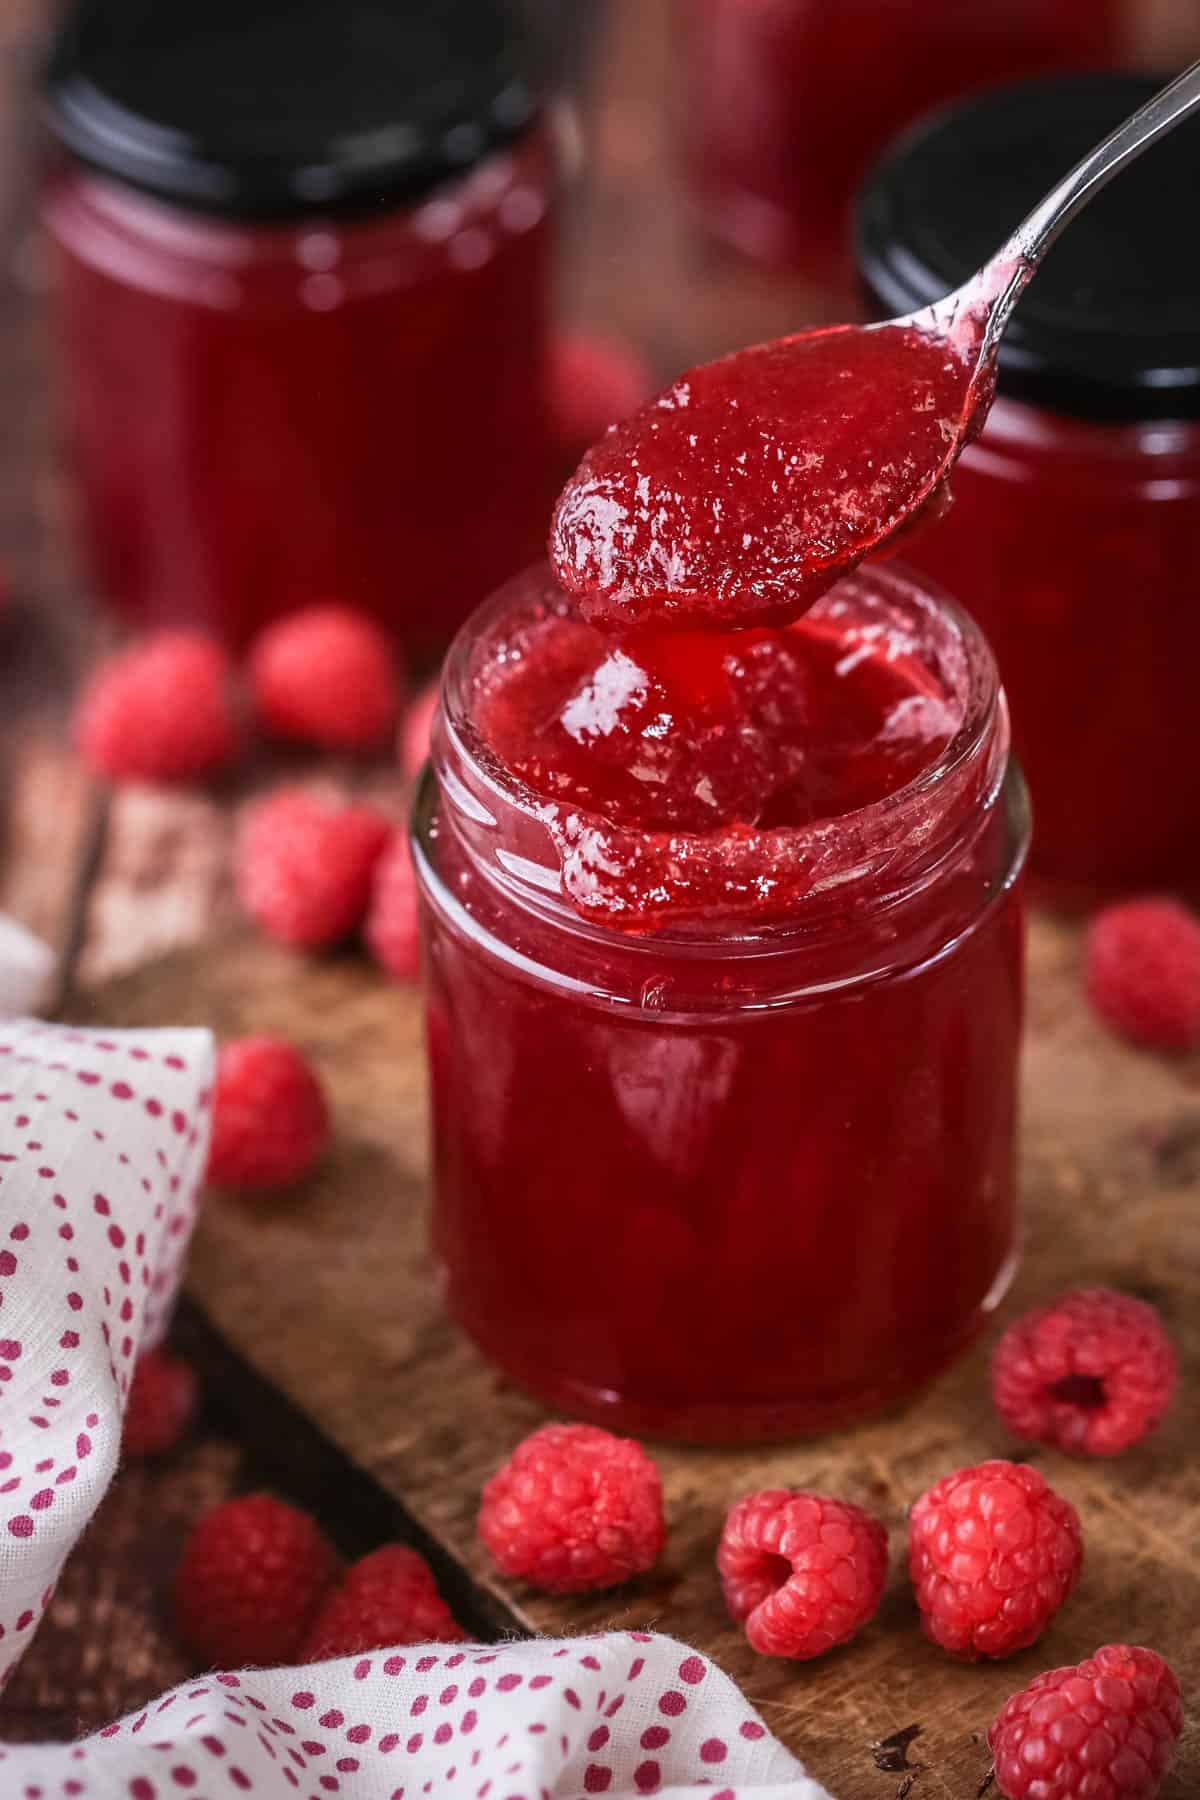
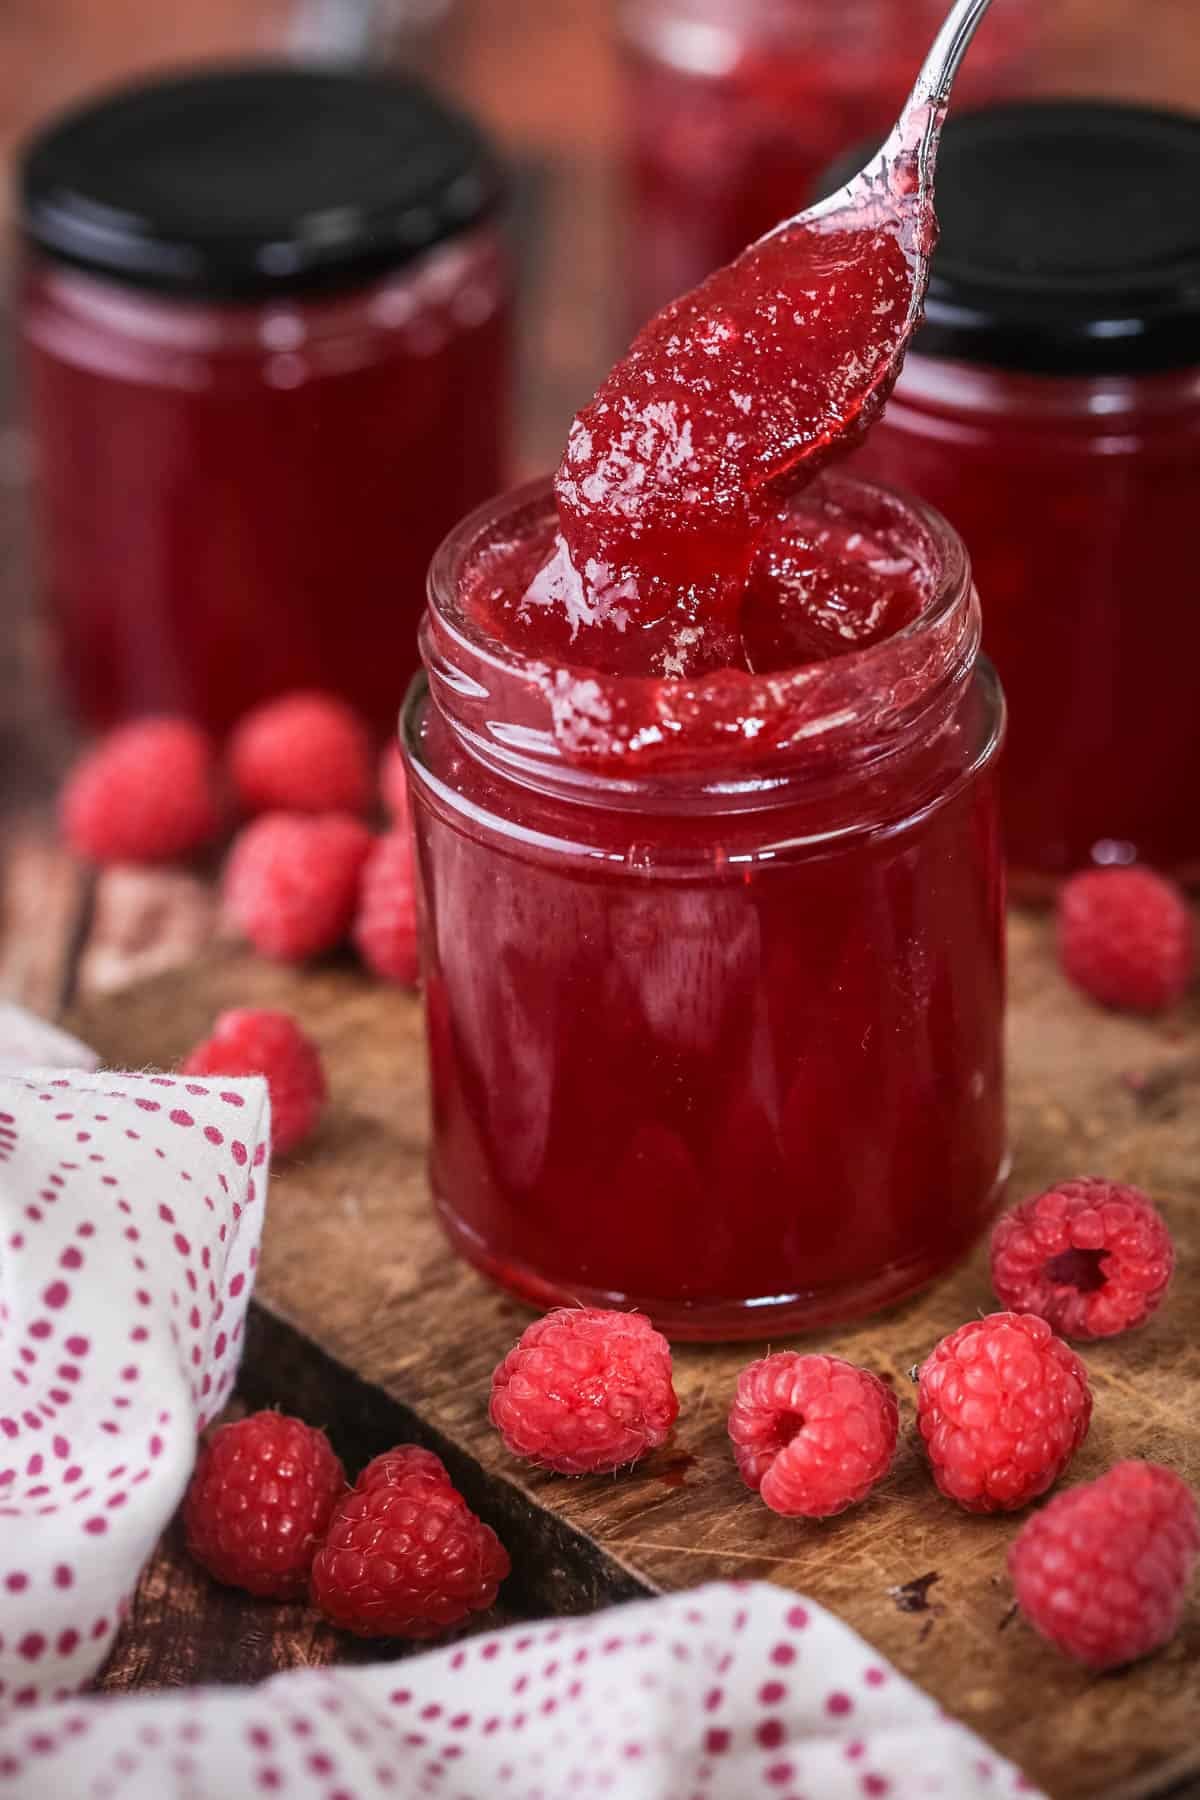
This Easy Raspberry Jam has a smart and simple method and can be achieved in under an hour. Ideal for beginners and since we are removing the seeds it’s also perfect if you prefer a smooth and softly set fruity preserve.
Raspberry jam is an easy classic beginners’ jam which we are going to take one step further by removing the seeds. This step is done at the very beginning of the recipe before you add the raspberries to the sugar.
It does mean that you will slightly reduce the amount of jam 1kg of raspberries produce – you’ll probably have 4 jars instead of 6. However, if you are serving to picky eaters who just don’t enjoy the bits (believe me I have many of them in my household and actually I have a bit of a soft spot for an ultra smooth spread) then it can mean the difference between your precious fruity jars being eaten or not.
The other bonus is that you have a little stash of very flavourful raspberry seeds which can be used to produce other recipes such as homemade raspberry vinegar and raspberry liqueur so don’t throw them away!

What is Seedless Raspberry Jam?
Raspberries are packed with tiny little seeds which can go relatively unnoticed when you are eating the fruit itself. However, in the context of jam those miniscule hard seeds can suddenly appear plentiful and distracting to eat as they get stuck in your teeth.
Removing the seeds from the raspberries before you make the jam is an easy process and produces a beautiful silky smooth spread which is ideal for kids and adults alike. Plus it can actually be a more preferable baking ingredient so you can use it in cakes, fillings and smooth glazes.
The texture of a Victoria Sponge with a smooth jam layer can be more pleasurable to eat rather than it being studded with dozens of gritty seeds.
Why You’ll Love This Smooth Raspberry Jam
- Simple method to remove the seeds.
- Ideal for kids or adults who like a smoother jam texture and often works better as a baking ingredient.
- Beginners’ recipe so easy to make if you are new to homemade jam.
- Small batch of four jars so you are not storing away a huge hoard.
- Bonus ingredient. Don’t throw away your raspberry seeds – there is plenty of flavour in these little seeds and they will make an excellent base for a fruit liqueur or raspberry vinegar.
Ingredients Needed
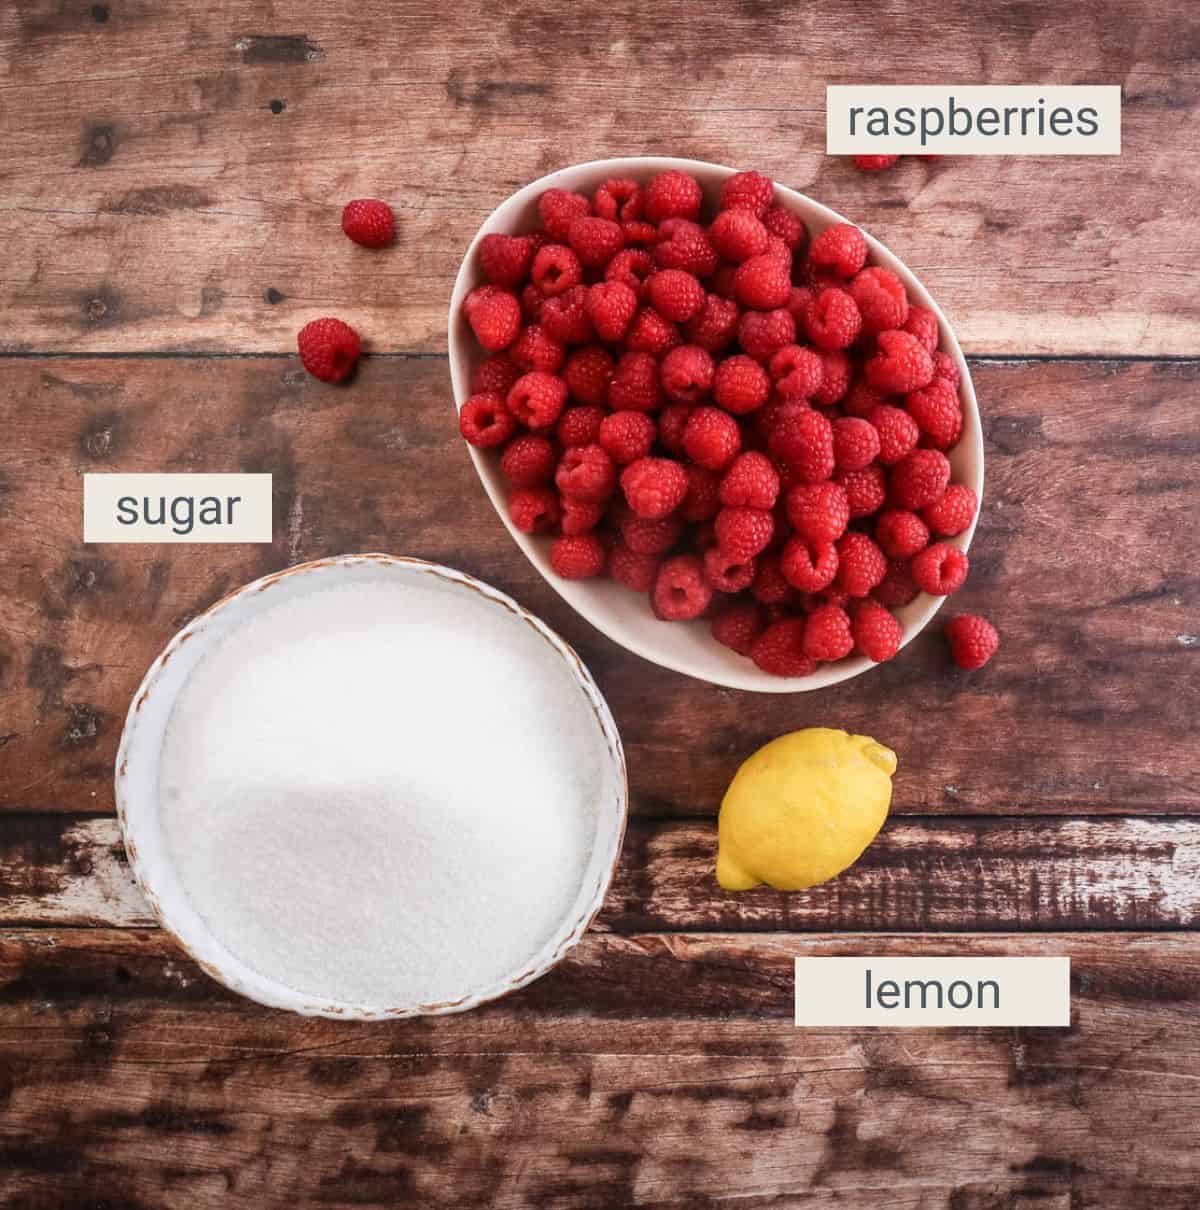
Raspberries. You can use fresh or frozen berries. However, not all frozen berries are of the same quality. I tend to avoid the supermarket ones which are often bland and thaw to a squishy mess. You are much better using berries you have frozen yourself the day after picking, or using a good frozen berry stockist like British Frozen Fruits. The most important thing is to use good plump berries.
White sugar. Granulated sugar is the more economical option. There is no point using caster sugar which is better for baking and is more expensive. Jam sugar isn’t necessary as we are aiming for a slightly softer set and we can use a little lemon juice for boosting flavour and adding a small amount of natural pectin instead.
Lemon juice. Use freshly squeezed lemon for acidity and to help with setting.
Equipment You’ll Need
Since the list of equipment you need for preserving recipe is pretty similar across all my jams and chutneys I have compiled an Essential Equipment Guide which lists things you need to buy, some nice to haves and how to make do with what you’ve got.
However, the most essential pieces to have for this recipe is:
- Fine mesh sieve (a food mill is definitely an elevated piece of equipment if you’re a keen preserver).
- Large heavy bottomed pan - a maslin pan is perfect.
- Sterilised jars and lids.
How To Make Easy Seedless Raspberry Jam
For full recipe instructions go to the recipe card at the end of this post.
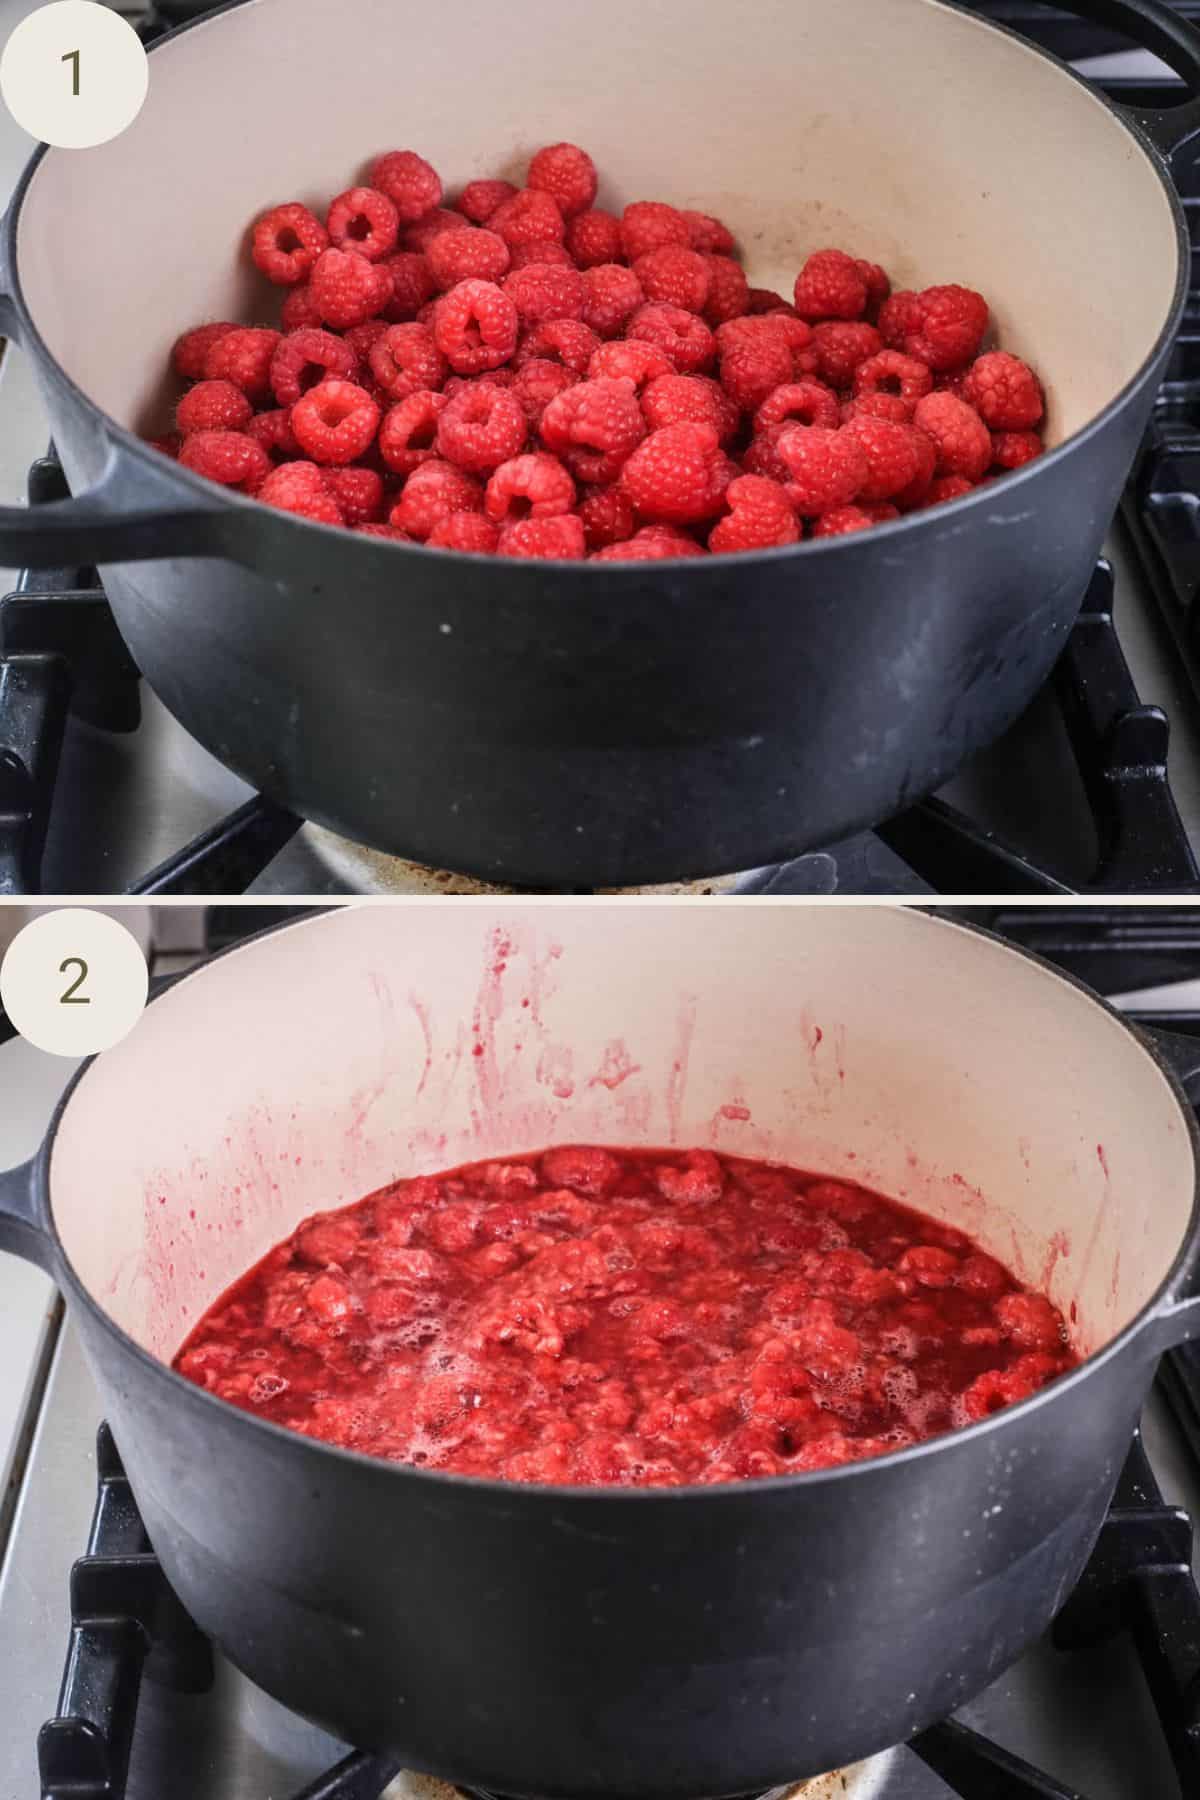
Place the raspberries in your preserving pan and heat for 5-10 minutes until soft and pulpy.
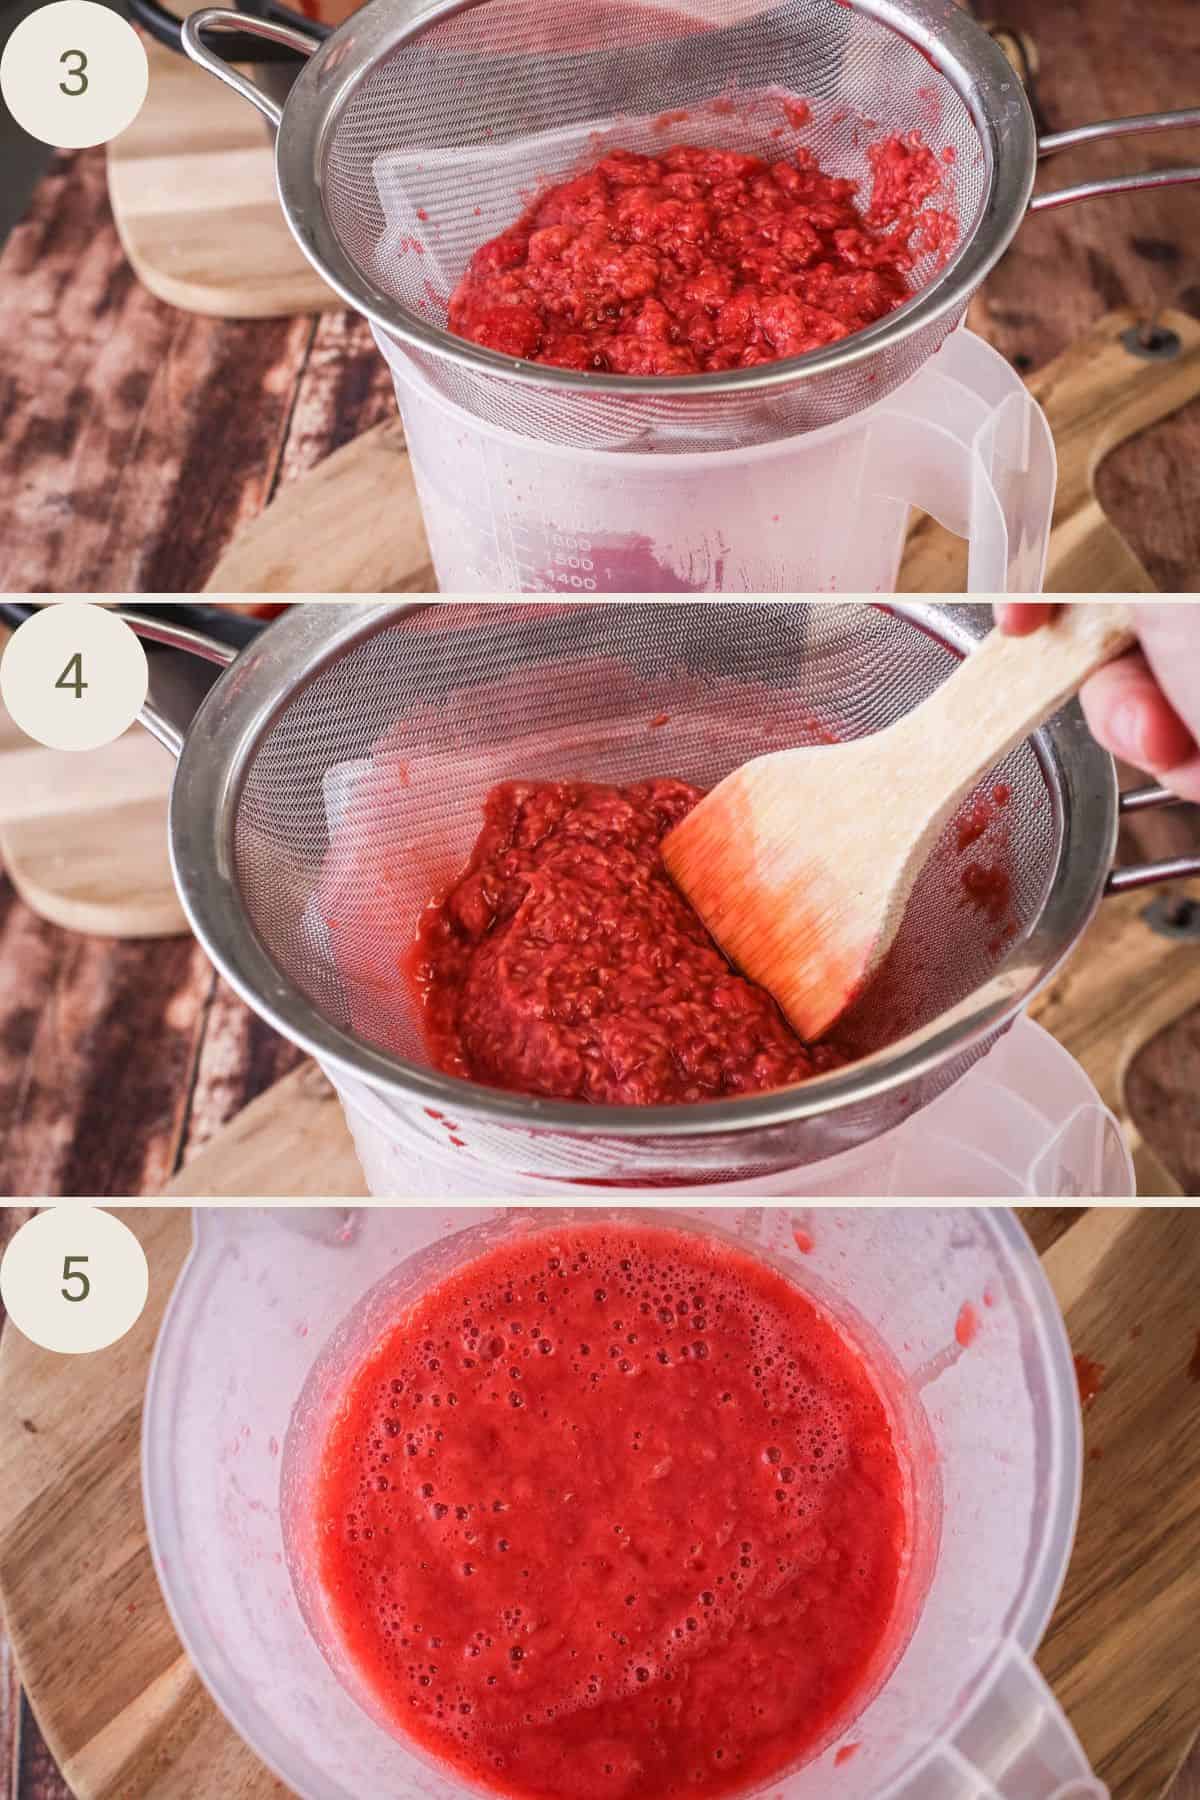
Mash the raspberries into a sieve and push the fruity pulp through so the seeds remain in the sieve (save the seeds for a future recipe – ideas below).
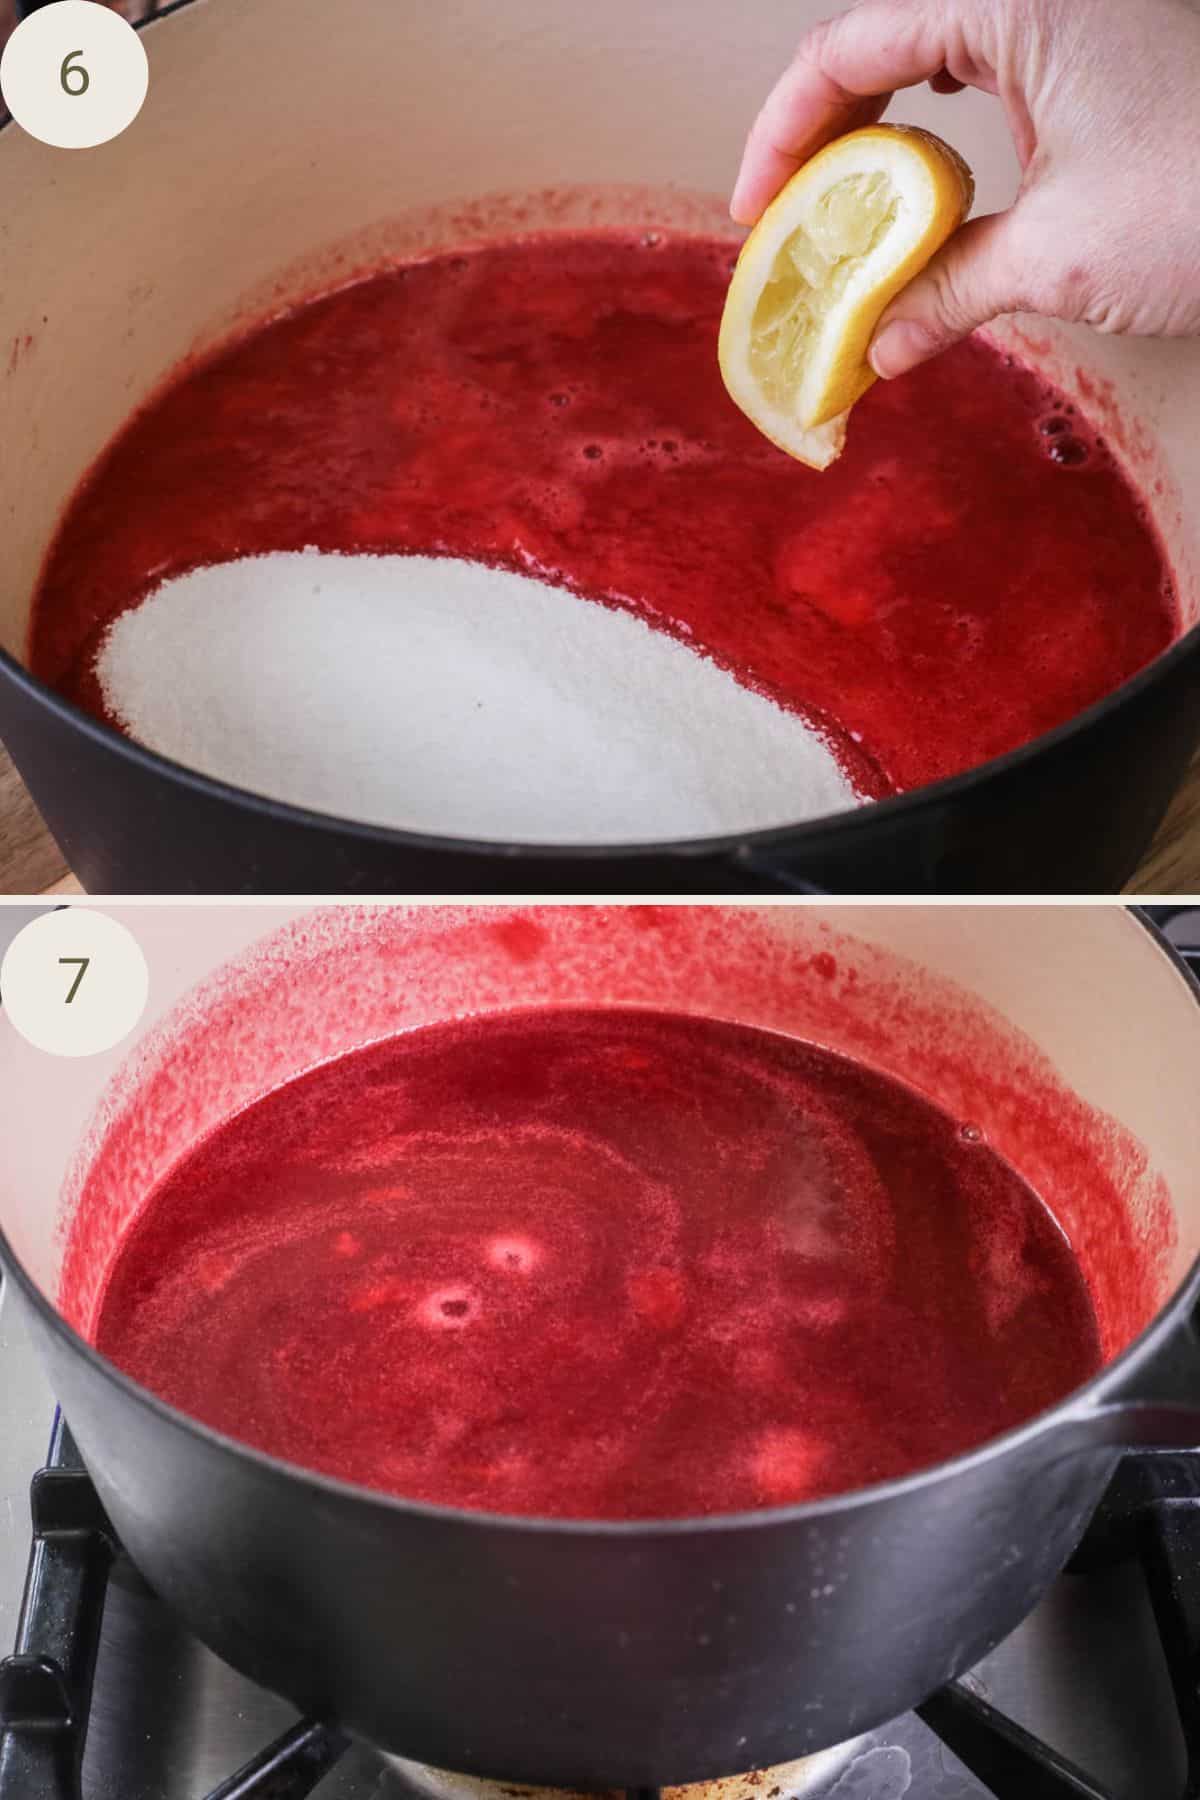
Place the raspberry puree, the same weight of sugar and lemon juice into a large preserving pan over a low – medium heat until the mixture comes to a boil.
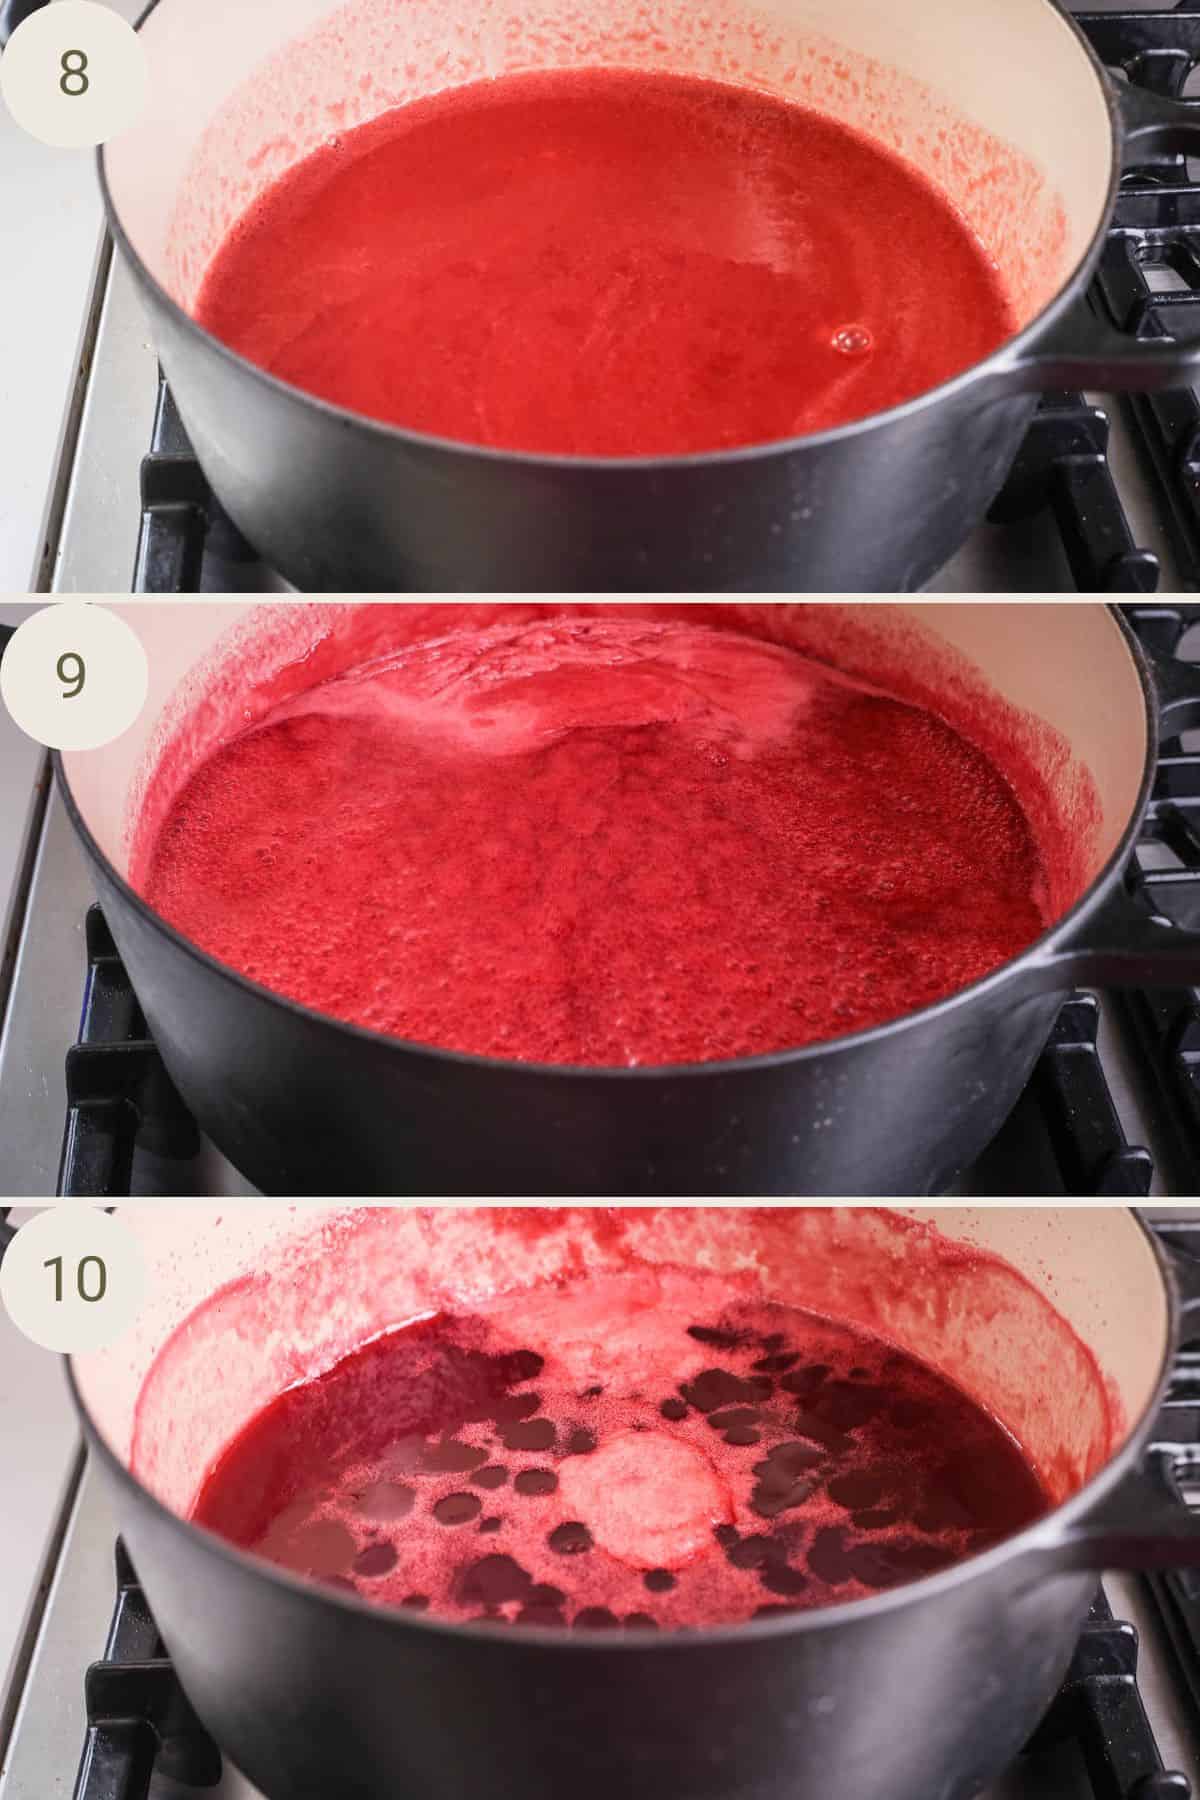
Turn up the heat to high and boil on a rolling boil for 5 minutes. Turn the heat off, remove a saucer from the freezer and test for set. This test is briefly outlined below or you can swot up on my detailed guide to perfect jam setting.
If the jam has not set then turn the heat back on the jam and heat for a further 1-2 minutes (depending on how close the set was) before trying the test again with a fresh frozen saucer.
Repeat this process until you achieve the desired set.
Skim the scum off the top of your jam.
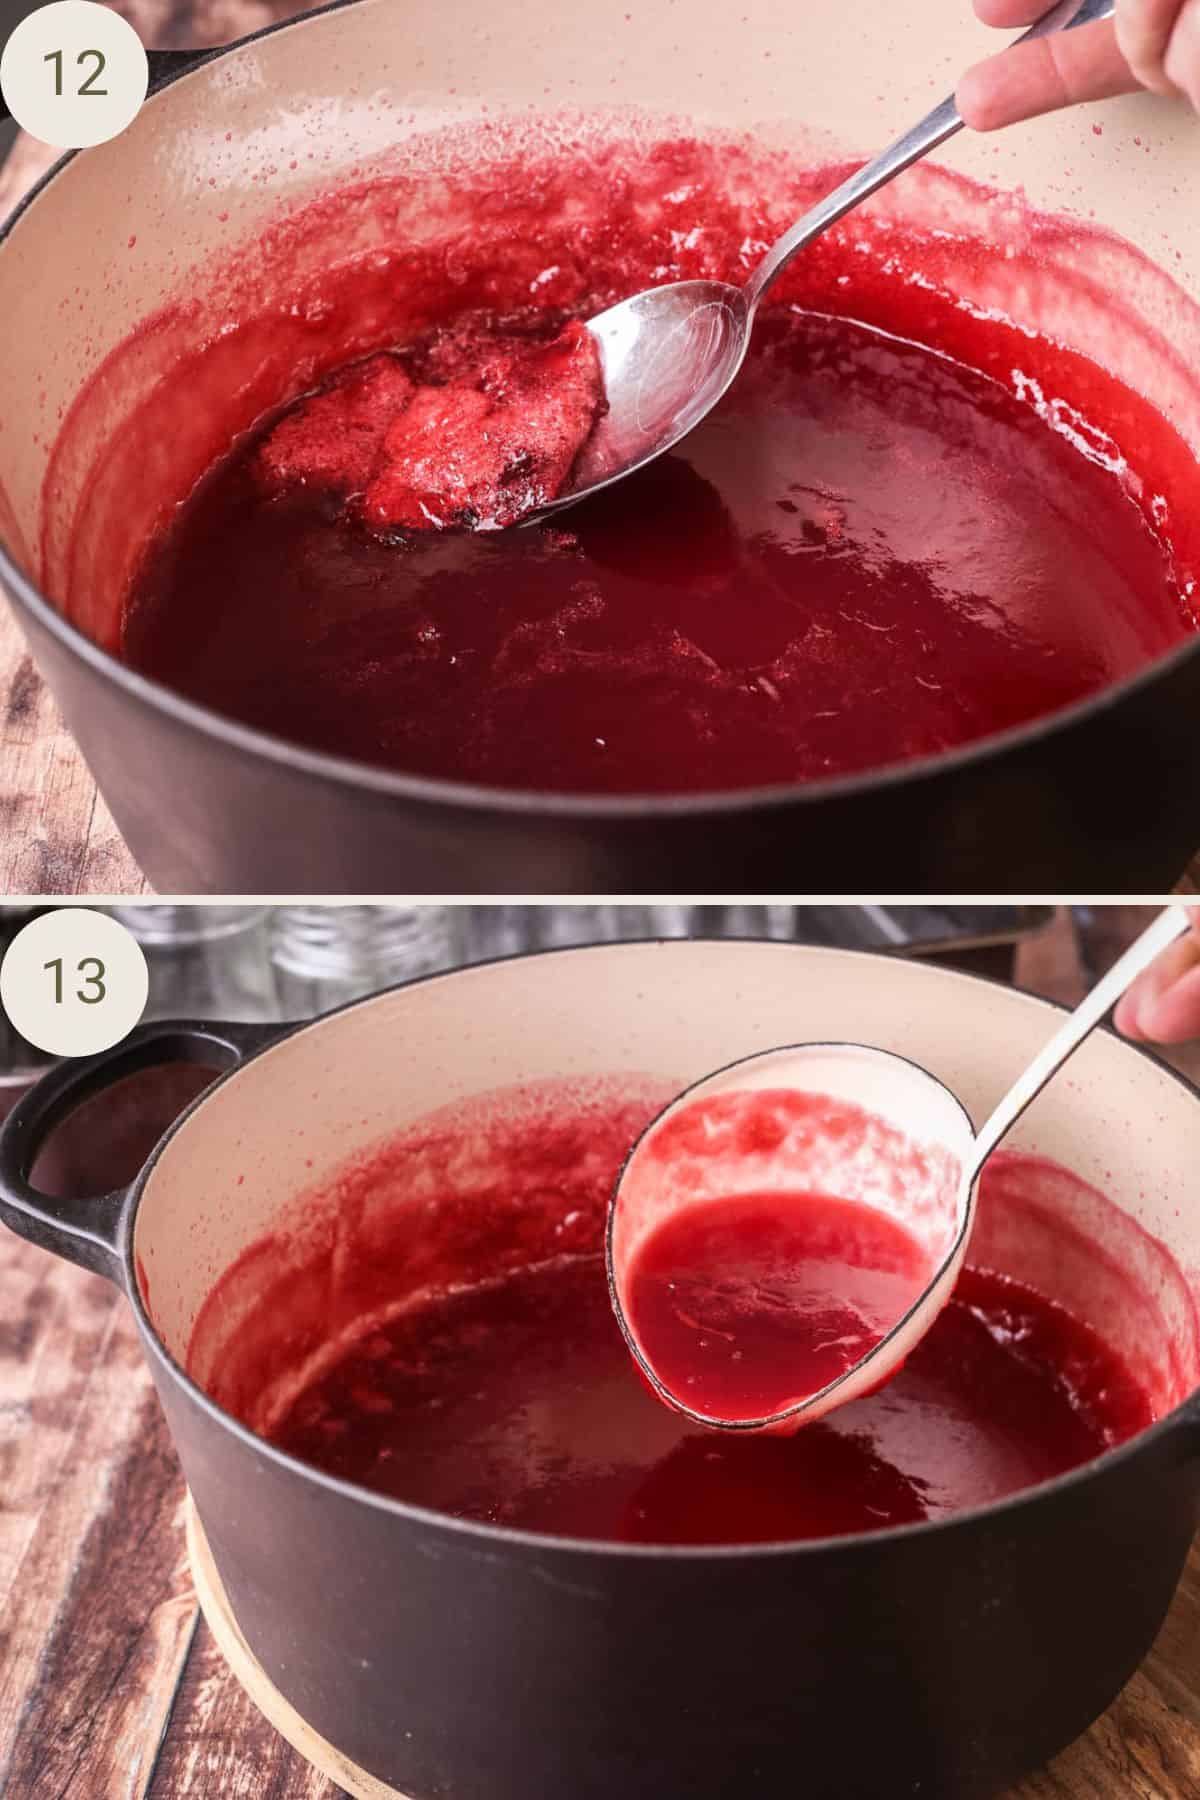
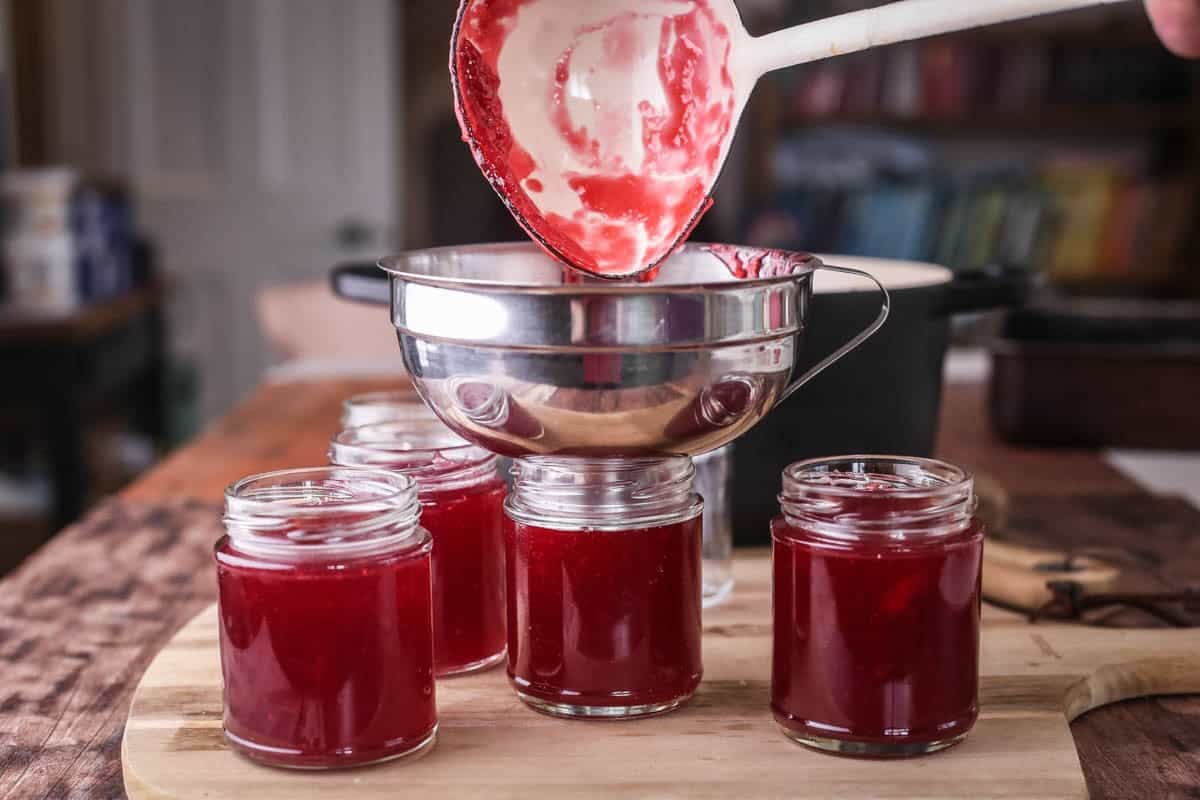
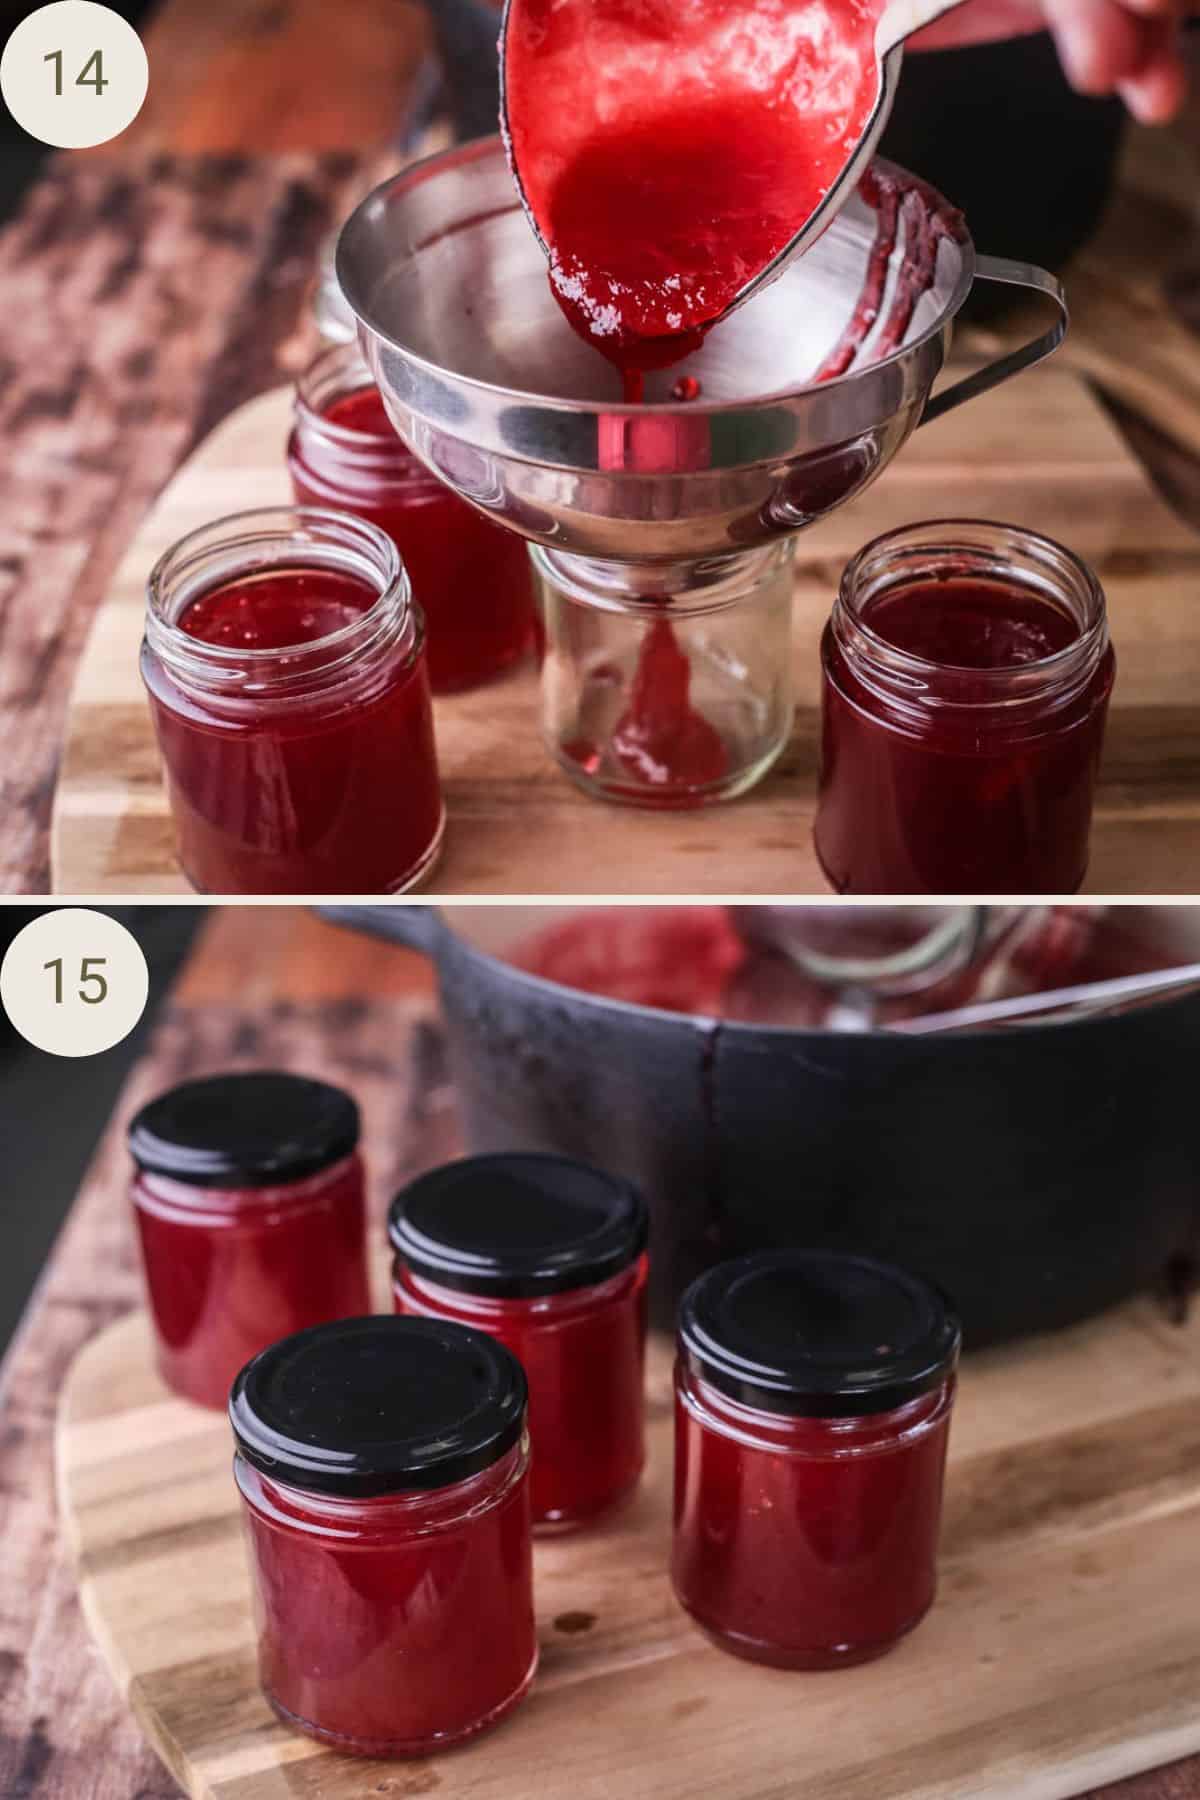
Pour the jam into your sterilised jars and allow to cool completely at room temperature before storing.
Expert Tips
Take time to wash and go through your raspberries, discarding any that seem too soft or are passed their best. They might be fine for eating (and indeed pop them in your mouth at this point if so) but for jam you want top notch quality.
You might be tempted to skip the heating of the raspberries before mashing them through the sieve (some recipes don’t bother) but I do find this improves the seed extraction.
If you have a food mill then this is a much quicker process than using a sieve to strain your raspberries through. I have one as I used to run a preserves business and it was an essential time saver, you certainly don’t need to buy one if you’ll just use it a few times a year.
Don’t forget to use a clean silicone spatula to scrape the underside of the sieve into your raspberry puree so you’re not leaving any essential strained pulp behind.
Rinse the preserving pan after you have warmed the raspberries so it’s clean for when you are making the jam with the raspberry puree and sugar.
Label the jars properly once cooled and include the date of making the jam.
What to do with Leftover Seeds
If you throw your seeds away you are missing a real trick and an excellent ingredient. These raspberry seeds which usually still have some raspberry pulp clinging to them are full of fruity flavour.
You can add them to vinegar and a little sugar to create a delicious Raspberry Vinegar (recipe coming soon).
Or you can steep them in alcohol and sugar to make a richly flavour Berry Liqueur.
How To Test if Your Jam Has Set
The setting point of jam is between 104-105.5°C (220°F). However, even if you do have a digital thermometer to give you this reading I feel more assured when I test the set myself as it gives more accuracy. So I like to use the saucer test (sometimes called the ‘wrinkle test’).
- You need to begin with some clean white saucers which you have placed into the freezer when you begin your recipe. 5-7 saucers should be enough.
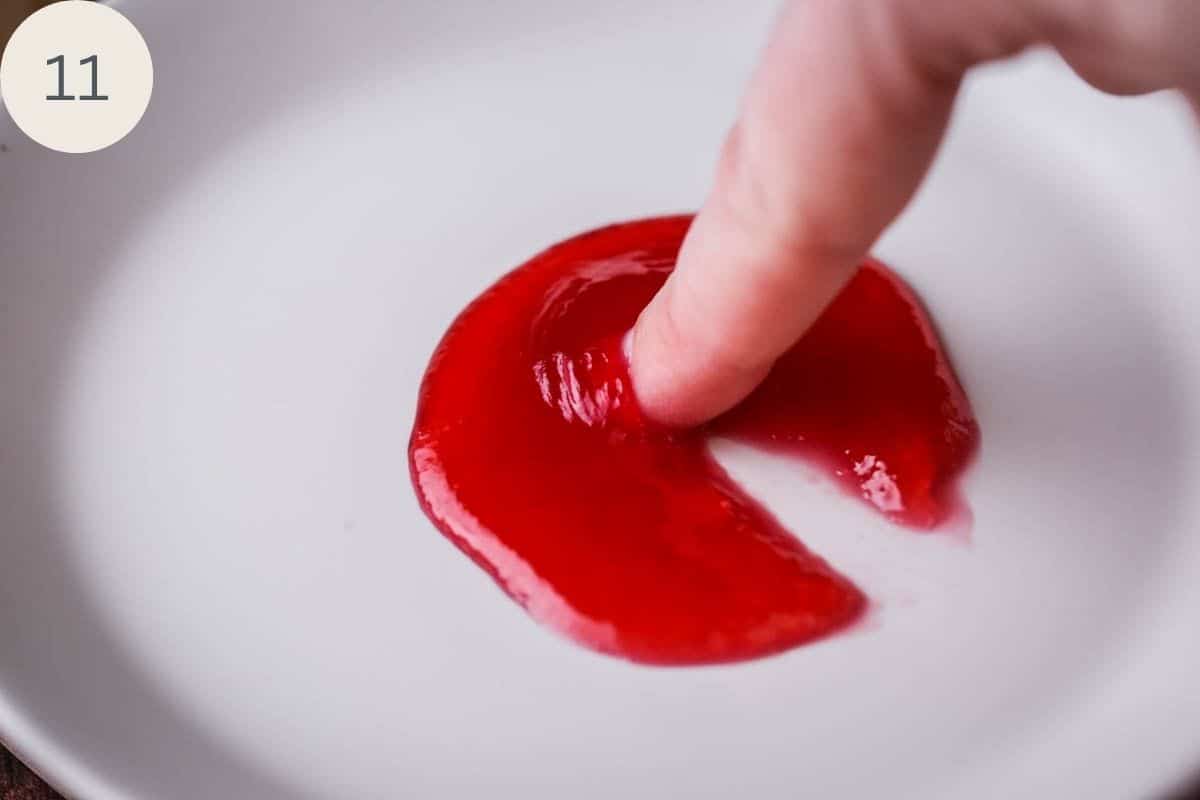
- At the point of testing if your jam has set then you need to pour 1 teaspoon of jam out onto the saucer. Wait an excruciating 60 seconds. Push the jam with your finger, if it wrinkles up and forms a secure parting of the jam then it’s ready.
- If the jam fails to wrinkle and is still very liquidy then it’s not ready.
- However, the jam may wrinkle up a little but then the jam can flood back into the space your finger left behind, this is nearly ready but not quite. The path your finger makes into the jam needs to remain separate.
For more details on preserve setting then visit my Essential Jam Setting Guide.
Once you have finished making your recipe remember to remove the unused saucers from the freezer.
Storage, Shelf Life & Safety
Fridge vs. larder
This recipe has enough sugar to preserve the jam in a cool dark place (like a larder) as long as they are potted correctly in sterilised jars and lids. If the sugar is reduced then you may end up with a ‘fridge jam’ which would require refrigeration after the jam has cooled.
Once you have opened a jar of jam then store in the fridge for up to a month.
How long it lasts
This jam recipe does not require the jars to be sealed using the water bath method. There is enough sugar in the recipe to ensure excellent and safe storage of the jam for up to 6 months. Test the jars the day after making the jam to make sure the lids are very securely sealed and store in a cool dark place.
Sterilising the jars and lids
To sterilise the jars place the very clean jars you would like to use in an oven pre-heated to 160°C / 140°C fan assisted / gas mark 3 / 320°F for 20 minutes.
Sterilise the lids by dropping them into a saucepan of boiling water for 10 minutes with a splash of vinegar. I don’t sterilise my lids in the oven as they tend to ruin.
FAQs
If your jam is more runny than you would like after it has cooled down in the jars it’s just because you decanted the jam before it had reached a more solid set. The good news is that at this point you can pour all the jam out their jars, back into the preserving pan (even if it’s the next day) and re-boil to improve the set. Use the saucer test to ensure you’re happy with the result before decanting into newly sterilised jars.
If you raspberry jam is too thick then you boiled the jam for too long before taking off the heat. It is possible to fix this issue if it’s inedibly thick (although that’s rarely the case) by re-boiling with a little more raspberry puree to loosen the mixture. Then test for set again using the saucer test to ensure you’re happy with the result before decanting into newly sterilised jars. Just take care not to add too much raspberry as then you are altering the raspberry : sugar ratio which can affect the safe shelf life of your jam.
If you begin with 1kg of raspberries but then remove ¼ of the weight due to the seeds then you will achieve a smaller yield of jam than if you were making regular jam with the seeds. By heating the raspberries before you sieve them then you will produce a higher yield of raspberry puree as the basis for your jam. The other issue could be if you are boiling the jam for too long which will evaporate more water and lead to a smaller amount of jam. As long as you remove the jam from the heat as soon as the correct set has been achieved then you should produce about four small jars of jam.
You can reduce the amount of sugar in this recipe by about 10%. However, the set will be softer and the shelf life of the jam will be shorter. A vastly reduced sugar quantity will produce a ‘fridge jam’ which means that the jam is not suitable for long term storage and should be stored in the refrigerator.
It’s not really practical to attempt to extract the seeds from the raspberries without a sieve. That is, unless, you have a food mill which is very efficient but can be a pricey piece of equipment. Other methods include muslin or cheesecloth but this is time consuming and not terribly effective at achieving a high yield of raspberry puree.
If you have done a few saucer tests and the jam is showing little sign of correct setting, then try boiling the jam for longer. If you are not getting a good result after about 10 minutes then it could be your jam does not have enough pectin or sugar in the recipe which is necessary for setting. Check out my Jam Setting Guide for clear information on what may have happened and how you can fix.
Recipe Variations
This is a good base recipe for a classic raspberry jam. The fun about preserving (and this recipe in particular) is that you can mix and match your flavour and berries.
Raspberry Coconut Jam. I have a regular recipe for Raspberry Coconut Jam but you can use the coconut variation here with the added step of removing the raspberry seeds if you like.
Raspberry Strawberry Jam. Use a mix of raspberries and strawberries. Keep to the same amount of fruit and the rest of the recipe remains the same.
Raspberry Rose Jam. Use ¼-1/2 teaspoon of rose water stirred into the end of the recipe for this lovely fragrant jam.
How To Use Seedless Raspberry Jam
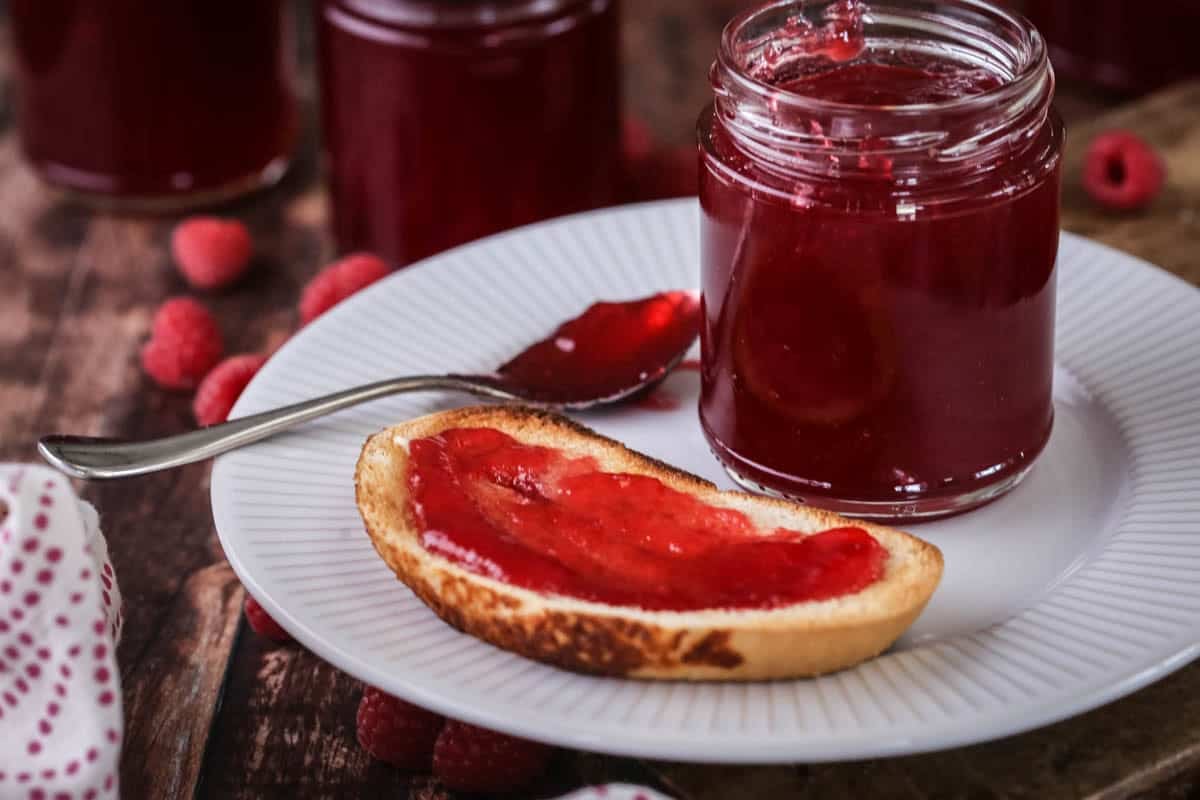
Of course raspberry jam is delicious on crumpets, English Muffins, a toasted slice of sourdough but here are some other options for enjoying your jam:
- Cakes. Use to fill a Victoria Sponge or a Swiss Roll.
- Bake into Thumbprint Cookies.
- Doughnut filling.
- Spread at the base of a Bakewell Tart.
- Bake into Jam Tarts.
- Use to top classic scones.
- Stir through rice pudding.
- Top this indulgent Chocolate Porridge.
- Stir into Greek yoghurt, chia pudding or porridge.
- Drizzle over granola, waffles or pancakes.
More Recipes You’ll Love
Seville Orange Marmalade has the bones of a traditional recipe, richly sweet and slightly bitter with a zesty sweetness but we are also enhancing the flavour with a little grapefruit in the mix and a gentle grounding of rosemary.
Seedless Gooseberry Jam with Thyme is wonderfully tart with earthy floral notes from the thyme.
Seedless Wild Blackberry and Lime Jam is a firm favourite preserve. It’s tangy and not too sweet and best of all contains no added pectin.
Enter your email below to get this recipe sent to your inbox plus get new recipes, baking tips, and updates.
Easy Seedless Raspberry Jam
Ingredients
- 1 kg raspberries
- 650-750 g granulated white sugar
- ½ lemon - juiced (1 tbsp)
Instructions
- First place 5-7 saucers in the freezer ready for the setting point test.
- Wash your raspberries, picking through them at the same time discarding the squishy ones.
- Place the raspberries in a large preserving pan with a couple of tablespoons of water to avoid them catching immediately. Cook on a low-medium heat for 5 minutes until pulpy.
- Mash the raspberries into a sieve, set on top of a large measuring jug. Pushing the fruity pulp through so the seeds remain in the sieve (save the seeds for a future recipe – like raspberry vinegar or liqueur).
- Weigh the sieved raspberry pulp and match the weight with the same weight of sugar.
- Place the raspberry pulp, sugar and juice of half a lemon in a large preserving pan over a low – medium heat until the mixture comes to a boil.
- Turn up the heat to high and boil on a rolling boil for 5 minutes.
- Turn the heat off, remove a saucer from the freezer and test the jam for whether the right setting point has been reached.
- Pour 1 teaspoon of jam out onto the saucer. Wait 60 seconds. Push the jam with your finger, if it wrinkles up and forms a little parting of the jam then it’s ready. It may wrinkle up and then the jam can flood back into the space your finger left behind. The jam needs to remain with a clear finger path.
- If it’s not ready then turn the heat back on the jam and heat for a further 1-2 minutes (depending on how close the set was) before trying the test again with a fresh frozen saucepan.
- Repeat this process until you achieve the desired set.
- Once the raspberry jam has reached the correct setting point then skim the scum off the top of the jam and pour into sterilised jars. Seal with the lids and store in a cool dark place.
Notes
- To sterilise the jars place the very clean jars you would like to use in an oven pre-heated to 160°C / 140°C fan assisted / gas mark 3 / 320°F for 20 minutes.
- Sterilise the lids by dropping them into a saucepan of boiling water for 10 minutes with a splash of vinegar. I don’t sterilise my lids in the oven as they tend to ruin.
