Gluten-Free Garibaldi Biscuits
This post contains affiliate links. Please read my disclosures.
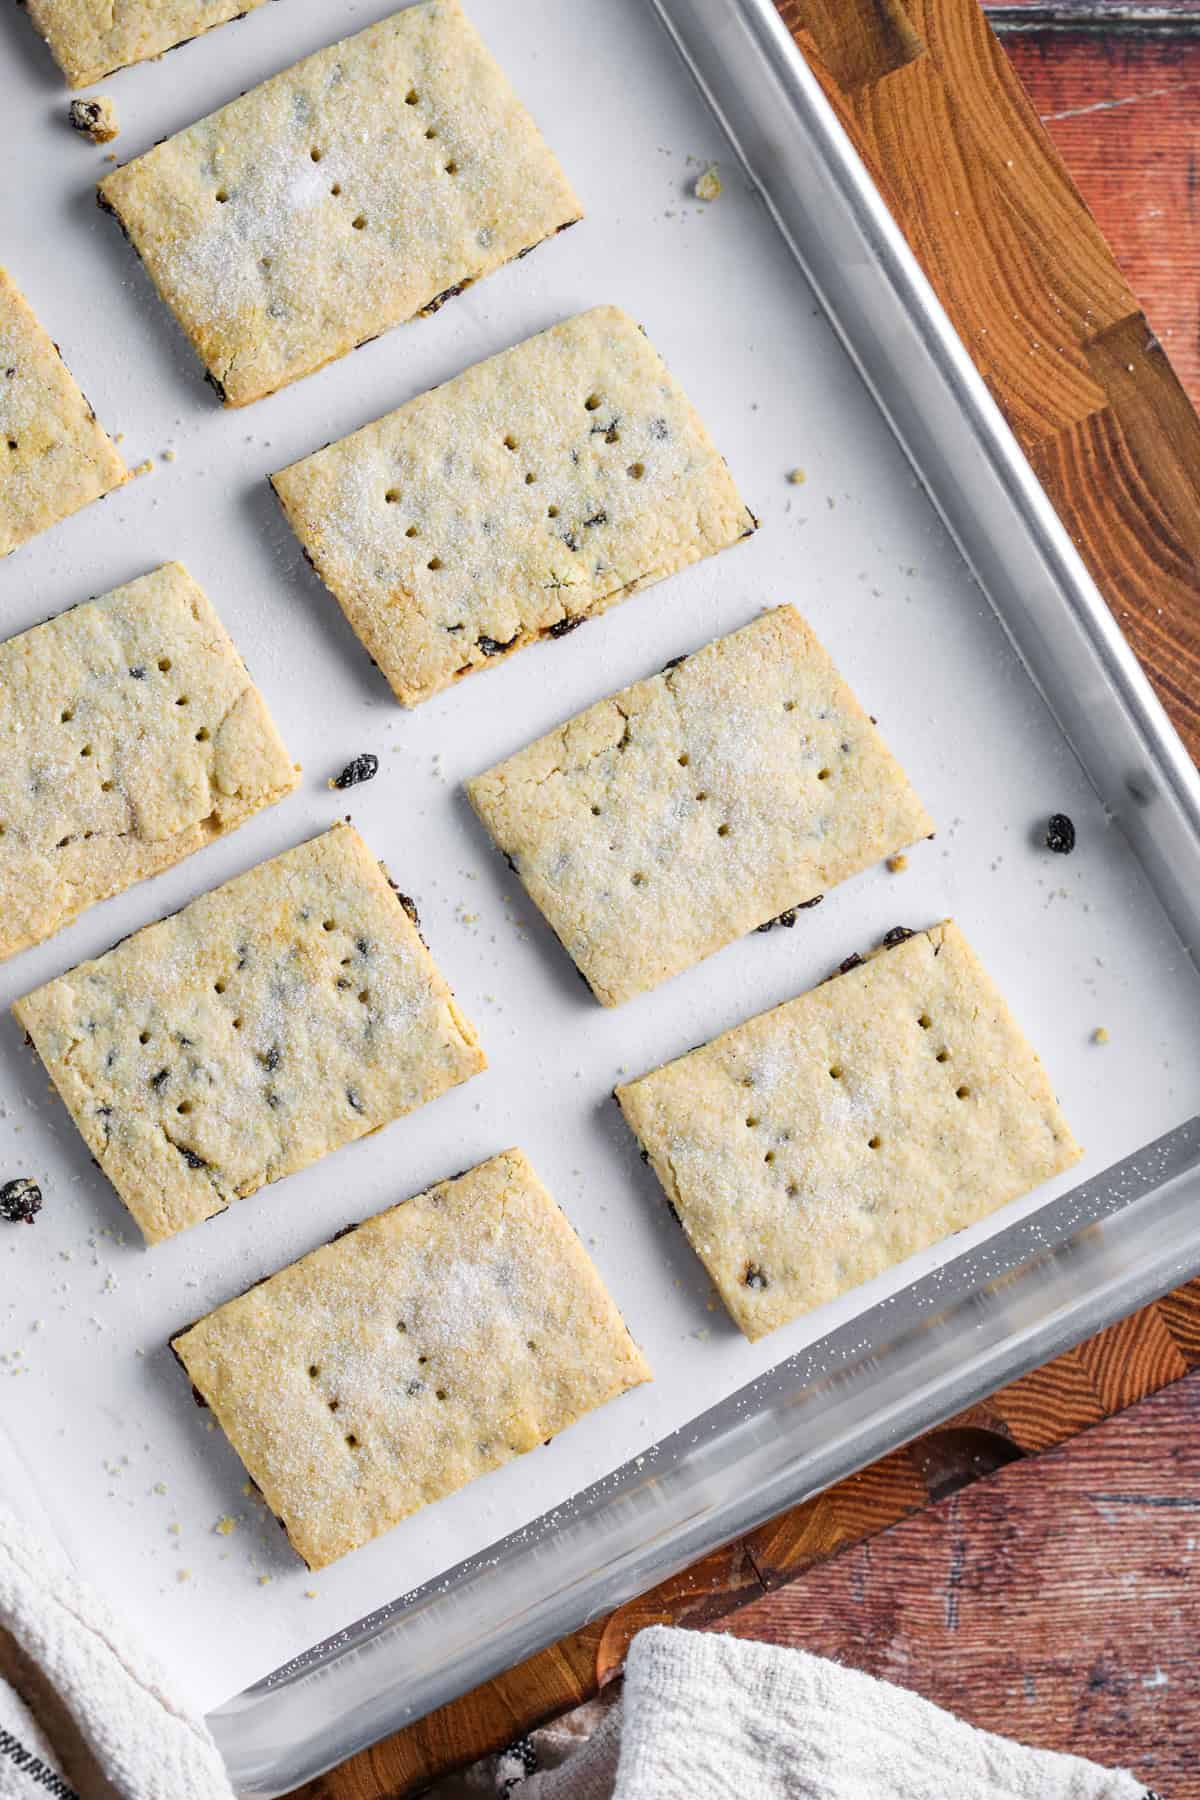
Crisp and buttery Gluten-Free Garibaldi Biscuits with chewy currant centre. These easy traditional biscuits are made with a homemade gluten-free flour blend and no xanthan gum for the perfect accompaniment to a cup of tea.
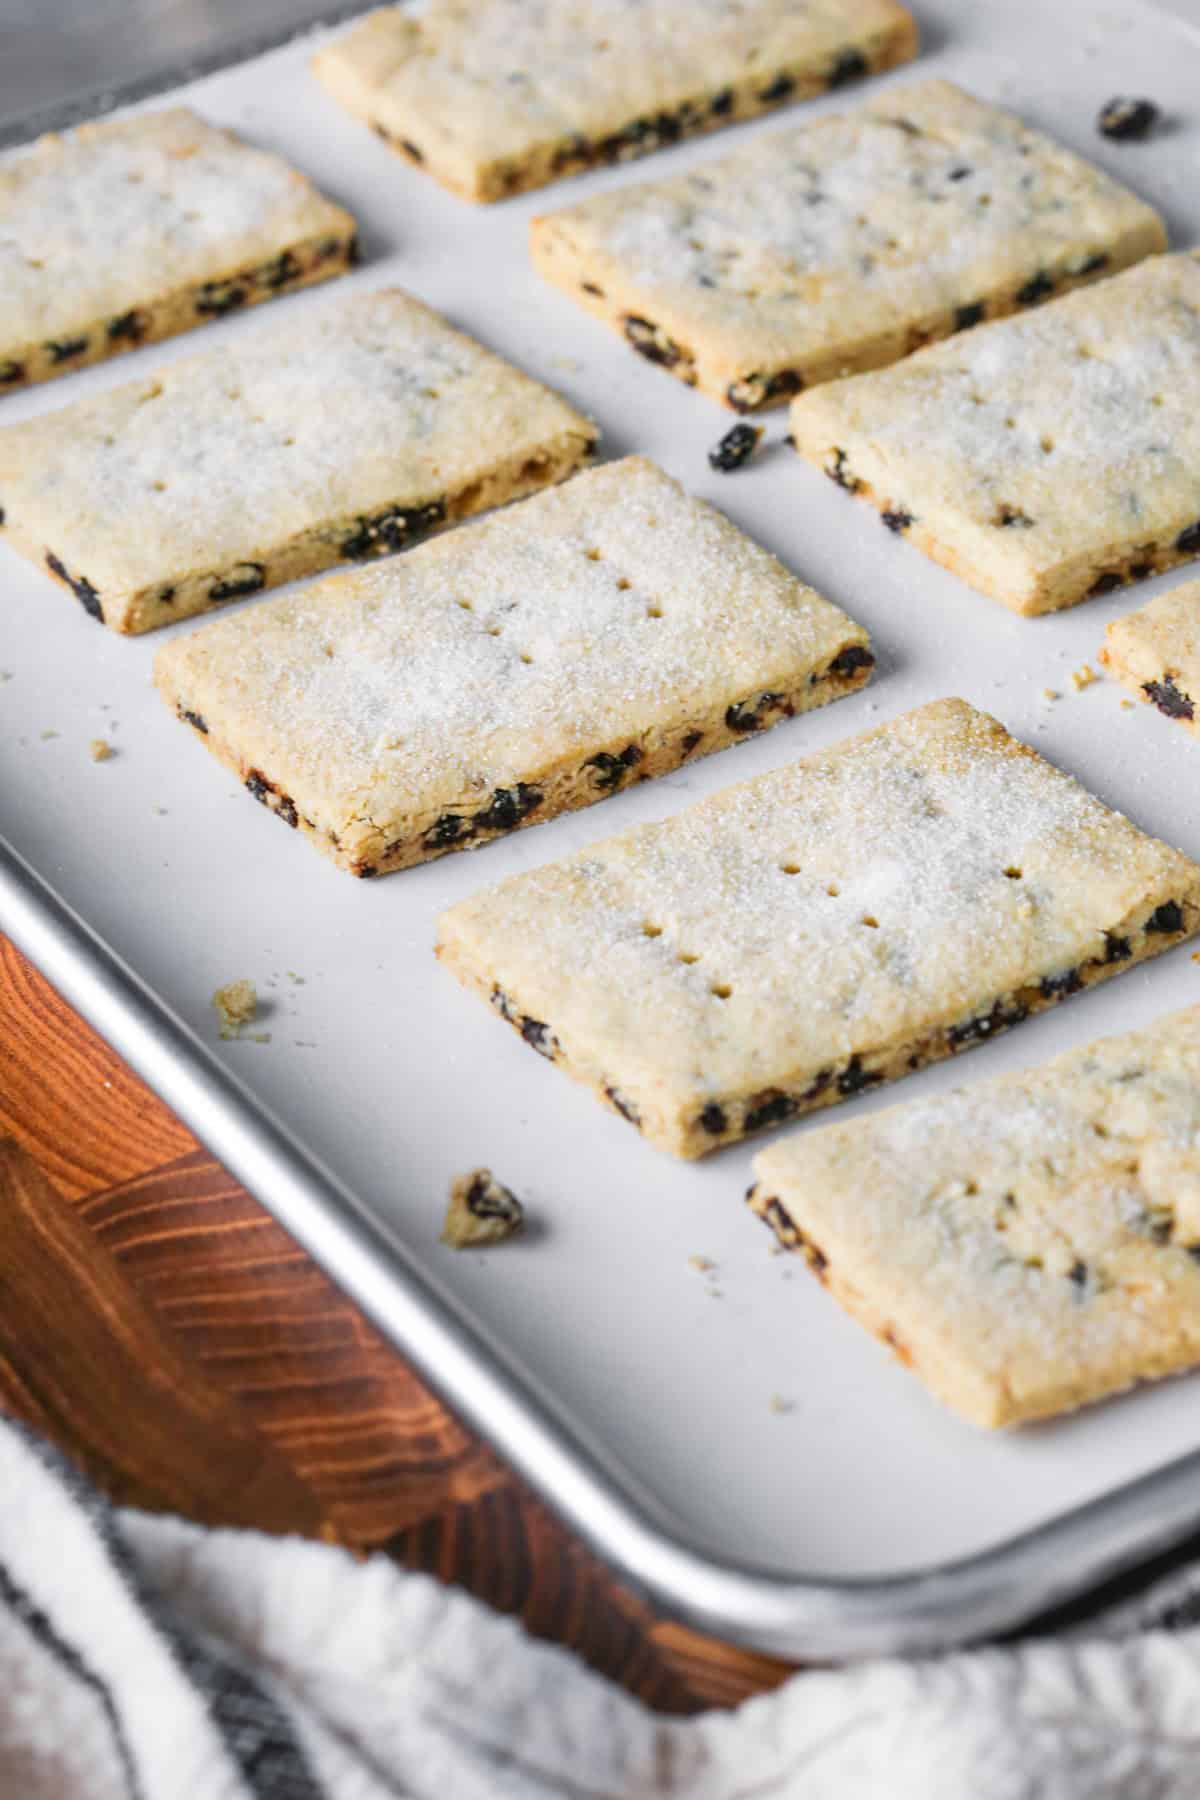
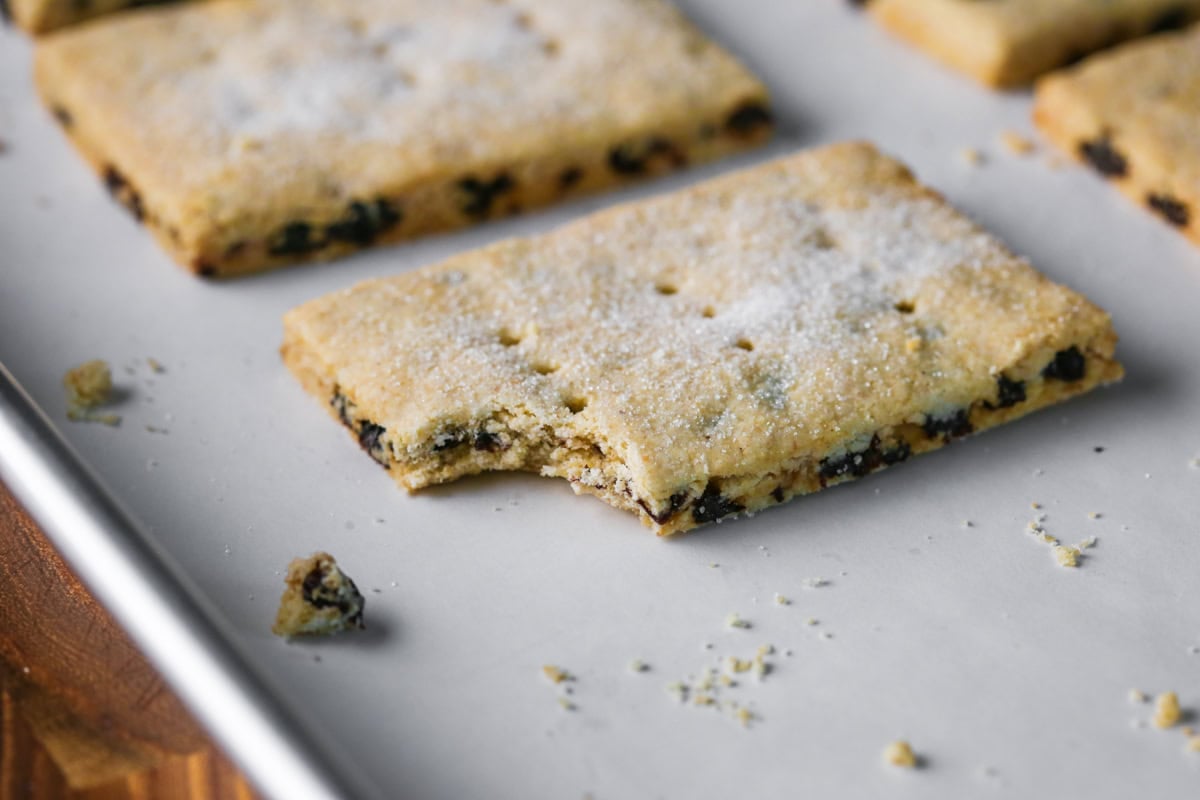
Sometimes unappetisingly called ‘Squashed Fly Biscuits’ (urgh – I really dislike that name) these crisp buttery biscuits have a little bit of chew in the centre from the orange soaked currants pressed between the layers of dough (the currants being the ‘squashed flies’).
These traditional biscuits were invented by the renowned British biscuiteer Jonathan Dodgson Carr in 1861. They were named after the Italian general Giuseppe Garibaldi, who was at the time, an acclaimed Italian general popular in the UK.
This gluten-free version is very easy to make but the dough is a little fragile as you are rolling it out. This is par for the course for gluten-free dough, and is nothing to be concerned about. You can just press it back together if it does break a little as despite this it always bakes up beautifully firm with a robust structure.
If you have ever experienced gritty, sandy or crumbly gluten-free biscuits then be assured this recipe bears none of those hallmarks due to a homemade gluten-free flour blend mixed through with my secret weapon – defatted almond flour.
We’ll go through the trickier aspects of this recipe which is mainly how to roll out the dough but all it needs is a bit of confidence in the process. I’ve included a video so you can see how I handle the dough.
These biscuits also last for a good few days, so if you bake them up on the Sunday then you’ll have biscuits all week long. Well, in theory, but they are rather moreish!
Why You’ll Love These Gluten-Free Garibaldi Biscuits
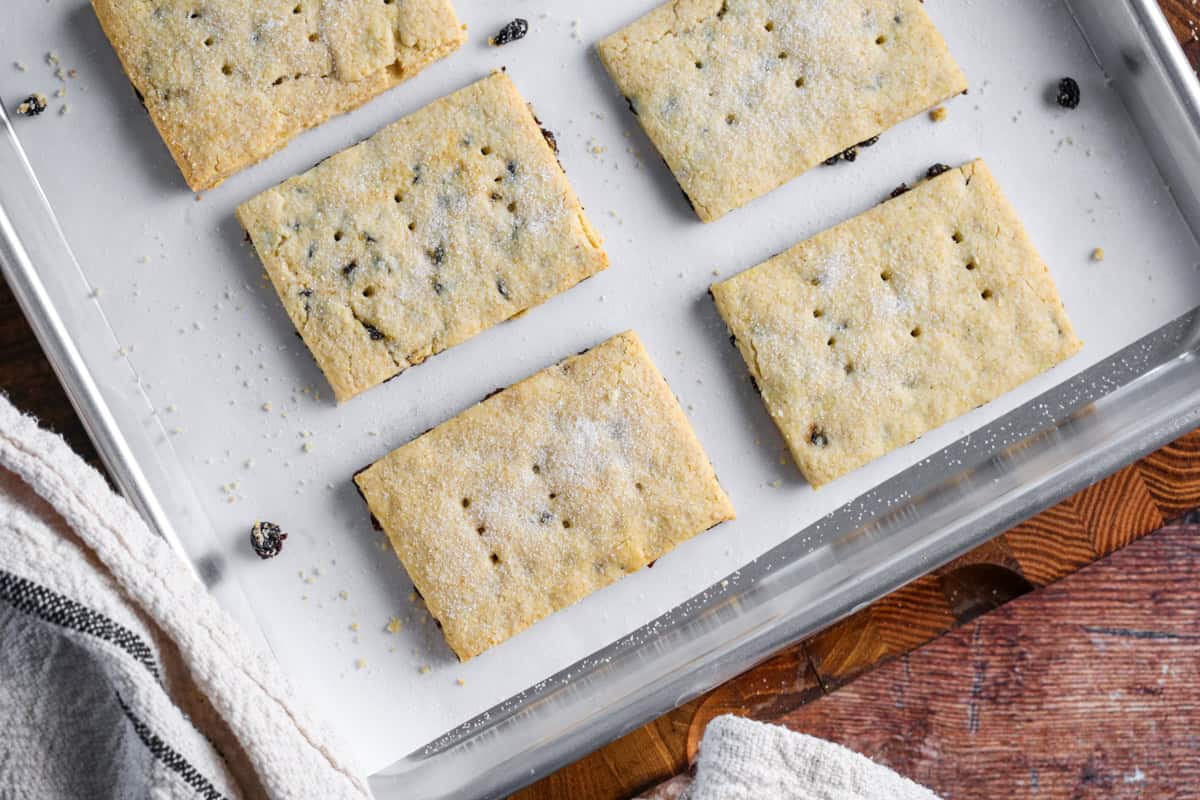
- Familiar crisp buttery biscuits layered with a chewy currant centre, dusted with sugar.
- Great structure that doesn’t crumble apart.
- No xanthan gum needed as we use a homemade gluten-free flour blend which holds our biscuits together.
- Perfect to snack on and especially good dunked into a cup of tea.
Watch the Video
Sometimes it helps to see a visual of what I'm talking about – especially when it comes to rolling out the dough here. So watch the video to see what it looks like to make your Garibaldi Biscuits.
Ingredients Needed
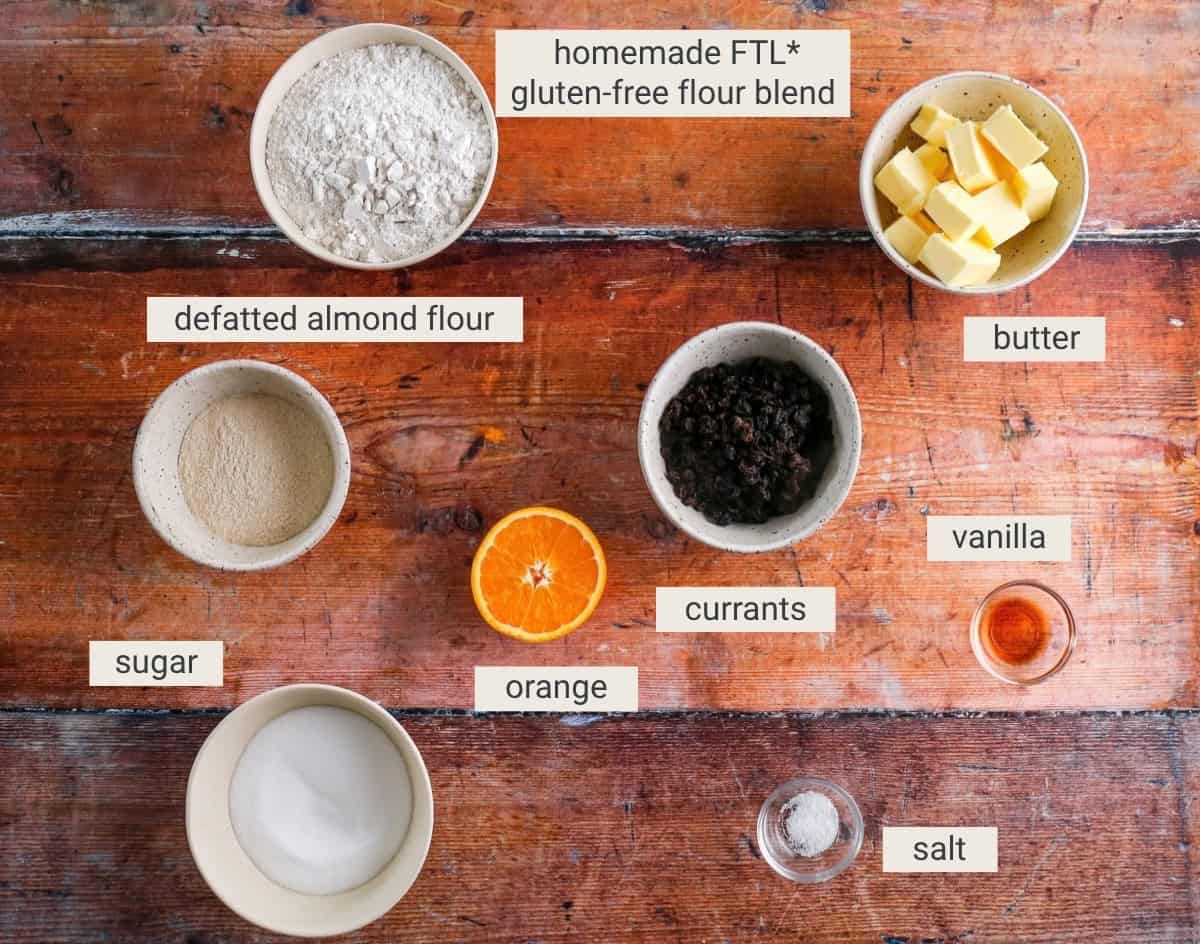
Currants. These little dried grapes which come from Greece have an intense tart sweetness and are the traditional dried fruit at the centre of our Garibaldi Biscuits. Sometimes they need a little assistance to juice up a bit so a little soak in some fresh orange juice is just the ticket so they are not uncomfortably chewy.
Orange. You just need the juice from half a large orange to soak our currants in.
Unsalted butter. We need unsalted so we can control the salt content of the recipe. Make sure it is at room temperature.
Caster sugar. It’s a fine white baking sugar available in the UK. If you can only get hold of granulated sugar you can grind more finely in the food processor before you use it in the recipe.
Gluten-Free Flour – FTL Blend. This recipe uses my Homemade Gluten-Free All Purpose Flour which works really well here as the flour ratio has been carefully tested to ensure the mix between wholegrain flours and starchy flours is balanced. This also means we don’t need to use xanthan gum as the blend is strong enough and produces a well structured and textured bake which can hold together without needing any extra binders.
This flour blend is a mix of 4 different flours: sweet rice flour (glutinous rice flour), sorghum flour, oat flour, tapioca flour (tapioca starch).
Defatted almond flour. The high protein content of the defatted almond flour gives the biscuits a robust structure. Don’t use regular almond flour (ground almonds) here as they will provide too much moisture. You need the ultra fine powdery quality and protein boost of the defatted flour.
Vanilla extract. Use a good quality extract as the flavour really stands out and you don’t need much for this recipe. I like Nielsen Massey.
Salt. I like to use kosher salt in my baking as it has a round gentle flavour. Using salt in your baked goods lifts and sharpens all the other flavours.
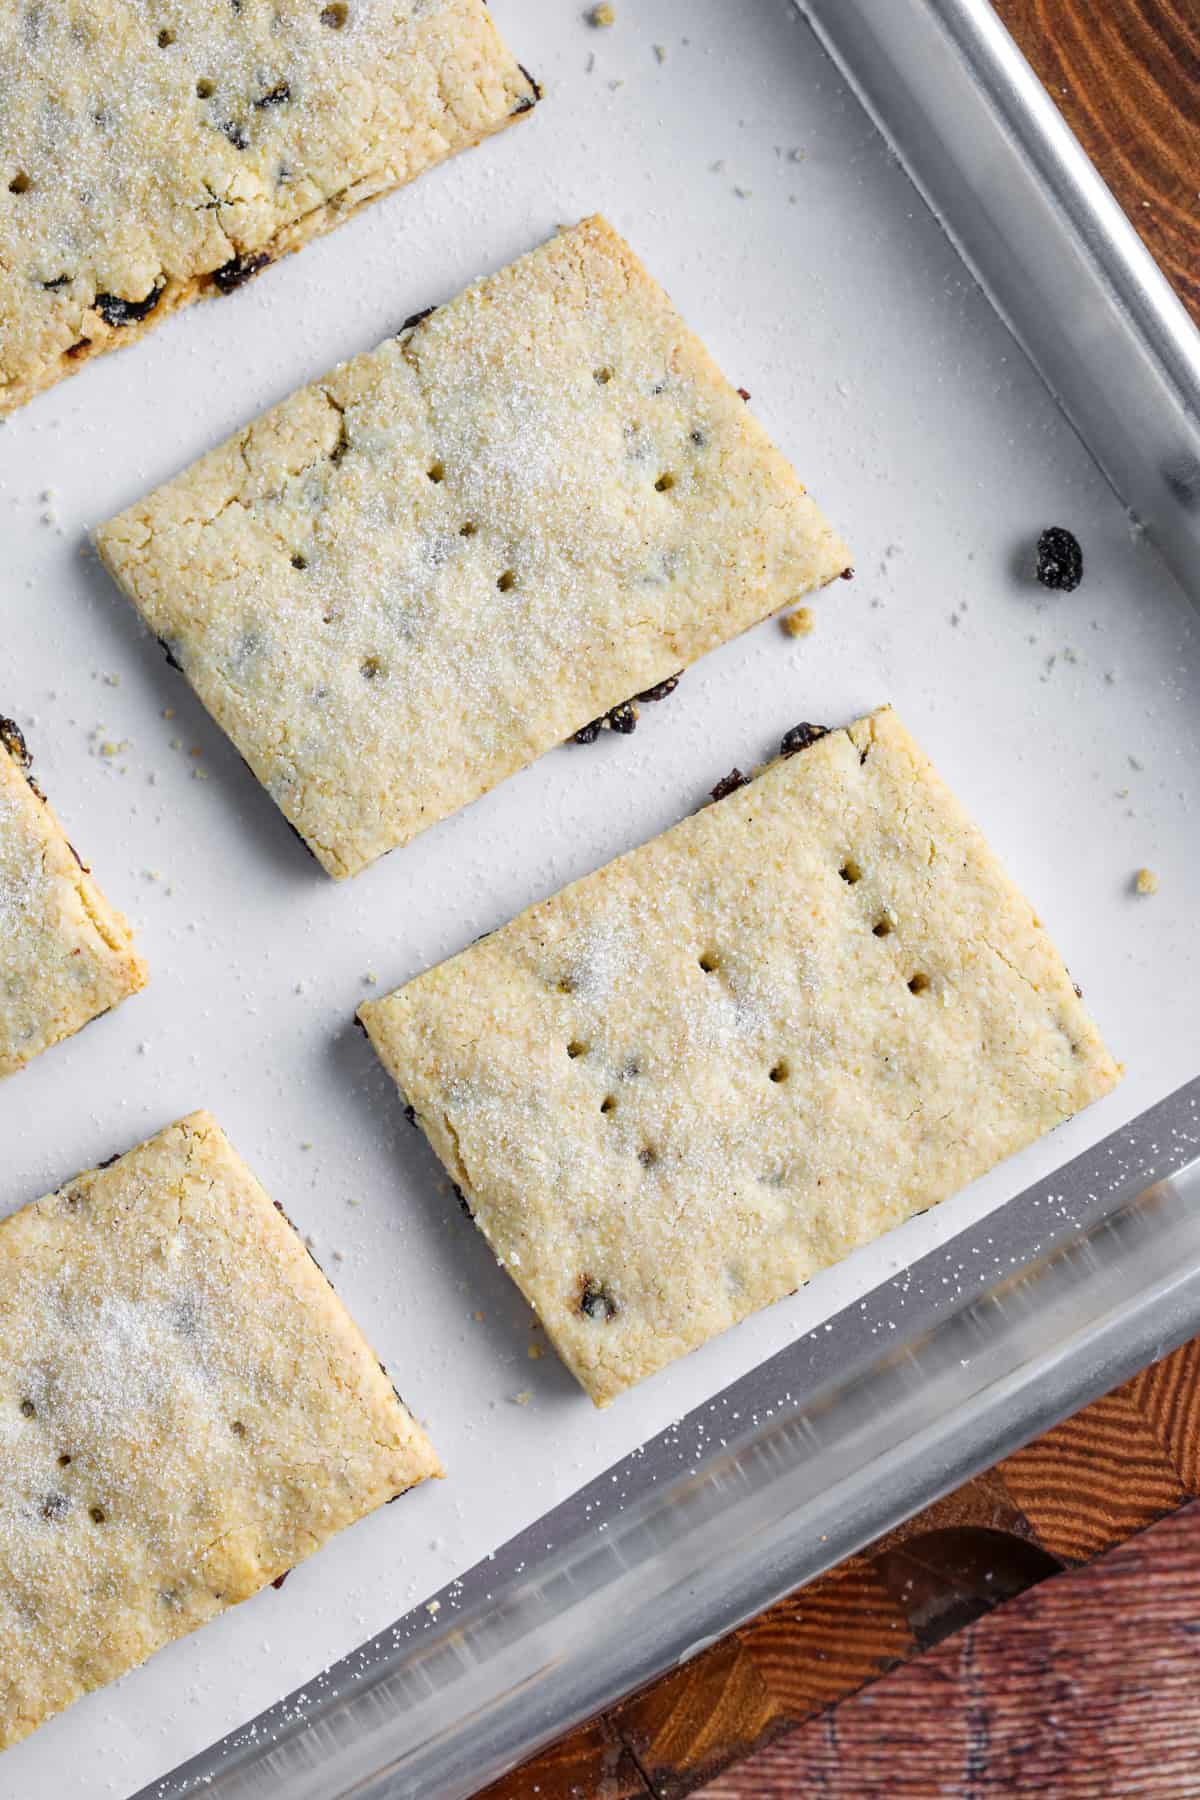
How To Make Gluten-Free Garibaldi Biscuits
For full recipe instructions go to the recipe card at the end of this post.
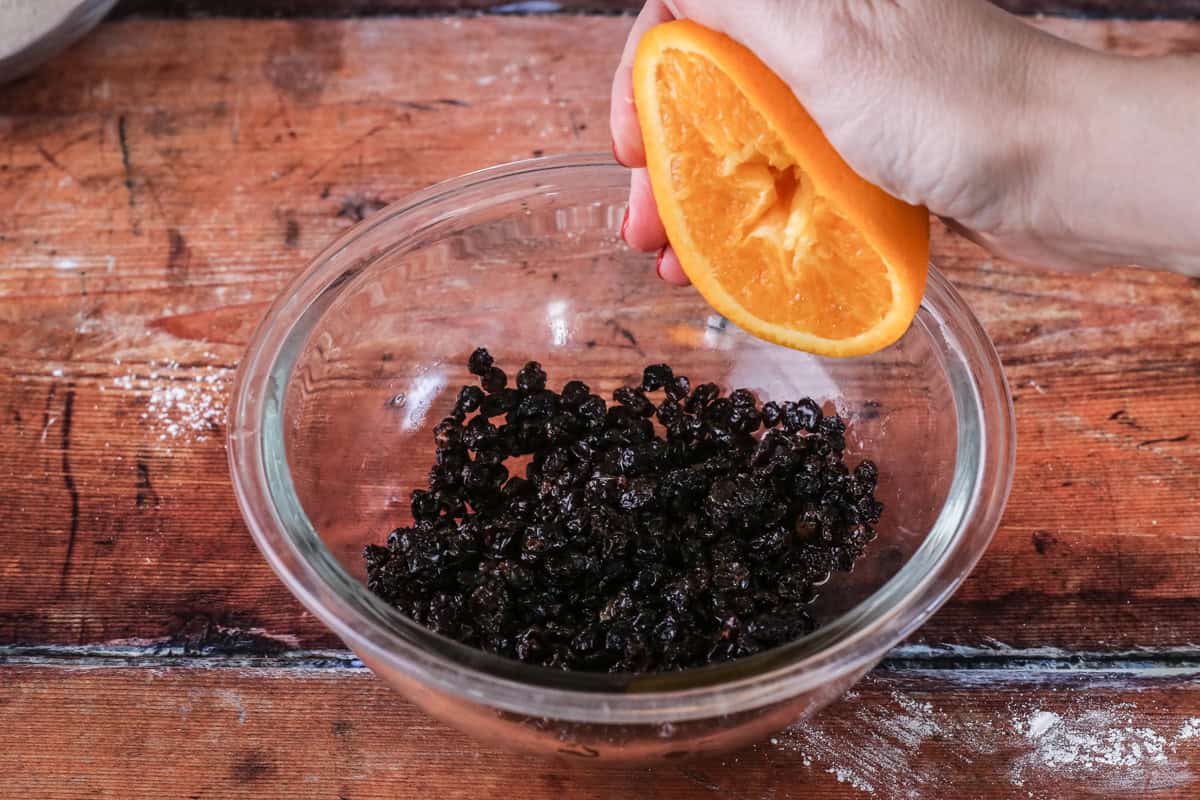
Squeeze orange juice into currants and allow to rest and soak up the juice whilst you prepare the rest of the recipe.
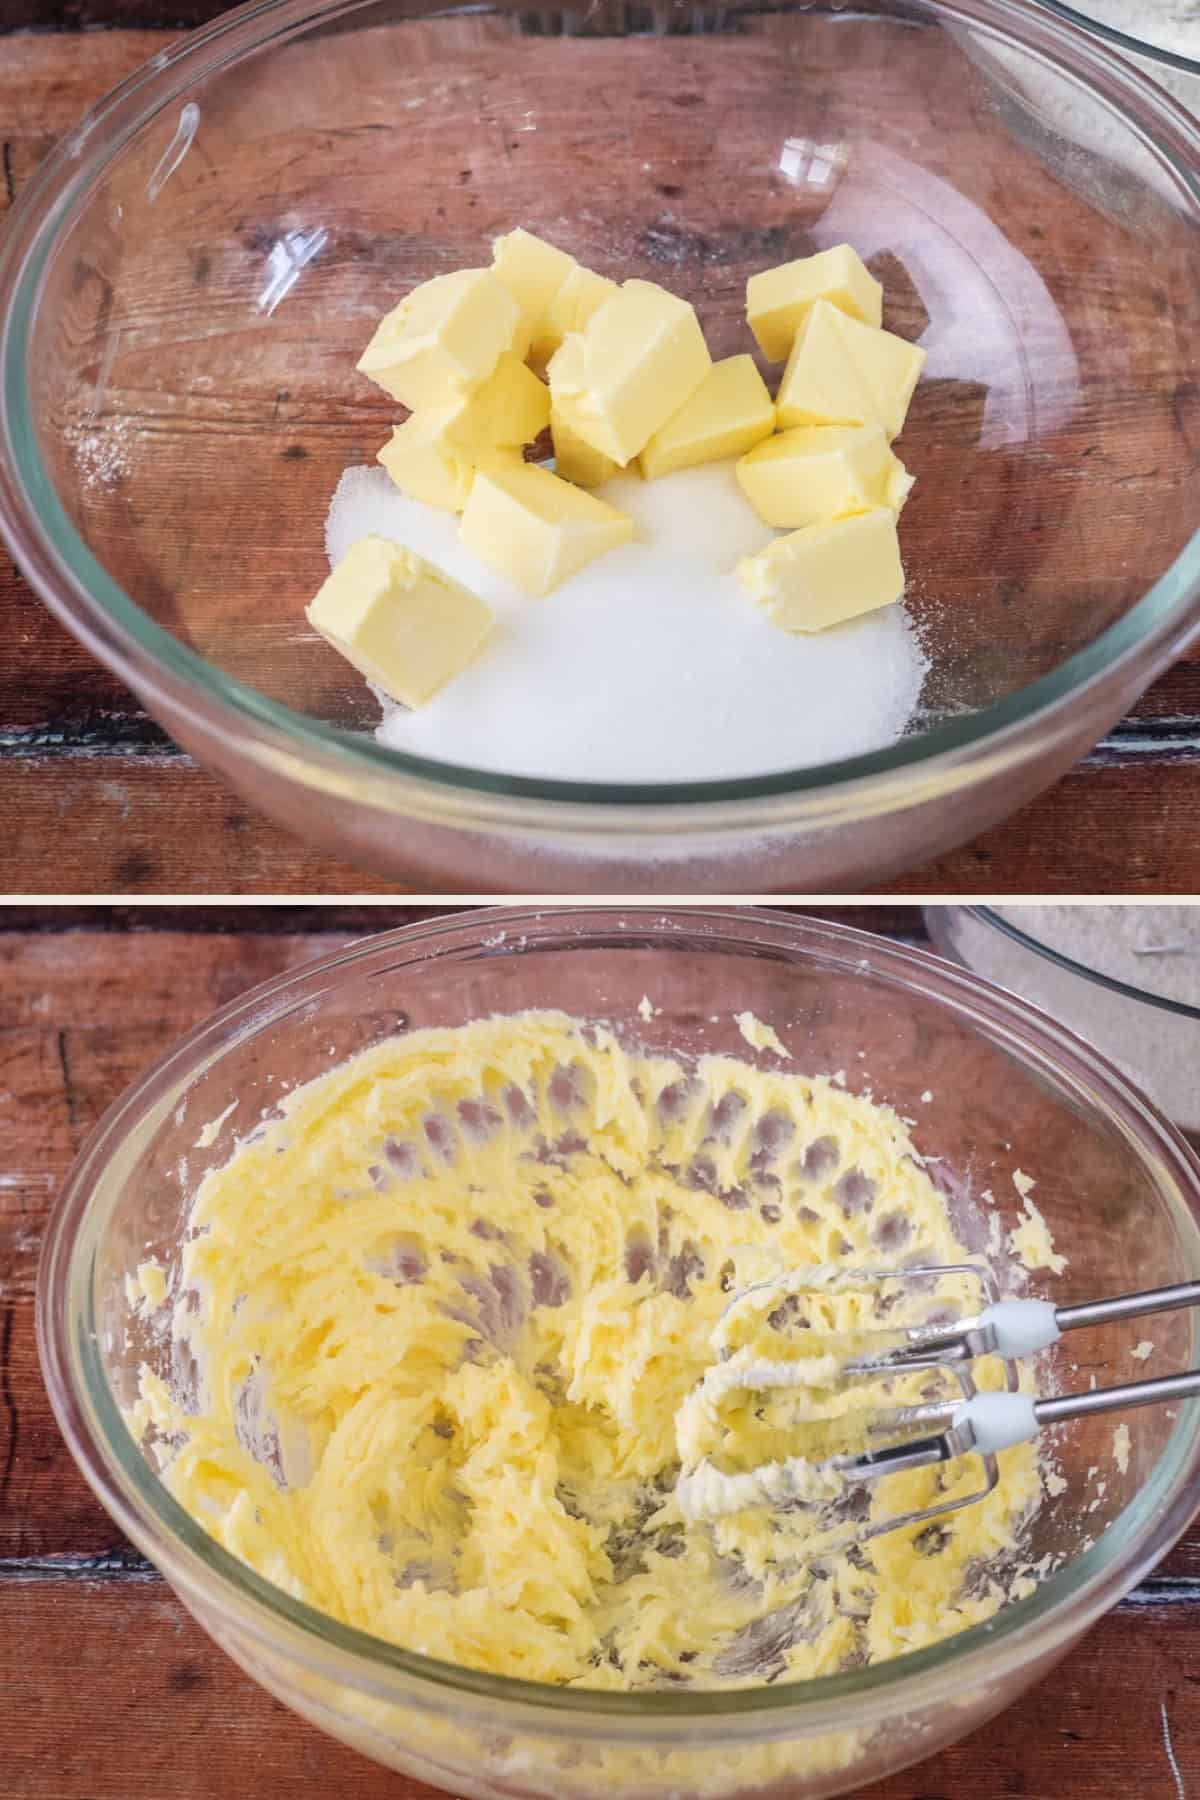
Beat butter and sugar for a couple of minutes until light and creamy.
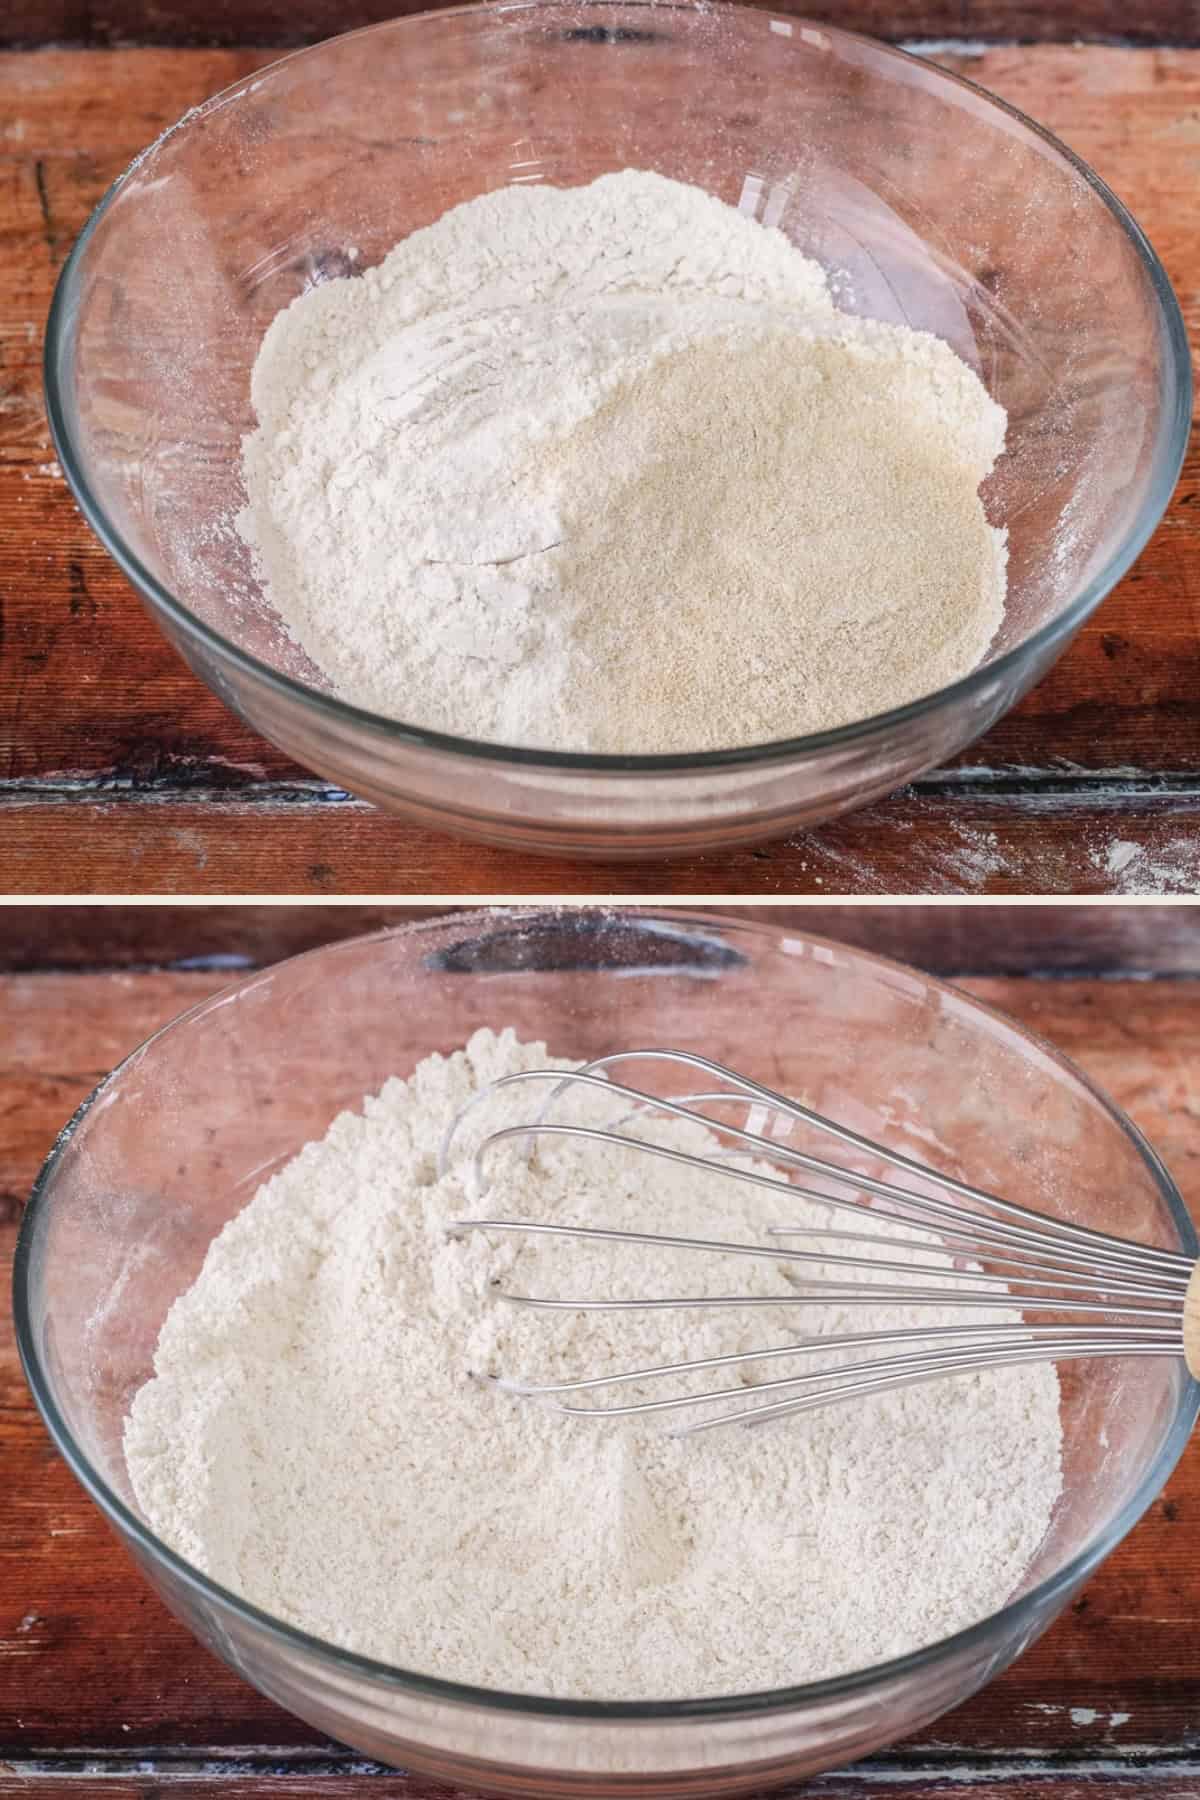
Whisk the gluten-free flour blend, defatted almond flour and salt together.
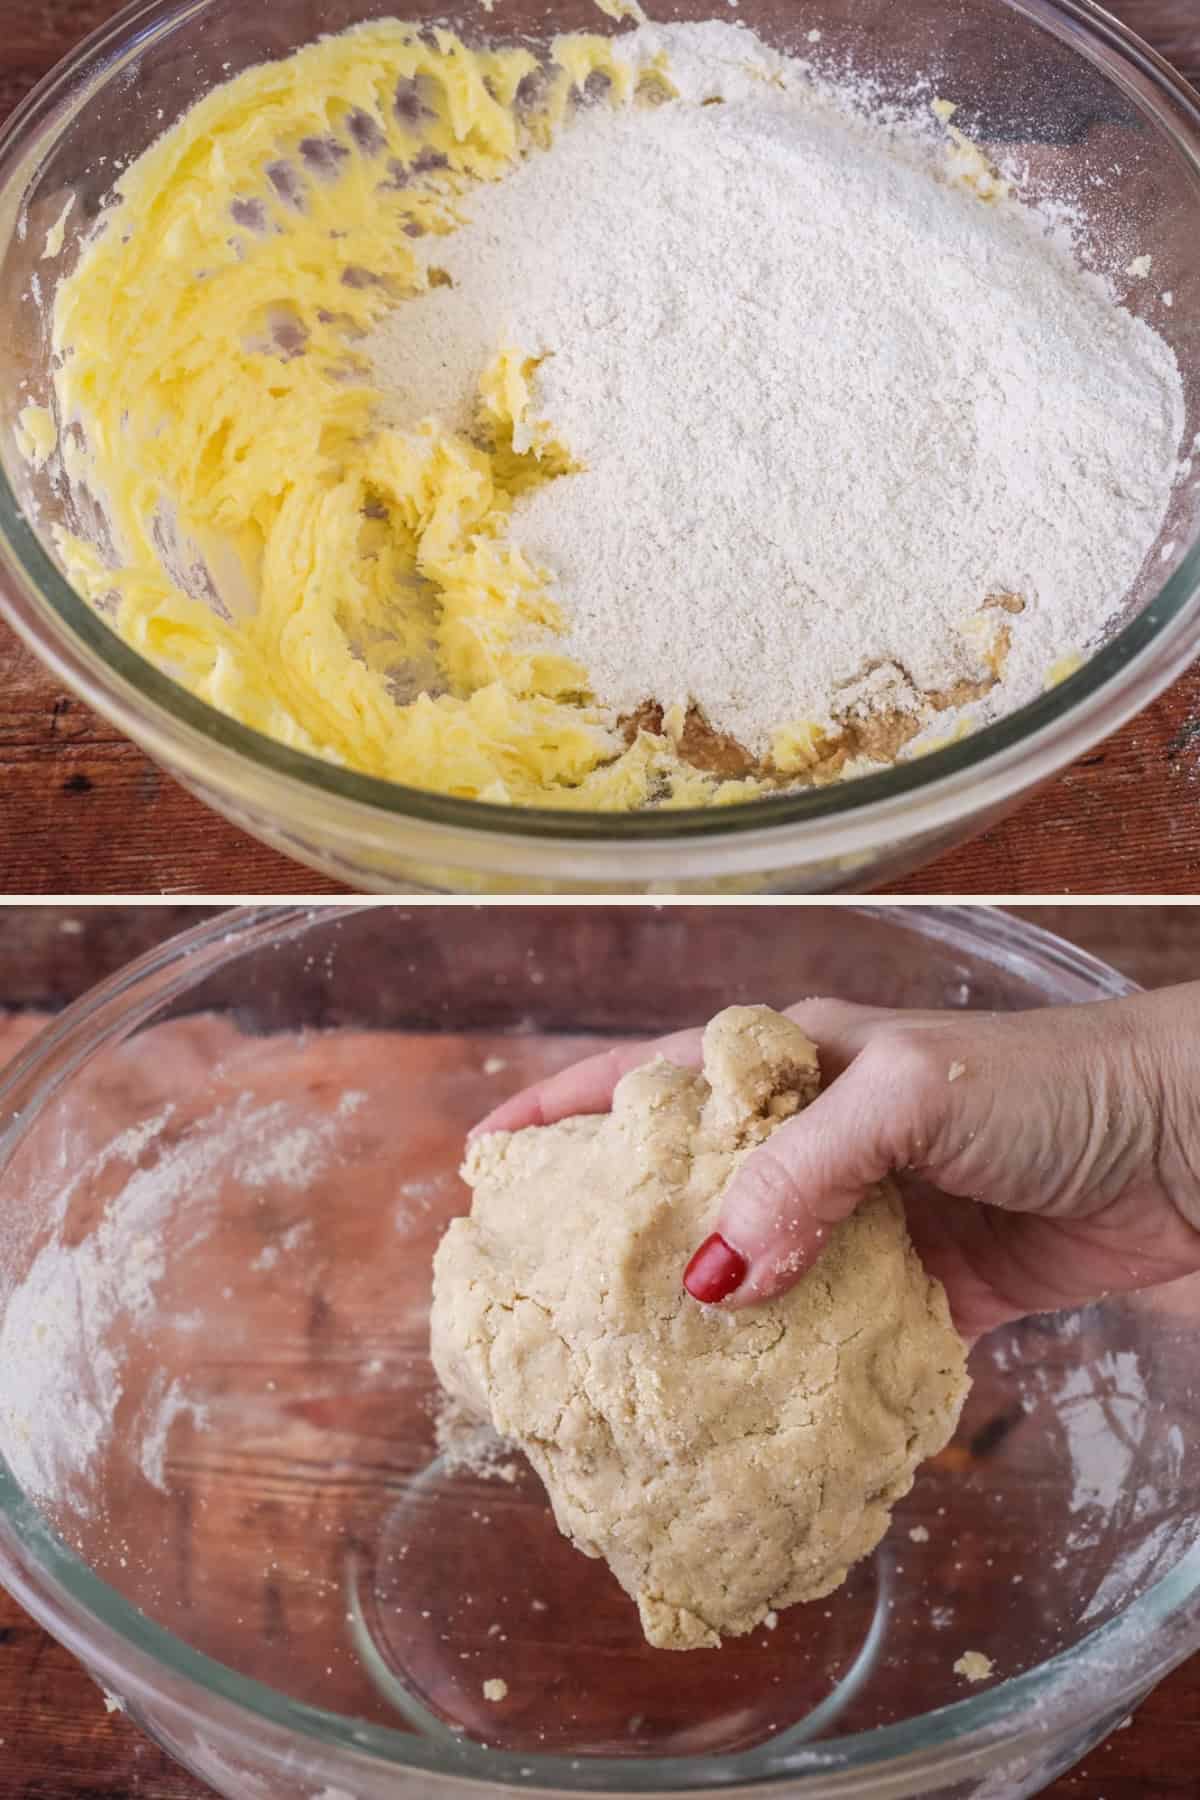
Add the flour mixture and vanilla to the creamed butter and sugar and bring into a dough using your hands.
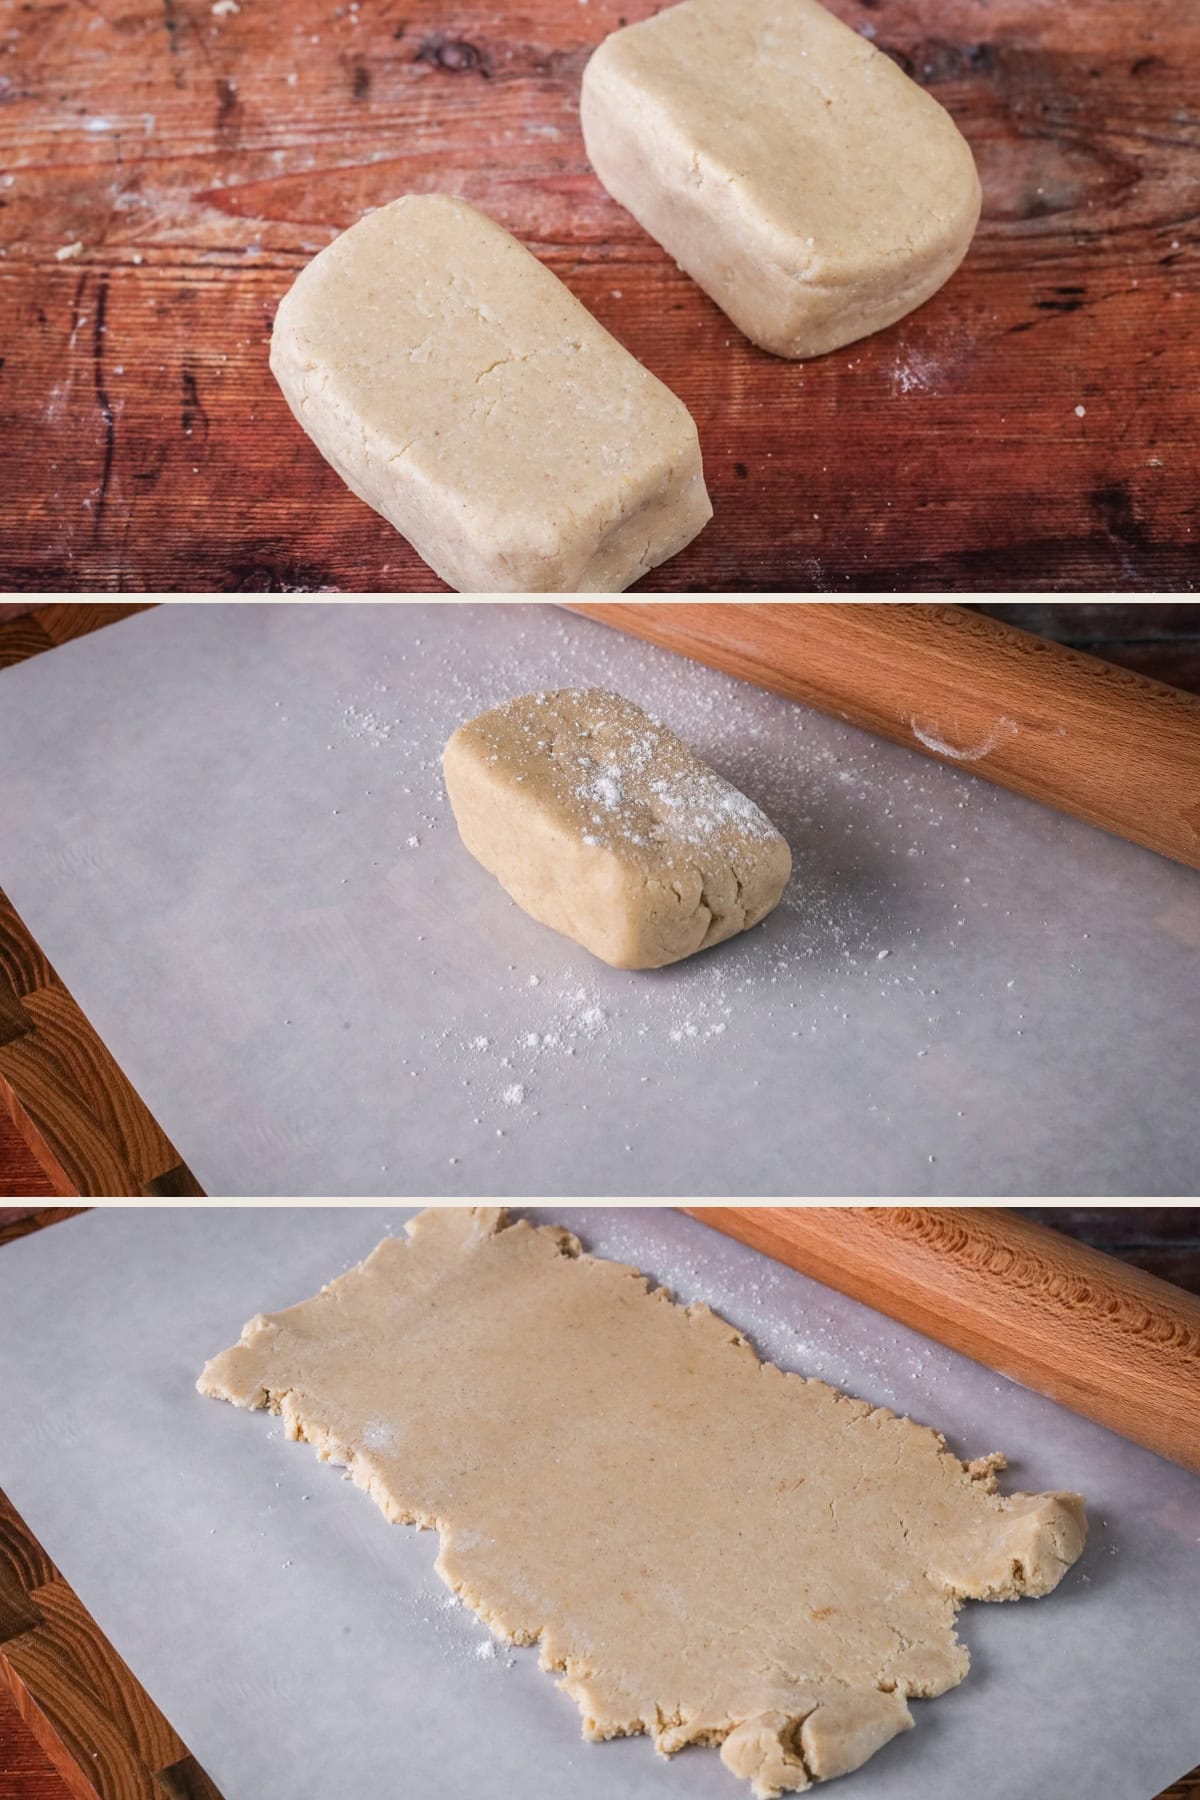
Split the dough in half and make them into the shape of rectangles. Wrap and place in fridge for 20 minutes to firm.
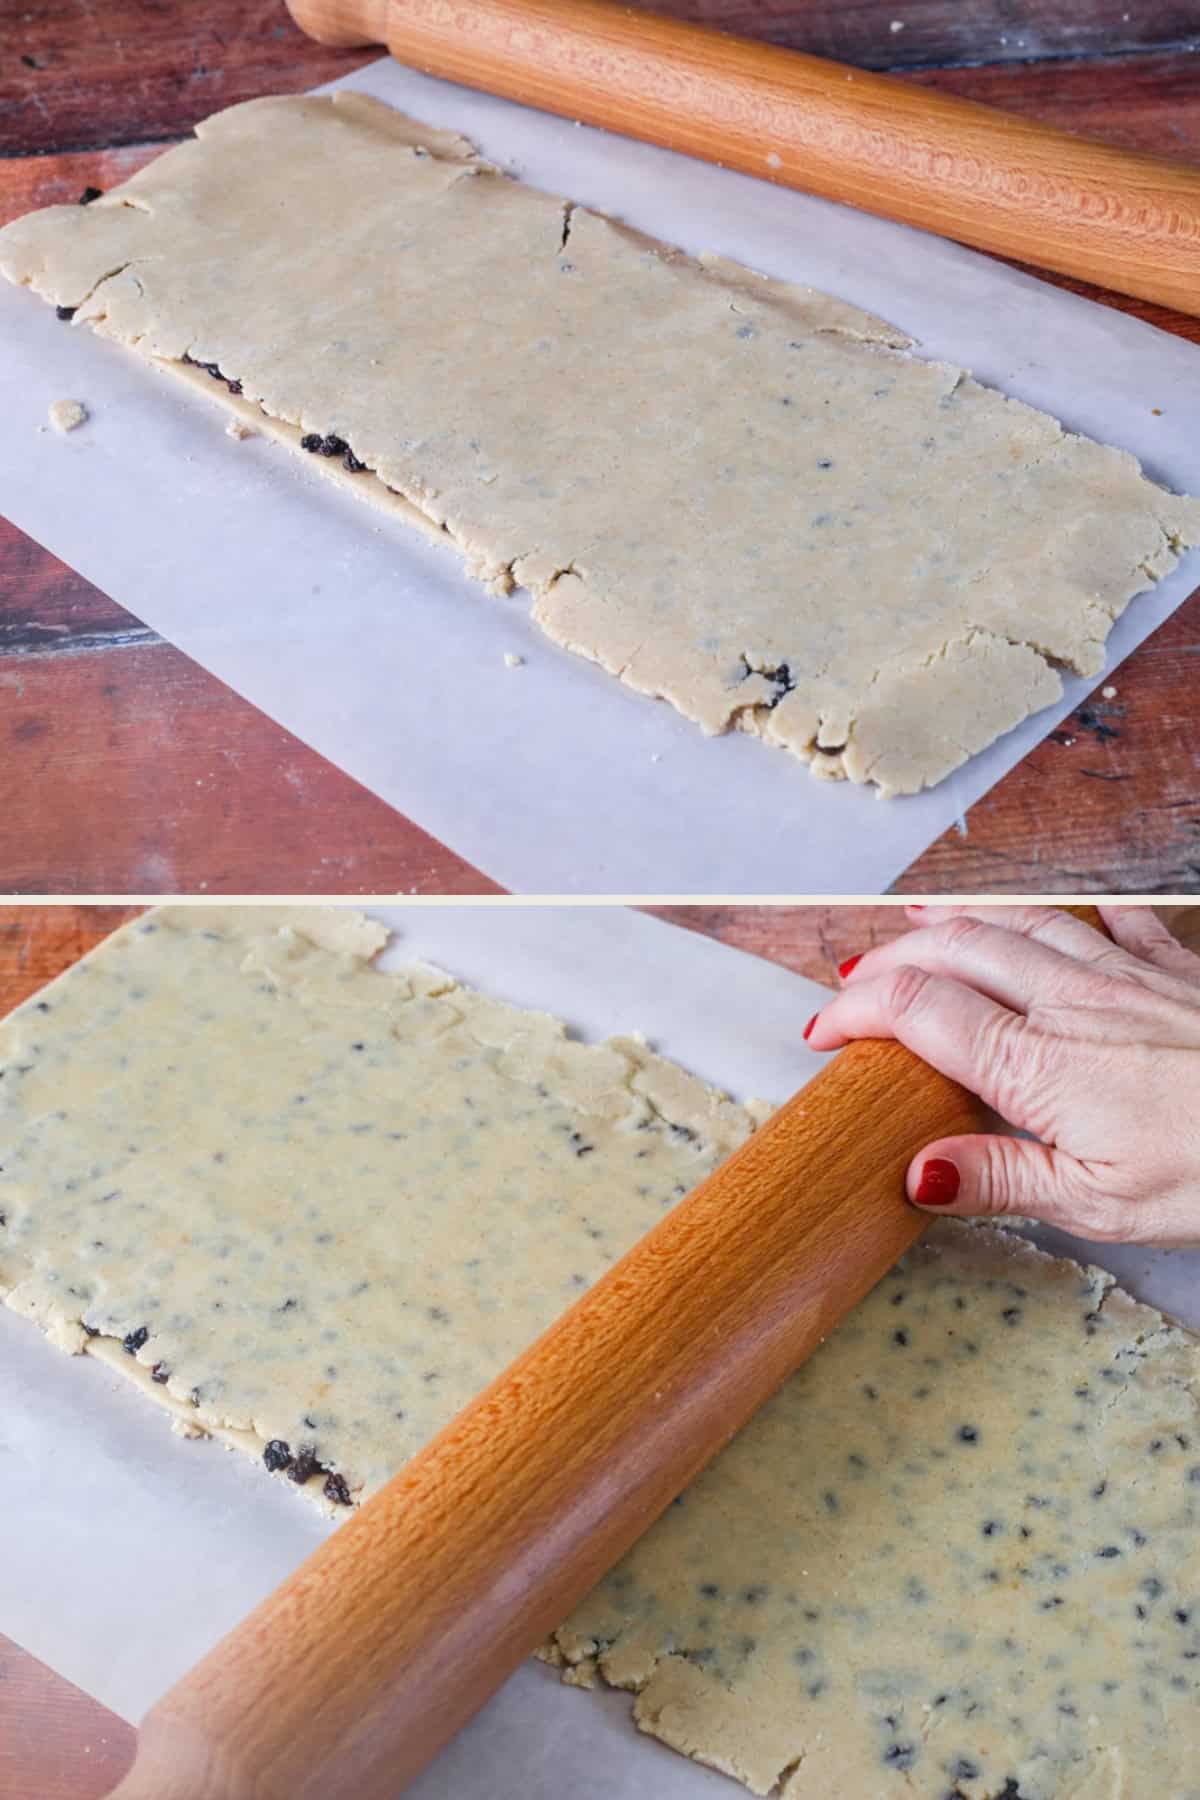
Roll out each dough half on top of parchment to size of 15 x 6 inches.
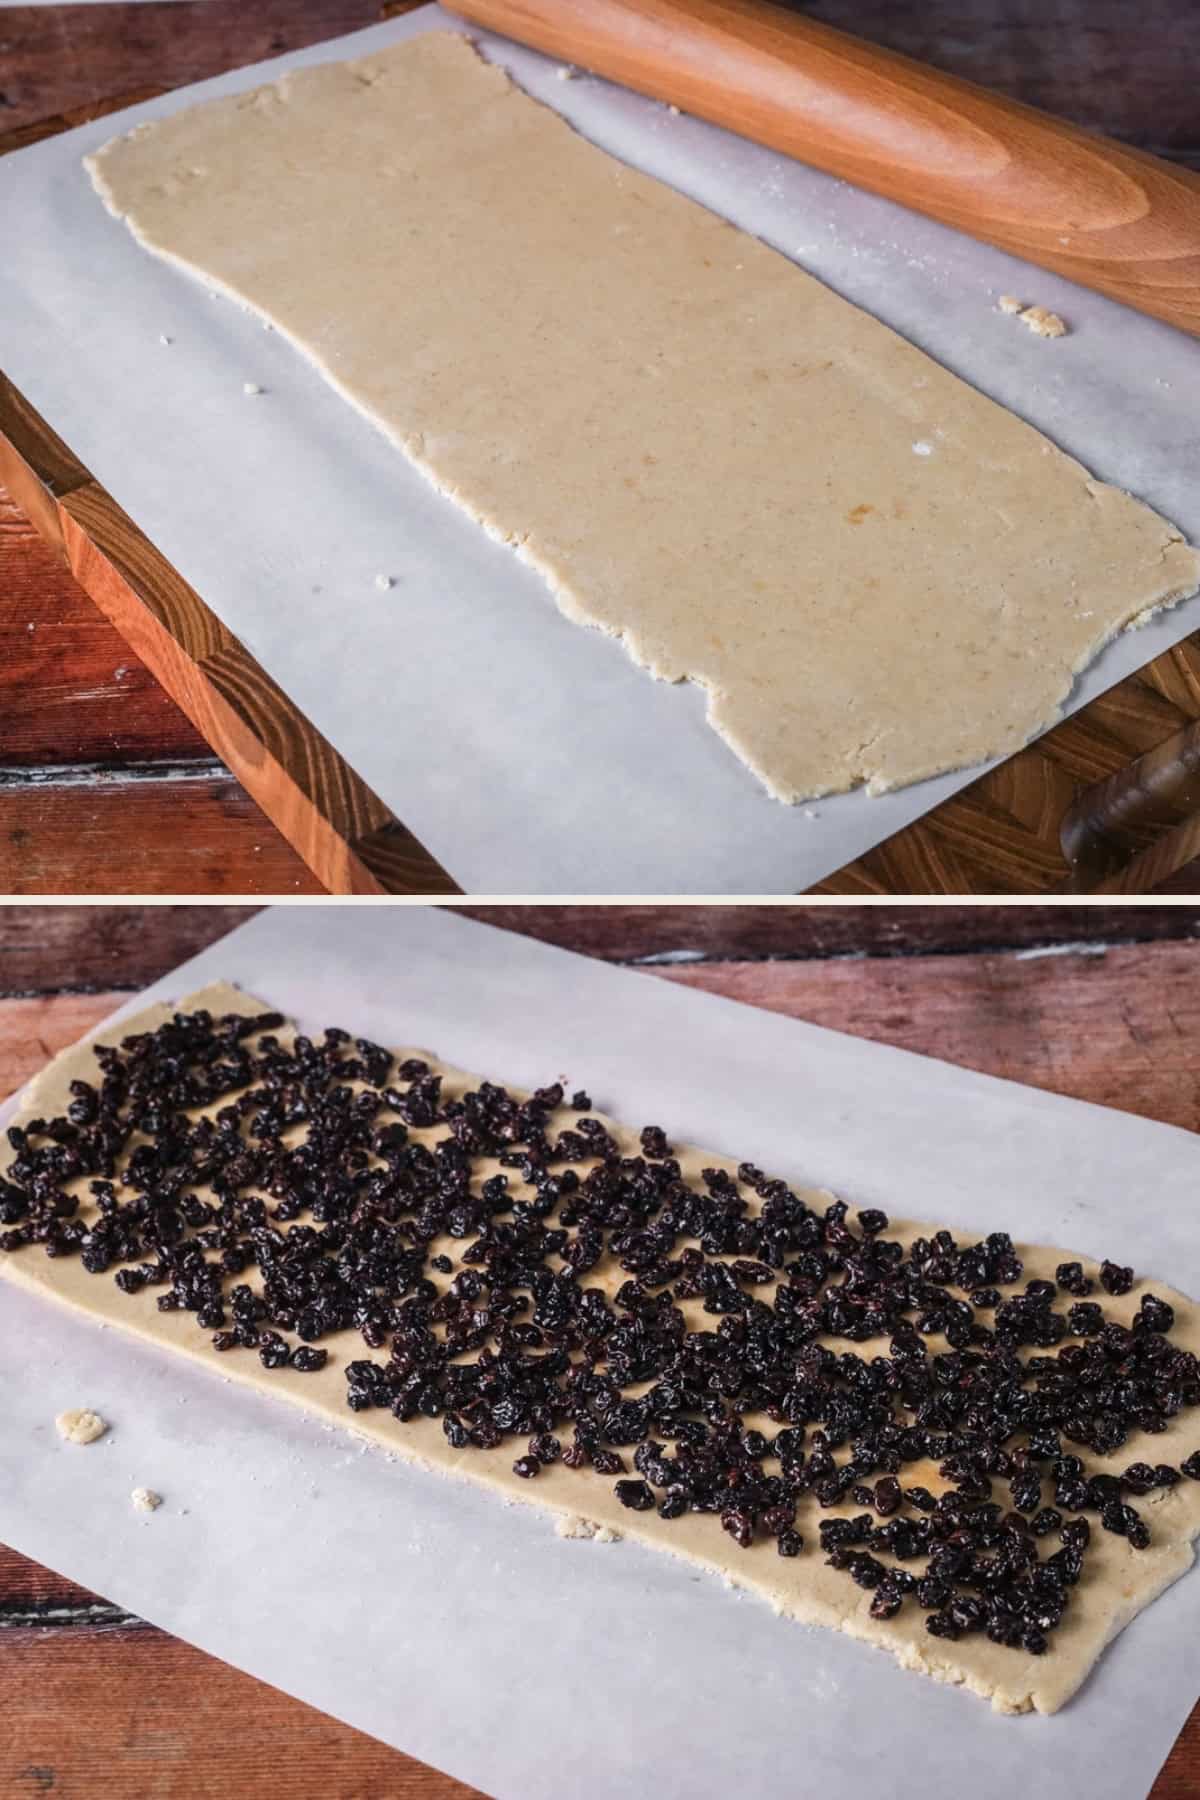
Spread currant mixture on one rectangle, thinly and evenly.
Press other rectangle over the top. Use rolling pin to press the layers together.
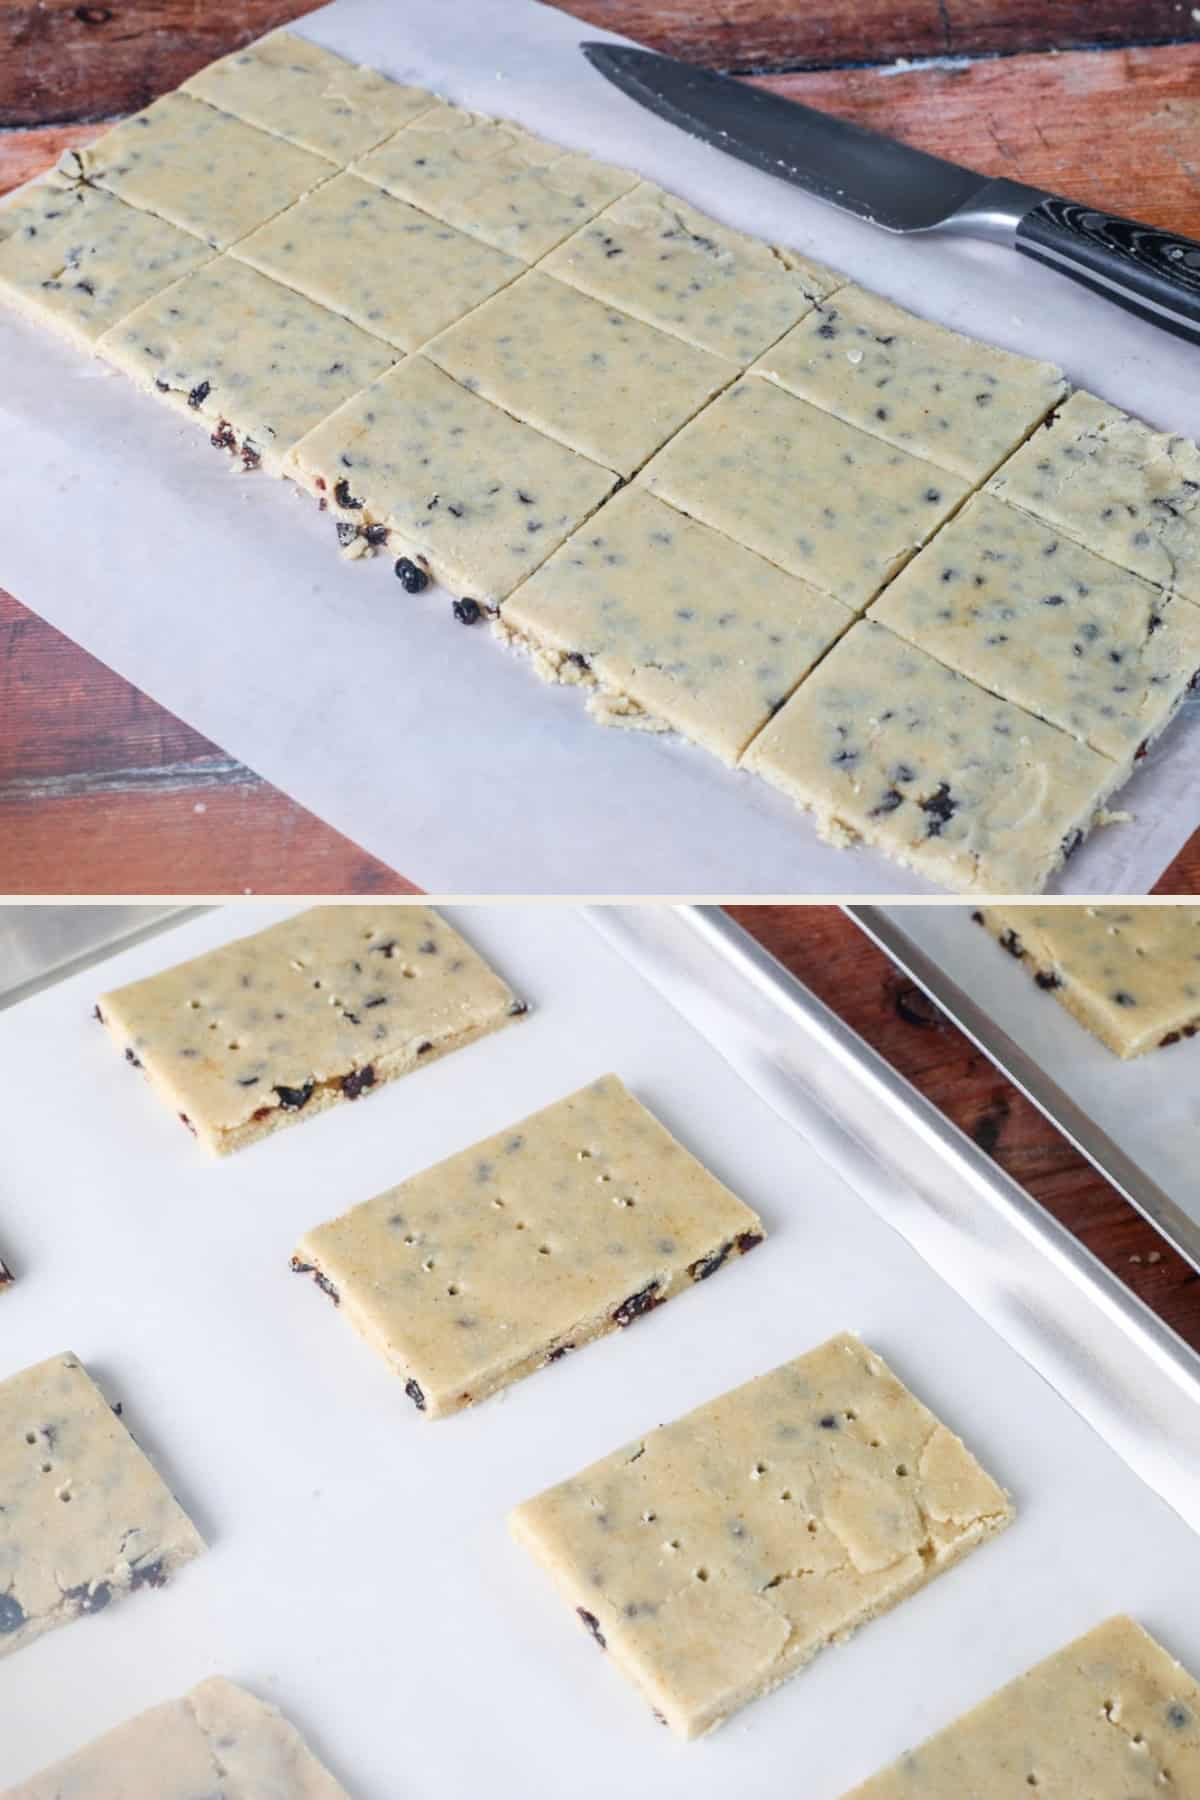
Cut into 15 even rectangles. (4 cuts widthways, 3 cuts lengthways). Place onto baking trays spaced apart and pierce the top of the biscuits with the tine of a fork. Chill for 15 minutes.
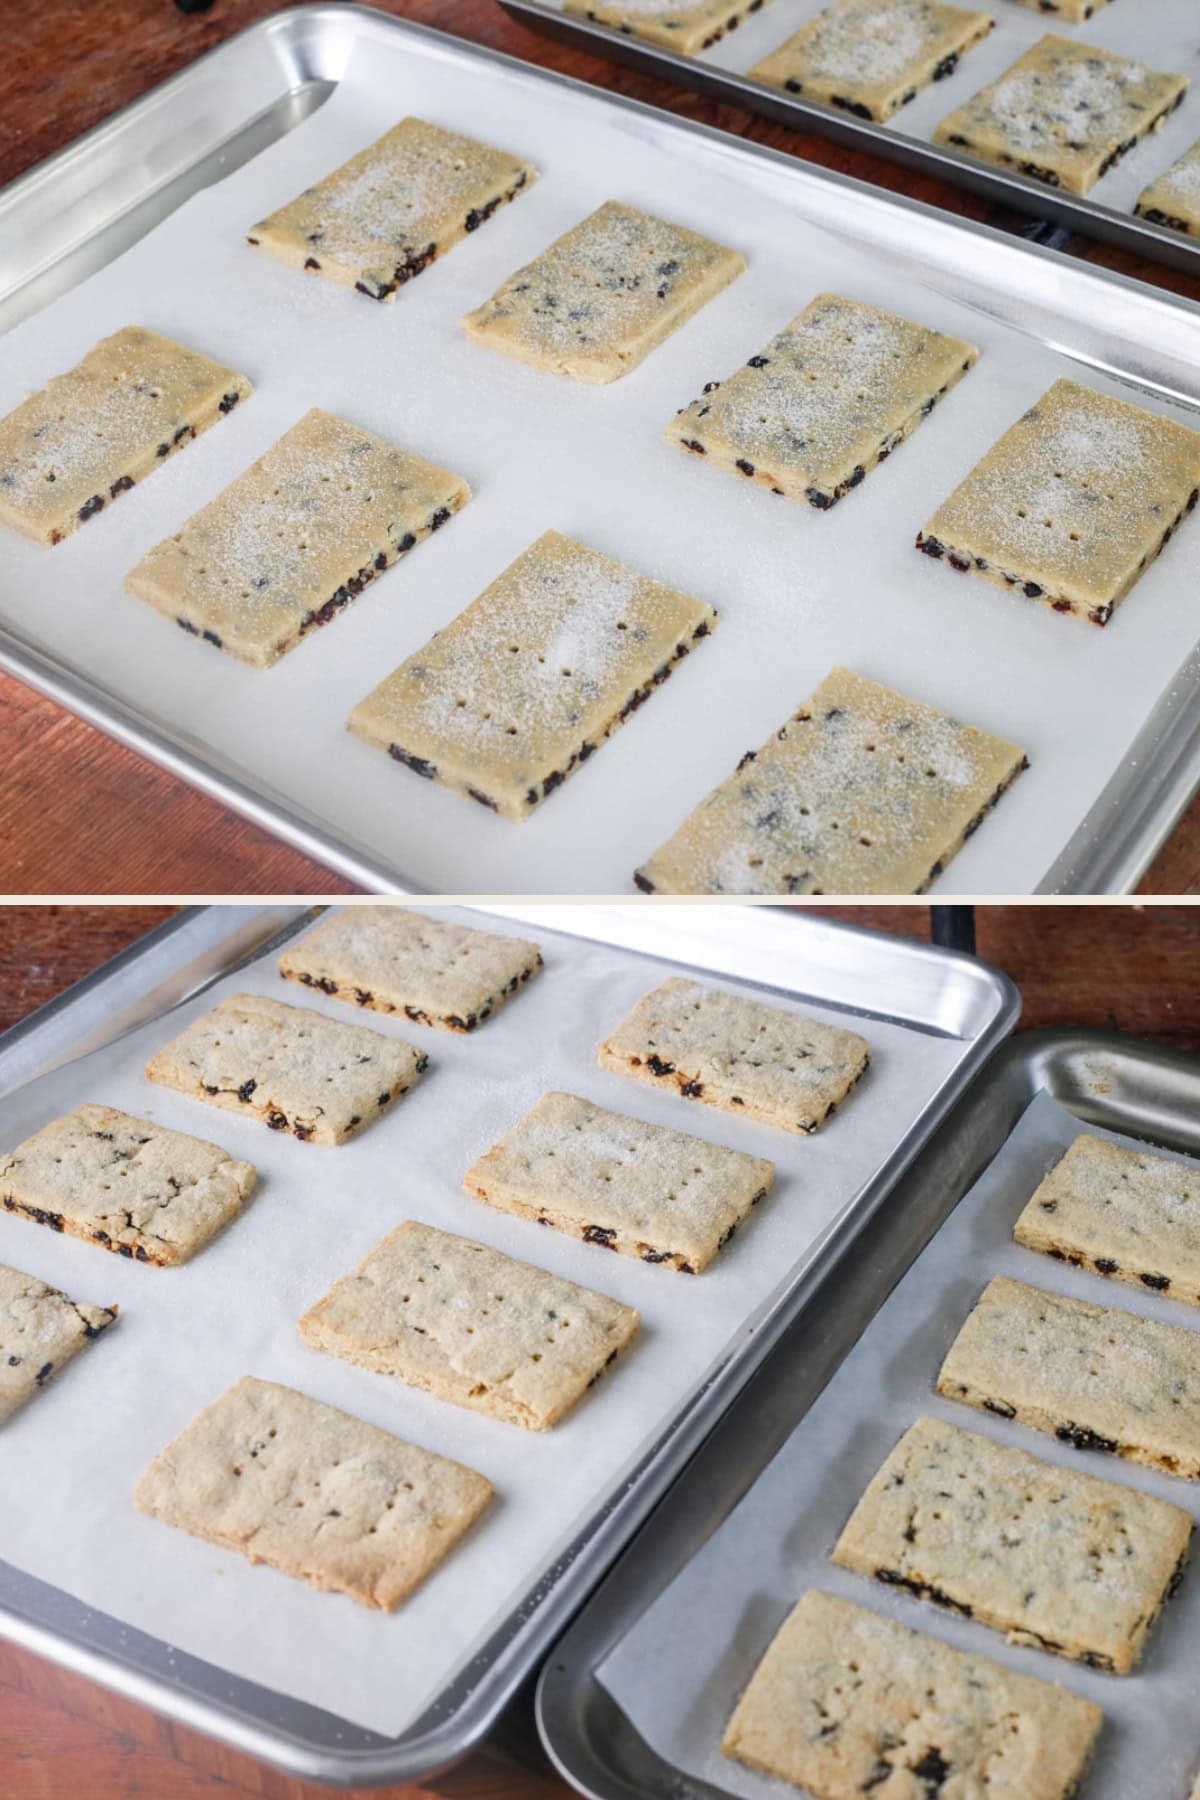
Pre-heat the oven to 190°C / 170°C fan assisted / gas mark 5 / 375°F. Scatter over extra caster sugar and then bake for 12 - 15 minutes until lightly golden.
How To Avoid Pastry From Breaking
Well, you can’t really. Gluten-free dough is always more fragile than regular biscuit dough. Don’t let this trouble you.
This is why we are rolling the dough out onto baking parchment. It helps hold the dough together so it doesn’t stick to the work surface and break. It’s also incredibly useful at moving the dough around when you need to lift one layer onto the other.
Dust the dough lightly with just a little bit more of the homemade flour blend, and on the rolling pin itself before you begin. Roll the dough gently out, your pressure shouldn’t be too firm. If the dough is resistant to rolling you may have chilled it for too long. Rest it at room temperature for 15 minutes to soften slightly.
As you are rolling the dough out it will break. Just push it back together (see my video). If there are some heavy cracks that form in the middle, just slice off a bit of dough from the edges and patch it up and keep rolling.
Every so often neaten up the edges of the dough as you are rolling it out with your hands and fingers to keep the dough in a nice neat rectangle. It’s almost like being in control of the dough and not letting its fragile nature get the better of you. Confidence in the process is key.
Tips & Troubleshooting
The butter needs to be at room temperature so it creams properly with the sugar. The creaming method just means you mix the two ingredients together so they are homogeneous, light and creamy. It takes about two minutes if you are using either an electric hand whisk or a stand mixer.
The orange juice should soak happily into the currants making them a little plumper, you don’t want a wet filling. Every orange has a different amount of juice so I recommend just draining the currants in a sieve before adding them to the biscuit dough so there’s no excess liquid added in. Although there’s no need to pat them dry.
By placing the unbaked biscuits in the fridge to cool for at least 15 minutes you are just re-firming the butter in the dough a little which will lead to lovely crisp results and stop the biscuits from spreading in the oven.
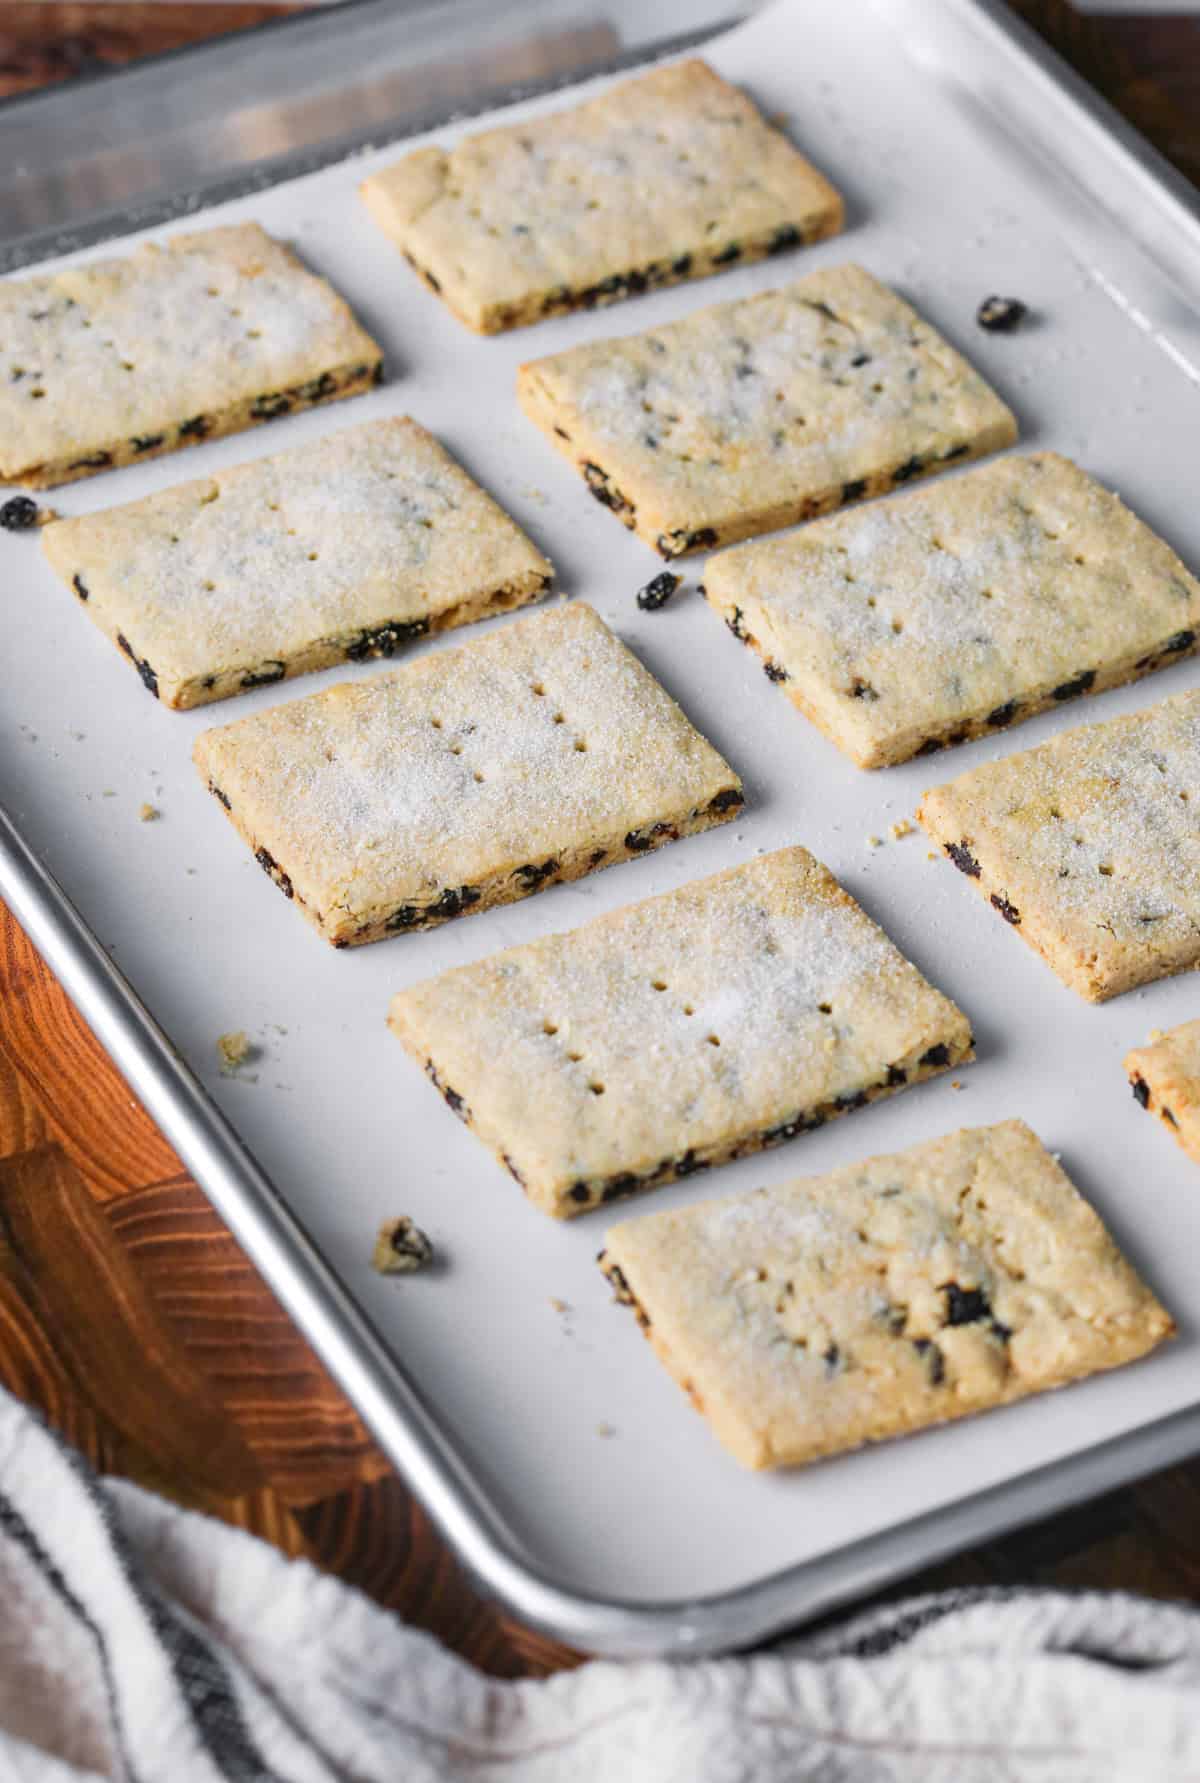
The baked biscuits will look ever so slightly golden – just turning at the edges. You don’t want them to be browning at all otherwise they’ll be overbaked.
The biscuits will still be fragile fresh out of the oven. Resist the temptation to try a warm biscuit. Allow them to cool completely on the baking tray, this will finish firming them up so you can achieve the right texture. You don’t need a cooling rack for this recipe.
FAQs
Honestly you want to roll it as thin as you can which will end up being about 3-4mm. You will be limited to the dough which will start to break apart too much if you go too far. You’ll find that each rectangle will comfortably roll out to the requisite 15 x 6 inches and that’s your main guideline.
Currants are a very small dried fruit so if you were to substitute for another dried fruit like sultanas, raisins, blueberries etc. then cut them up nice and small so they still have the same look and feel to the Garibaldis.
Once the biscuits have completely cooled then you can store them in an airtight container. A metal tin is the best choice as plastic containers can keep moisture in and make the biscuits a little soft. Store in a cool dark place at room temperature.
The gluten-free garibaldi biscuits should last for up to 5 days in the airtight container without staling.
You can prepare the biscuits all the way up to the final chill in the fridge. Instead then of chilling then baking them you can place them instead into the freezer on the baking tray for a couple of hours to flash freezer. Then store the unbaked biscuits layered up in airtight container with baking parchment between the layers. You can bake them directly from frozen – just add a minute or two to the baking time.
You can freeze the baked Garibaldi biscuits. Just store layered up in airtight container with baking parchment between the layers. Allow to thaw at room temperature for about an hour before enjoying with your tea.
This recipe has only been tested with butter (which is the only ingredient you need to swap out to make it dairy-free or vegan). In my experience swapping with 1:1 dairy-free butters can make biscuit dough spread out a little more and the dough will be much softer. If you have a brand you trust then you can substitute it in but I would imagine you might need a little more flour to compensate for a dairy-free butter.
I’ve just invested in some new baking trays for all my cookies and biscuits and they work so well. Lighter coloured baking trays mean your bakes won’t overbrown. These Jelly Roll Pans (sized 40cm (15”) x 28cm (10”)) are made from aluminium for the best results.
Your gluten-free Garibaldis will fall apart if you don’t allow the biscuits to fully cool on the tray after baking. They also will benefit from the defatted almond flour (in the ingredients list) so try not to leave it out as it does help hold them together. If the currants are too wet they can also add too much moisture to the dough which can lead to crumblier biscuits.
Your Garibaldi biscuits should have a crisp texture. If they are soft this is another indication that they were too warm before eating. Another culprit could be underbaking. The biscuits will also become soft is stored in plastic containers as it adds more moisture back into the baked biscuits.
Recipe Variations
The version I’ve given you is pretty traditional (save the gluten-free flours) but there are plenty of ways we can modernise this biscuit:
Spice. Add some spice into the biscuit dough. 1 teaspoon ground mixed spice or cinnamon would add a bit of gentle depth.
Marmalade. Add 2 tablespoons of orange marmalade to your currant mixture which will give it a sweetly tart citrus skew to your biscuits.
Stem ginger. Or dice up some stem ginger and sprinkle into the currant layer as well. For a real ginger kick add 1 teaspoon ground ginger into the biscuit dough as well.
Dried cranberries. Swap out half of the currants for dried sour cranberries. They are a little chunkier and also go nicely with our orange juice soak.
More Gluten-Free Biscuits You’ll Love
Gluten-Free Digestive Biscuits are simple yet strong and flavourful biscuits, ideal for dunking in your afternoon tea, slathering with chocolate or making your favourite cheesecake bases.
A good ginger biscuit should be spicy, have a good crunch and survive a good tea dunking. These Gluten-Free Ginger Biscuits pass all those tests with flying colours.
These Gluten-Free Embossed Biscuits are so pretty and actually very easy to make. Beautifully spiced and made with buckwheat and tapioca flour.
Enter your email below to get this recipe sent to your inbox plus get new recipes, baking tips, and updates.
Gluten-Free Garibaldi Biscuits
Ingredients
- 100 g currants
- ½ orange - juice only
- 150 g unsalted butter - room temperature
- 75 g caster sugar - + 1 teaspoon to scatter
- 180 g homemade gluten-free flour blend
- 60 g defatted almond flour
- ½ teaspoon vanilla extract
- ¼ teaspoon kosher salt
Instructions
- Place the currants into a small bowl and squeeze the orange juice into currants. Allow to rest and soak up the juice whilst you prepare the rest of the recipe.
- Whisk together the homemade flour blend, almond flour and salt in a medium sized mixing bowl until well combined. Set aside for a moment.
- Place the butter and sugar in a large mixing bowl and cream together for about two minutes until light and creamy.
- Add the flour mixture and vanilla and bring into a smooth dough. You can start by combining the ingredients in the mixing bowl and then tipping it out on to a work surface to finish bringing together.
- Split the dough in half and shape each half into a thick rectangle. Wrap the dough in cling film (plastic wrap) or baking parchment and place in the fridge for 20-30 minutes to firm up a little.
- Place each dough half onto large pieces of baking parchment. Roll each rectangle out, one at a time, using a rolling pin, into long thin rectangles, 38cm (15 inches) long and 15cm (6 inches) wide. If the dough breaks apart slightly as you are rolling out just press back together or patch up any large tears with dough from the edges.
- Drain the currants to remove any excess orange juice then tip them out along the centre of one of the pieces of dough.
- Spread our the currants to the edges.
- Lift the other piece of dough carefully using the baking parchment and place on top of the currant layer. Press these layers together then use a rolling pin to firmly press them together.
- Neaten up the edges of the biscuit dough then slice the dough, 4 cuts widthways, 3 cuts lengthways to make 15 rectangular biscuits.
- Divide the biscuits between two baking trays (I used 40cm (15”) x 28cm (10”) sized baking trays) lined with baking parchment. Placing the biscuits spaced well apart.
- Fork tine the top.
- Place the baking trays full of biscuit dough in the fridge and chill for 15 minutes.
- Meanwhile pre-heat the oven to 190°C / 170°C fan assisted / gas mark 5 / 375°F.
- Finally scatter over extra caster sugar across the biscuits then place in the oven and bake for 12 - 15 minutes until just turning lightly golden.
- Remove from the oven and allow the biscuits to fully cool and firm up on the baking trays before enjoying.
Video
Notes
- Gluten-Free Flour – FTL Blend: This recipe uses my Homemade Gluten-Free All-Purpose Flour and I don’t recommend substituting. It is a balanced mix of wholegrain and starchy flours, eliminating the need for xanthan gum. The blend includes sweet rice flour, sorghum flour, oat flour, and tapioca flour, providing structure and texture without extra binders. For substitution tips, check the original post for this flour mix.
- Defatted almond flour. This is not the same as regular almond flour (ground almonds) and I don’t advise you swap one for the other as regular almond flour won’t give the same results. Defatted almond flour has been processed further to remove some of the fat and is more powdery looking. Check against this article The Difference Between The Almond Flours. If you can’t get hold of it then you can use gram flour (chickpea flour) instead.
- Baking Trays. These Jelly Roll Pans (sized 40cm (15”) x 28cm (10”)) are made from aluminium for the best results.
- Rolling out. The pastry can be a little fragile. Don’t worry, just press back together and patch up any tears.
- Cool completely on the baking trays before enjoying so they can totally firm up.
- Storing: Cool completely then store in an airtight container for up to 5 days in a cool dark place.
- Freezing: Freeze the unbaked biscuits into layers (baking parchment in between) in airtight containers for up to 2 months. You can bake from frozen – just add a minute or two to the baking time.