Gluten-Free Almond Tuile
This post contains affiliate links. Please read my disclosures.

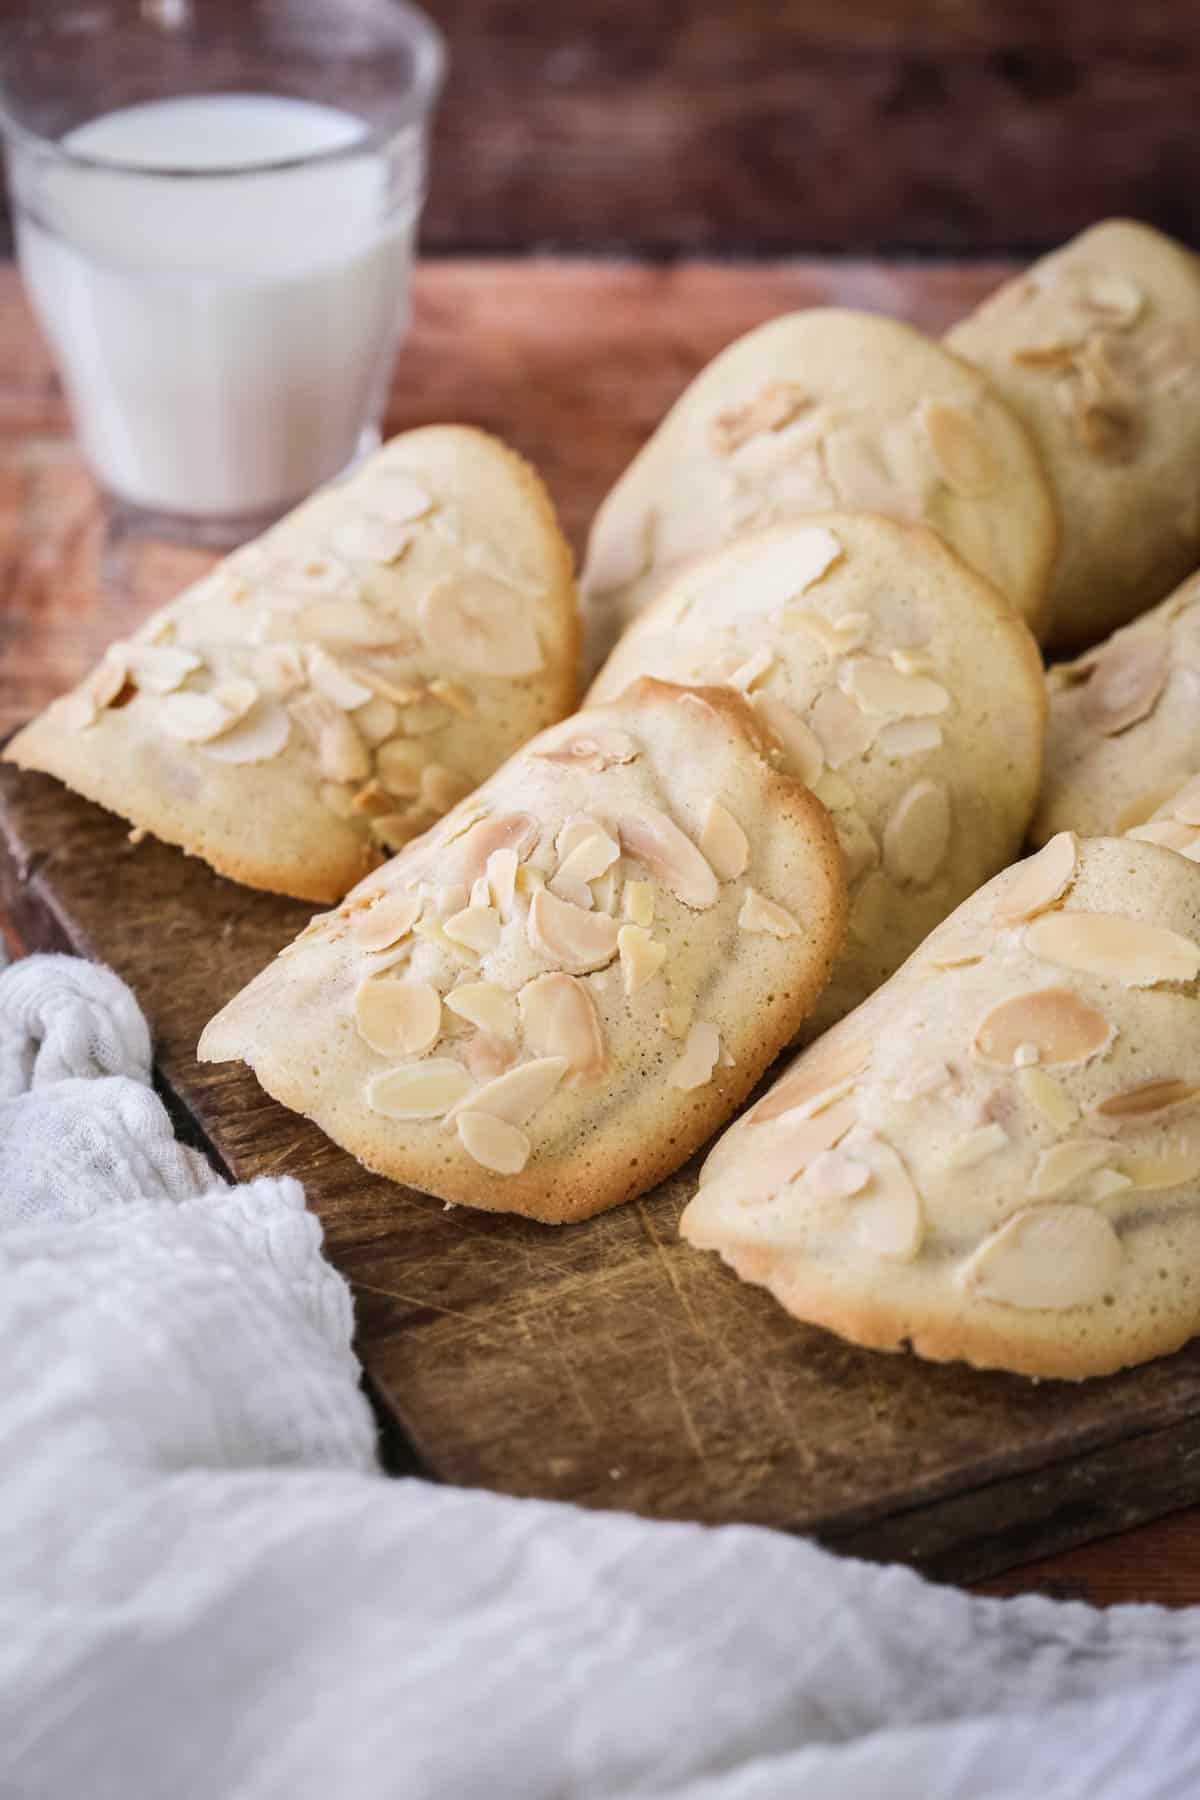
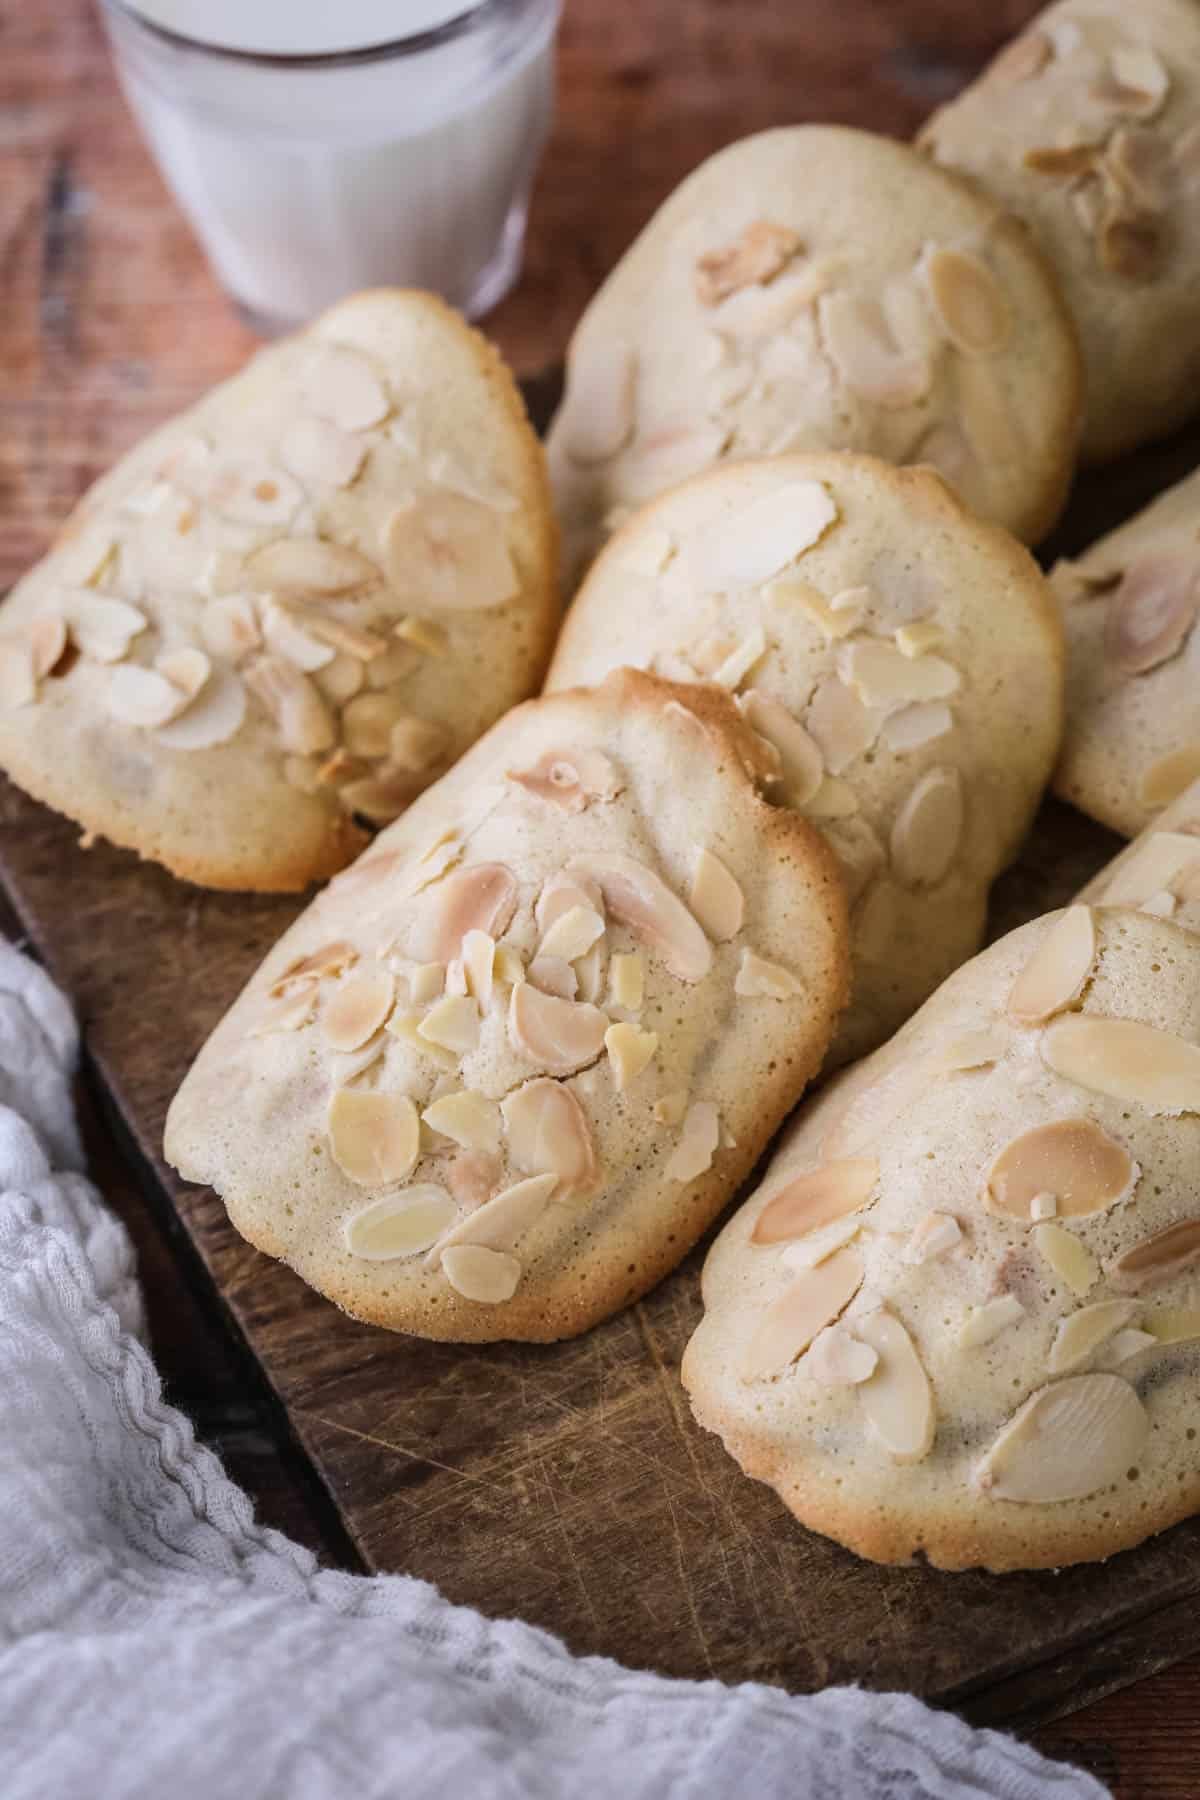
Crisp and buttery gluten-free tuile with almonds are quick and easy to make. They are beautifully elegant and delicious served with coffee or alongside individual dessert pots.
I developed this recipe as I was looking for a crispy biscuit bite to accompany my Chocolate Pots. These fit the bill as they are very quick to whip up which matches the ease of the Chocolate Pots. However, in our house they have taken on a life of their own.
Their popularity became clear whilst I was testing the batches as they were disappearing off the rolling pin (which they were being shaped over) as quicky as I was baking them. My family take fresh baking for granted since there is so much of it going on from my recipe testing. So some of even my most delectable of bakes can be ignored after the initial cupcake. But whenever I hear ‘Got any …. left?’ and I’m apologising as they’ve run out, I know they have been a hit. My son was scooping them off the rolling pin, and I can’t deny I might have been a little clumsy and accidently broken a couple directly off the baking tray. Oops, now they can’t be photographed. Chef’s treat.
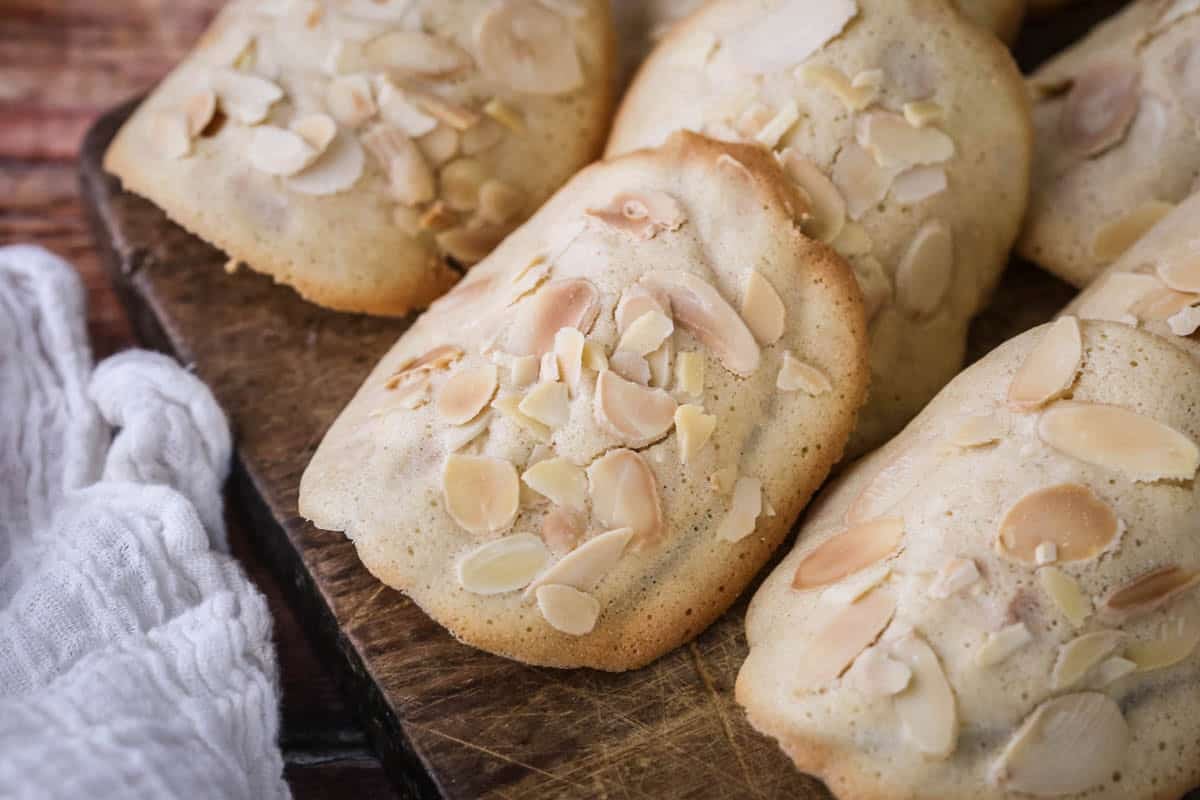
Their irresistibility lies in their rich buttery flavour and whispy crunch which is increased with the nuttiness of the almonds.
Why You’ll Love These Gluten-Free Almond Tuile
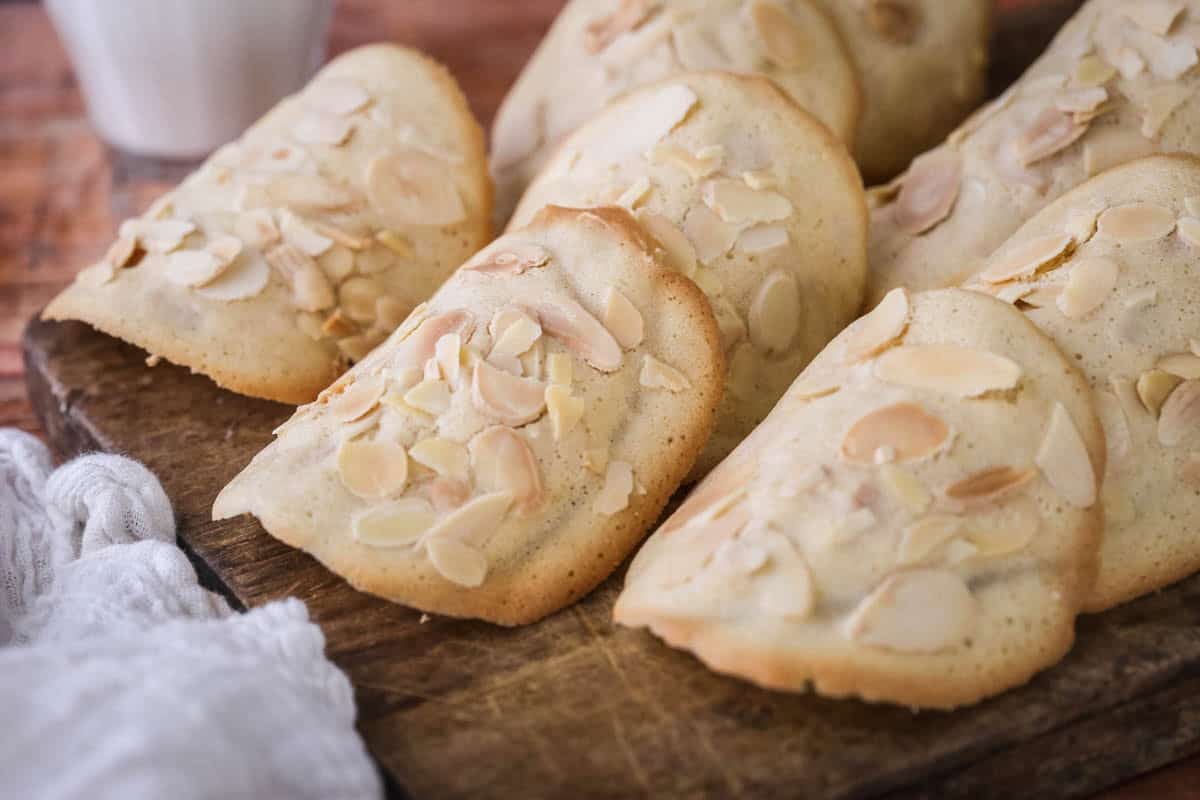
- Perfect little biscuits. Light crisp delicate cookies which have a rich buttery flavour with lovely texture from the flaked almonds.
- Simple equipment. It’s a one bowl, one wooden (or silicone) spoon, one teaspoon and a baking tray recipe.
- Fast. The batter takes 10-15 minutes to whip up and the baking just 7 minutes per batch.
- Versatile. Gorgeous with a cup of tea or coffee but also lovely accompaniments to individual desserts like possets, fools, mousses or chocolate pots.
Ingredients Needed
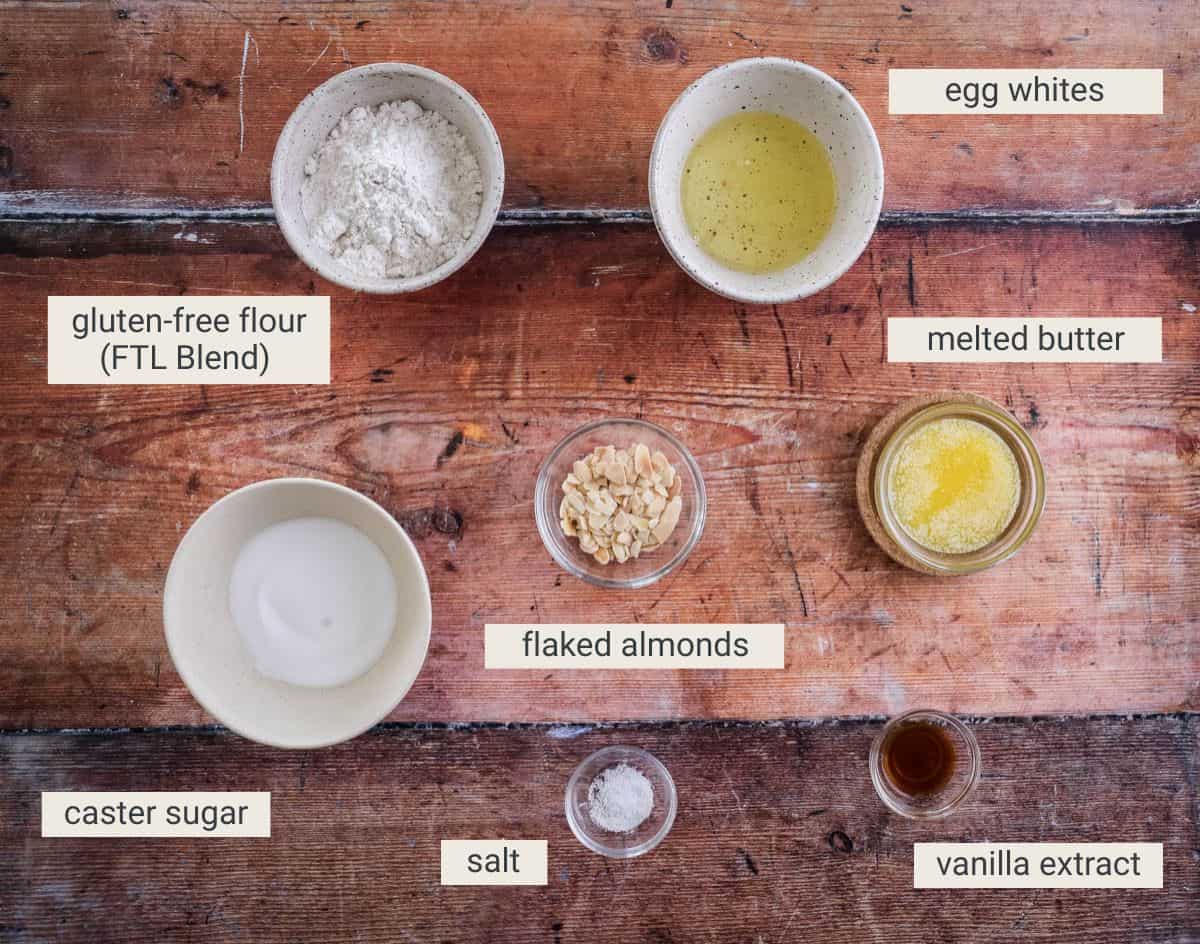
Egg whites. You can use freshly cracked eggs or the egg whites from a carton if you don’t want to waste the egg yolks.
Caster sugar. It’s a fine white baking sugar available in the UK. Regular white granulated sugar can be substituted.
Vanilla extract. Use a good quality extract for the best flavour, I like Nielsen Massey.
Gluten-Free Flour – FTL Blend. This recipe uses my Homemade Gluten-Free All Purpose Flour which works really well here as the flour ratio has been carefully tested to ensure the mix between wholegrain flours and starchy flours is balanced. This also means we don’t need to use xanthan gum as the blend is strong enough and produces a well structured and textured bake which can hold together without needing any extra binders.
This flour blend is a mix of 4 different flours: sweet rice flour (glutinous rice flour), sorghum flour, oat flour, tapioca flour (tapioca starch).
Salt. I like to use kosher salt in my baking as it has a round gentle flavour. Using salt in your baked goods lifts and sharpens all the other flavours.
Unsalted butter. We need unsalted so we can control the salt content of the recipe. Make sure it is at room temperature.
Flaked almonds. I like to use the toasted flaked almonds as they are not in the oven long enough to toast well. However, regular sliced almonds are fine if that’s all you can get hold of. You can make this recipe nut-free by just omitting the almonds.
How To Make Gluten-Free Almond Tuile
For full recipe instructions go to the recipe card at the end of this post.
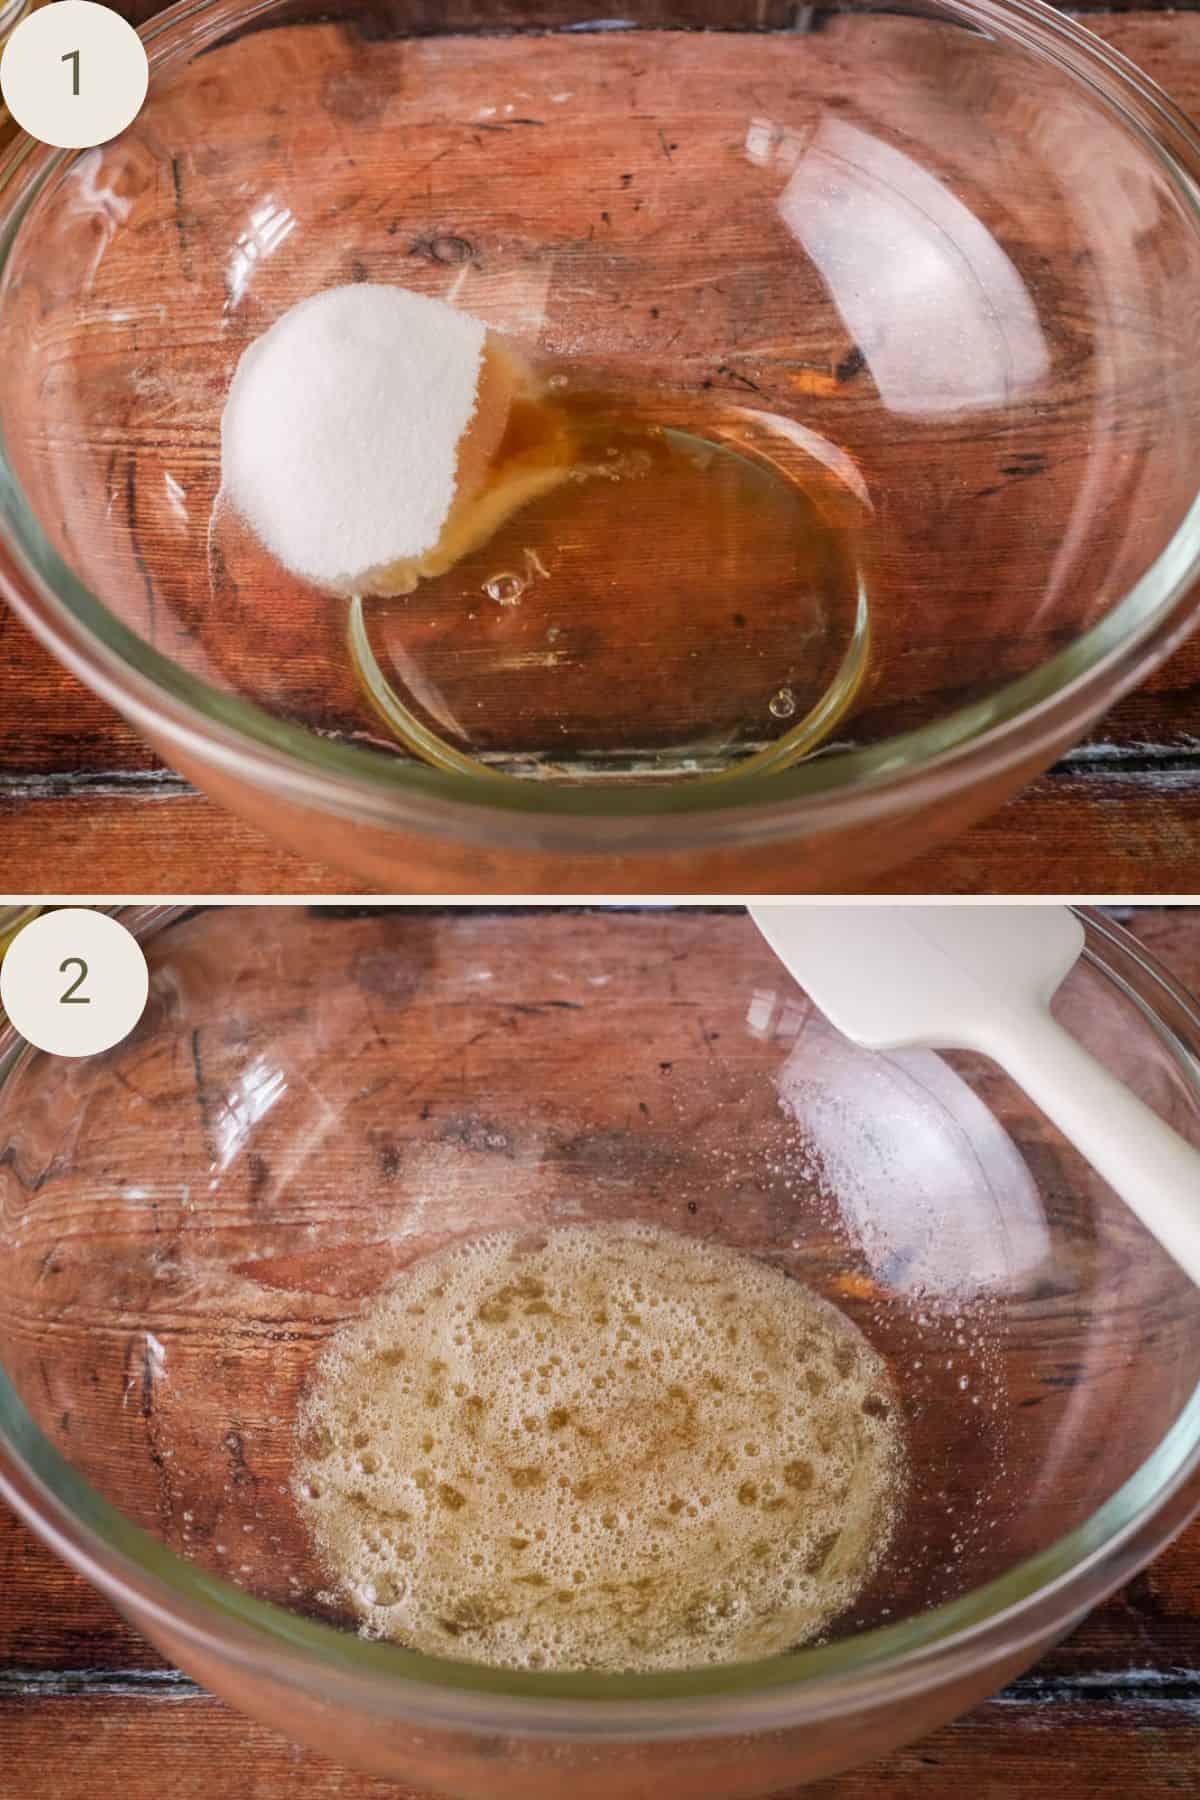
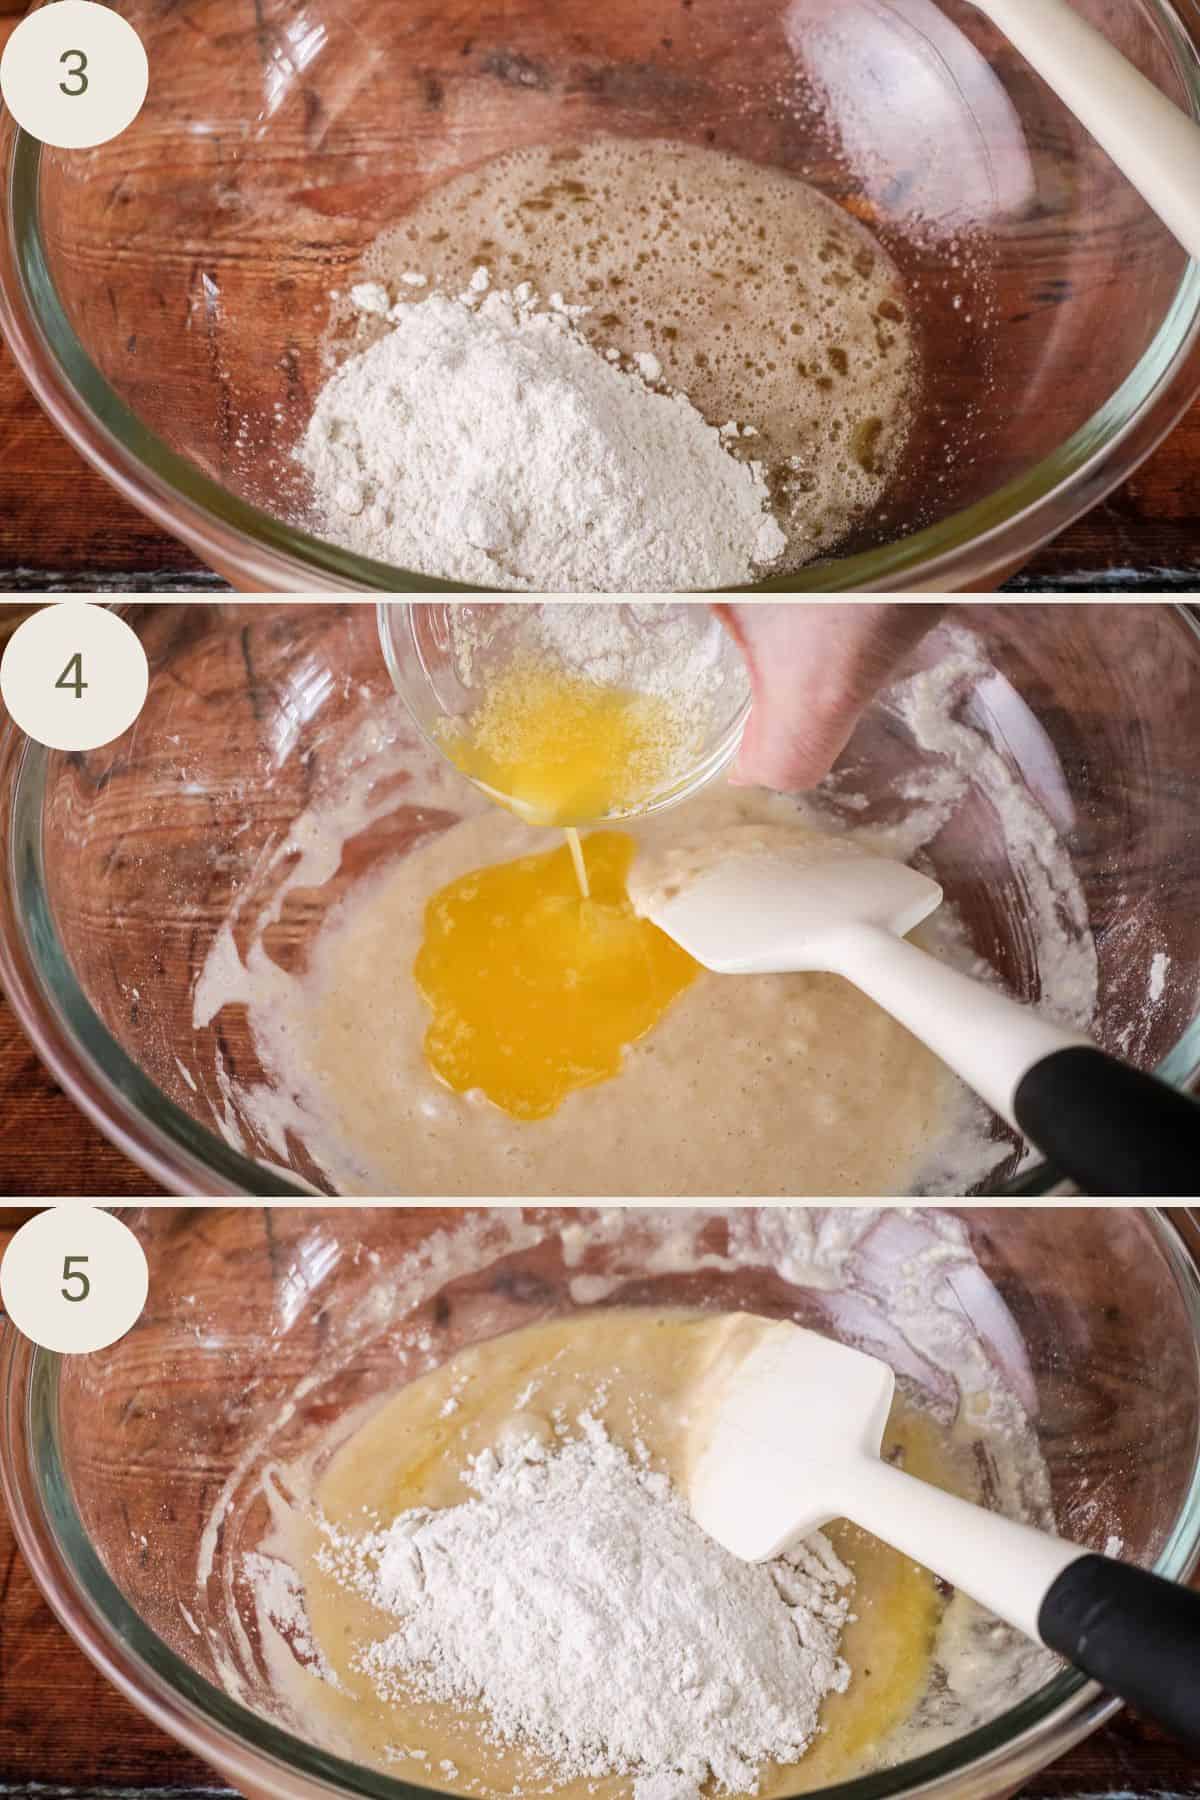
Stir the egg whites, sugar, vanilla together in a large bowl.
Fold in half the flour with the salt, then stir in the melted butter. Fold in the second half of the flour
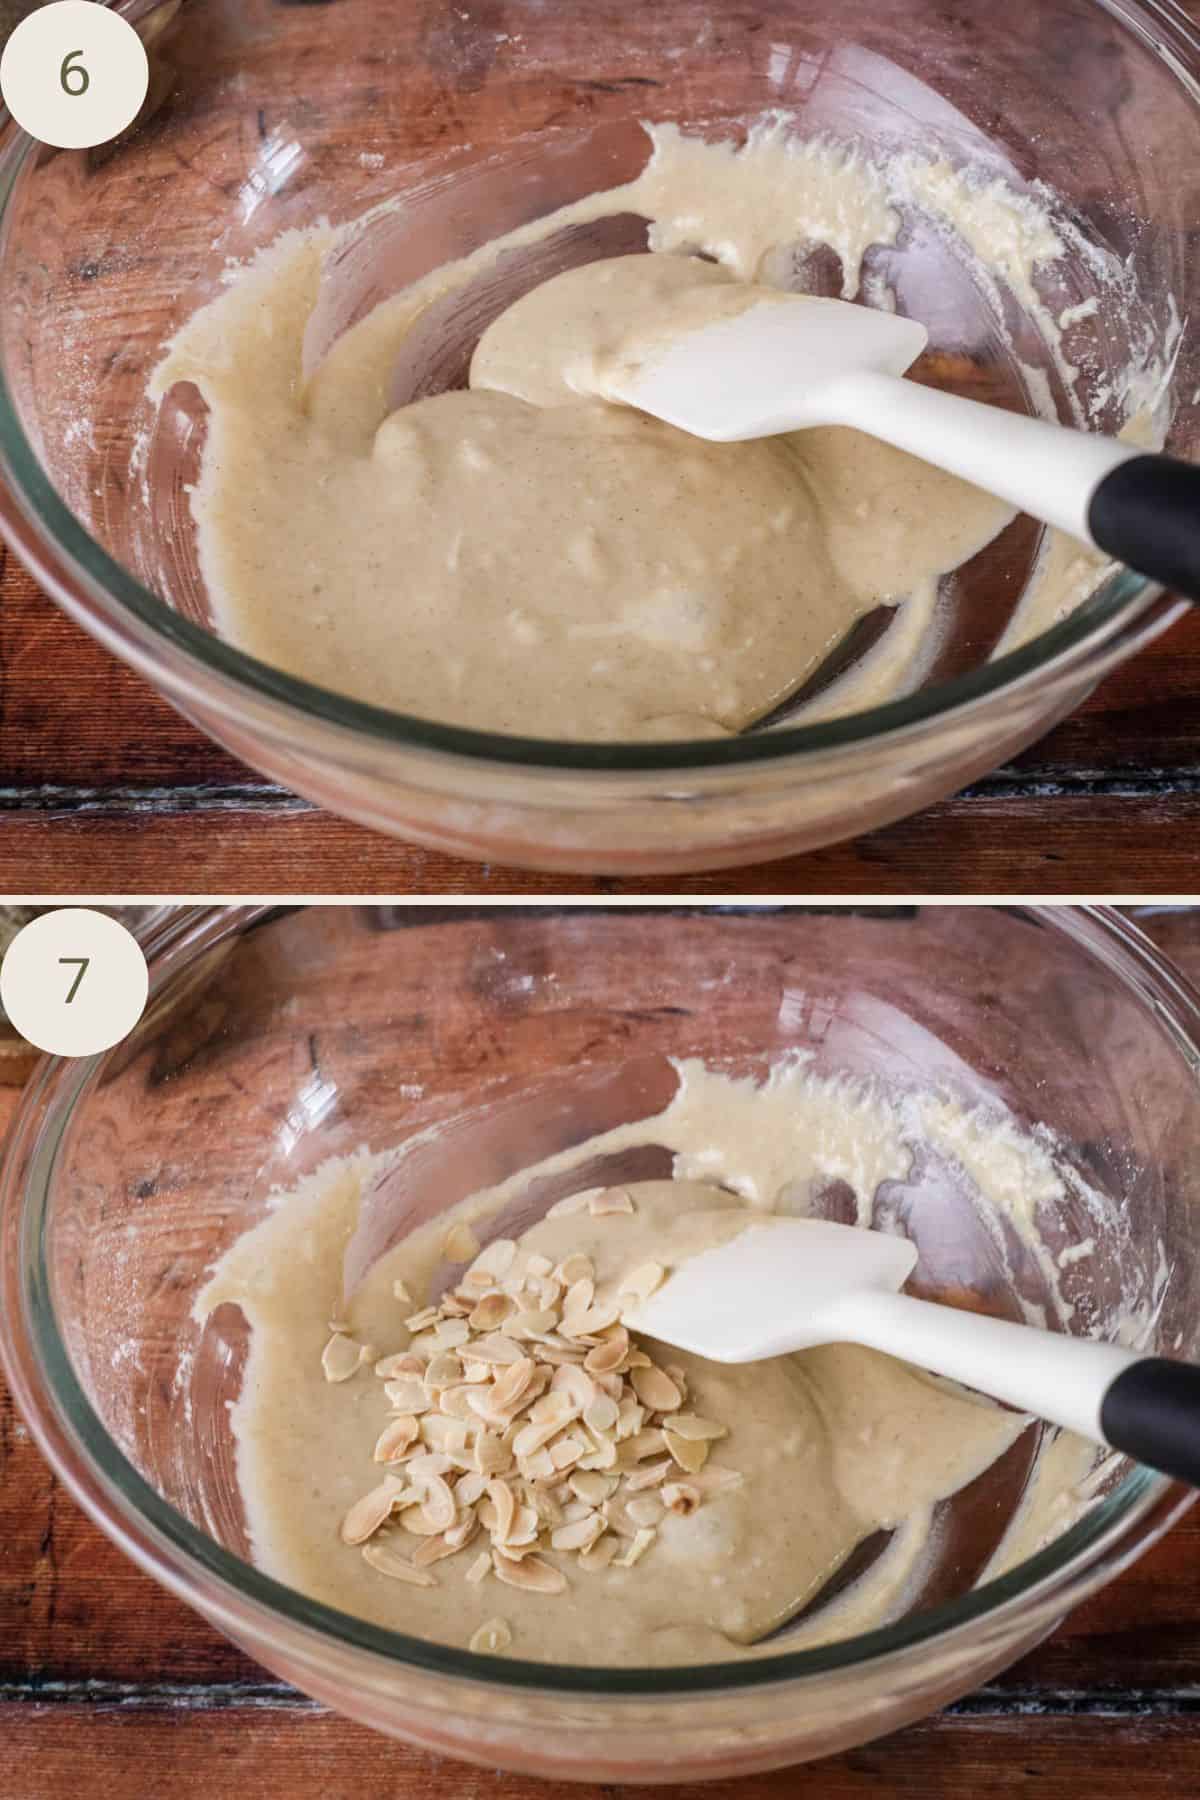
Add a third of the flaked almonds so they are coated with the biscuit batter. Rest the batter for 10 minutes.
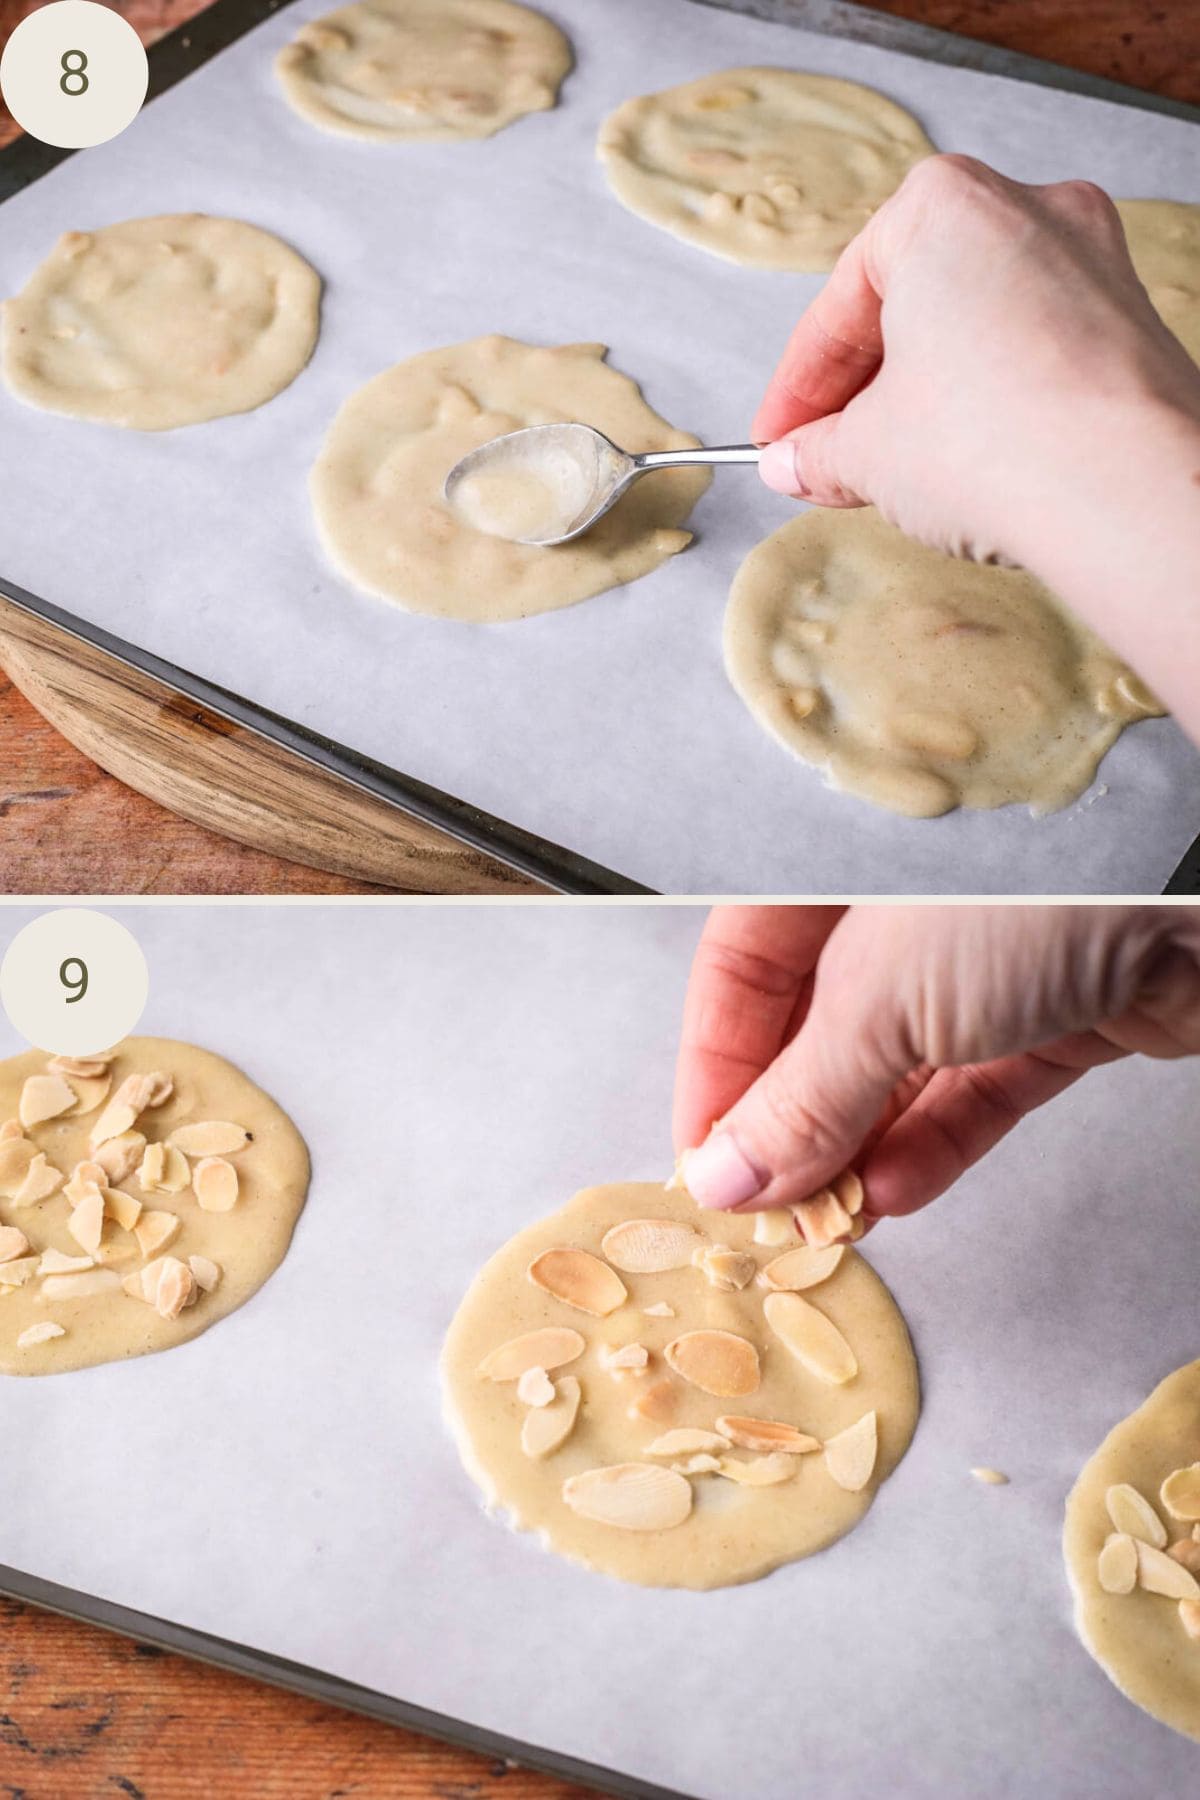
Spoon one heaped tablespoon of batter onto the baking parchment and using the back of the spoon, swirl the batter into thin circles. Sprinkle the rest of the flaked almonds over the top of each biscuit.
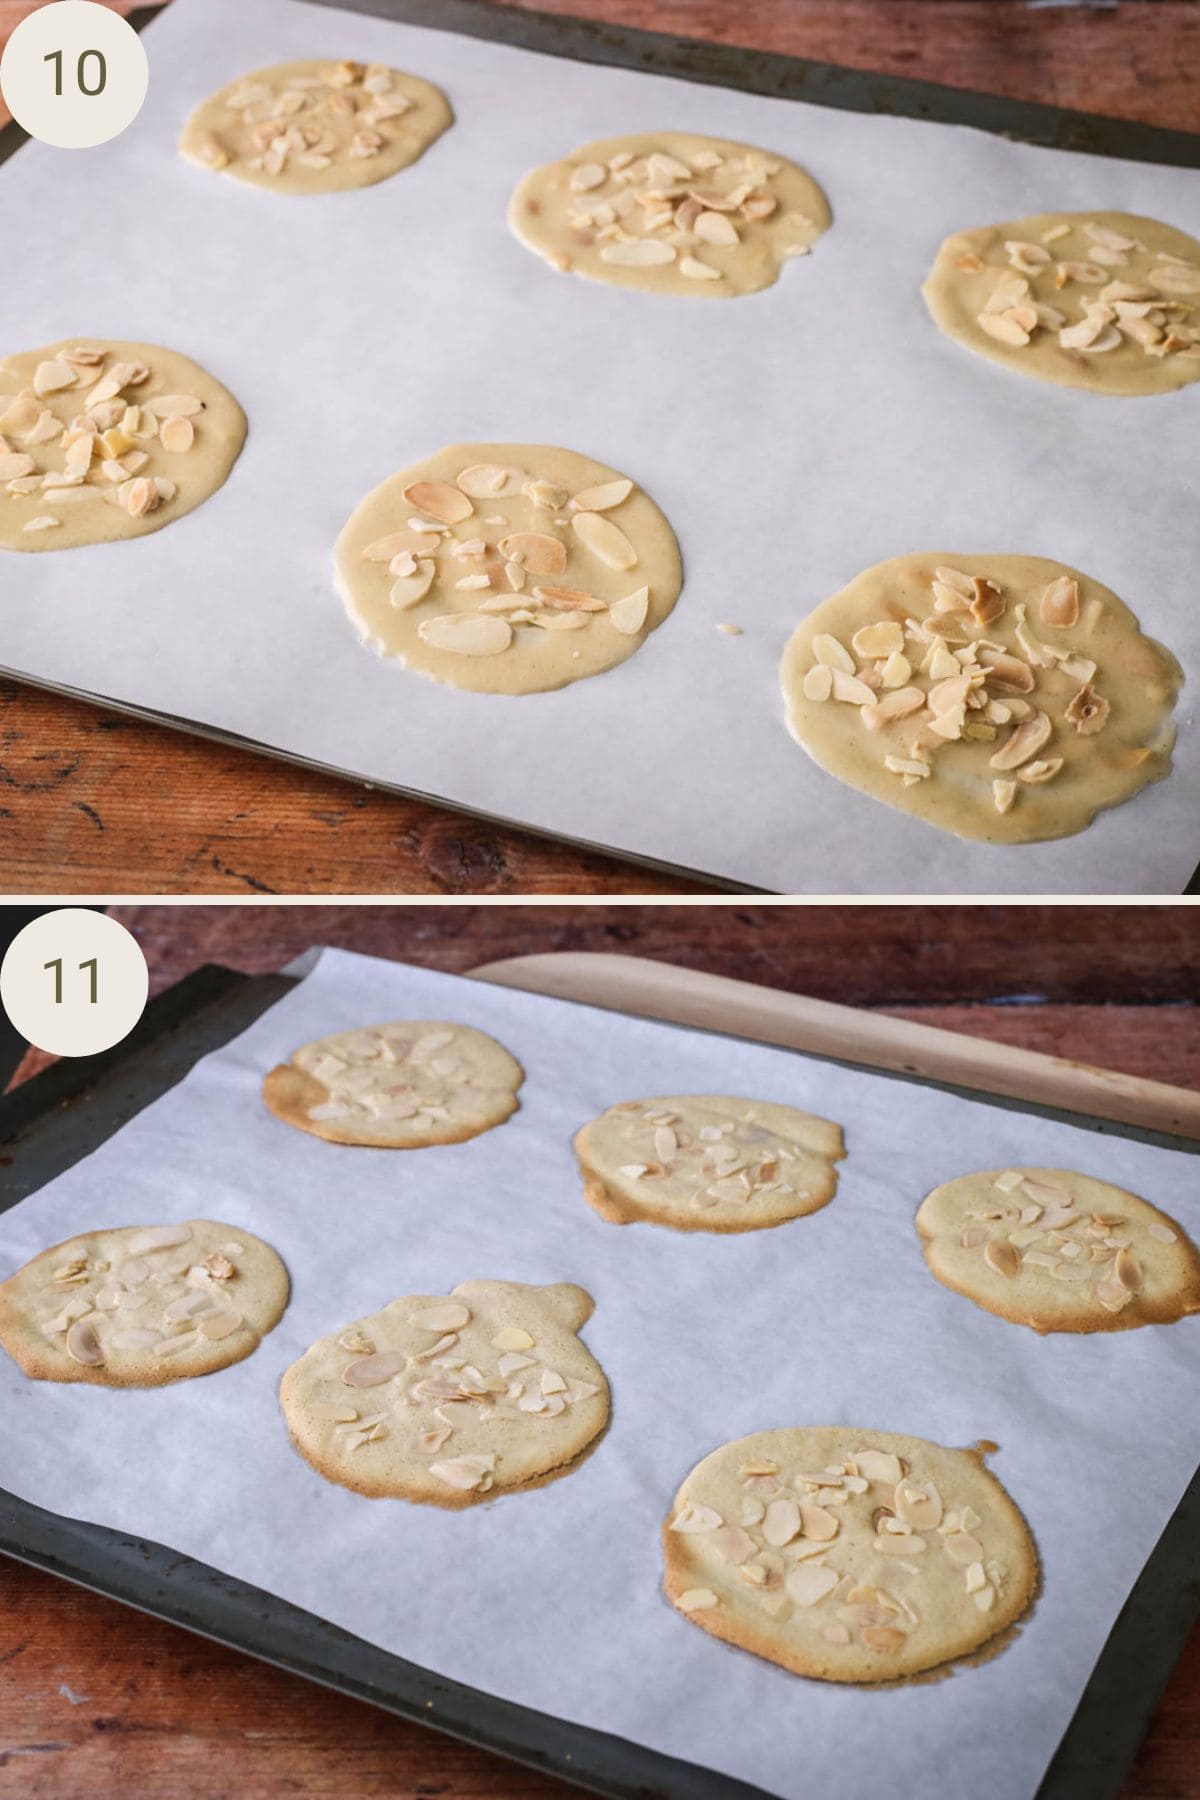
Bake for 6-8 minutes.
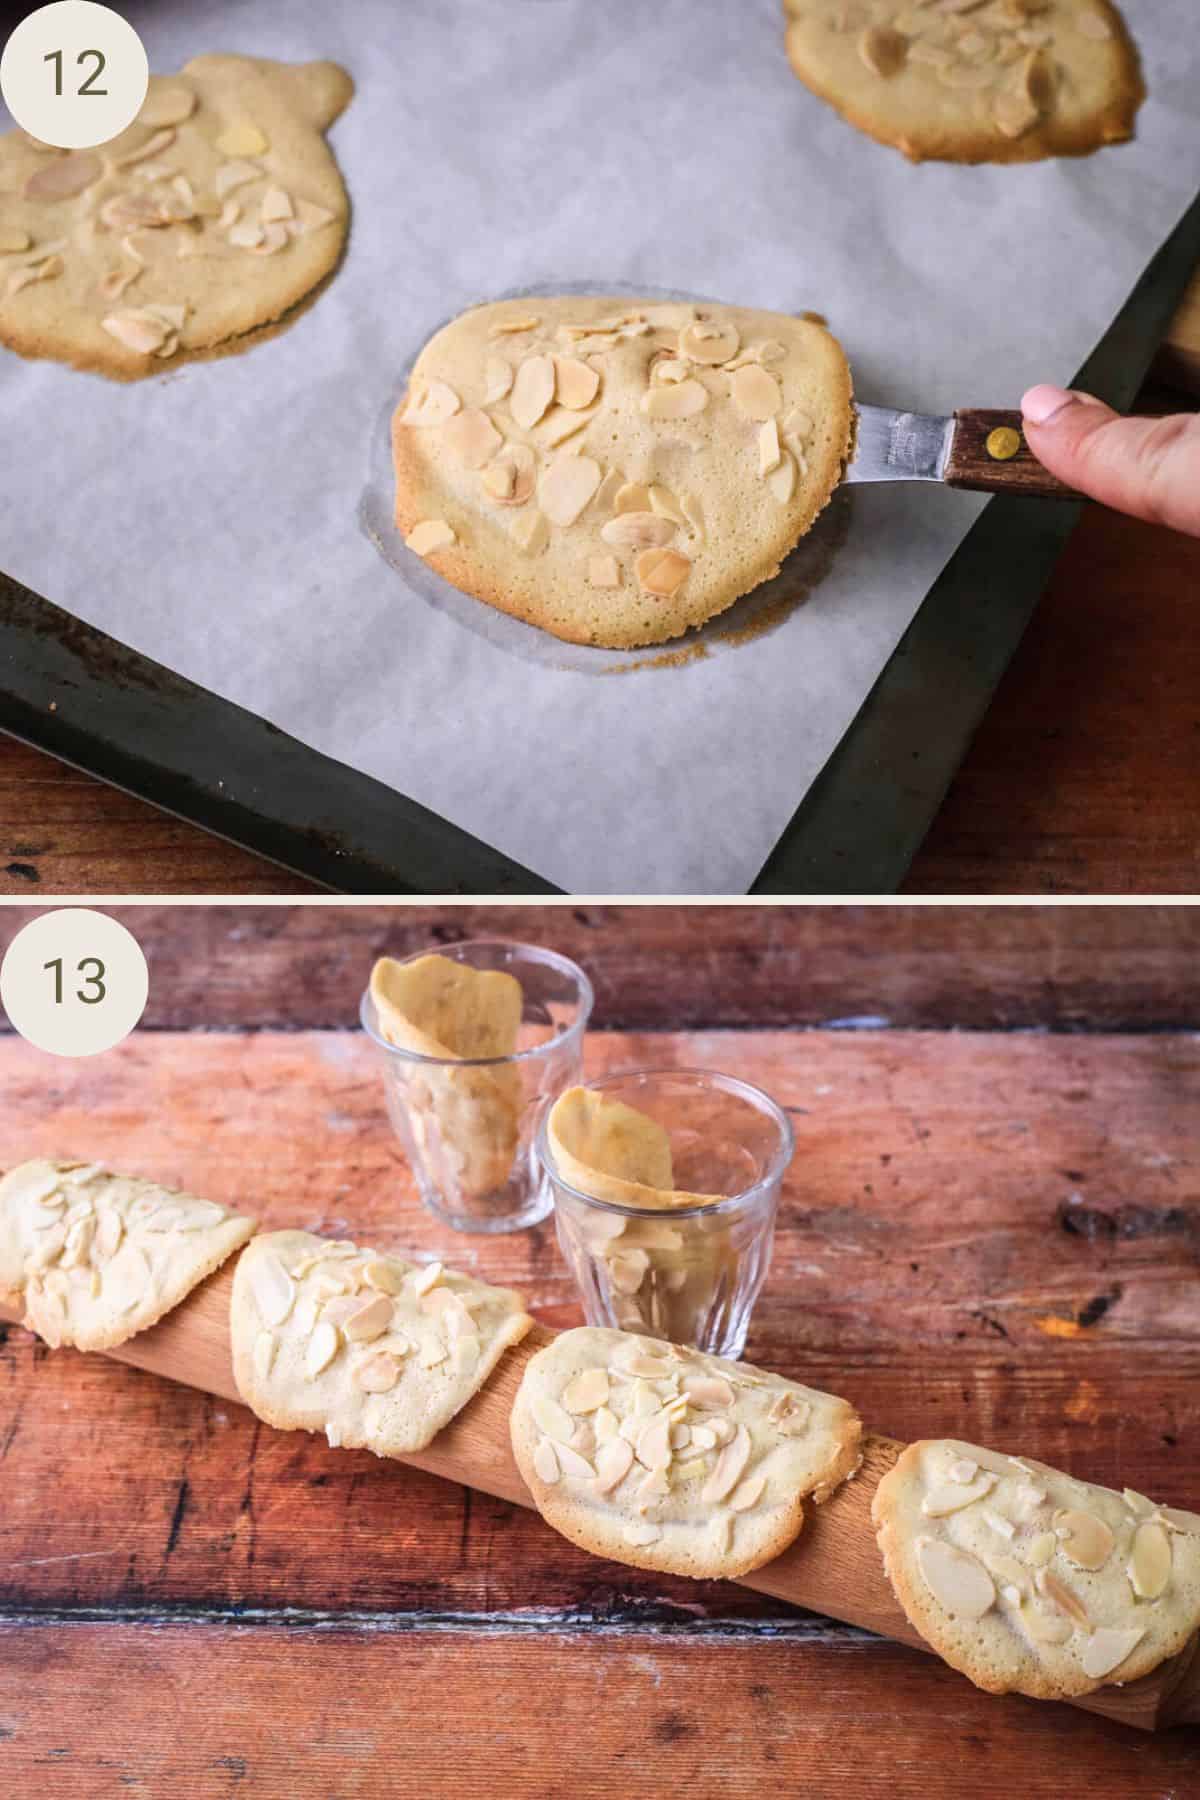
Remove from oven and whilst still hot, carefully life and shape over a rolling pin or inside small glasses. Allow to set for at least 15 minutes then you can remove off the rolling pin to finish cooling.
Tips & Troubleshooting
Do not whisk this batter, just lightly stir with a spoon or spatula as we don’t want the air added to the batter so they stay thin and crisp without puffing up in the oven.
Use the back of a teaspoon and swirl the batter round in a circle as thin as you can to create light delicate biscuits.
The thicker the biscuits the more chewy they bake up which isn’t really what we’re aiming for.
These almond tuile bake up crisp with a slight chew in the centre. If you want them to be more crispy then just leave for an 1-2 minutes in the oven.
Make sure to not delay and remove and shape the biscuits directly after baking whilst they are still warm and pliable. They take just a couple of minutes to set.
Use a small spatula to slide gently between the biscuit and the baking parchment then lift up and shape over a rolling pin.
They do stick a little to the baking parchment so you can use a silicone sheet if you have one (I don’t).
You can shape the biscuits in small drinking glasses if they can’t all fit on the same rolling pin.
You don’t need to curve these biscuits, it’s really for visual presentation. You can keep them flat. However, it’s best to remove them from the baking parchment directly after baking but you can just transfer them to a wire rack for cooling.
FAQs
Spread the tuile batter as thin as you can, about 1-2mm. The thicker the batter the more chewy and you are aiming for them to be crisp.
They are probably a little too thick and just a tad underbaked. Spread the batter out more next time and increase the baking time by 1 minute.
They won’t tear if you use a silicone mat I’m told. However, I don’t have one and I achieve success by very carefully holding the baking parchment with one hand so it doesn’t move and sliding a mini spatula underneath the biscuit swiping it back and forth underneath to gently loosen them.
They shouldn’t be stored in a plastic airtight container as there’s too much moisture there. I often keep them in a paper bag with a clean paper towel to absorb any excess moisture. However, you can re-crisp in a hot oven for a minute or two.
This recipe can be nut free simply by omitting the flaked almonds. The rest of the recipe remains the same.
You don’t need to shape the biscuits at all, they are just as delicious if you leave them flat. The shaping just adds visual interest.

What Desserts To Serve Gluten-Free Almond Tuiles with?
- Ice Cream
- Chocolate Mousse
- Mango Lime Pudding
- Chocolate Pots
- Gooseberry Fool
- Lemon Posset
- Panna Cotta
- Crème Brûlée
- Fruit Salad
Flavour Variations
Citrus zest. You can add the zest of a lemon or orange to the batter for a light lift of flavour.
Spices. Try adding a ¼ teaspoon of crushed cardamom seeds, mixed spice, ginger or ground cinnamon.
Chocolate dip. You could also dip your finished almond tuile in a little melted chocolate. You don’t need to temper it but that always looks more elegant and glossy.
Nut alternatives. You can swapped the flaked almonds for chopped pistachios or hazelnuts.
More Easy Gluten-Free Biscuits You’ll Love
This Gluten-Free Shortbread recipe is the melt in mouth buttery biscuit with a touch of crunch that you know and love.
These Coconut Matcha Macaroons have a crisp exterior and chewy coconutty insides, spiked with a hint of grassy matcha and dipped in dark chocolate.
Ladyfingers are not just an ingredient for your favourite trifle or tiramisu recipe, they are gorgeous little biscuits which are delicious in their own right.
Enter your email below to get this recipe sent to your inbox plus get new recipes, baking tips, and updates.
Gluten-Free Almond Tuile
Ingredients
- 60 g egg whites
- 75 g caster sugar
- 1 teaspoon vanilla extract
- 60 g homemade gluten-free flour blend - FTL Blend
- ¼ teaspoon salt
- 30 g unsalted butter - melted
- 45 g flaked almonds
Instructions
- Pre-heat the oven to 190°C / 170°C fan assisted / gas mark 5 / 375°F.
- Line a large baking sheet with baking parchment.
- Stir the egg whites, sugar, vanilla together in a large bowl.
- Fold in half the flour with the salt, then stir in the melted butter.
- Fold in the second half of the flour then add a third of the flaked almonds so they are coated with the biscuit batter.
- Rest the batter for 10 minutes.
- Spoon one heaped tablespoon of batter onto the baking parchment and using the back of the spoon, swirl the batter into a thin circle so they reach about 9cm each. You are aiming for between 4-6 biscuits per batch. This will give you time to shape every biscuit after they are finished in the oven.
- Repeat to create more circles of batter, evenly spaced apart by about 5cm. Sprinkle the rest of the flaked almonds over the top of each biscuit.
- Bake for 6-8 minutes.
- Remove from oven and whilst still hot, carefully life and shape over a rolling pin. Allow to set for at least 15 minutes then you can remove off the rolling pin to finish cooling.
