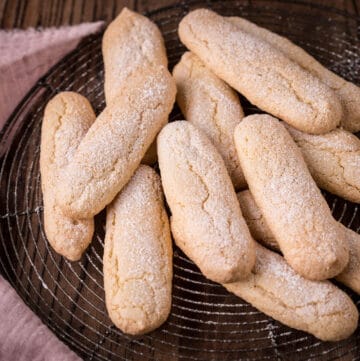
How to Make Gluten-Free Ladyfingers (Savoiardi)
This post contains affiliate links. Please read my disclosures.

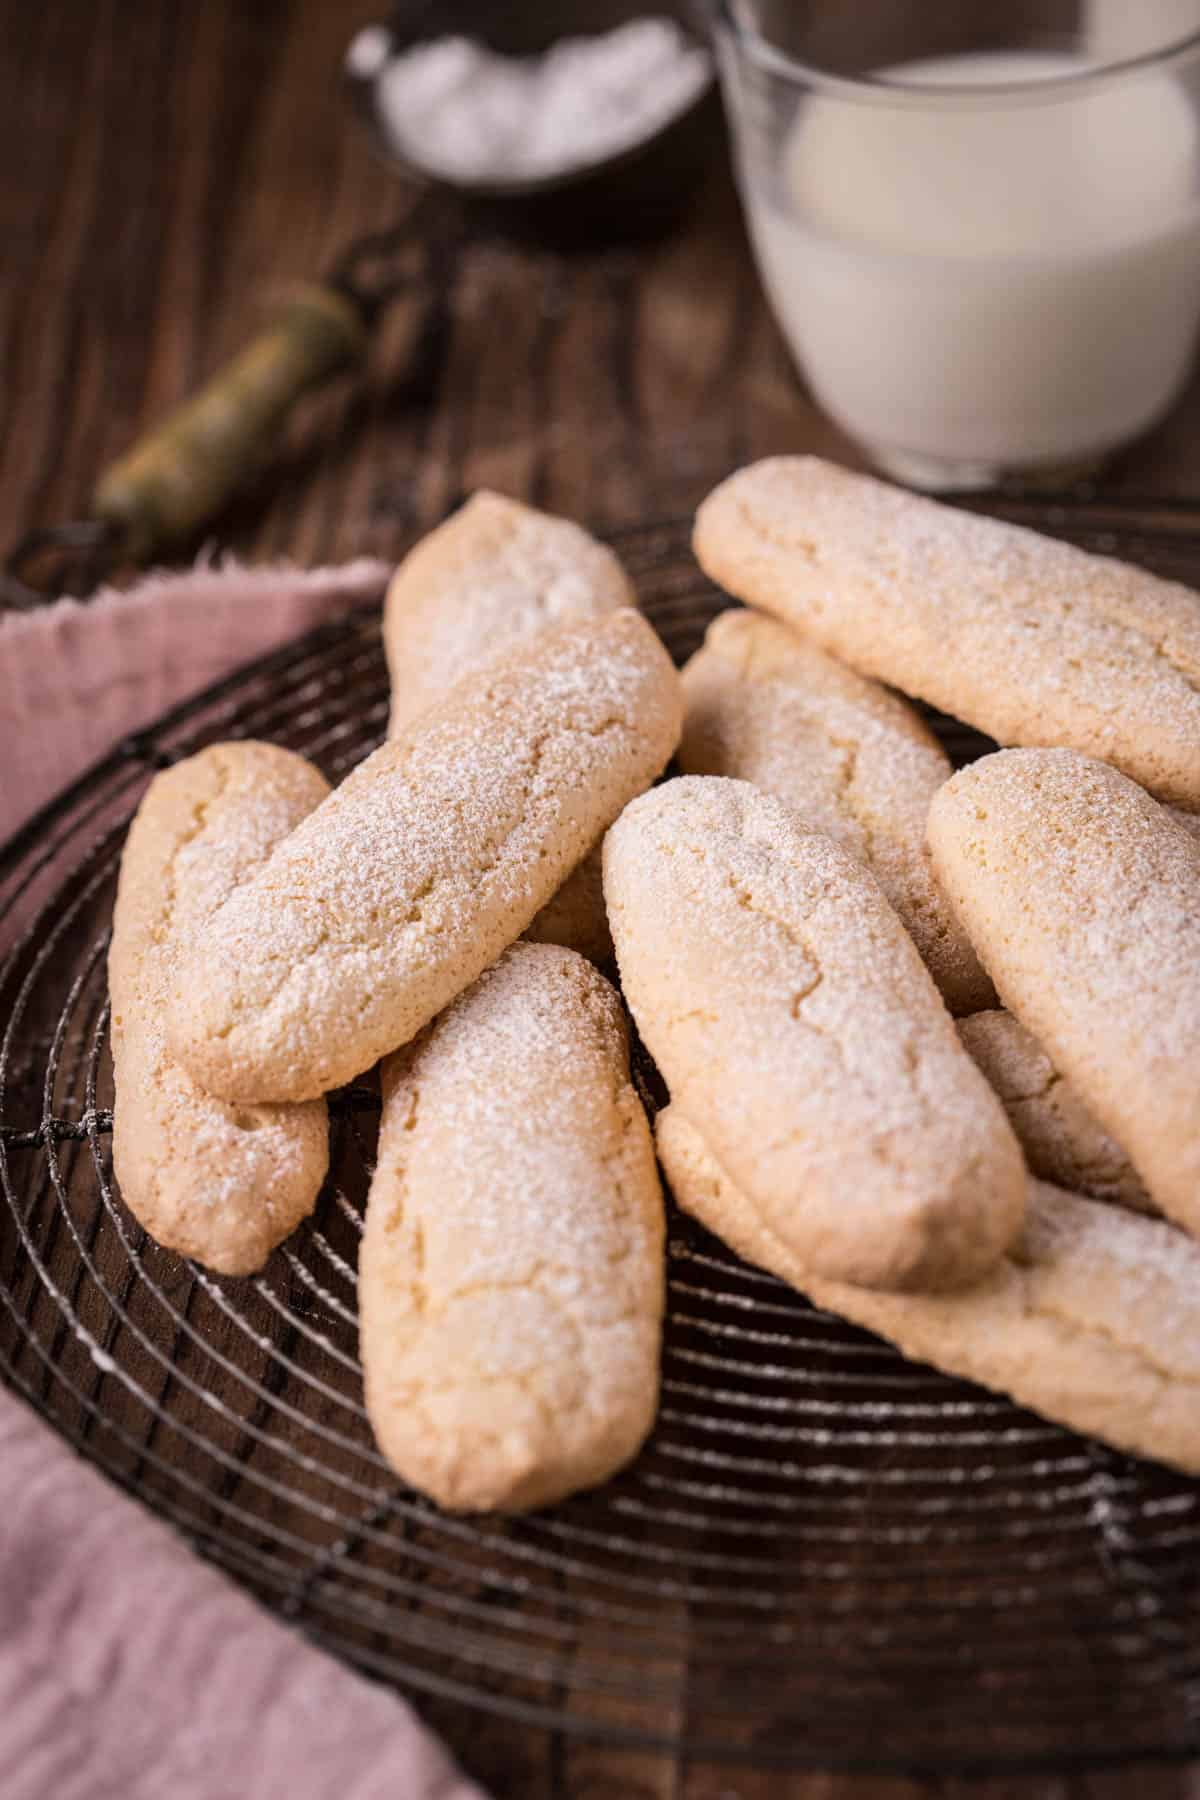
Ladyfingers are not just an ingredient for your favourite trifle or tiramisu recipe, they are gorgeous little biscuits which are delicious in their own right. In this recipe you’ll learn how to make perfect Gluten-Free Ladyfingers (also known as savoiardi biscuits) that are delicate and light using just 2 easy to source gluten-free flours and no xanthan gum.
If there were some sort of certification on gluten-free ladyfingers then believe me I would have earned my stripes. I got totally obsessed by perfecting this recipe and creating a version that is quick, simple, tasty with the exact right flavour, texture, size. So that you can enjoy using these sweet little fingers in a longed for Gluten-Free Tiramisu, Trifle or just dipped in a morning cup of espresso.
You will be relieved that this gluten-free version is just as easy to bake up as the original recipe, so I'll have you making your own gluten-free ladyfingers without any fuss or hassle if you follow all my tips and tricks from the right flours to use, to how to fold the ingredients together and how to pipe them into perfectly straight lines like a pro.
There is no xanthan gum here and I tested this recipe with many different combinations of flours including all-purpose gluten-free flours. I found that this final flour blend of chickpea flour (gram flour) and white rice flour gives the perfect delicate light and crisp result with a perfect flavour.

Watch the Video Below
Sometimes it helps to see a visual of what I'm talking about. So watch the video to see what it looks like to make your Gluten-Free Ladyfingers recipe.
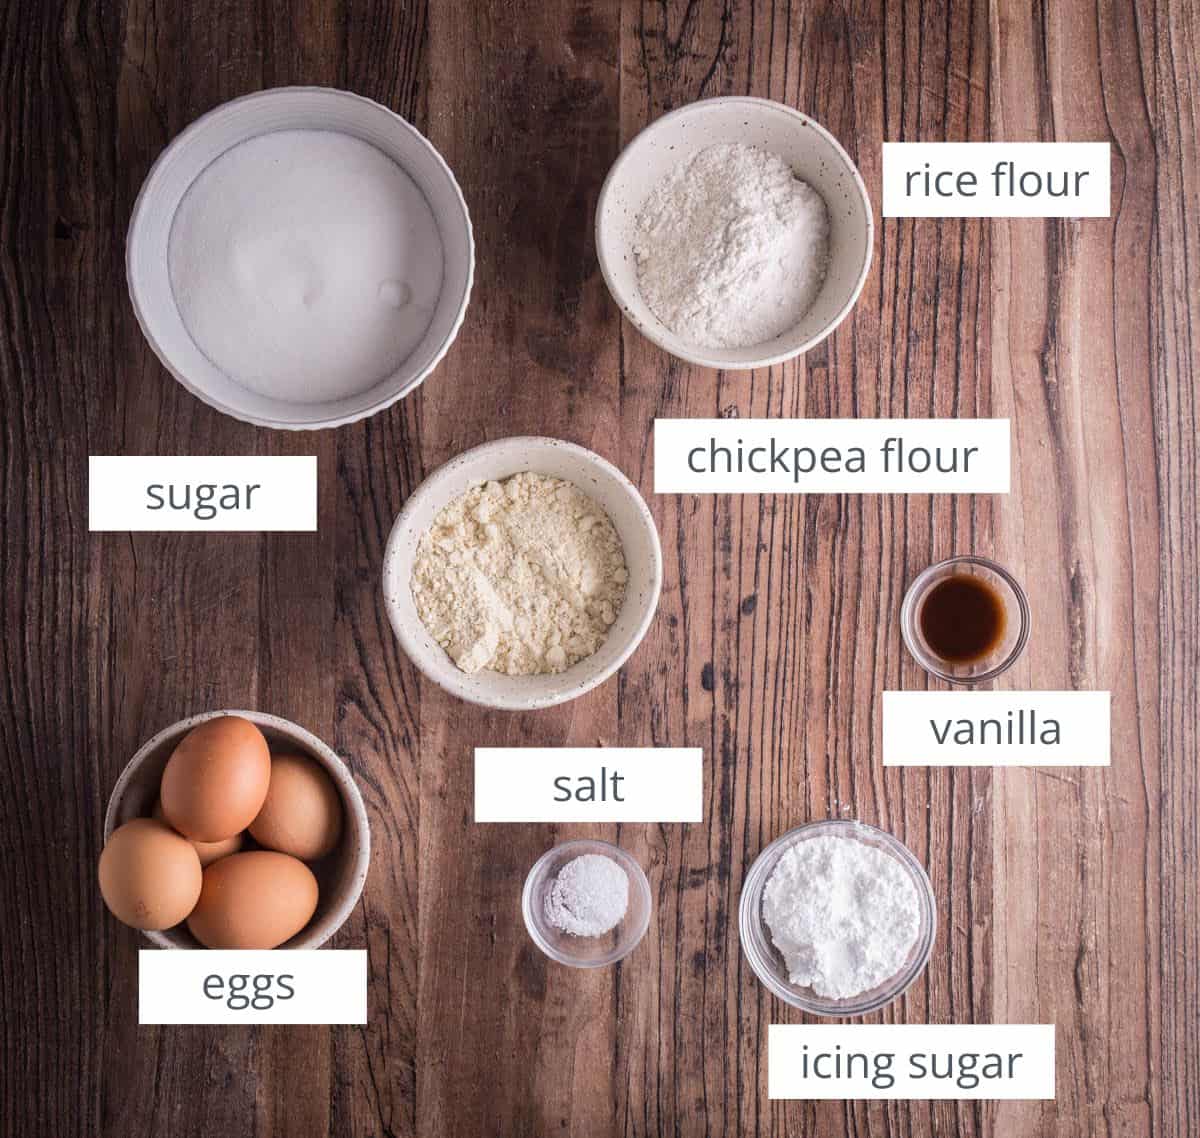
Ingredients and Notes
For this recipe I do not recommend substituting the flours for any other flour of gluten-free flour blend as the end results will be different.
Chickpea flour. Also known as gram flour or besan, is a gluten-free flour made from ground chickpeas. This flour is packed with protein so is excellent in baking. It helps the biscuits keep a stable bake and retain a lightness without crumbling.
Rice flour. A light delicate flour which will crisp up the ladyfingers and has a neutral flavour so the biscuit tastes authentic.
Eggs. This recipe uses medium size fresh eggs, about 60g each with shell (50g each without shell).
Caster sugar. It’s a fine white baking sugar. If you can only get hold of granulated sugar you can grind more finely in the food processor before you use it in the recipe.
Vanilla extract. Use a good quality extract, I like Nielsen Massey.
Salt. I like to use kosher salt in my baking as it has a round gentle flavour. Using salt in your baked goods lifts and sharpens all the other flavours.
Icing sugar (confectioners' sugar / powdered sugar). This is sprinkled over the biscuits before baking. It’s important as this protection of sugar in the oven helps the biscuits to retain their height so they don’t fall and become flat. If you are just serving the final biscuits by themselves then you might like to finish the baked biscuits with a final flourish of icing sugar so they look extra pretty.
How to Make Gluten-Free Ladyfingers
For full recipe instructions go to the recipe card at the end of this post.
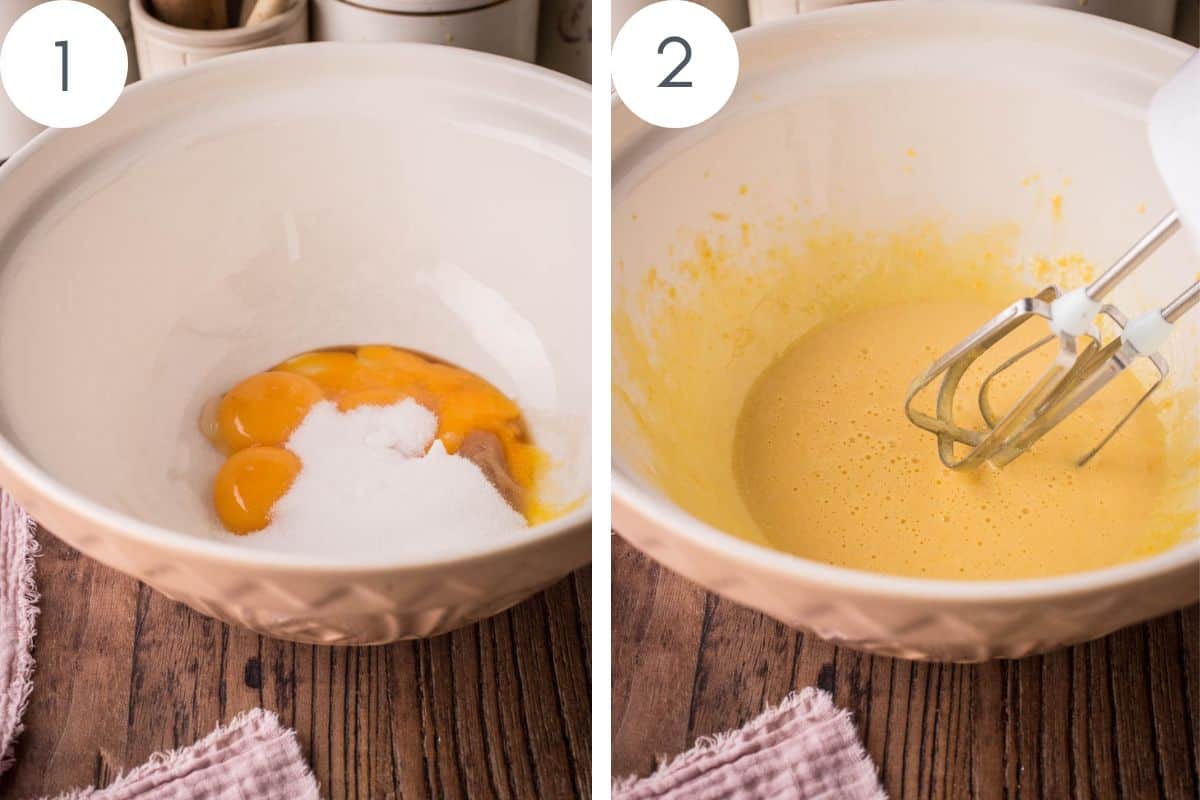
Break the eggs, dropping the whites into one large bowl and the yolks into a separate bowl.
Beat egg yolks with 35g sugar and vanilla using a hand mixer until thick and pale.
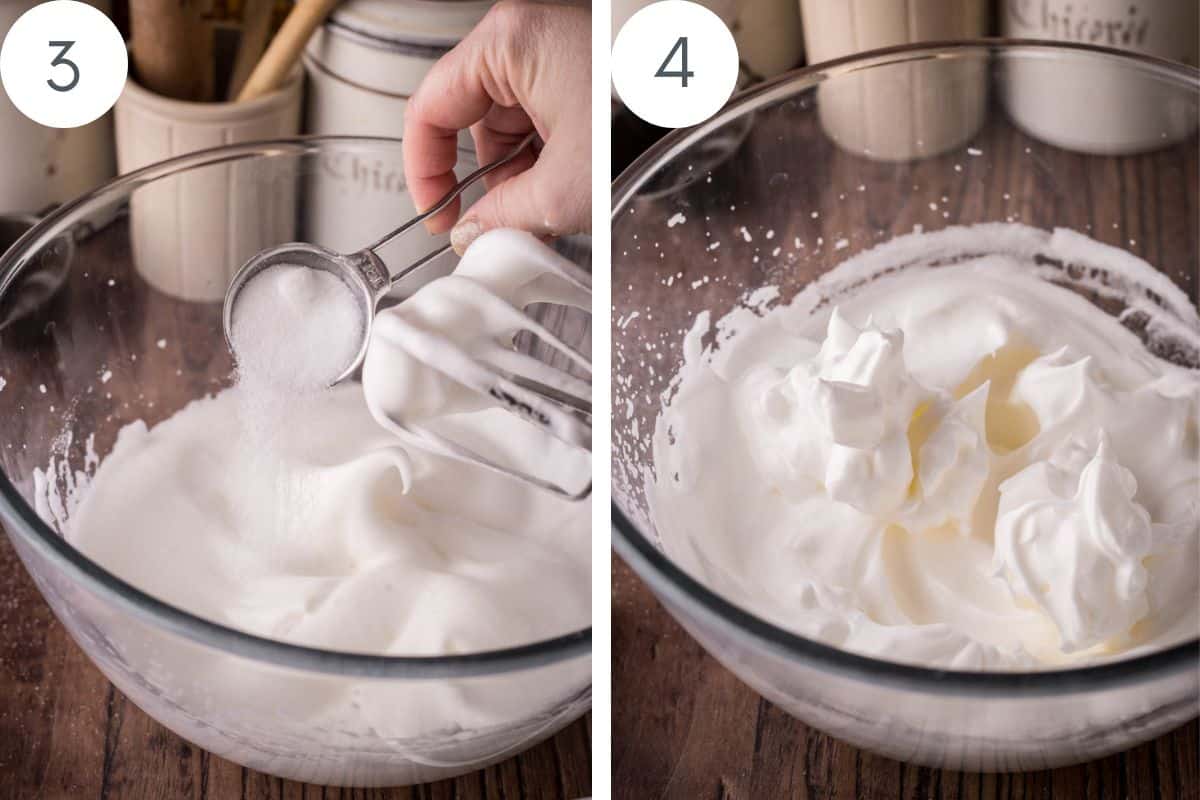
Beat egg whites until soft peaks form, gradually adding 40g sugar until ultra stiff peaks form.
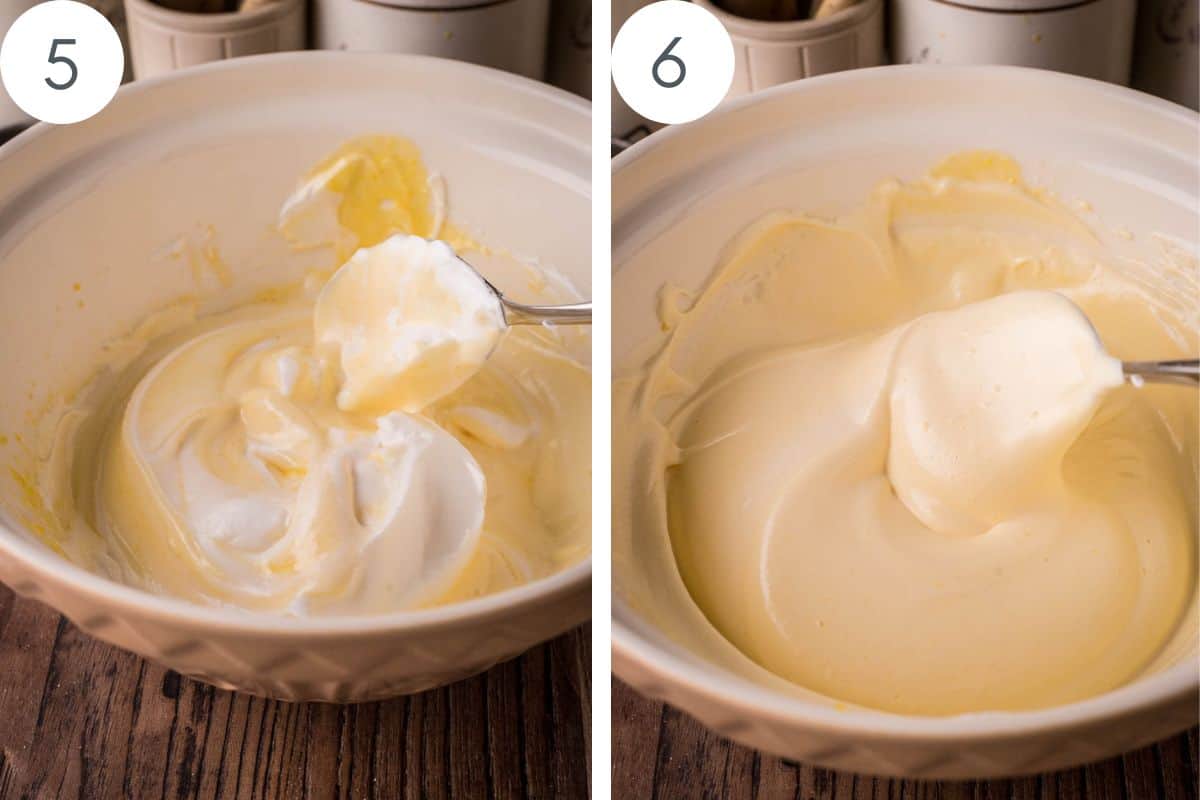
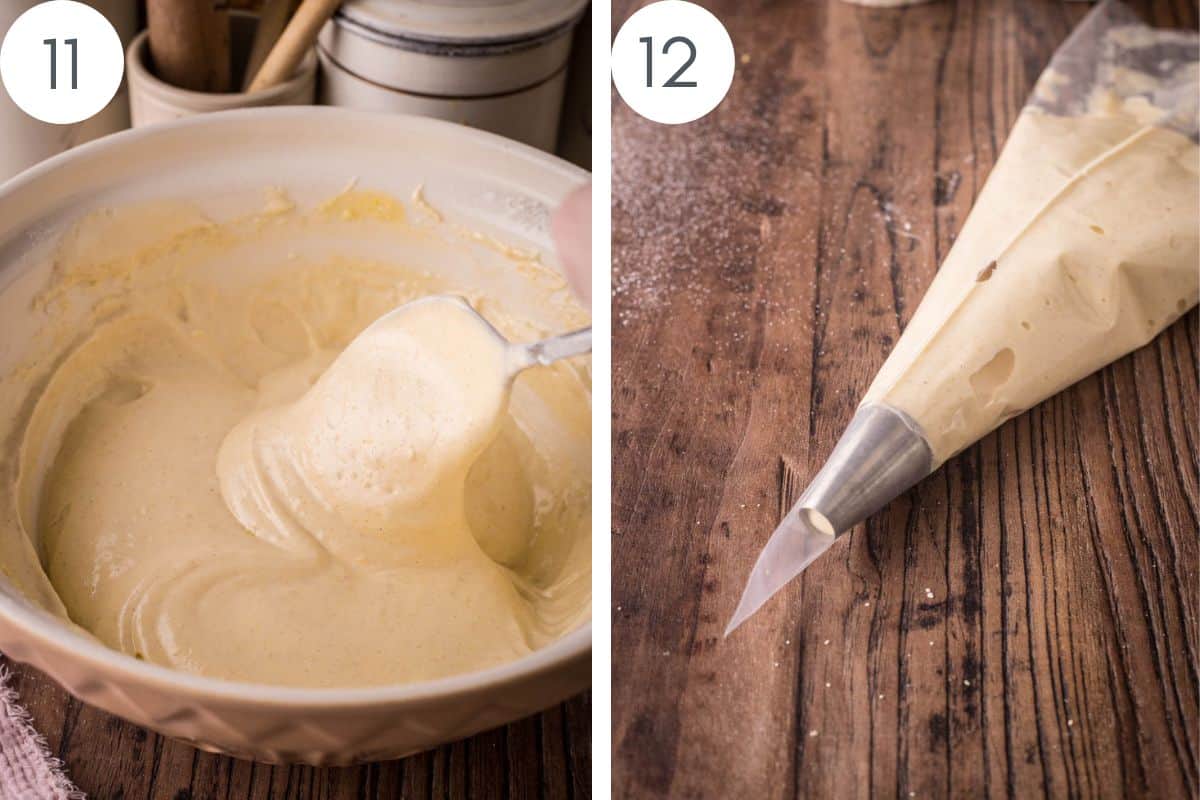
Fold egg yolks into whites with a metal spoon, being careful not to deflate much air.
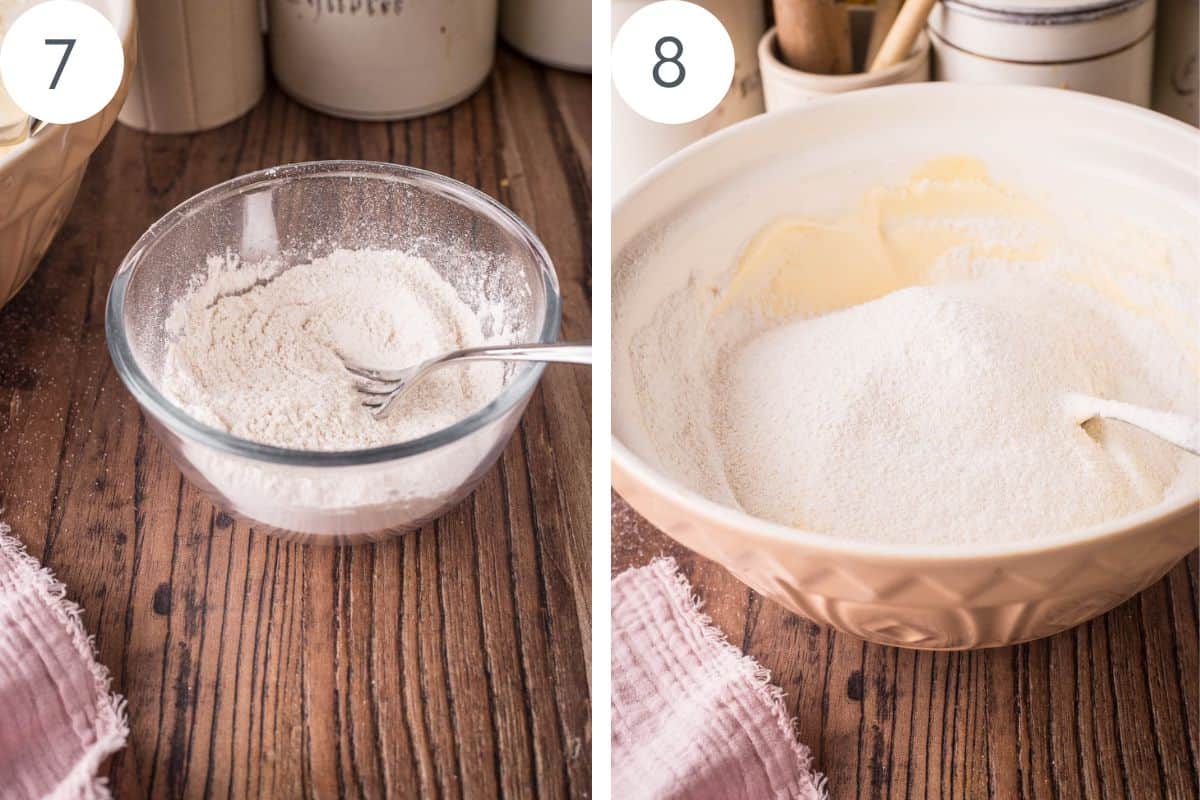
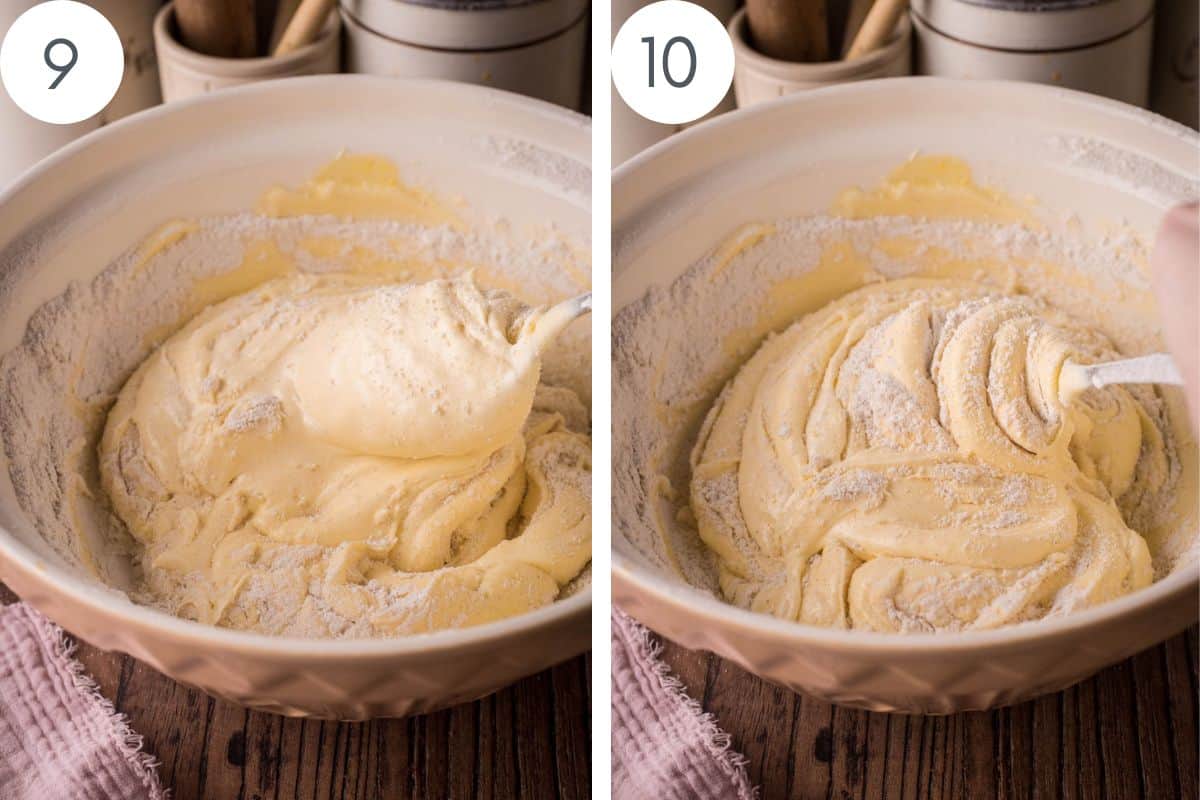
Whisk the gluten-free flours together then sift over the top of the egg mixture and continue folding in until just about combined.
Put mixture in a piping bag (pastry bag) with a large round nozzle,
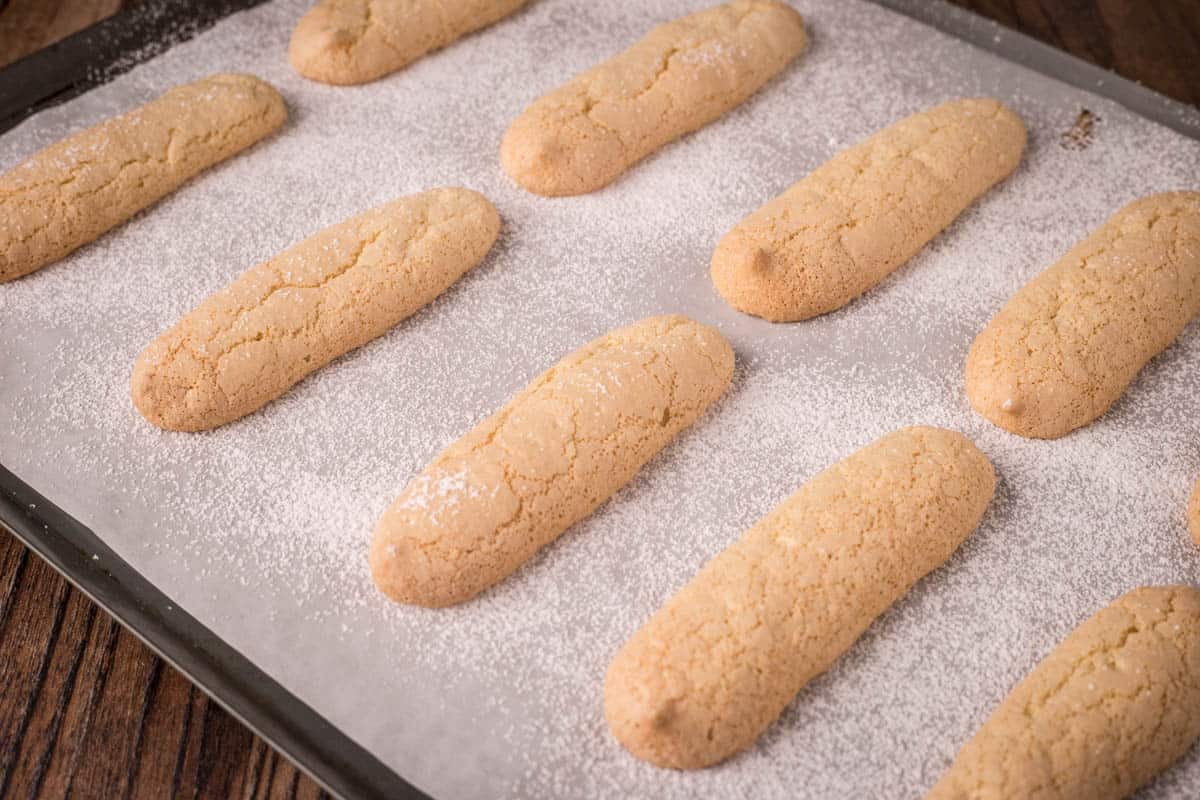
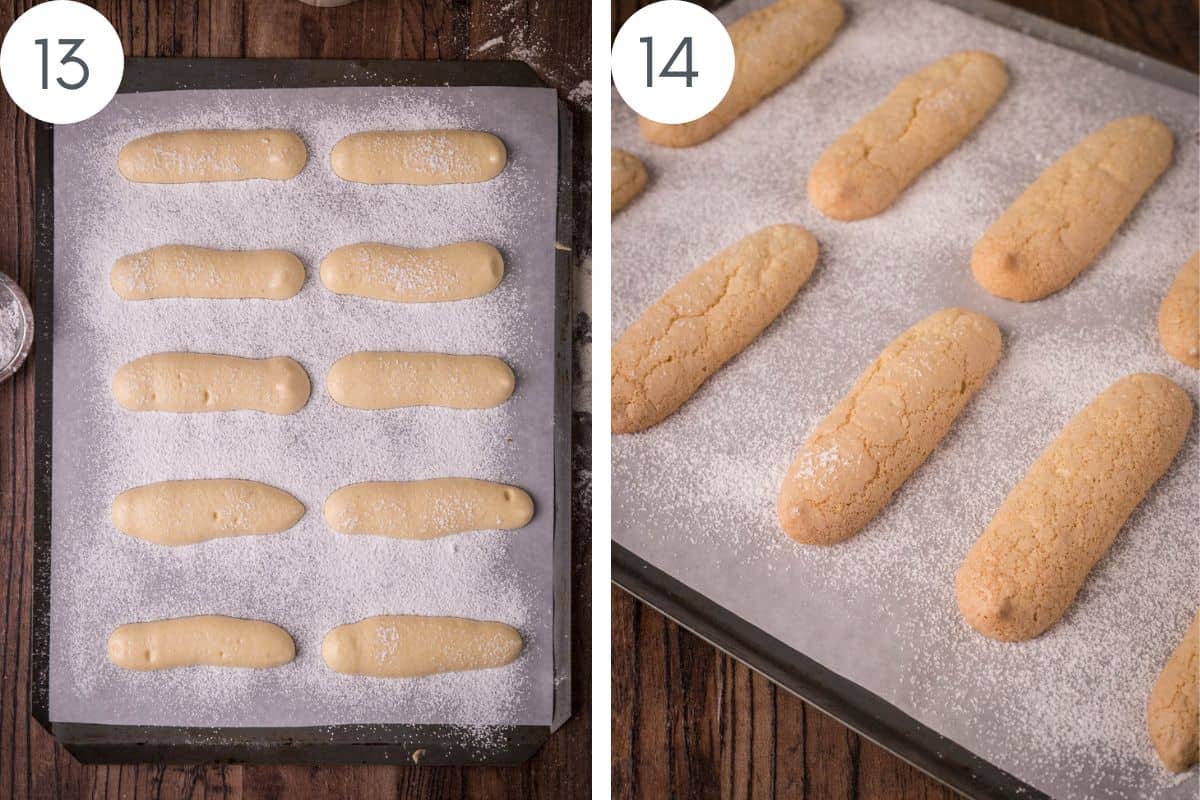
Pipe 10cm lines onto each prepared baking sheet, spaced apart. Sift icing sugar over the top.
Bake in an oven at 180°C /160°C fan assisted / gas mark 4 / 350°F for 15 minutes. (18 minutes for really crisp ladyfingers suitable for Tiramisu)
Cool for 5 minutes on the tray, then transfer the baked ladyfingers onto a wire rack with parchment paper. Allow biscuits to cool completely before removing with a palette knife.
Expert Tips
Assemble everything before you begin mixing the recipe, you don’t want the batter to be hanging around whilst you are preparing the baking sheets for example.
Draw 10cm straight lines on the baking parchment so you have a template for piping the biscuits onto. Make sure to turn the baking parchment over so you are piping onto the reverse side.
Make sure to clean the beaters in between the egg yolks and egg whites. Clean beaters and clean bowl.
Adding the sugar in a little at a time helps to avoid deflating the egg whites.
Use a rubber spatula to scrape the egg yolks into the large bowl of whipped egg whites but then use a metal spoon to actually mix them together.
To incorporate the yolk mixture into the whipped egg whites it is recommended that you fold them together. This process means you hold a large metal spoon in one hand and the bowl with the egg whites and yolks in the other, gently scooping down through the centre of the mixture. Lift the spoon, bringing the egg whites from the bottom up and over the egg yolks to incorporate them. This helps to trap the air for a light texture. Rotate the bowl as you fold to ensure even mixing, repeating the motion until the egg whites are almost evenly distributed.
Use a large round nozzle (1A) fitted to a piping bag. Slightly tuck the end of the piping bag inside the nozzle as a stopper so the batter doesn’t run straight out the nozzle when you fill the bag. Fit the piping bag into a tall glass so you can fill the bag more easily.
When piping, the piping bag should be just off the paper, at an angle, pipe out slowly. It will take practice to get a straight line. Make sure to get the ladyfingers straight into the oven as soon as they are piped.
Ideally you should bake all your ladyfingers immediately so that's great if you have 2 ovens and 4 baking trays. I recommend only baking 2 trays of ladyfingers in the same oven. Place one baking tray about ⅓ of the way up the oven and the second tray ⅔ up so there is lots of space in between the two trays to help with even baking.
If you only have 2 baking trays of the right size (like me) then you can pipe and bake the ladyfingers in batches, but don't keep the batter hanging around too long otherwise it will start to deflate.
If you like crisper ladyfingers then 18 minutes should be just right. If you are making them for Tiramisu then you need them to be crisp rather than soft and chewy.

FAQs
Ladyfingers are light, finger-shaped sponge cakes or cookies. They can be used in layered desserts like tiramisu, trifle or charlotte as the sponge layer which is there to soak up the flavours of the desserts.
If you don’t have a piping bag I recommend spooning the mixture into a ziplock bag and snipping a hole in the corner and using that as a piping bag.
It’s important as this protection of sugar in the oven helps the biscuits to retain their height so they don’t fall and become flat.
This could be for several reasons. It might be because you have under whisked the egg whites. Or you have over mixed the mixture when added to the egg yolks and flour or mixed it with a heavy hand so the air was pushed out. Or you might have left the finished batter to stand too long – they need to be mixed, piped and got into the oven as quick as possible. Or you might not have baked your cookies for long enough or maybe forgotten to dust over the icing sugar pre-baking.
You can make them a day or two in advance and store in an airtight container. Do note though that the ladyfingers are at their best on the day they are baked then after that they tend to soften. If you prefer the crisper biscuit (or if you are making your Tiramisu the next day) then place in a pre-heated oven for a couple of minutes to crisp back up.
To freeze, place them in a single layer in the freezer for 8 hours, then decant and store in a large ziploc bag or airtight container. They will be good in the freezer for up to 3 months. To thaw, place in a single layer and defrost at room temperature. You can place back in the oven for a couple of minutes to crisp back up.
These Lady Fingers are perfect just as they are, dipped in a cup of tea, hot chocolate or cup of coffee. However, they work excellently as the cookie layer in a Classic Homemade Tiramisu or even a Strawberry Tiramisu. Or you can swap into your favourite Gluten-Free Trifle recipe or Apple Charlotte

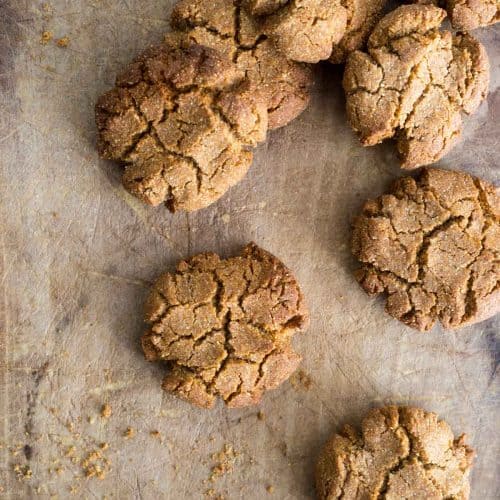
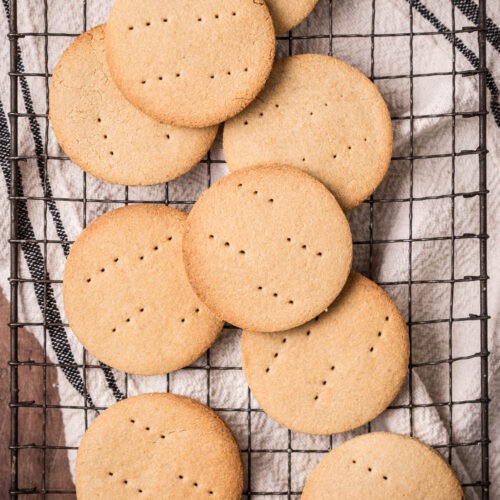
More Simple Gluten-Free Biscuit Recipes You'll Love

Enter your email below to get this recipe sent to your inbox plus get new recipes, baking tips, and updates.
How to Make Gluten-Free Ladyfingers (savoiardi)
Ingredients
- 4 eggs - medium
- 150 g caster sugar
- ½ teaspoon vanilla extract
- 60 g chickpea flour
- 60 g rice flour
- ¼ teaspoon salt
- 1-2 tablespoons icing sugar
Instructions
- Pre-heat oven to 180°C / 160°C fan assisted / gas mark 4 / 350°F.
- Whisk the rice flour and chickpea flour together with the salt and set aside.
- Line large baking sheets with baking parchment.
- Separate the eggs and place the yolks and the whites into 2 separate large mixing bowls.
- Beat egg yolks with half (75g) of the sugar and the vanilla for a couple of minutes until thick and pale.
- Beat egg whites in a clean large bowl until they reach soft peaks then start adding the rest of the sugar (75g) 1 tablespoon at a time, still whisking until it forms ultra stiff peaks.
- Fold egg yolks into white mixture with a metal spoon, being careful not to deflate much air.
- Sift the flour blend over the top and continue folding in until just about combined.
- Put in piping bag fitted with a plain nozzle and pipe 10cm lines onto the prepared baking sheets, spaced apart. Sift the icing sugar over the top.
- Place the baking trays in the oven with plenty of space in between them and bake for 15 minutes. You can bake in batches but make sure to pipe the ladyfingers immediately before placing them in the oven.
- Allow to cool for 5 minutes on the tray. Then slide the baking parchment with the baked lady fingers onto a wire rack. Allow the biscuits to cool completely before removing from the parchment. Use a palette knife to slide gently underneath to lift it up.
Video
Notes
- If your ladyfingers are baking up a little flat it could be due to under-whisked egg whites, over-mixed batter, heavy-handed mixing, leaving batter to stand too long or omitting the pre-oven dusting of icing sugar.
- For perfectly sized ladyfingers draw 10cm lines on parchment paper as a piping template then turn parchment over to pipe onto the reverse side.
- Make sure to clean the beaters and bowl between egg yolks and whites.
- When whisking the egg whites add the sugar gradually to avoid deflating egg whites.
- Use a metal spoon to fold yolk mixture gently into whipped egg whites gently.
- Fit a piping bag with a large round nozzle (1A) and tuck the end inside as a stopper.
- Fit the piping bag into a tall glass for easier filling.
- Pipe at an angle just off the paper, practicing for a straight line.
- Place trays in the oven promptly after piping.
- Position trays with plenty of space between in the oven for even baking.

The person I want to bake these for cannot tolerate chickpeas.
Have you got any suggestions for an alternative? I do realise that sometimes there are no good options.
You can try using defatted almond flour (not regular almond flour) or soy flour as they have similar amounts of protein. However, the results are a little different and the ladyfingers came out a little flatter.