Gluten-Free Orange and Poppy Seed Cake
This post contains affiliate links. Please read my disclosures.

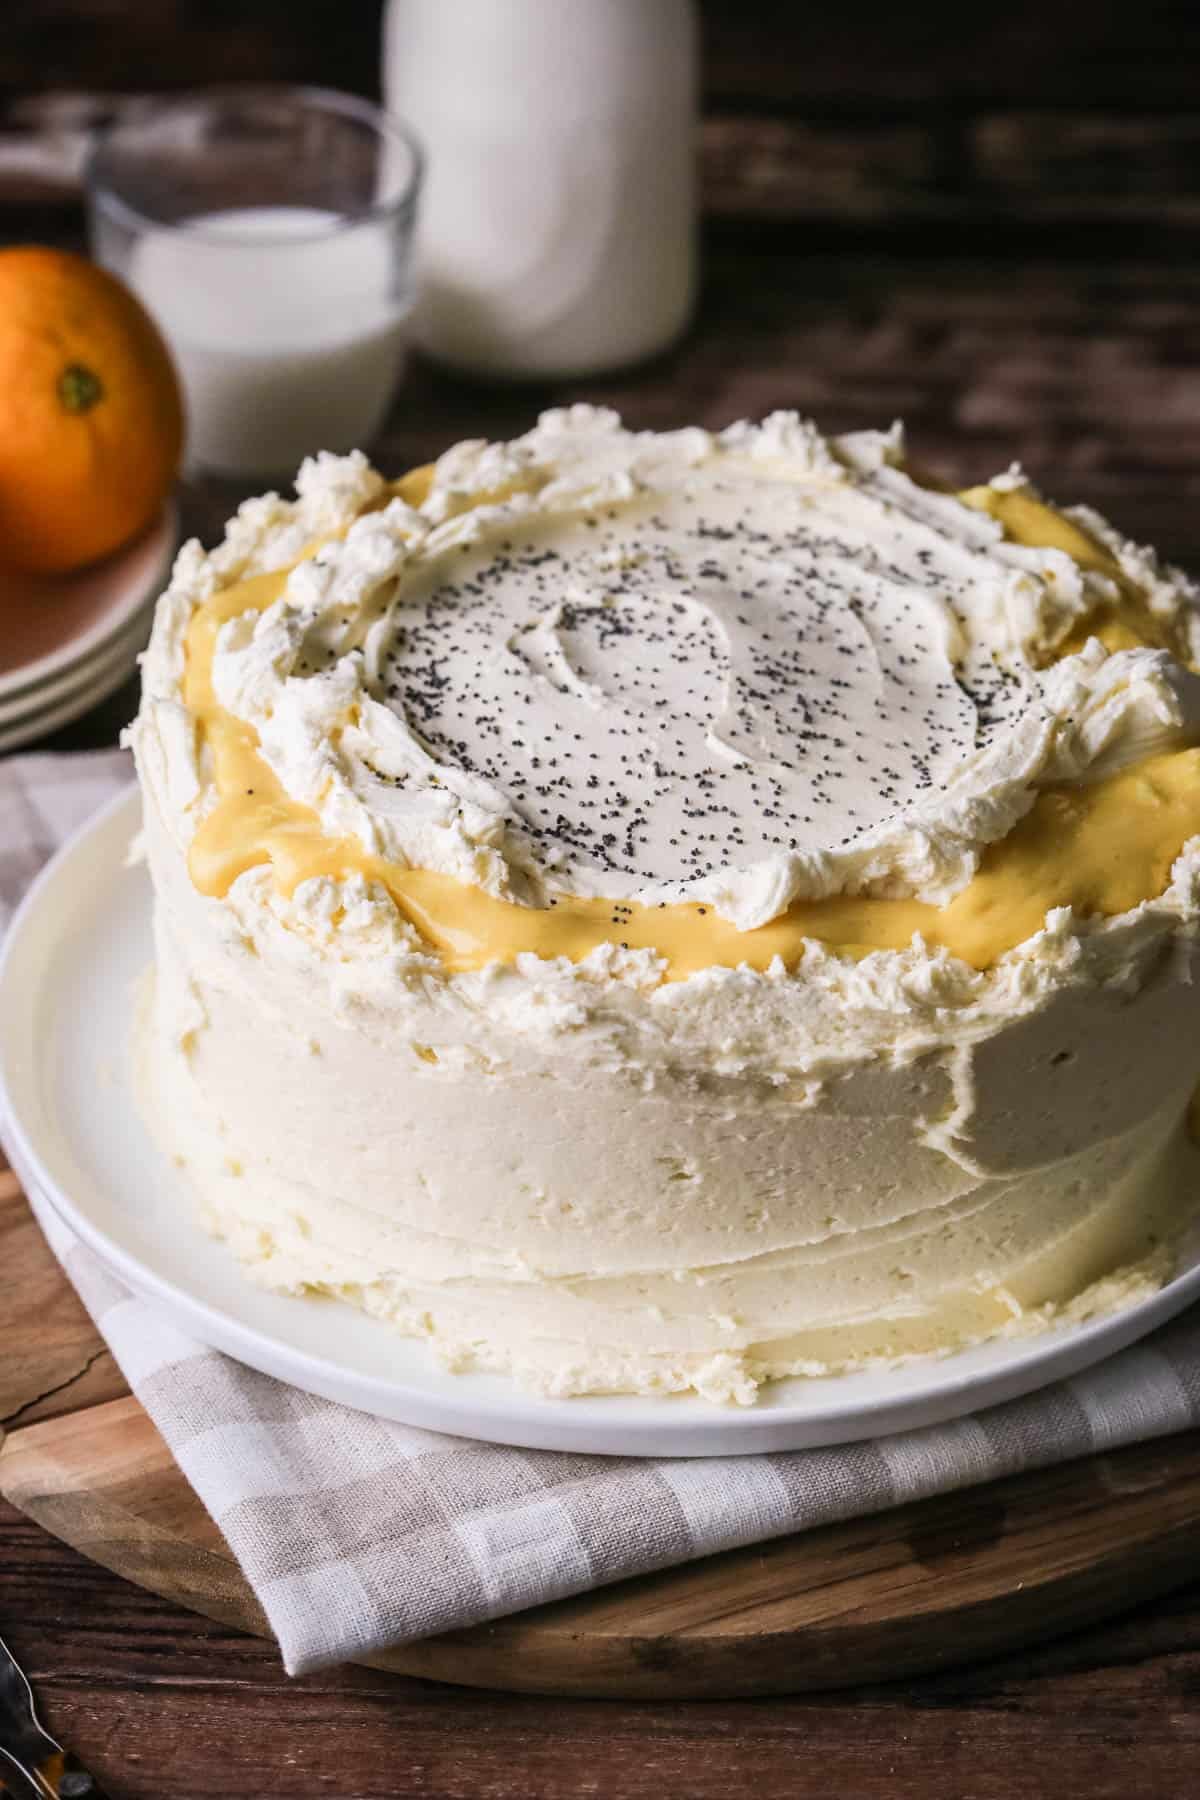
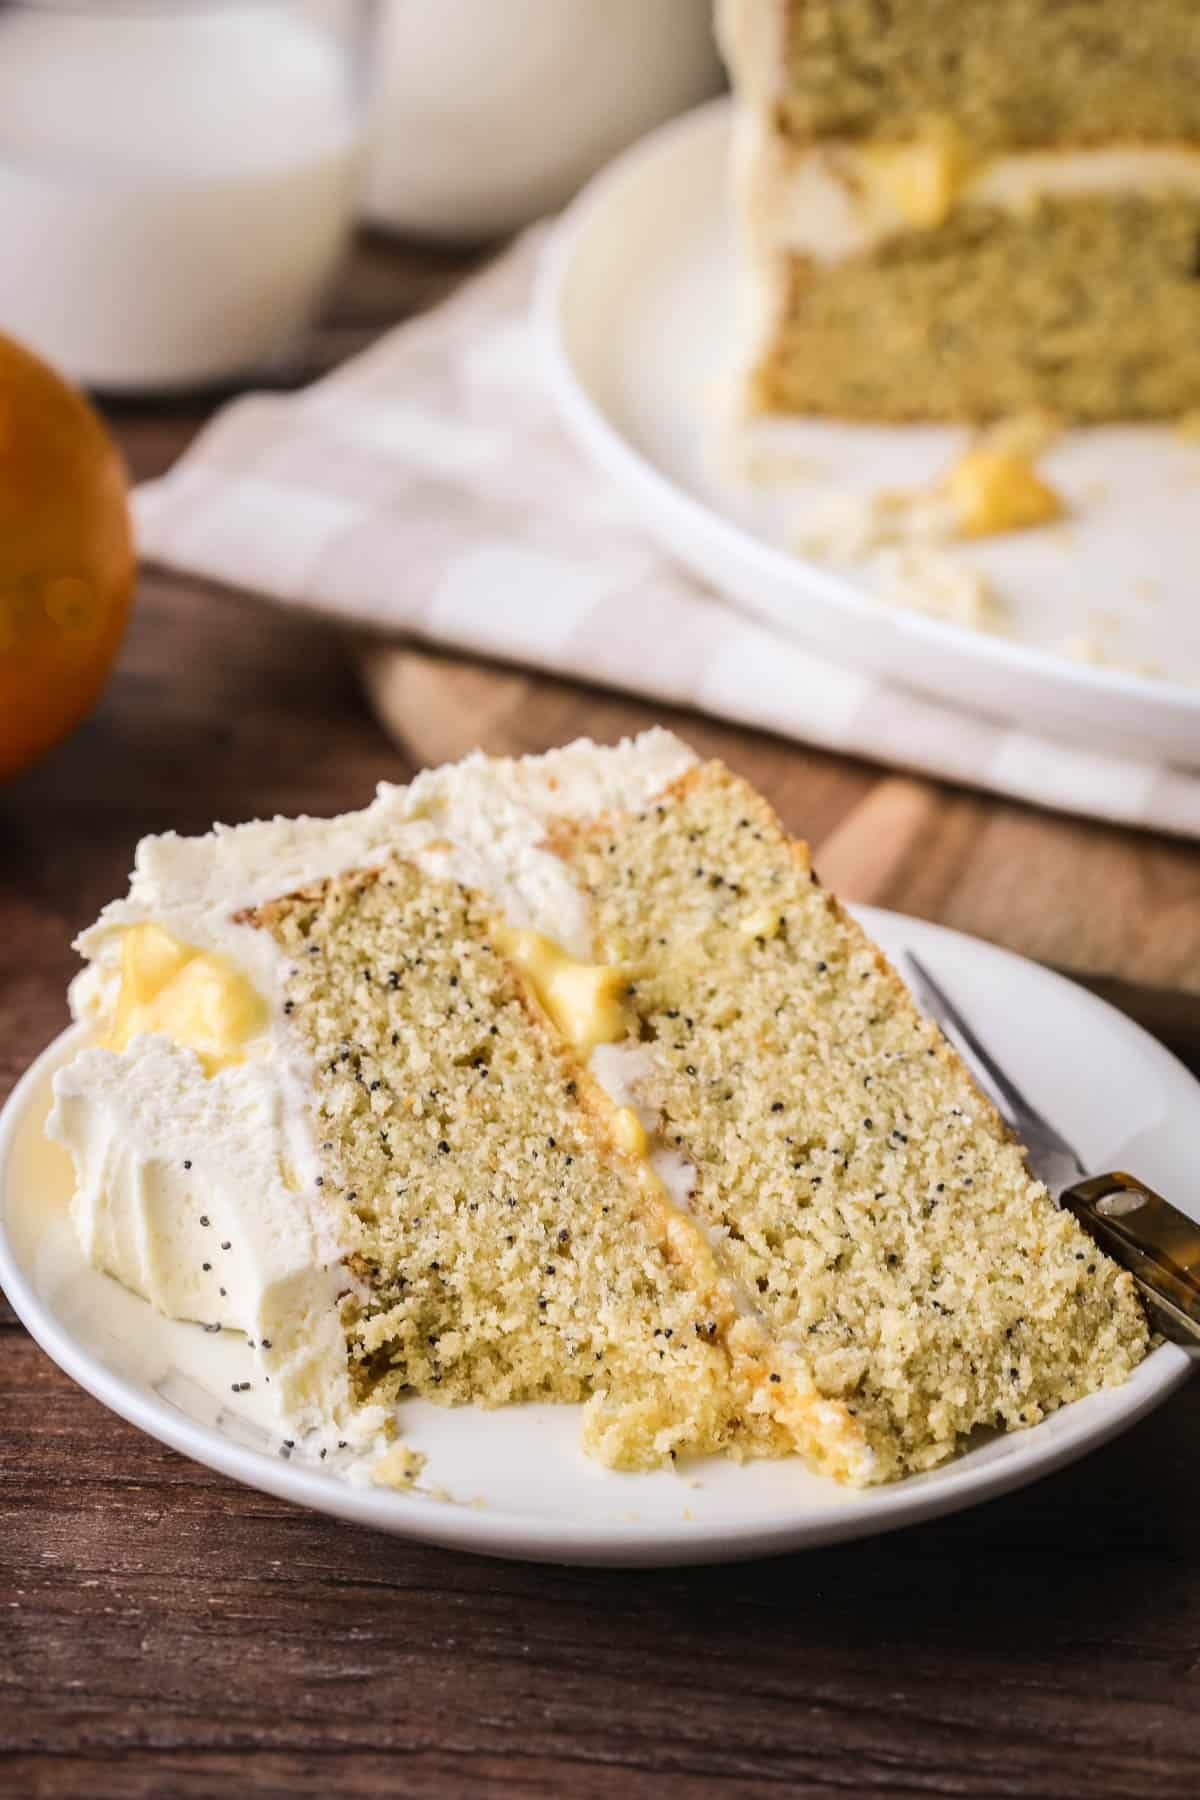
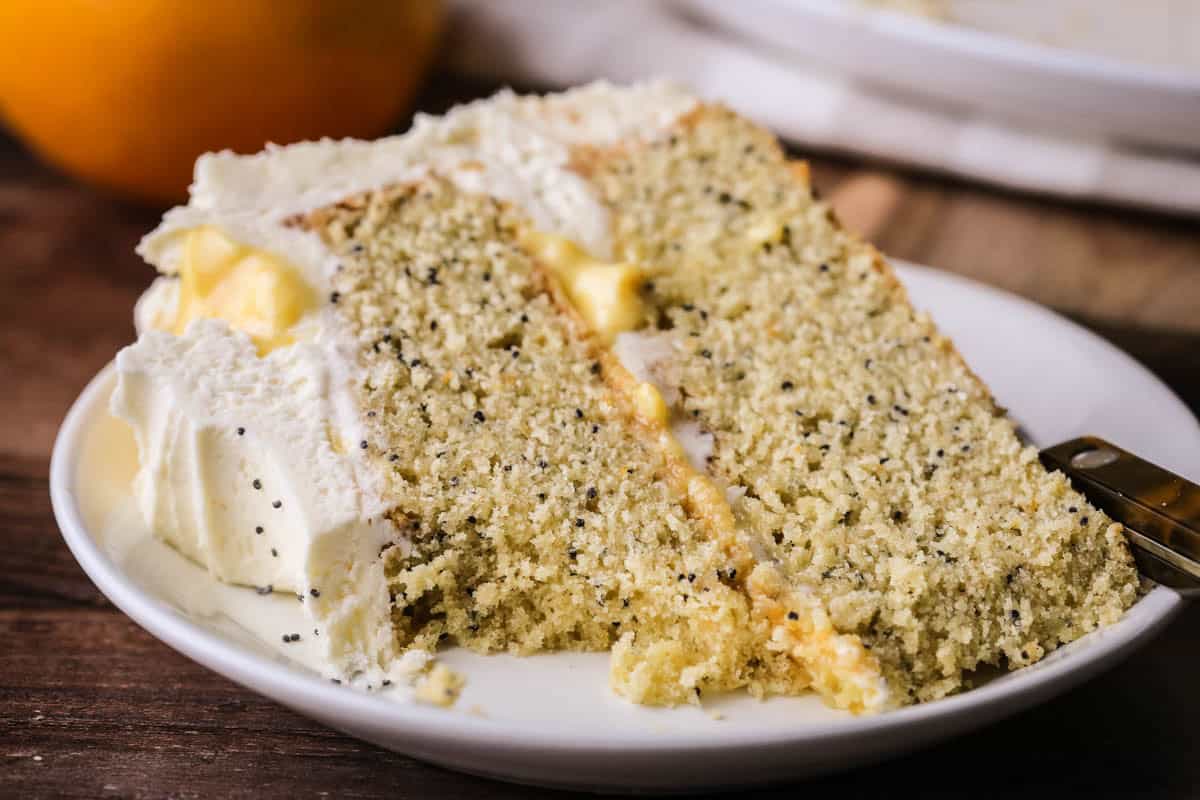
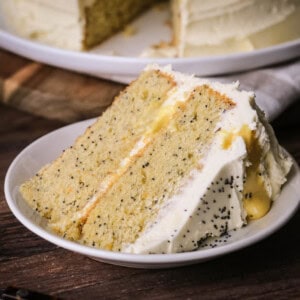
Light, fluffy and tender Gluten-Free Orange and Poppy Seed Cake filled with luscious orange curd and a simple buttercream icing.
I created this cake to show off my new homemade orange curd recipe but it has been an unexpected hit with the whole family. As you can imagine cake is not in short supply in our house as every week I’m testing recipes and my children can afford to be selective of which cakes they try and which they return to for a second slice.
I honestly thought this cake was one for the adults (basically as it’s not chocolate) and I was imagining this one would be particular favourite around Mothers Day. My mum concurred that she would be thrilled if I decided to make this again sometime around March.
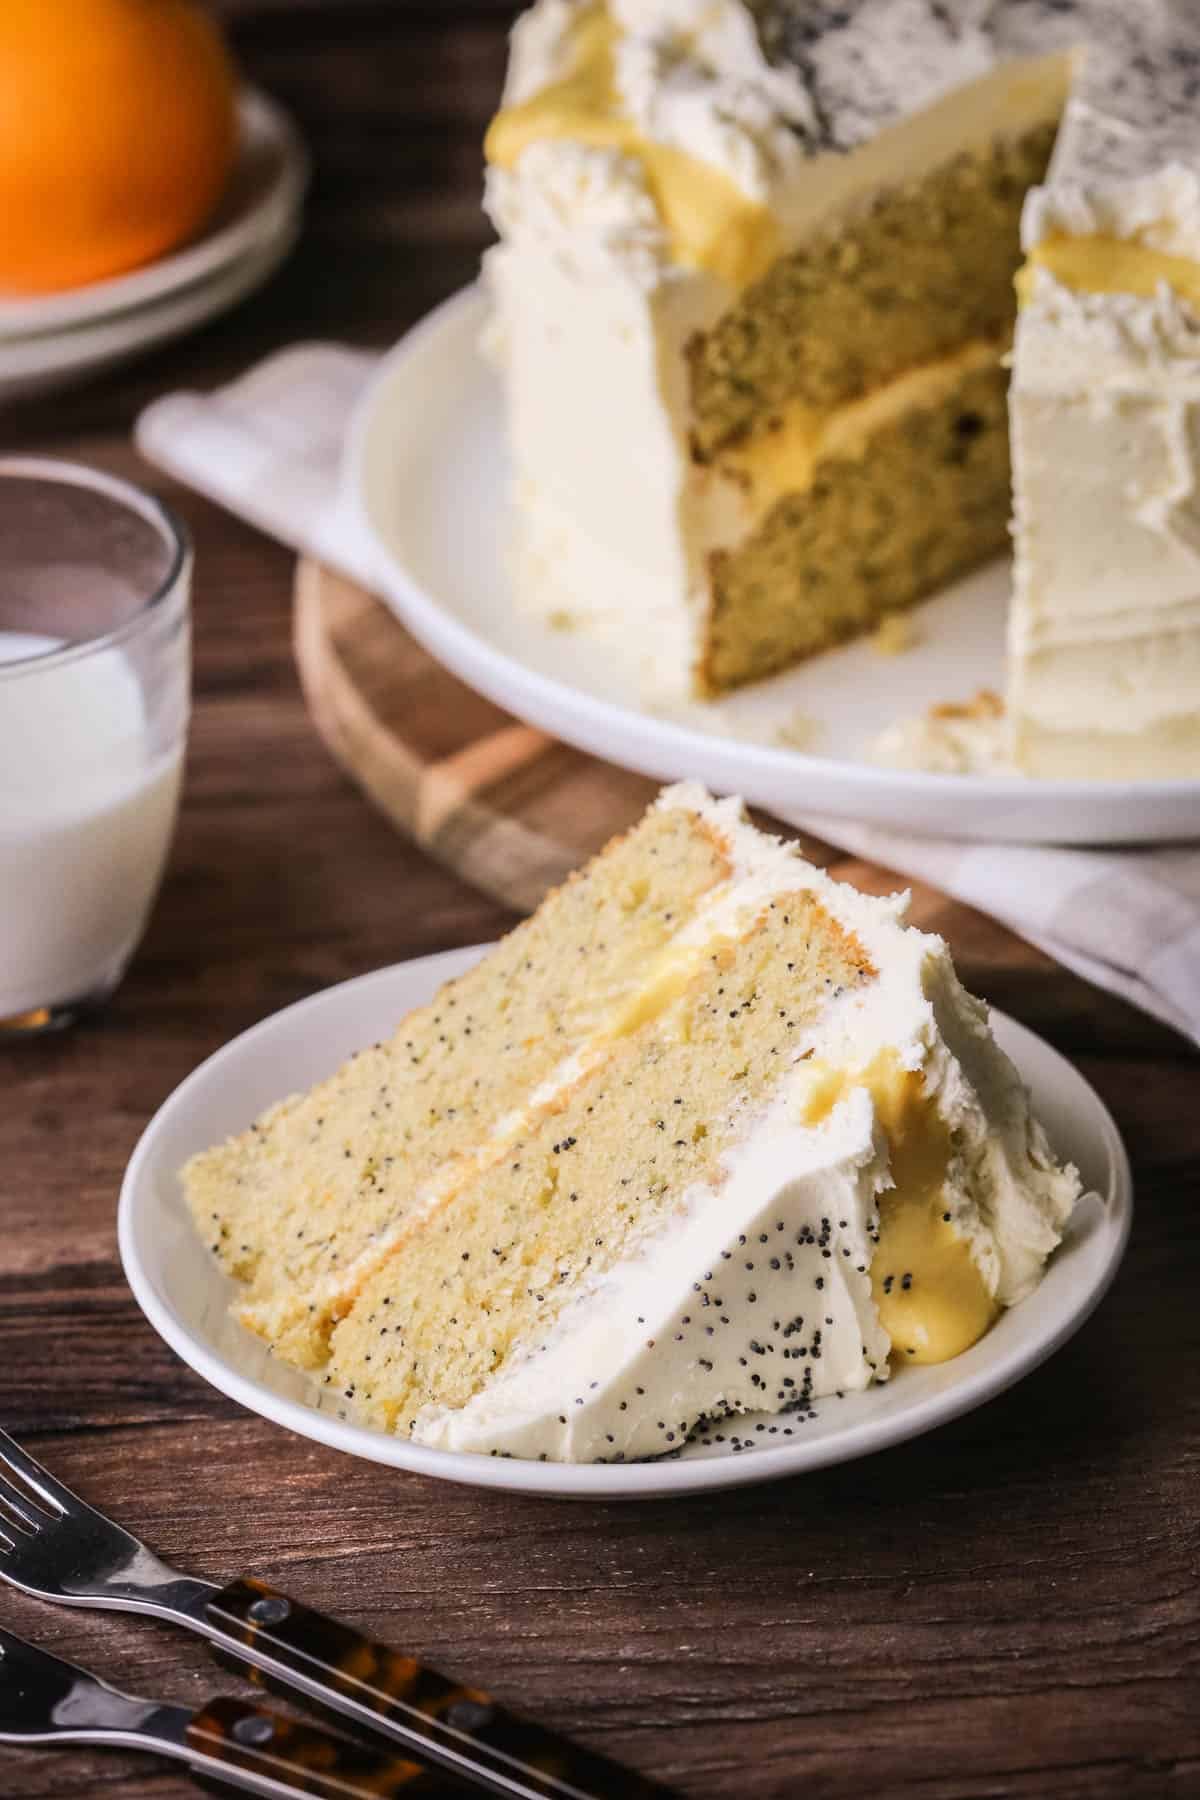
However, it has proven irresistible with everyone, even our very fussy seven-year-old, with minor squabbles being had over who has the slice with the most orange curd visibly squidging through the layers. Although I did try to explain that all the slices have an equal amount, some has just been swirled into the buttercream more.
The thick citrus bright curd nestled in the ultra creamy buttercream which we whip until its light as air and the soft and tender sponge layers, moist with sour cream baked into the batter and sparked with even more orange zest had us all coming back for more.
It’s such an easy cake to pull together too and although you can’t beat the homemade orange curd which is the star of the show here, if you are pressed for time you can buy it in. I’ve seen clementine curd and blood orange curd available from more upmarket preserve companies.
Why You’ll Love This Orange and Poppy Seed Cake
- Bursting with sunshiney orange flavour with zest rubbed into the sugar to fully infuse the sponge.
- Thick orange curd sandwiched between the layers and spooned liberally and swirled over the top of the cake.
- The cake batter comes together so quickly and rises beautifully.
- Homemade gluten-free flour blend means you don’t have to hunt for a specific brand of flour in the supermarket.
- No xanthan gum needed.
Watch the Video
Sometimes it helps to see a visual of what I'm talking about. So watch the video to see what it looks like to make your Orange and Poppy Seed Cake.
Ingredients Needed

Caster sugar. A fine white sugar which gives lightness. You can substitute for granulated white sugar.
Oranges. I used large unwaxed oranges. We only use the zest here so you can serve out the orange segments to family members who are revelling in the gorgeous orange scent permeating the kitchen whilst they are waiting for their cake to bake.
Unsalted butter. We need unsalted so we can control the salt content of the recipe. Make sure it is softened which is slightly more soft than room temperature as it will emulsify into the eggs better. I really find the best way to achieve this is to pulse cubes of butter in the microwave in 3 second bursts.
Eggs. This recipe uses medium size, about 60g each with shell (50g each without shell). These are often classified as large eggs in the US. I recommend weighing your eggs to ensure the correct amount.
Gluten-Free Flour – FTL Blend. This recipe uses my Homemade Gluten-Free All Purpose Flour which works really well here as the flour ratio has been carefully tested to ensure the mix between wholegrain flours and starchy flours is balanced. This also means we don’t need to use xanthan gum as the blend is strong enough and produces a well structured and textured bake which can hold together without needing any extra binders.
This flour blend is a mix of 4 different flours: sweet rice flour (glutinous rice flour), sorghum flour, oat flour, tapioca flour (tapioca starch).
Black poppy seeds. You can buy these from most supermarkets in the baking aisle.
Baking powder. A leavening agent which causes the cake to rise and become light and fluffy. Do check your baking powder is gluten-free before use.
Sour cream. Using sour cream is excellent in gluten-free cakes as it helps the texture and flavour of the cake. It adds moisture and a subtle tang and leads to a soft rich tender crumb.
Icing sugar (powdered sugar). I prefer to use icing sugar rather than caster sugar in buttercreams as it dissolves more easily which means an easy to achieve smooth texture which can whip up like a dream.
Vanilla extract. We’re just using vanilla in the buttercream here, not in the sponge itself. So we need a good quality extract, I like Nielsen Massey.
Milk. Use whole milk or even double cream in the buttercream icing.
Salt. I like to use kosher salt in my baking as it has a round gentle flavour. Using salt in your baked goods lifts and sharpens all the other flavours.
Orange curd. The orange curd is not baked into the batter but used in between the cake layers and spooned on the top of the cake. I recommend making it yourself and my homemade orange curd recipe is easy, I’ve tried to make it absolutely foolproof if you’ve never made a curd before so do read all the tips and tricks. You’ll need to make the orange curd the day before you want to use it as it needs time to set.
How To Make Gluten-Free Orange & Poppy Seed Cake
For full recipe instructions go to the recipe card at the end of this post.
Rub the orange zest into the sugar. Add the butter and cream until light and fluffy.
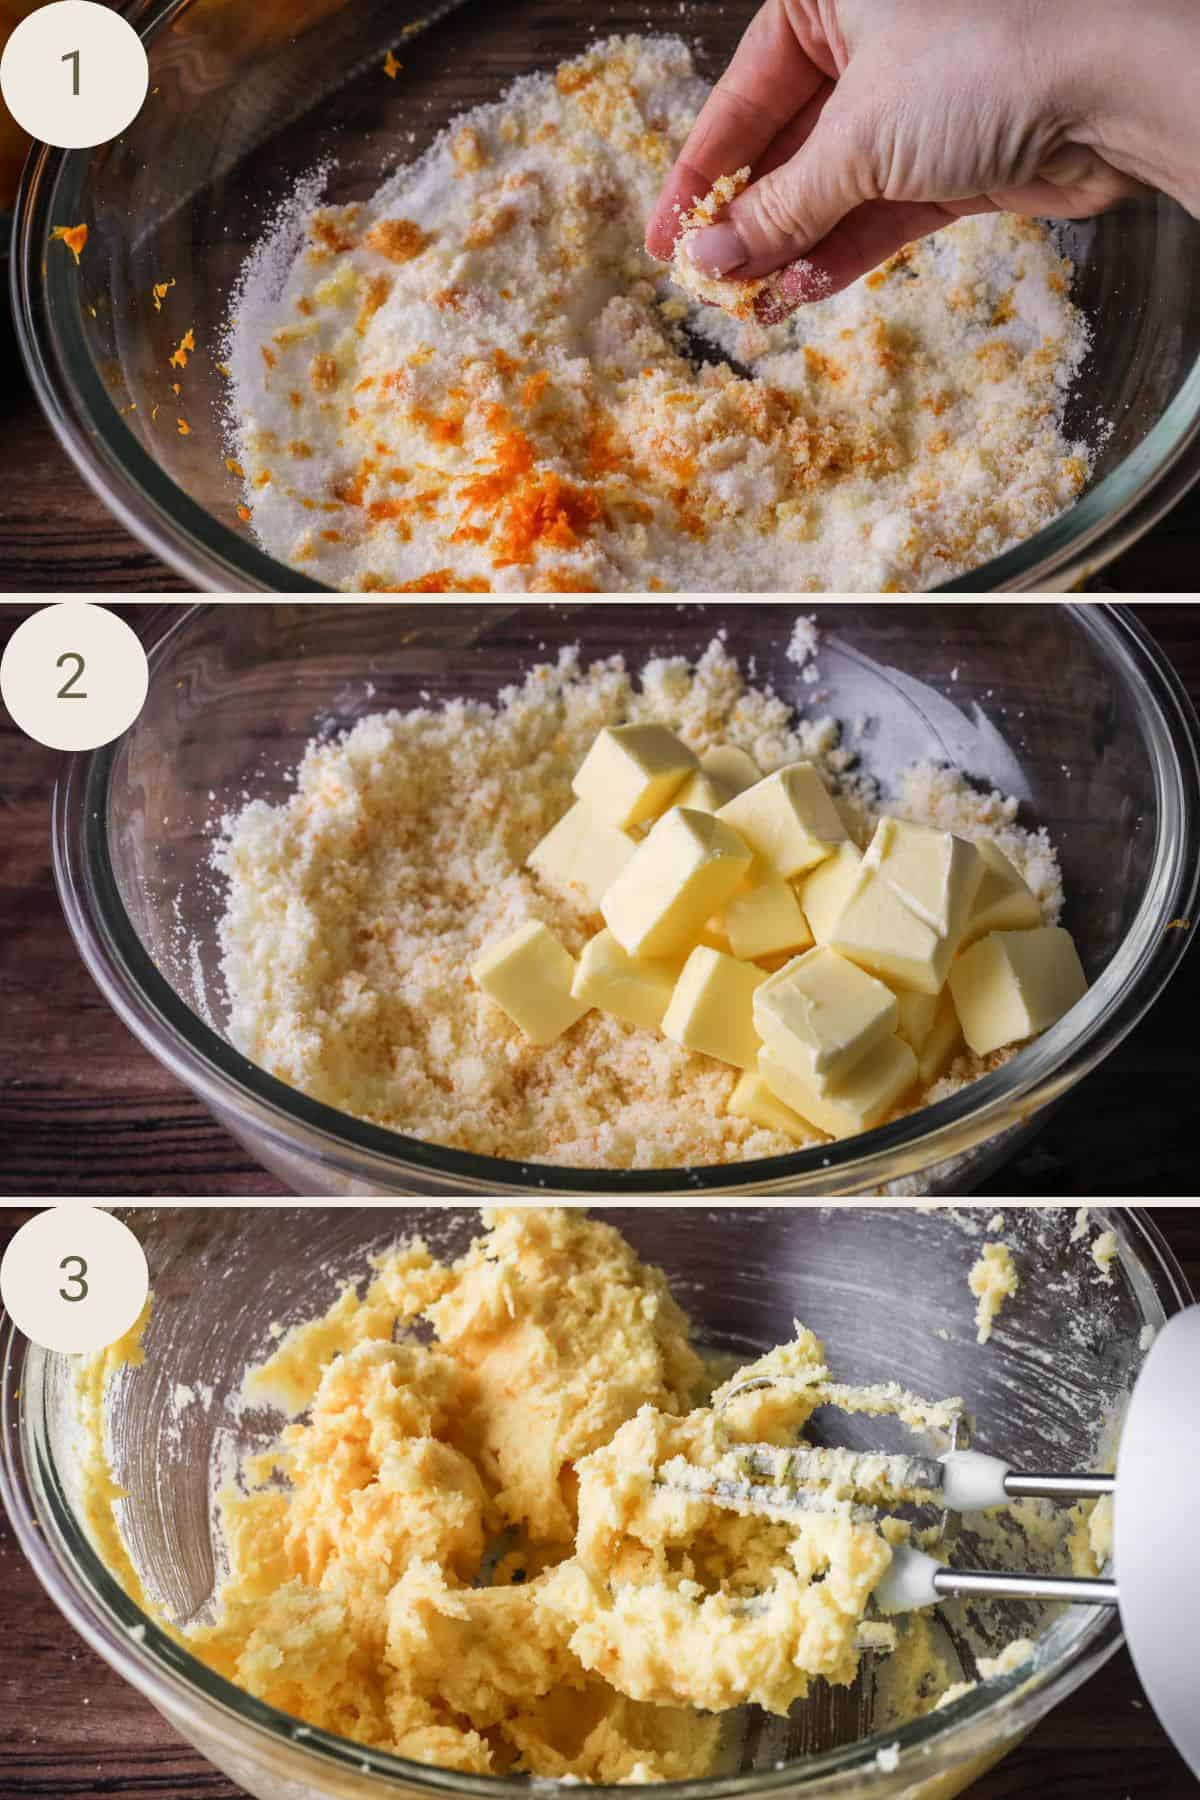
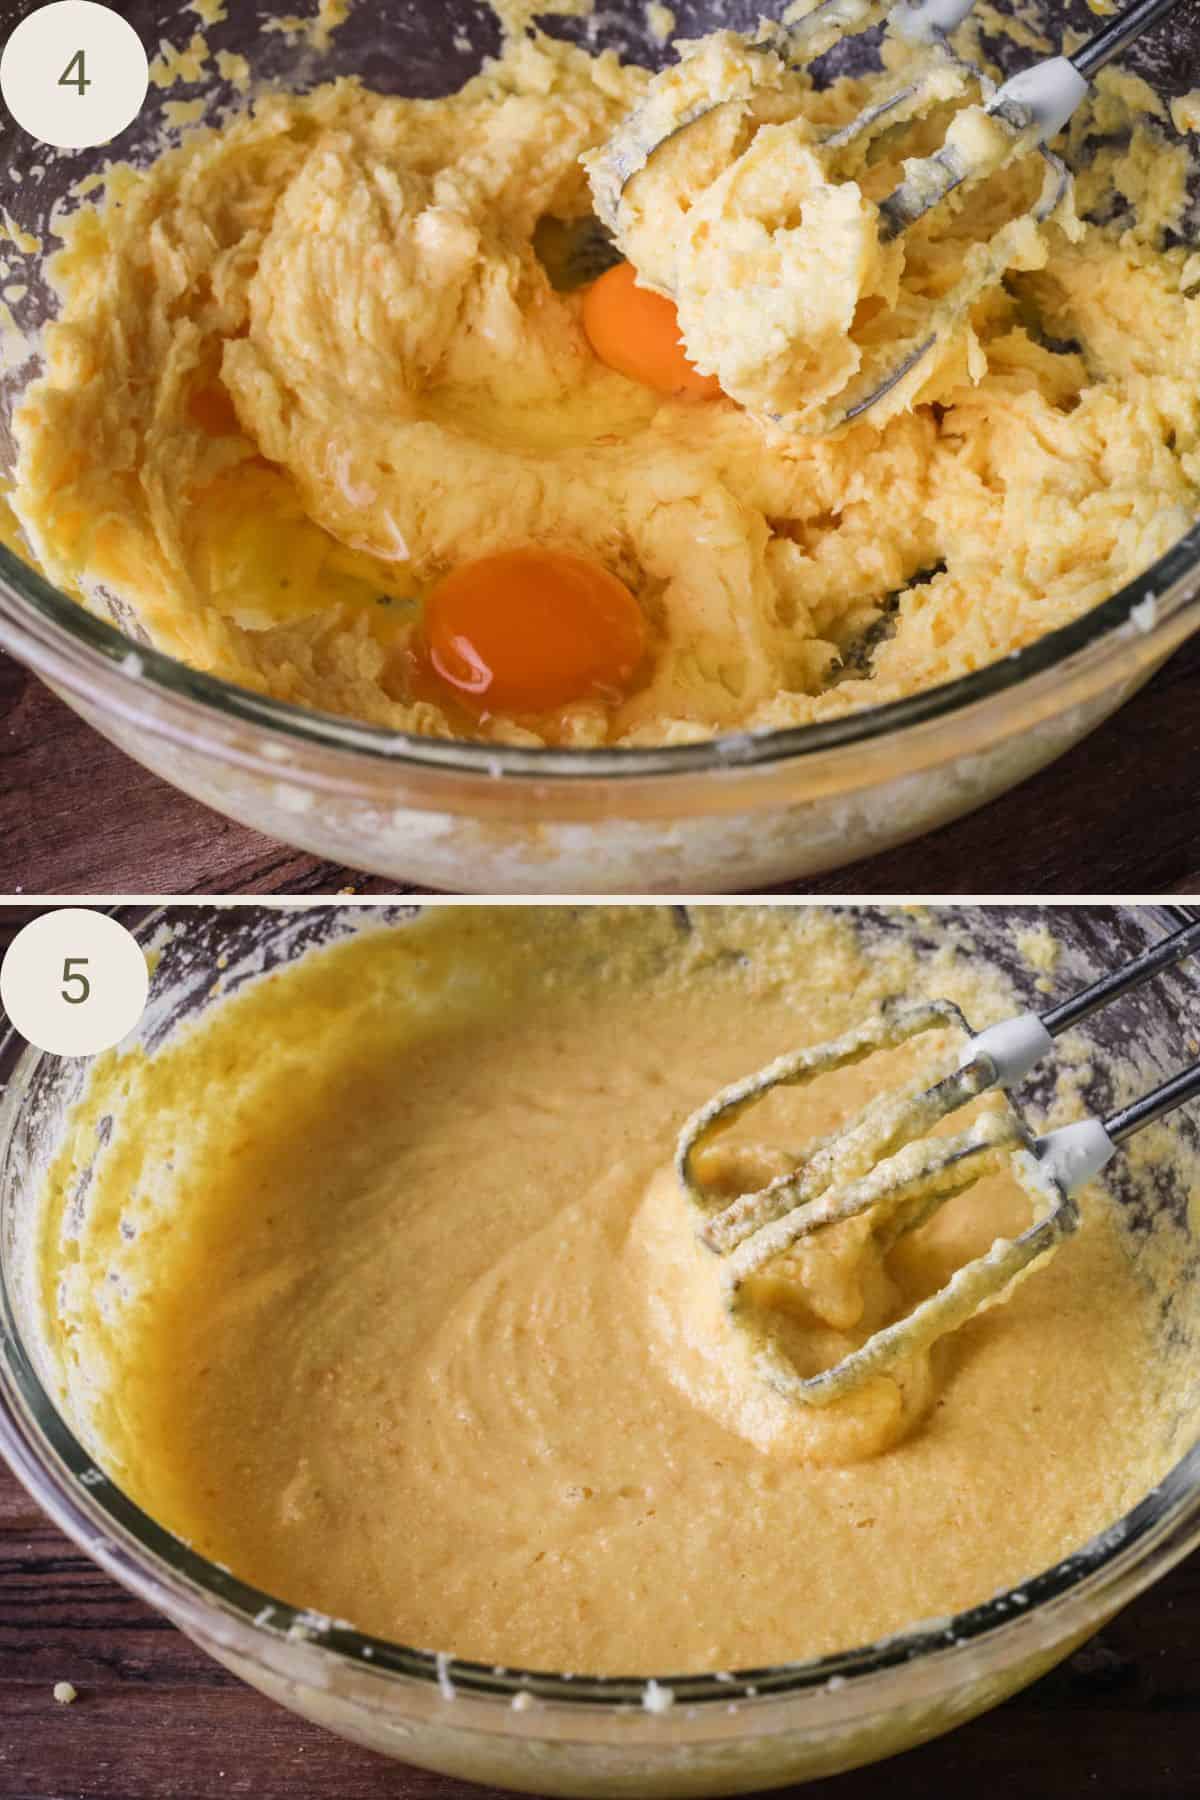
Add the eggs one at a time and mix until well incorporated.
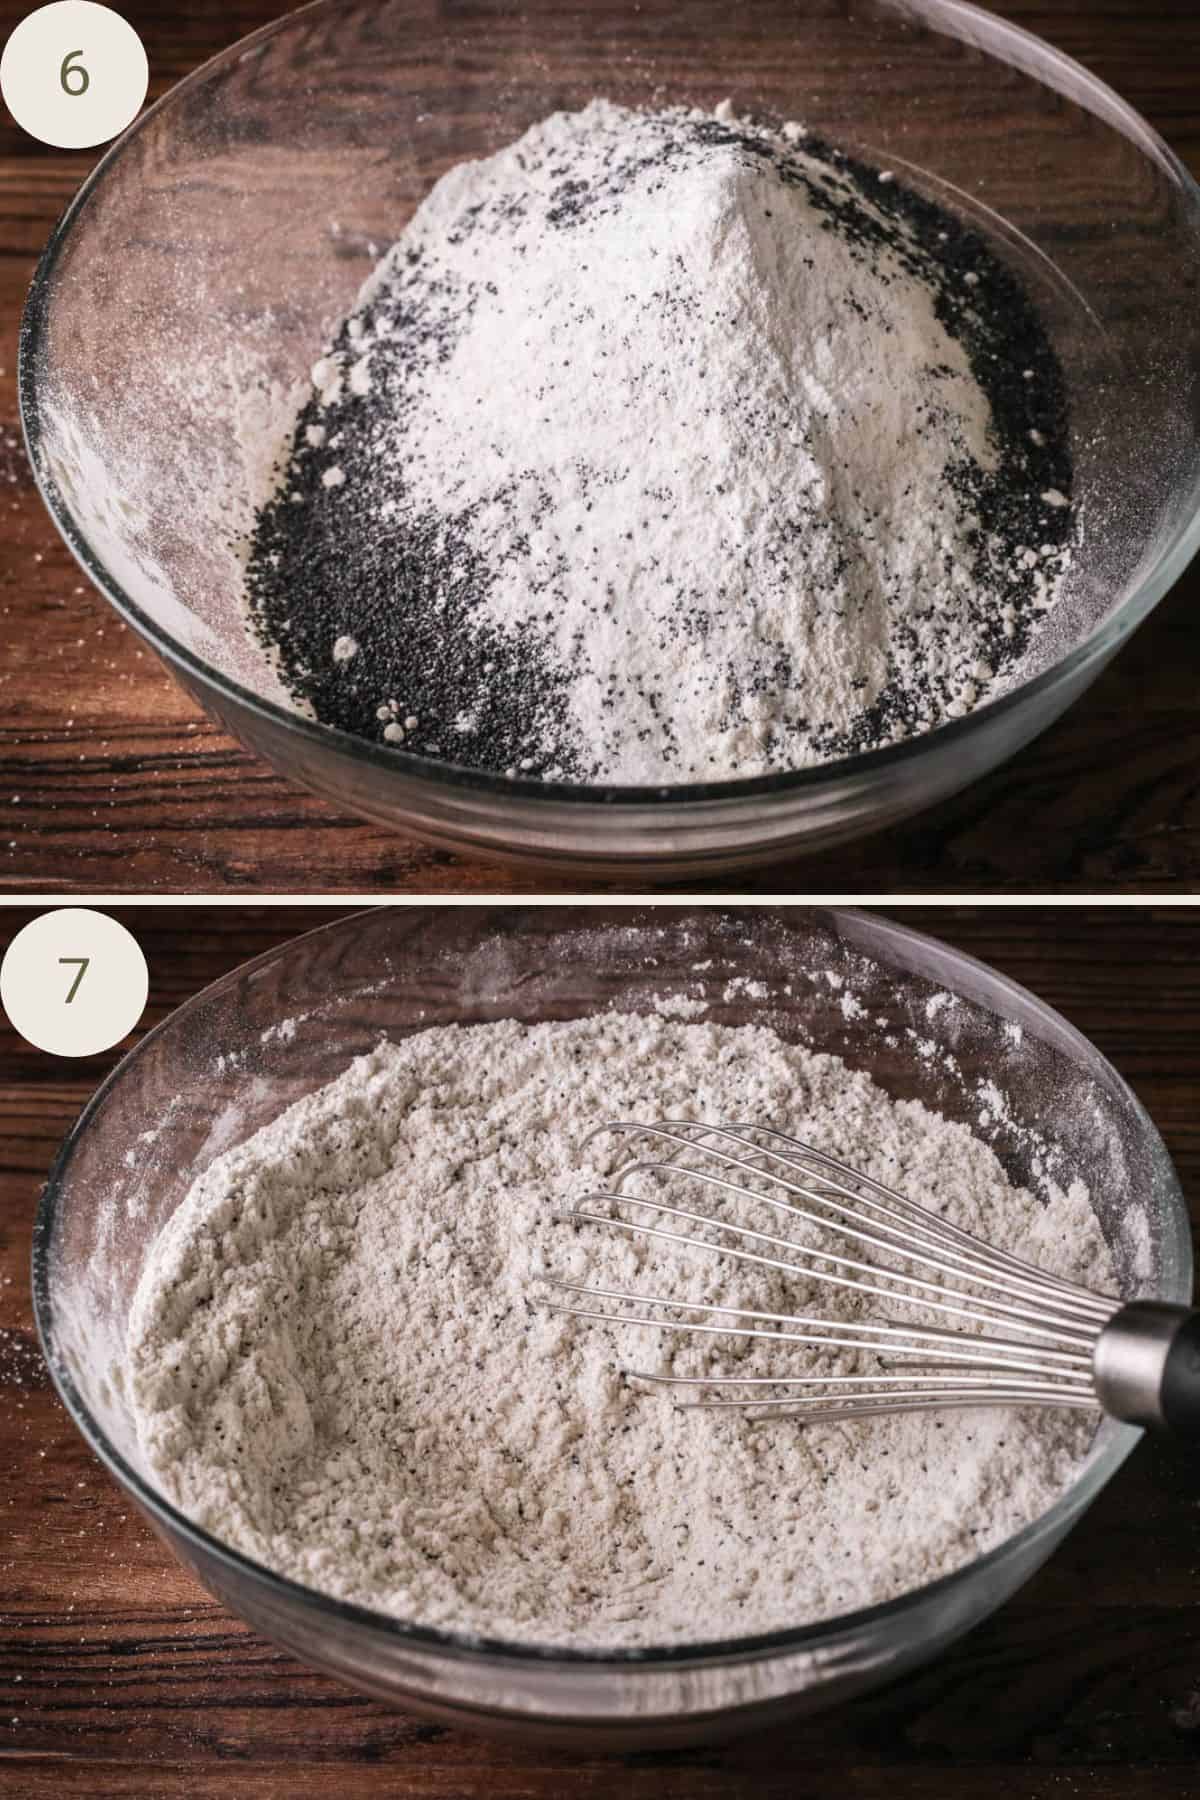
Whisk together the gluten-free flour with the poppy seeds, baking powder and salt.
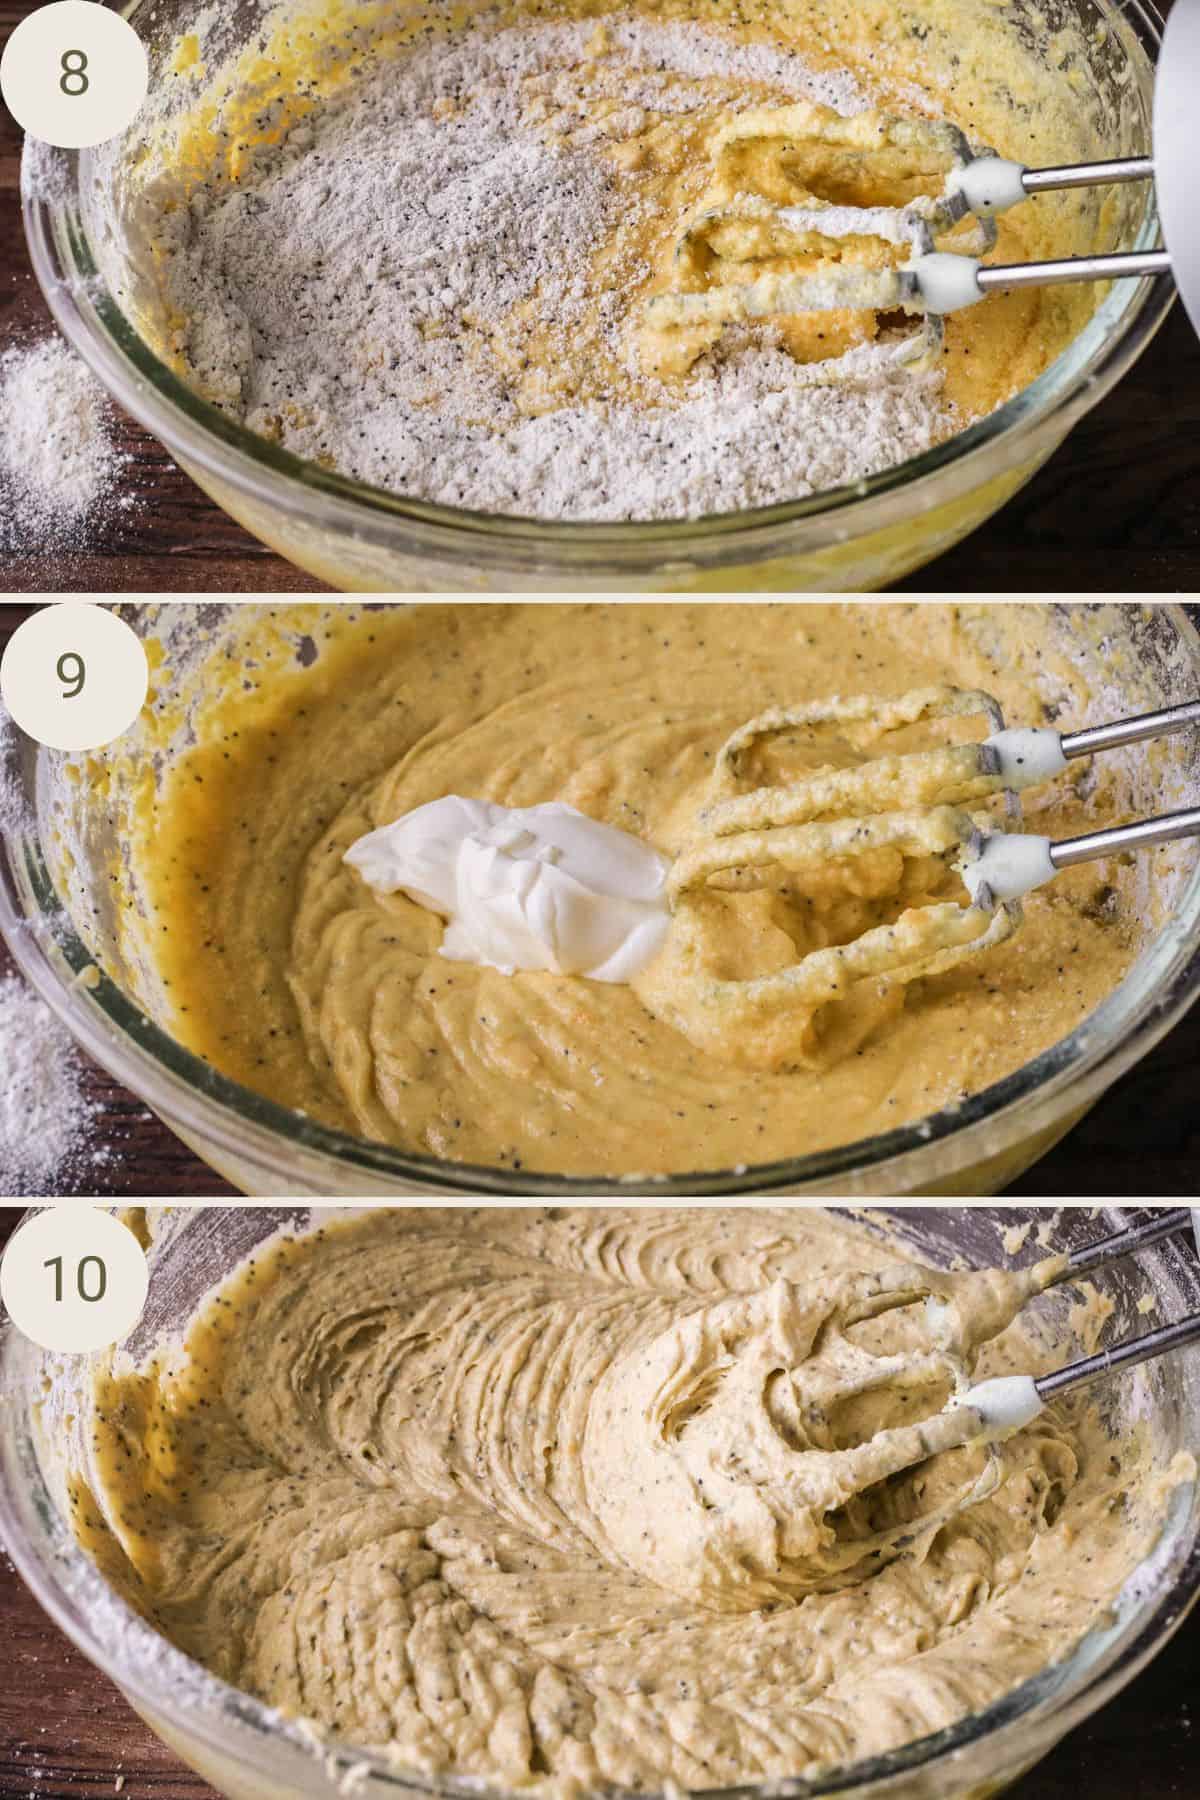
Add the ⅓ flour mixture alternately with ½ sour cream into the rest of the cake until it’s all evenly mixed.
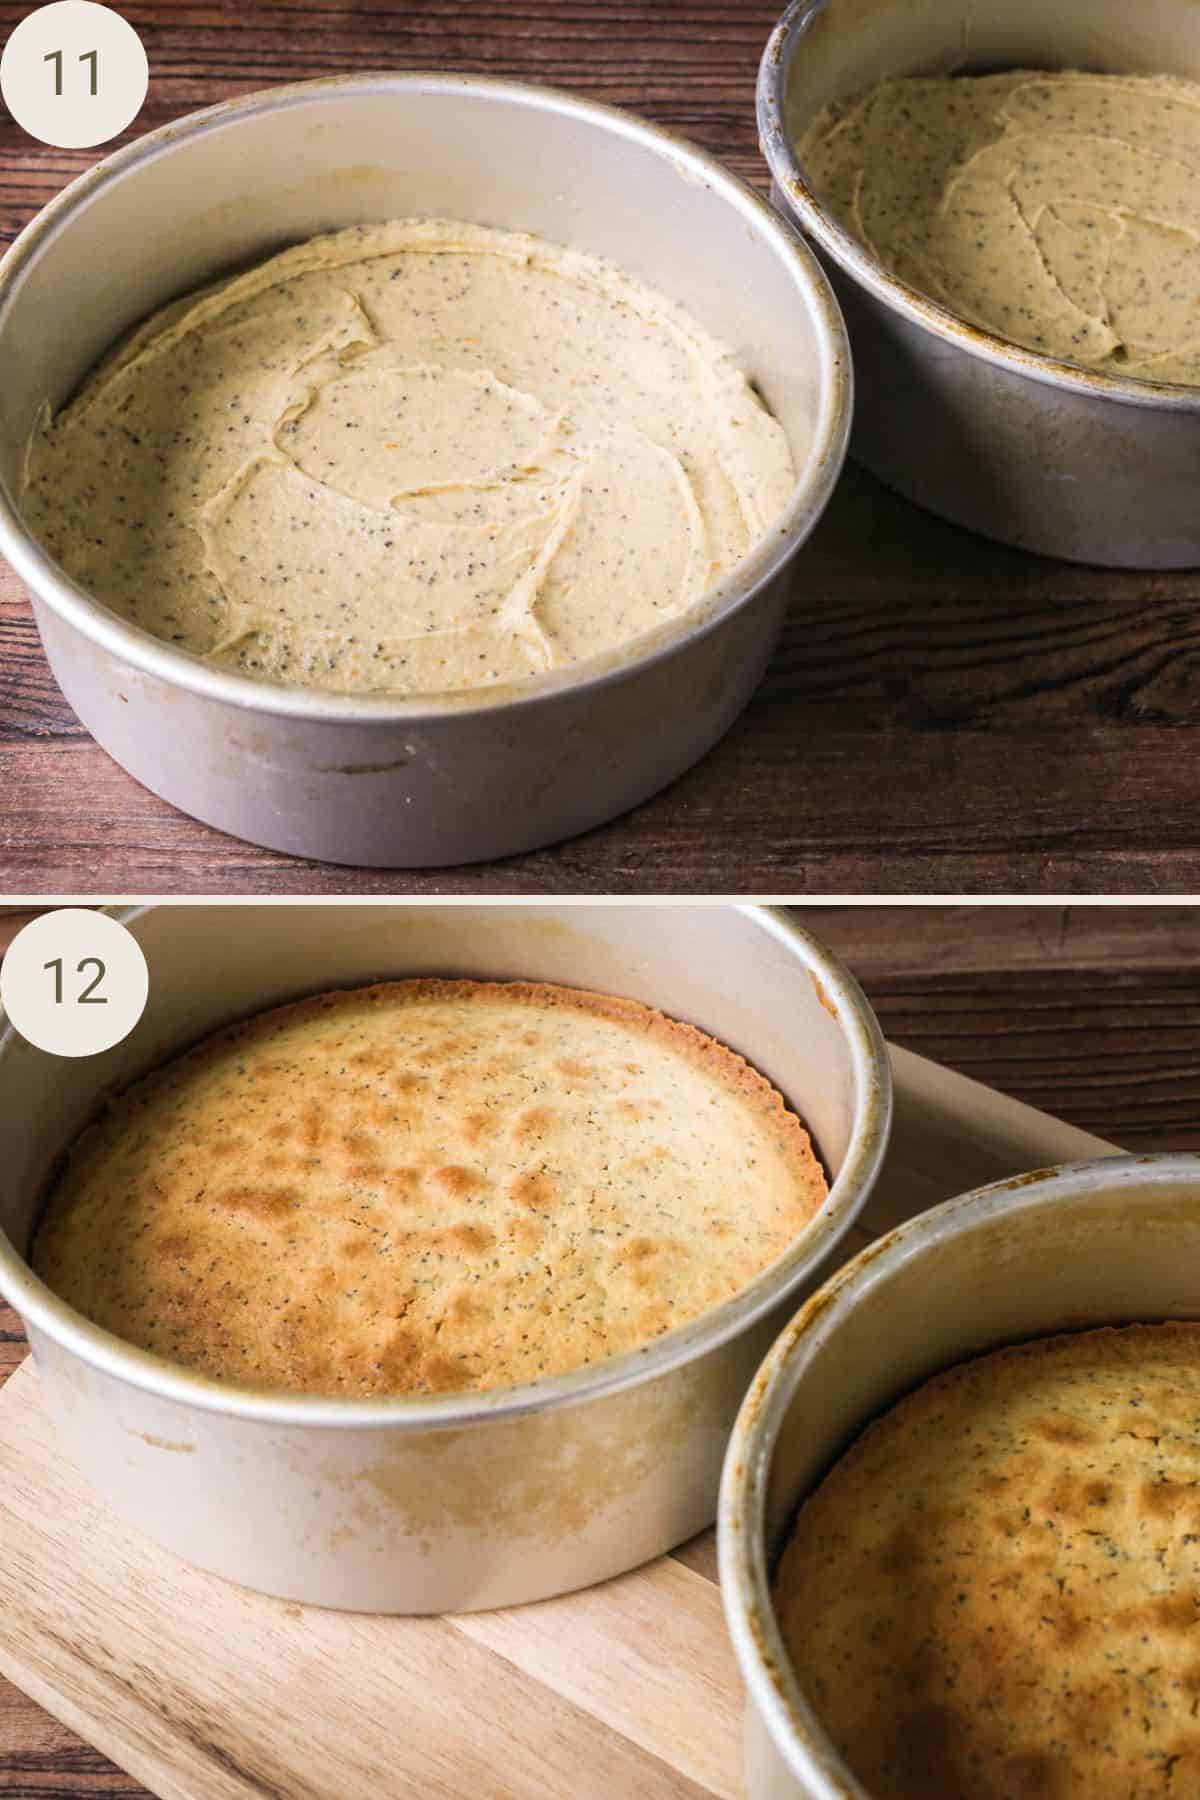
Divide the cake batter between two cake tins and bake for 30 minutes.
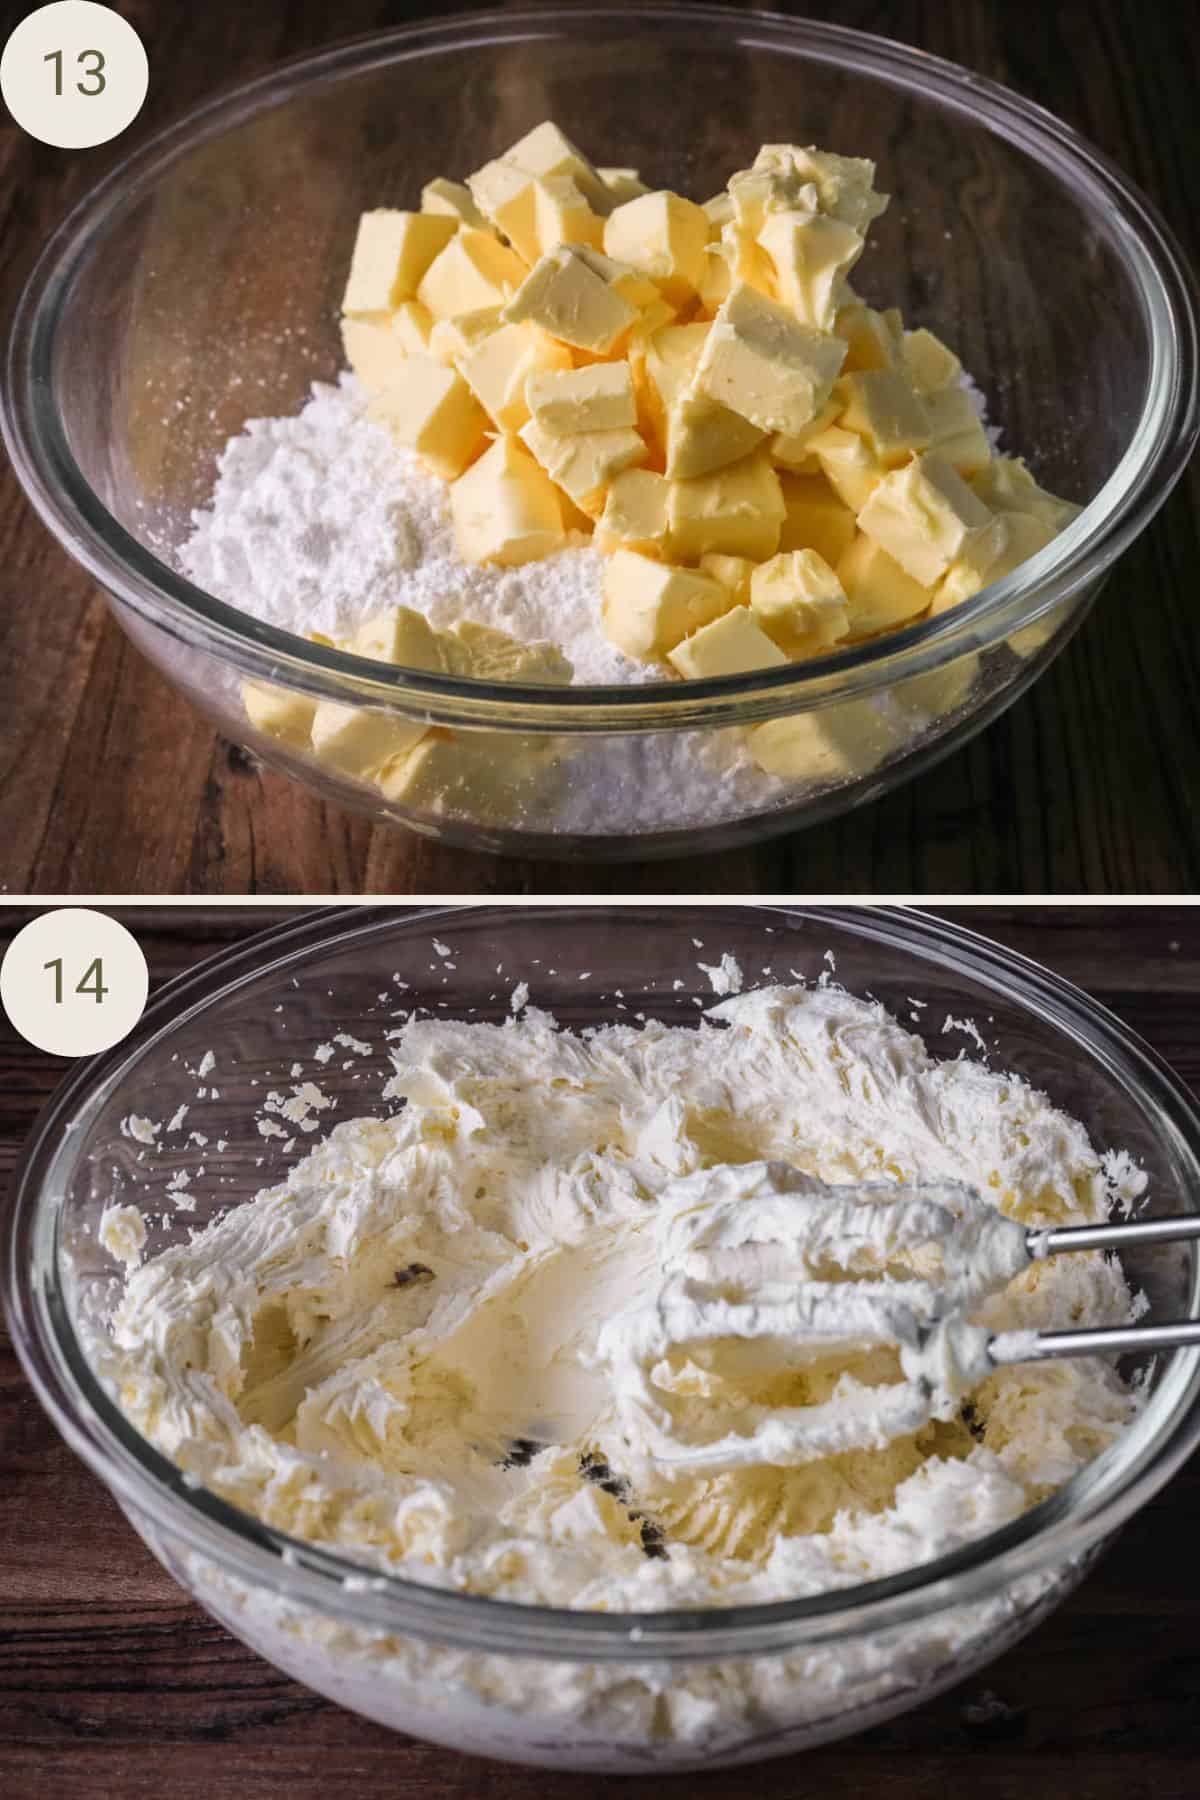
Beat together the butter and icing sugar until light and fluffy. Add the vanilla, salt and milk and mix again until evenly mixed.
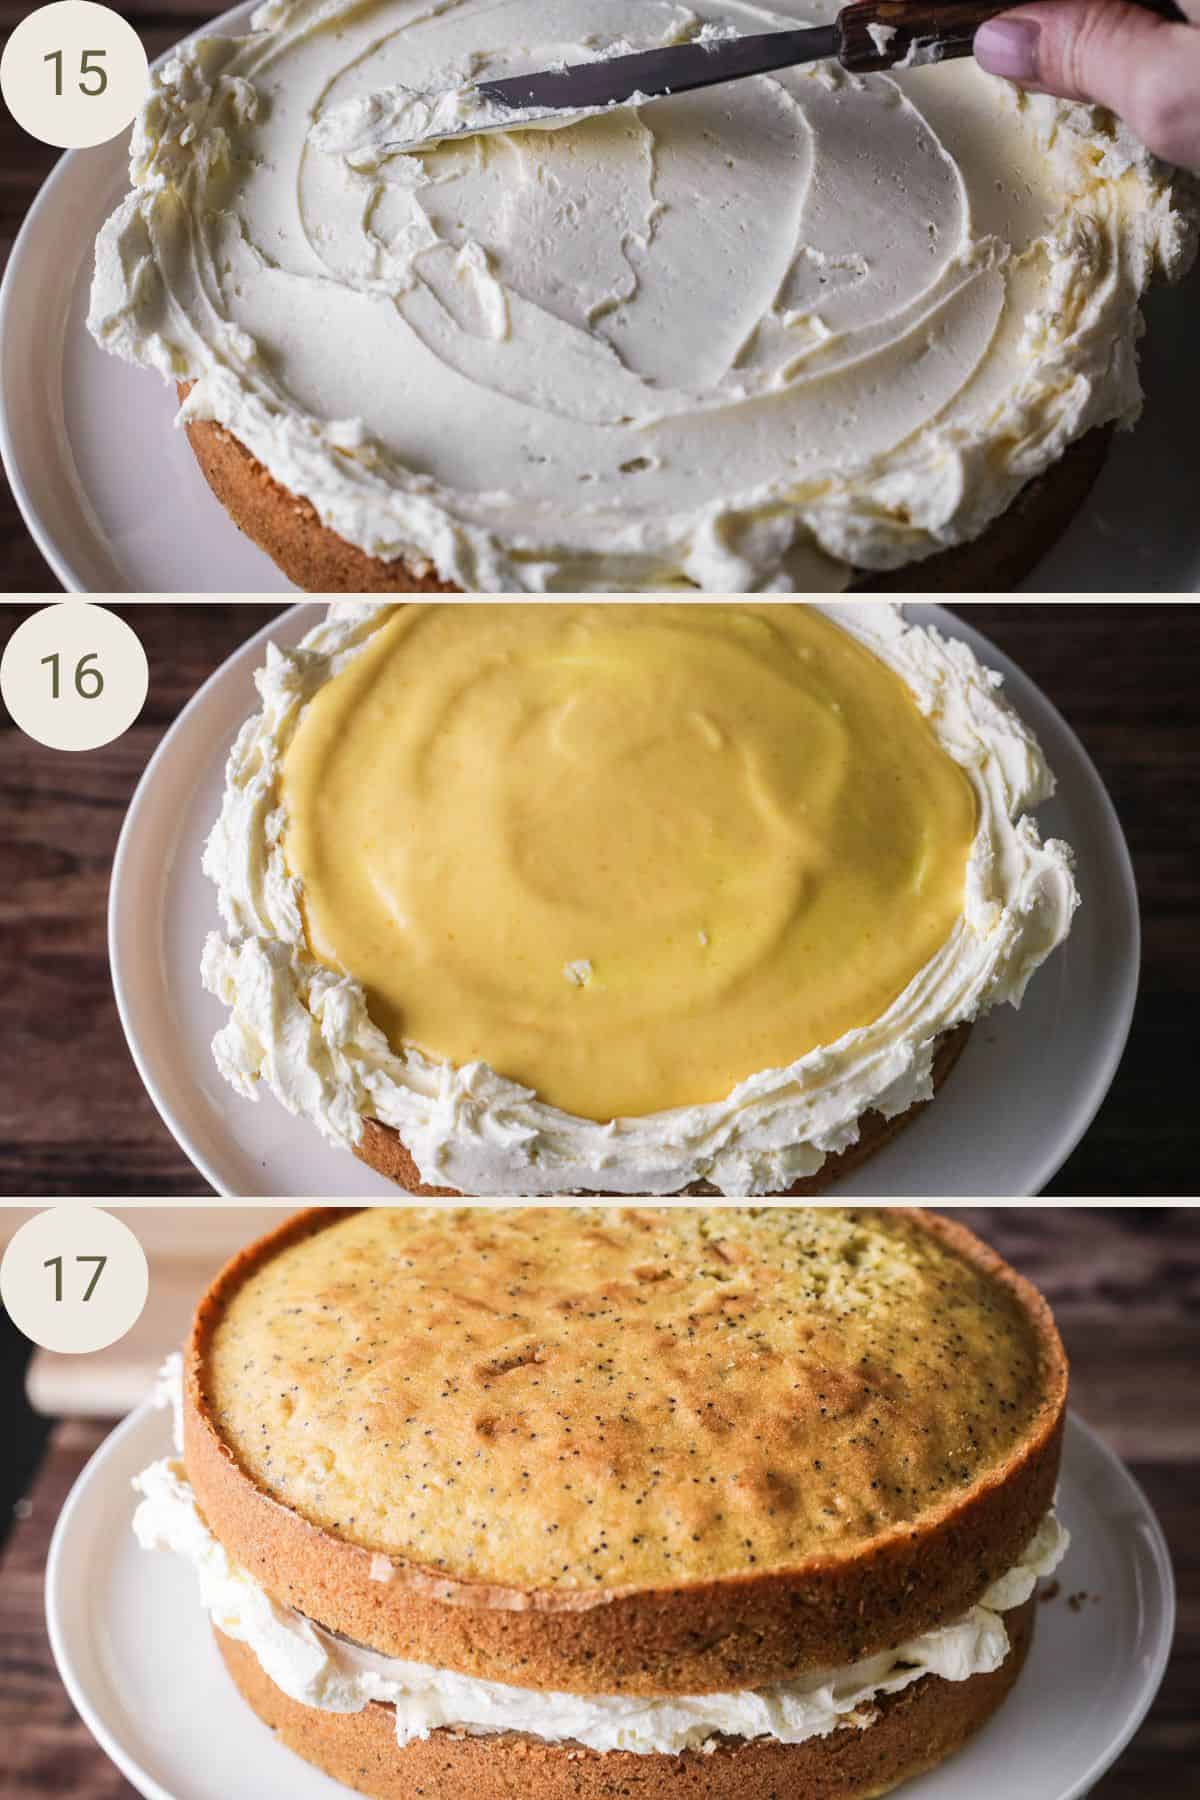
Spread ¼ of the buttercream on top of one of the sponge layers. Spoon over half of the orange curd and spread out. Place the second sponge layer over the top.
Cover and spread the whole cake with most of the rest of the buttercream, reserving a few spoonfuls.
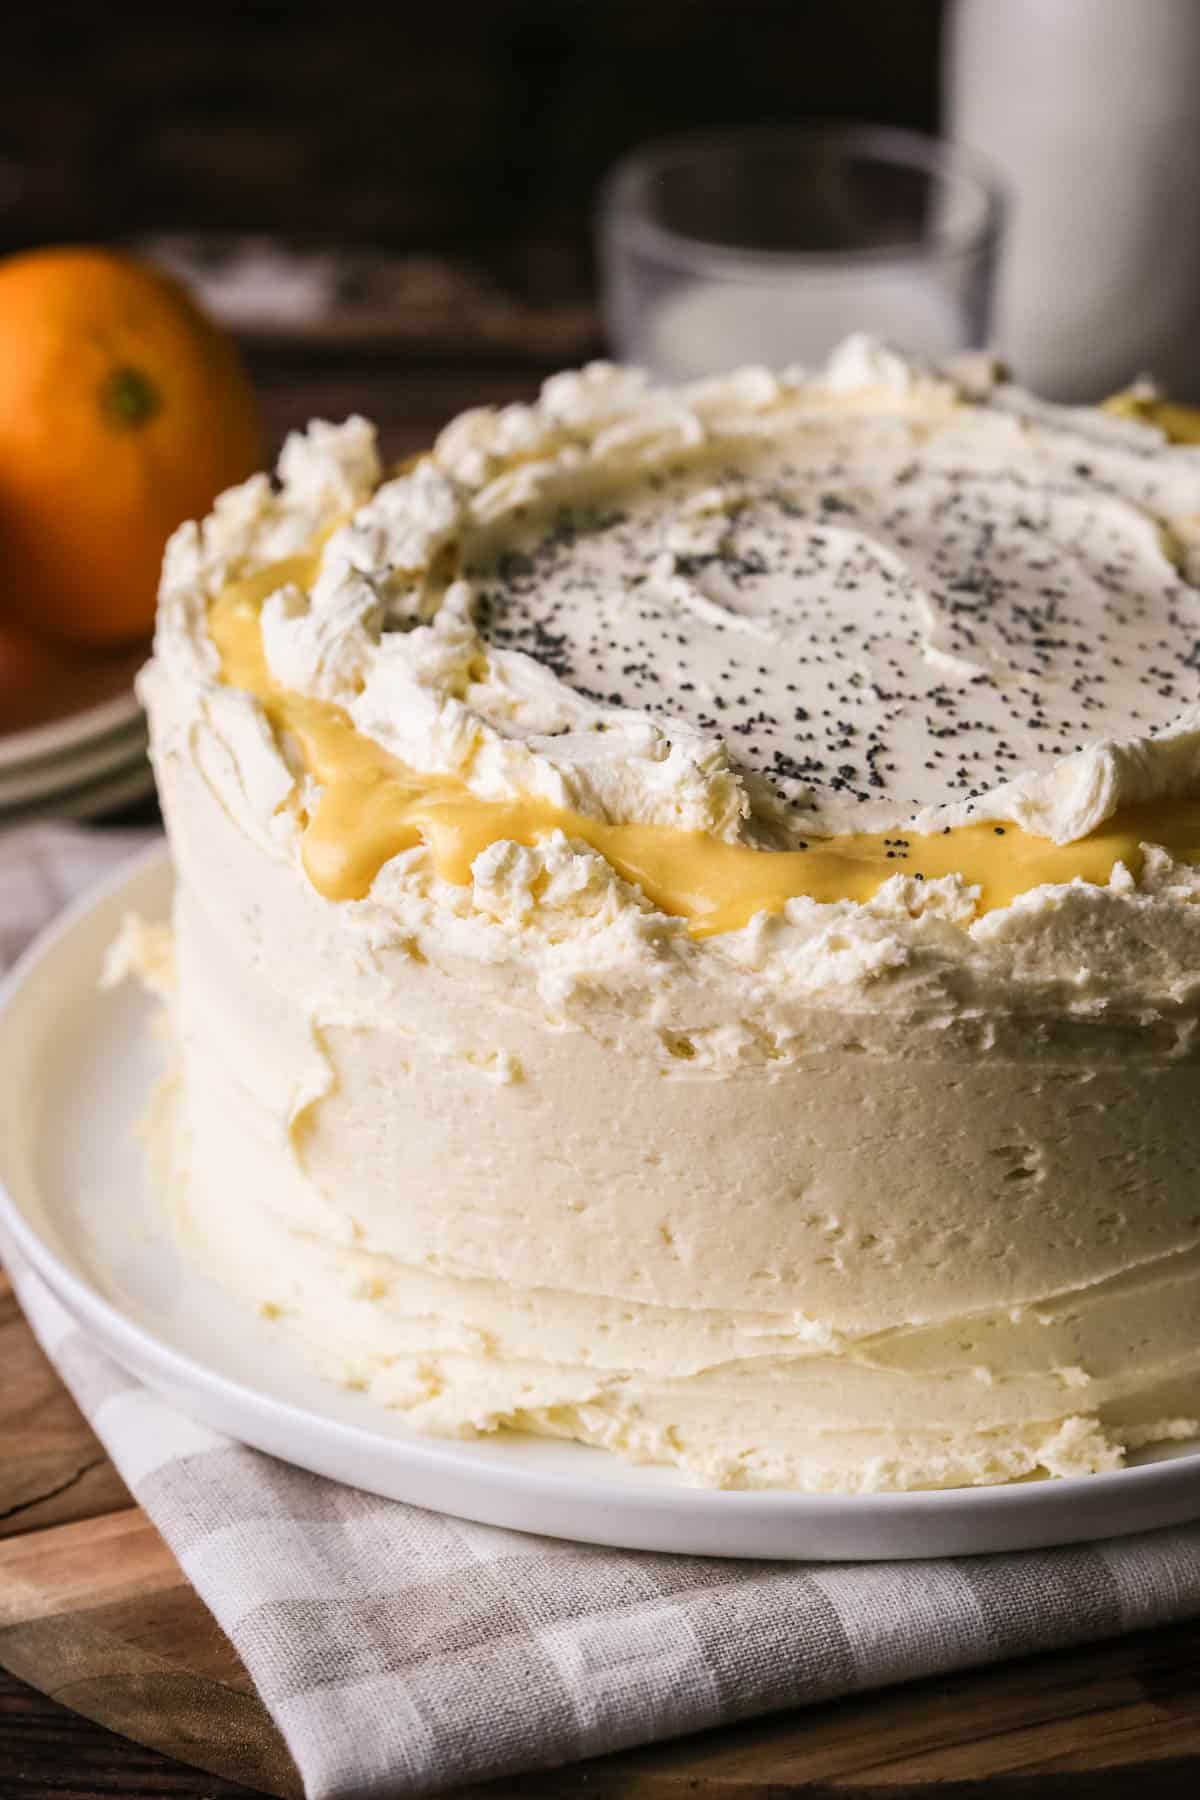
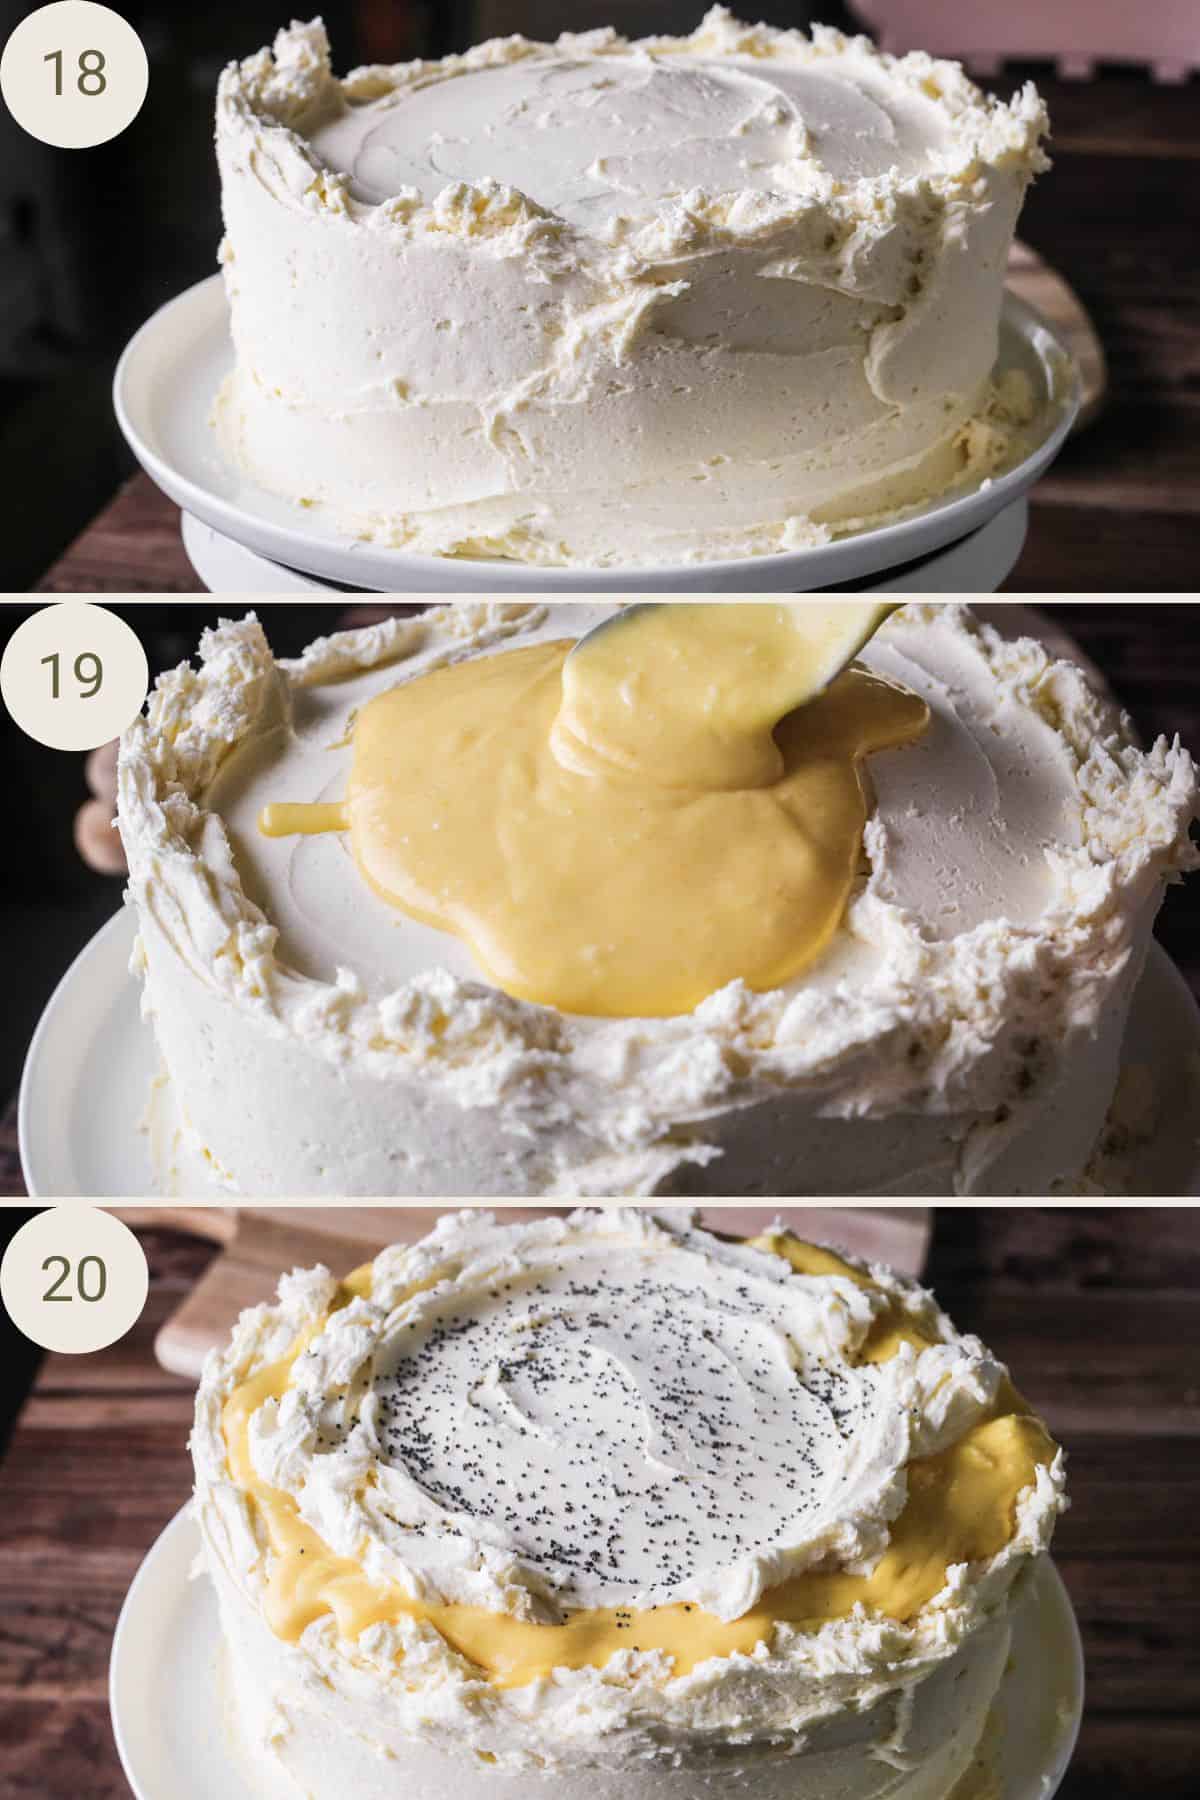
Spoon the rest of the orange curd over the top of the cake, lightly swirling it into the buttercream. Spoon the rest of the buttercream over the top of the orange curd, spreading it out so that the curd is peeking and dripping down the edges of the cake. Sprinkle over a little more poppy seeds over the top.
Tips and Troubleshooting
If you are using my homemade orange curd recipe here then you’ll need to make it the day before you’re assembling the cake as it needs time to set properly.
I don’t know if you can tell from the photos but the orange curd I used here was from an earlier batch that didn’t set as well which is why it’s a little looser than you might have achieved from your own batch. As you can see it was no barrier to making this cake.
Rub the orange zest directly into the caster sugar so it releases all its oils and enhances the orange flavour right from the get go.
There is a lot of fat in this cake so to ensure it all emulsifies correctly you need your butter to be softened which is just a fraction softer than room temperature. It should indent easily when pressed and is soft enough to spread with a spatula. I microwave my butter for a couple of seconds even if it’s already at room temperature for that softened texture.
Plus make sure the eggs are at room temperature and not chilled. Add them one at a time and preferably break them into a separate bowl first just in case you get a bad one in there. It’s not common but it did happen to me recently.
Recipe Variations
Buttercream. I love this classic buttercream recipe for its simplicity here but you could also use my cream cheese buttercream or swiss meringue buttercream in its place.
Lemon rather than orange. You can swap the orange zest in the sponges for lemon zest and use lemon curd instead of orange curd.
Making Ahead
You can make the sponge cakes up to 2 days before assembling with the orange curd and buttercream. Store the sponge cakes in an airtight container and keep in a cool dark place. Or freeze using the instructions below.
The whole cake can be made, including completely decorated, up to 2 days before serving. Store in an airtight container in the fridge.
Freezing
If you do want to make the cake ahead and freeze then I recommend just freezing the sponge cakes and filling and covering with the orange curd and buttercream on the day of serving.
Sponge Cakes. You can freeze the sponge cakes successfully for up to 3 months before decorating. First wrap the cooled sponges tightly in cling film (plastic wrap) and then double wrap in aluminium foil. Don’t forget to label including the date. To enjoy, thaw at room temperature overnight, unwrap once thawed and fill and decorate with the orange curd and buttercream icing.
Individual Slices. You can also freeze leftover slices of the whole cake. It needs a little more care when freezing:
- Place the leftover cake slices on a tray and flash freeze for 6-8 hours, before wrapping each slice up individually in cling film (plastic wrap) and placing in an airtight container.
- To thaw, remove the cake slices individually, unwrap whilst frozen so not to disturb the glaze. They should take about 1-2 hour to fully thaw.
More Gluten-Free Orange Cakes You’ll Love
Gorgeous Gluten-Free Orange Drizzle Cake is a lovely simple afternoon tea cake for citrus lovers with zesty fresh orange flavour and a very moist, tender crumb.
This Whole Orange Cake with Chocolate Chips is made with unpeeled whole oranges which are boiled until soft then pureed before added to the cake mixture for an authentically fresh orange flavour. The cake is beautifully moist and flavourful with chocolate chips dotted throughout for added luxury.
This fudgy Chocolate Orange Marmalade Cake is gloriously rich and chocolatey with an unmistakable tangy orange kick. The cake has a gorgeously moist texture with an indulgent chocolate orange flavour.
Enter your email below to get this recipe sent to your inbox plus get new recipes, baking tips, and updates.
Gluten-Free Orange & Poppy Seed Cake
Ingredients
- 300 g caster sugar
- 2 oranges - zested
- 240 g unsalted butter - softened
- 6 eggs
- 360 g homemade gluten-free flour - FTL Blend
- 2 tablespoons black poppy seeds - plus a few for scattering over the top
- 2 teaspoons baking powder
- 120 g sour cream
- ¾ teaspoon salt
Easy Vanilla Buttercream Icing
- 800 g icing sugar - sifted
- 500 g unsalted butter - softened
- 1 tablespoon vanilla extract
- 50 g whole milk
- ½ teaspoon kosher salt
- 200 g orange curd - homemade orange curd
Instructions
- Pre-heat the oven to 180°C / 160°C fan assisted / gas mark 4 / 350°F and line and grease 2 x round 20cm (8 inch) cake tins.
- Rub the orange zest into the sugar using your fingertips in a large mixing bowl or the bowl of a stand mixer.
- Add the butter and mix with the sugar and butter until pale, light and fluffy, about 2-3 minutes, scraping down the sides every so often.
- Add the eggs one at a time, beating on a low speed, until well incorporated.
- Whisk together the gluten-free flour, poppy seeds, baking powder and salt in a large mixing bowl until completely combined.
- Add the flour mix alternately with the sour cream, adding the flour in three additions and the sour cream in two (begin and end with the flour), scrape down the sides of the bowls as needed and mix until just combined.
- Divide the cake batter between the two prepared cake tins and bake for 30 minutes or until an inserted cocktail stick comes out clean and the sponges are just starting to pull away from the sides.
- Allow the sponges to rest for 5 minutes in their tins then carefully remove onto wire racks and allow to cool completely before assembling the cake.
Making the buttercream
- Place softened butter in the bowl of a stand mixer (food mixer) and whip with the icing sugar until ultra fluffy and soft for about 6-8 minutes.
- Add the vanilla extract and salt and beat until combined. Finally pour in the milk slowly and beat for a further minute until light and creamy.
Assembling the cake
- Place one of the sponge layers on a 20cm (8 inch) cake board, or just directly onto a serving plate, and spread ¼ of the total amount of buttercream over the surface of the sponge pushing it out to the very edges of the cake so the buttercream is a little raised at the edges which will act like a dam for the orange curd.
- Spoon orange curd on top of the buttercream and spread out towards the edges of the buttercream dam.
- Place the second sponge layer on top and cover the top and the sides of the cake with most of the rest of the buttercream, reserving a few spoonfuls. On the top of the cake, again, push the buttercream out so there is almost like a raised buttercream dam.
- Spoon orange curd on top of the buttercream and spread out towards the edges of the buttercream dam, slightly swirling it into the buttercream too.
- Spoon the last few spoonfuls of the buttercream straight on top of the orange curd, spreading it out lightly so that the curd is peeking and dripping down the edges of the cake. Sprinkle a few more poppy seeds over the top of the cake.
