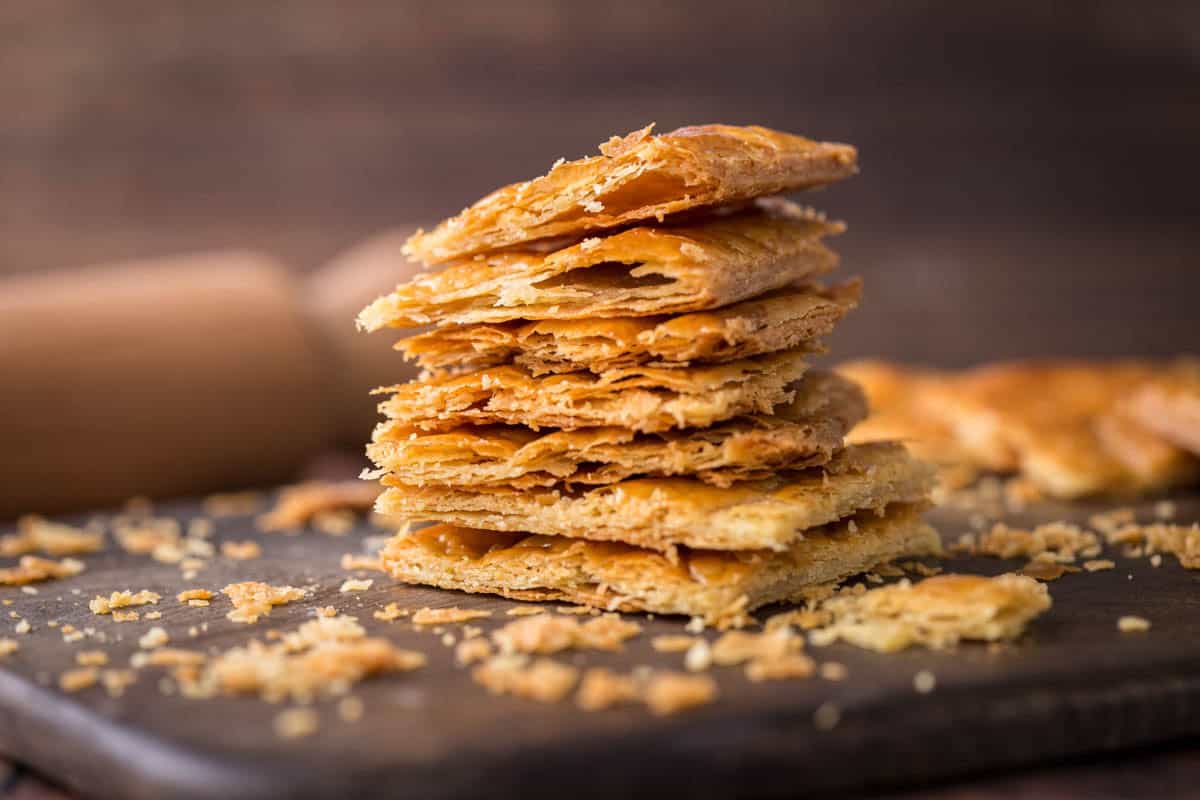
Easy Homemade Gluten-Free Puff Pastry (quick rough puff)
This post contains affiliate links. Please read my disclosures.
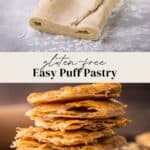
This Gluten-Free Puff Pastry recipe is quicker and easier than traditional puff pastry as it uses the rough puff method which means there isn't endless chilling and folding which can take all day. All that work gets done at once and still leads to incredibly crisp buttery, flaky layers. We use a unique gluten-free flour blend to create this pastry so you are not beholden to a specific brand and no xanthan gum is needed. Use this pastry for sweet or savoury recipes including incredible apple turnovers or a delicious beef wellington.
Gluten-Free Puff Pastry Dough
You'll love this versatile dough which has an incredible flaky texture with plenty of rich buttery flavour. Using the rough puff method is the easiest way to make puff pastry it doesn’t take nearly as long and is made with real butter so has an unmatched flavour unlike the inferior version you can buy at the grocery store which is made with vegetable oils.
I'll show you how to produce this pastry quickly and easily with the best results coming from this gluten-free flour mixture, which uses only 3 flours, and provides great elasticity which is strong enough to roll out without breaking.
Why You’ll Love This Gluten-Free Puff Pastry
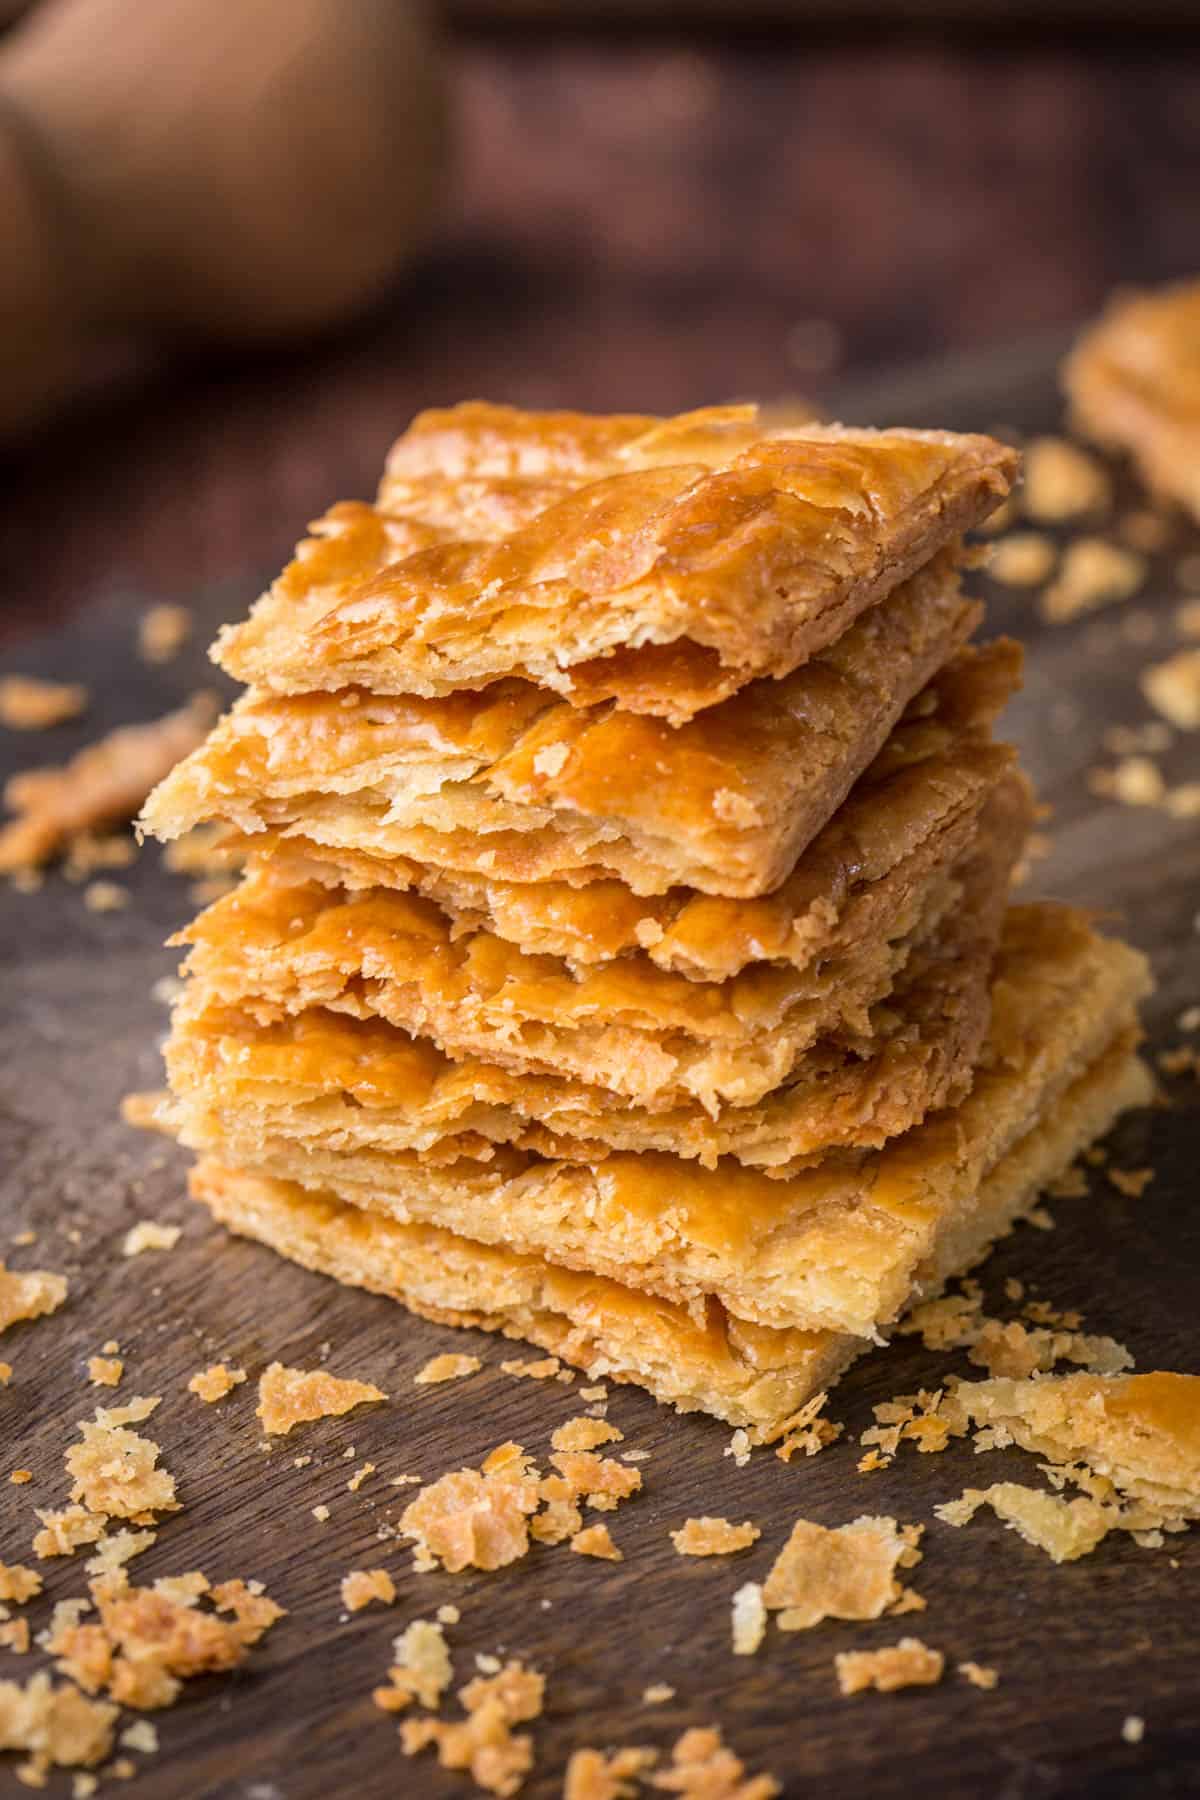
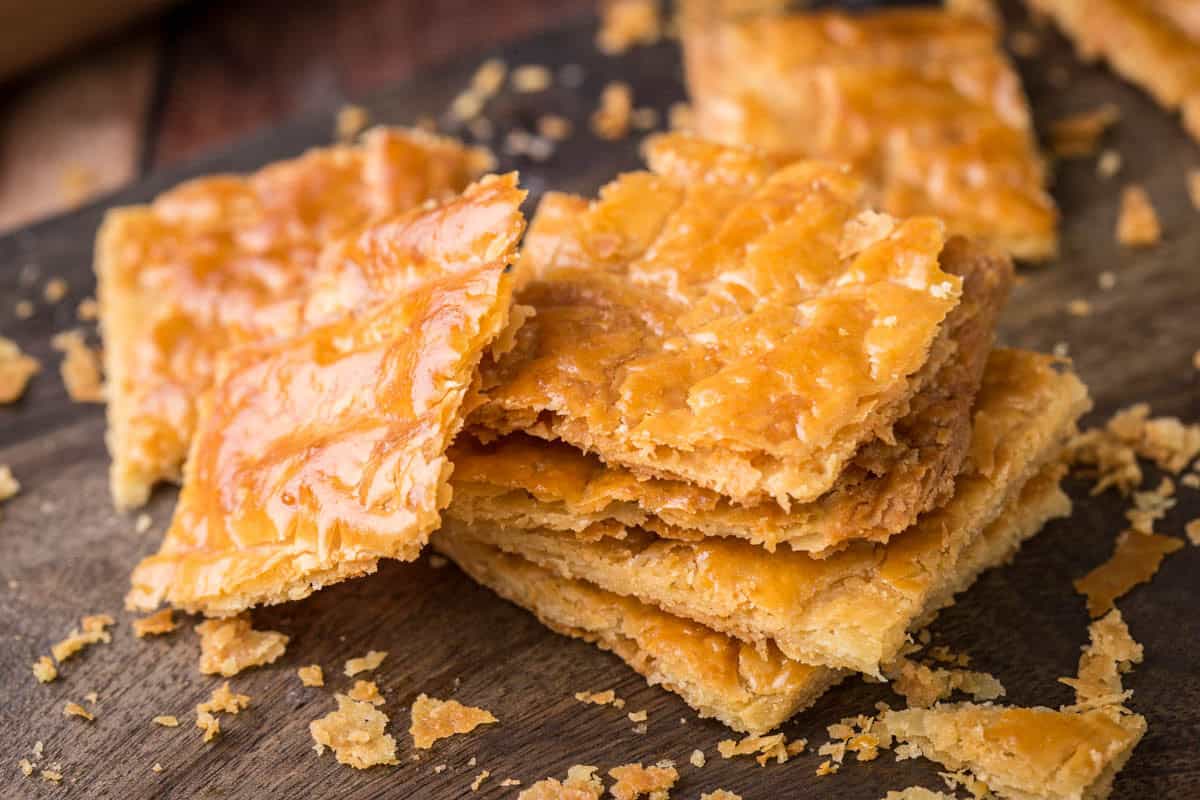
- Flaky Layered Texture. Produces a lovely crisp gluten-free pastry.
- Buttery Flavour. There is a greater fat to flour ratio so it produces an incredible taste.
- Versatile Dough. It can be used for all sorts of puff pastries from sweet to savoury.
- Beginner Friendly. If you’ve never made puff pastry before you can follow all my tips and tricks to make it easily first time.
- No Xanthan Gum (or guar gum or psyllium husk).
Watch the Recipe Video
Sometimes it helps to see a visual of what I'm talking about. So watch the video to see what it looks like to make your Gluten-Free Puff Pastry recipe every step of the way.
Ingredients Needed
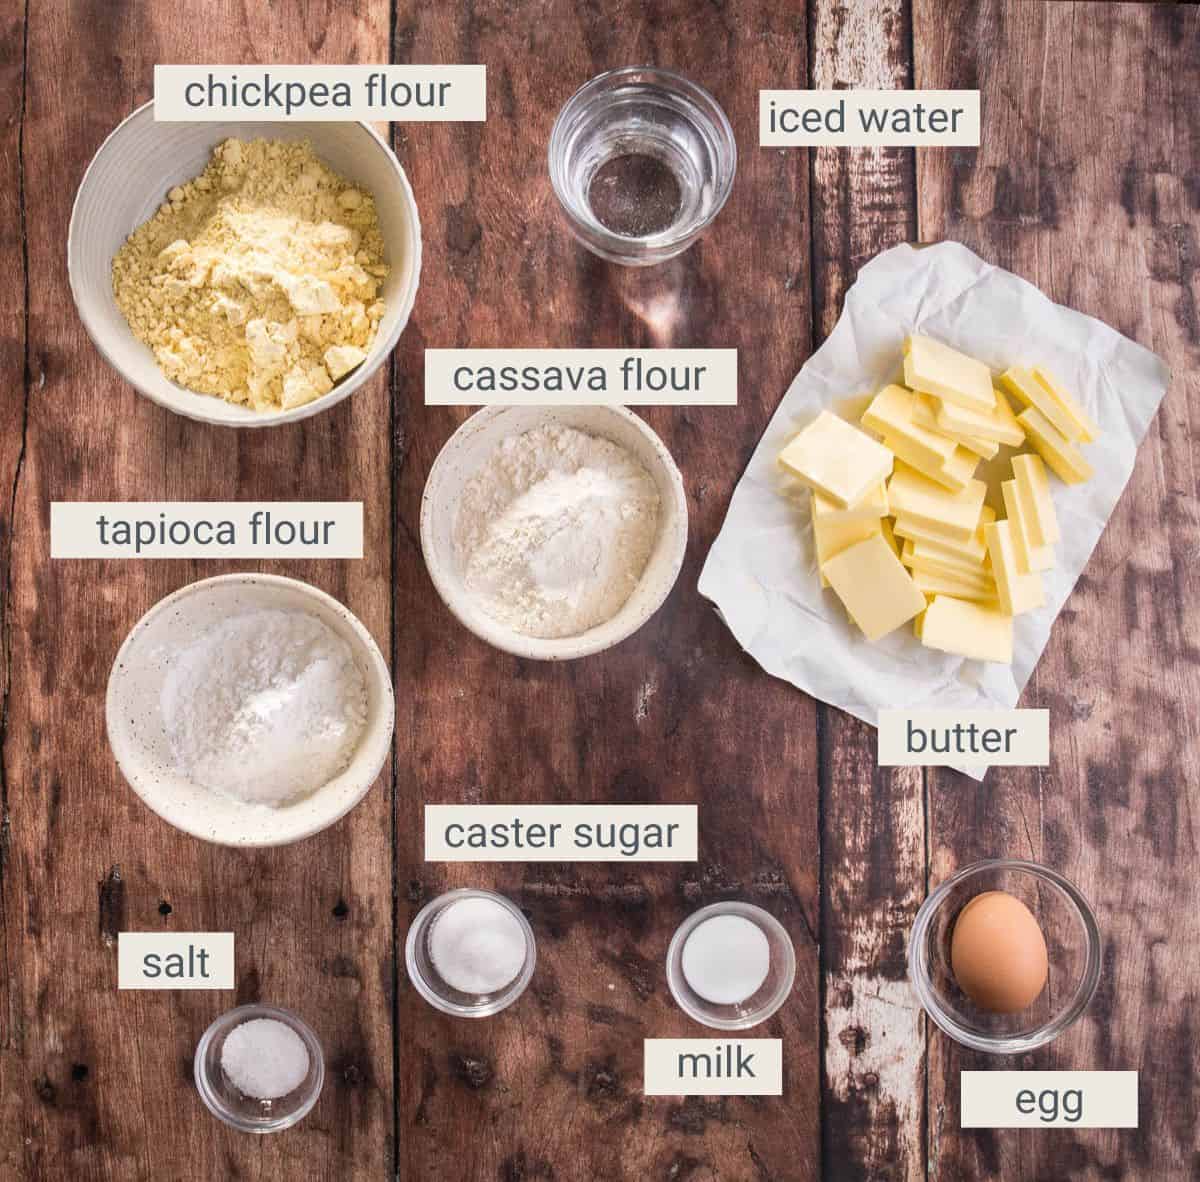
Chickpea flour (gram flour, besan, garbanzo). I love using this flour in gluten-free pastry. It is a protein packed flour which adds great structure to gluten-free bakes and has a distinctive nutty flavour and dense texture. The flavour though isn’t overpowering here, even for the sweet recipes, and is used to give stability to our flour blend so the pastry dough holds together really well.
Cassava flour. This starchy flour is great in gluten-free pastry recipes because it helps add stretch and elasticity to the dough. Plus, it's neutral in flavour, so it won't overpower the other ingredients, and is perfect for grain-free or nut-free diets.
Tapioca starch (tapioca flour). Needed to help with the structure of the pastry. Tapioca flour is a great starchy flour that is ideal for binding and also helps give the pastry a lovely golden colour as it browns very well.
Caster sugar. I encourage you to put this very scant amount of sugar in your pastry recipe whether you are making it for a sweet or savoury purpose, you don’t taste it at all. It really does help with crisping it up and the all-important browning (which all gluten-free flours need serious help with).
Salt. I like to use kosher salt in my baking as it has a round gentle flavour. Using salt in your baked goods lifts and sharpens all the other flavours.
Unsalted butter. We need unsalted so we can control the salt content of the recipe. Make sure it is very very cold in the fridge. I encourage you to slice the butter then place back in the fridge (or even freezer!) for at least 30 minutes to properly chill. Keeping the butter cold is all important for this recipe and you’ll get very bored of me saying it. I also don’t recommend substituting the butter for margarine or a non-dairy replacement.
Cold water. This recipe needs ice cold water, tap water is fine (filtered even better!). Place ice cubes into the water after you have measured it out to keep it chill and use straightaway.
Egg (for egg wash). You just need the egg yolk for making the egg wash (large or medium size is fine).
Milk (for egg wash). You just need a splash to loosen up the egg yolk for the egg wash.
Flour Substitutions
I do not recommend swapping the flours for an all-purpose gluten-free flour as the recipe won’t work. The flours are the perfect balance of high protein and starches to give the pastry strength and elasticity.
However, if you are absolutely stuck with dietary requirements then at a pinch you can substitute the following flours:
Chickpea Flour. You can swap for defatted almond flour (not regular almond flour).
Cassava Flour. You can swap for sweet rice flour (not regular rice flour).
Tapioca Starch. You can swap for potato starch (not potato flour).
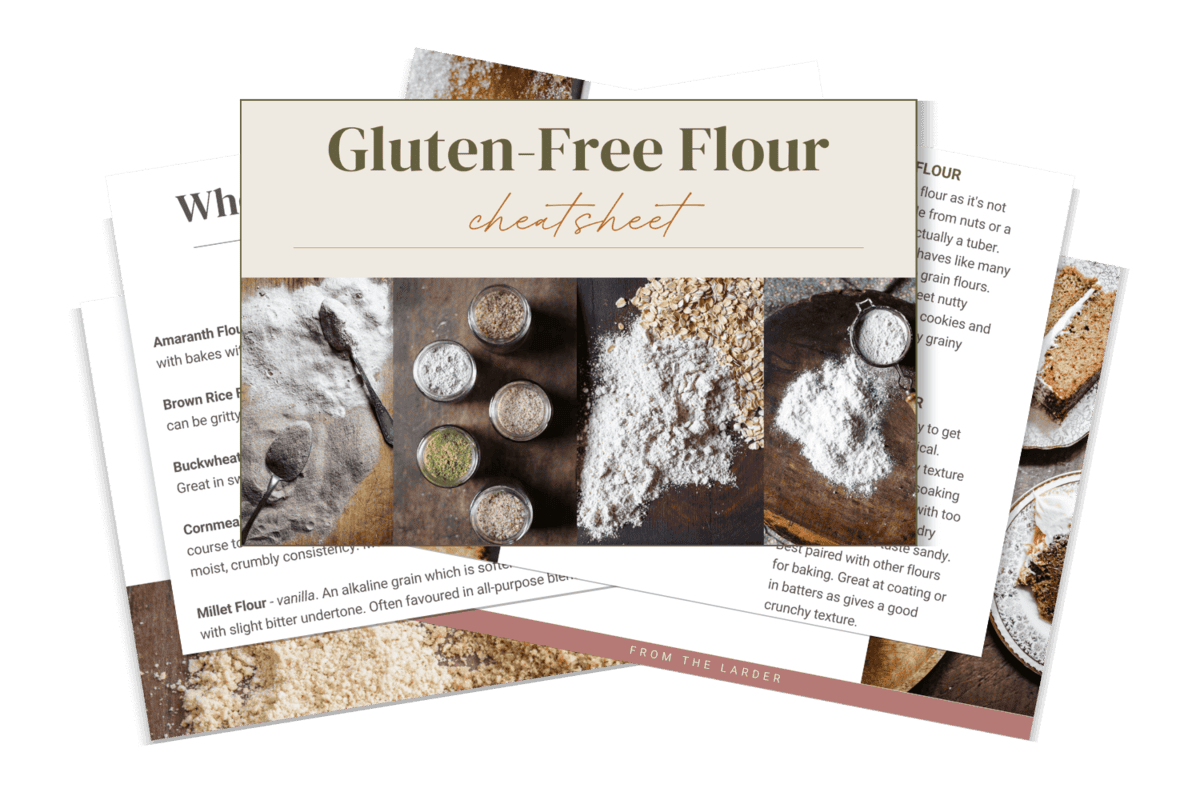
Gluten-Free Flour Cheatsheet
The Gluten-Free Flour Cheatsheet makes choosing the right flour easy, breaking down every option from sorghum to cassava into four simple categories. With nutritional info, flavour pairings, and a printable reference section, this guide cuts through the confusion so you can navigate gluten-free baking with clear flour choices.
How To Make Quick Gluten-Free Rough Puff Pastry
For full recipe instructions go to the recipe card at the end of this post.
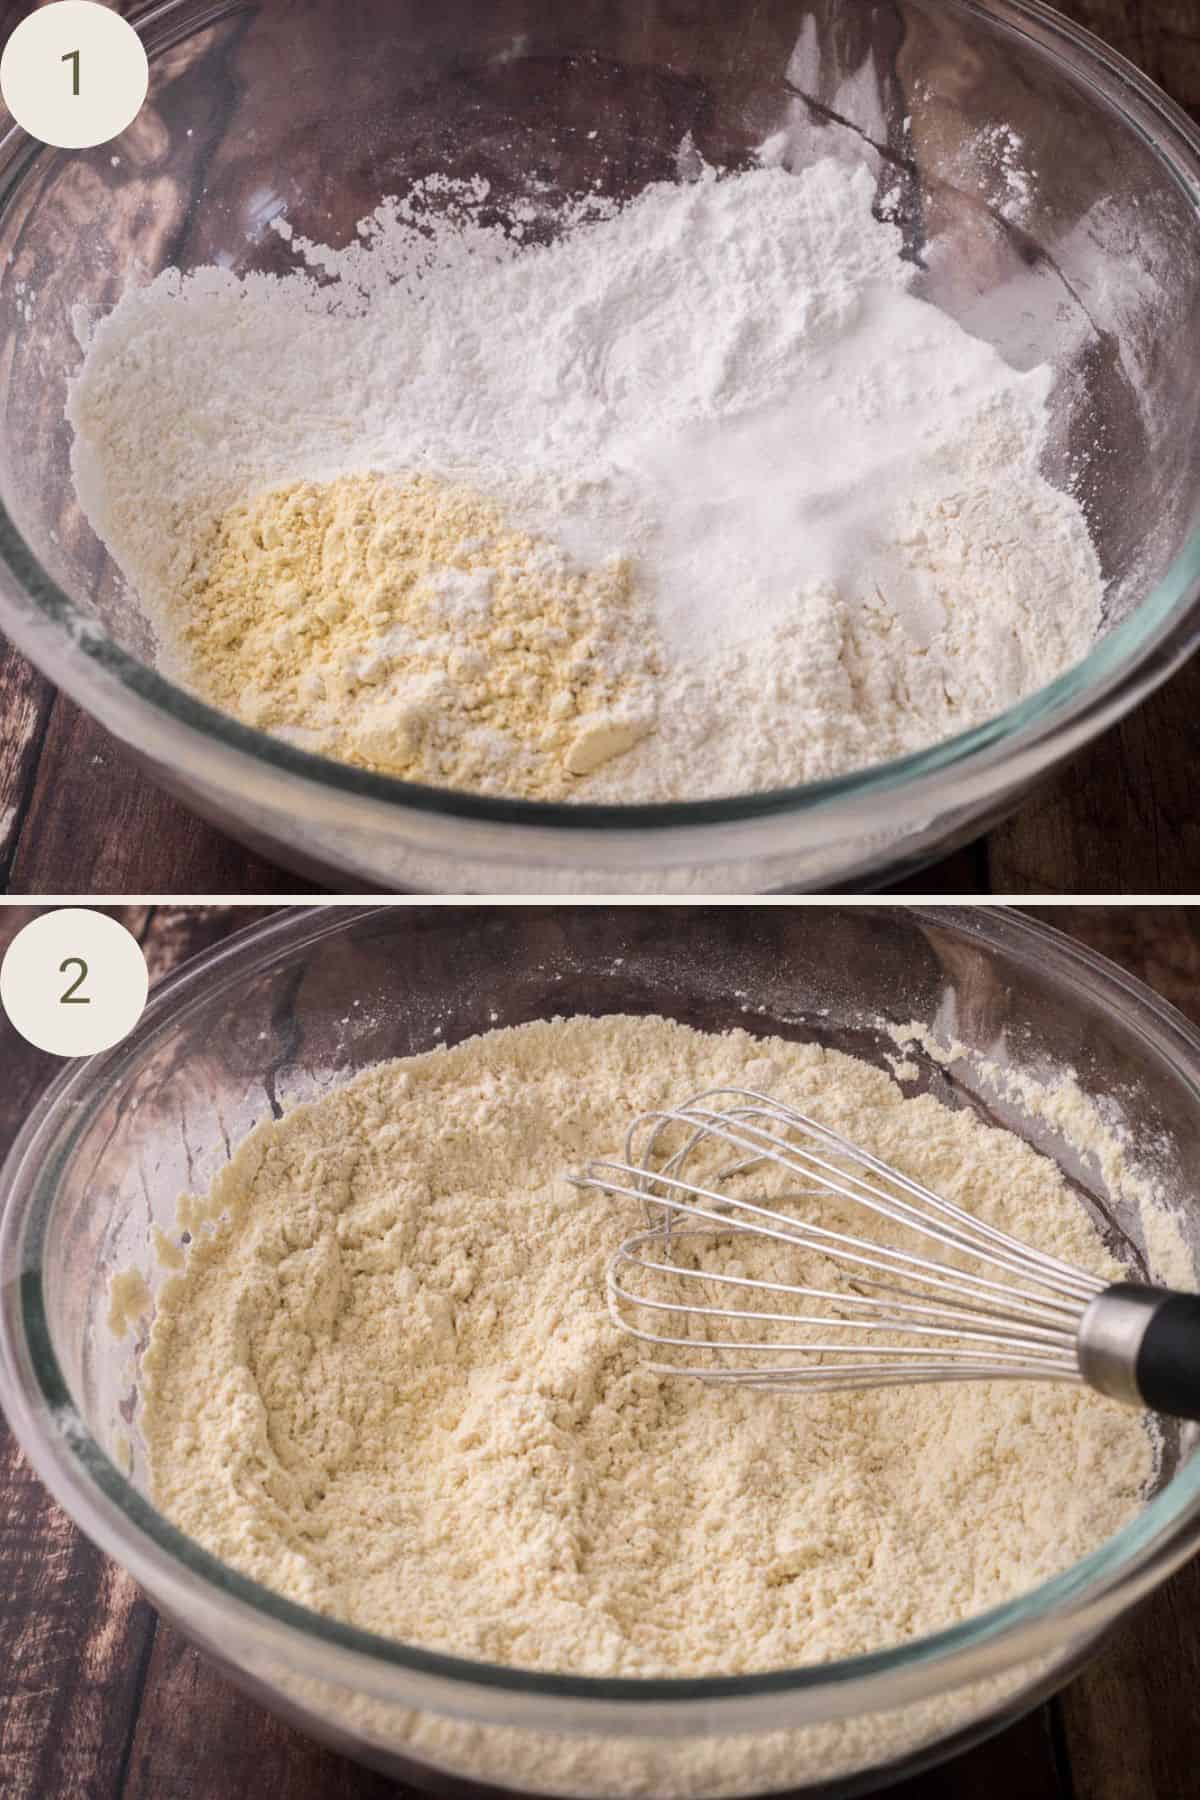
Mix the Dry Ingredients: In a large bowl, mix the flours with the sugar and salt.
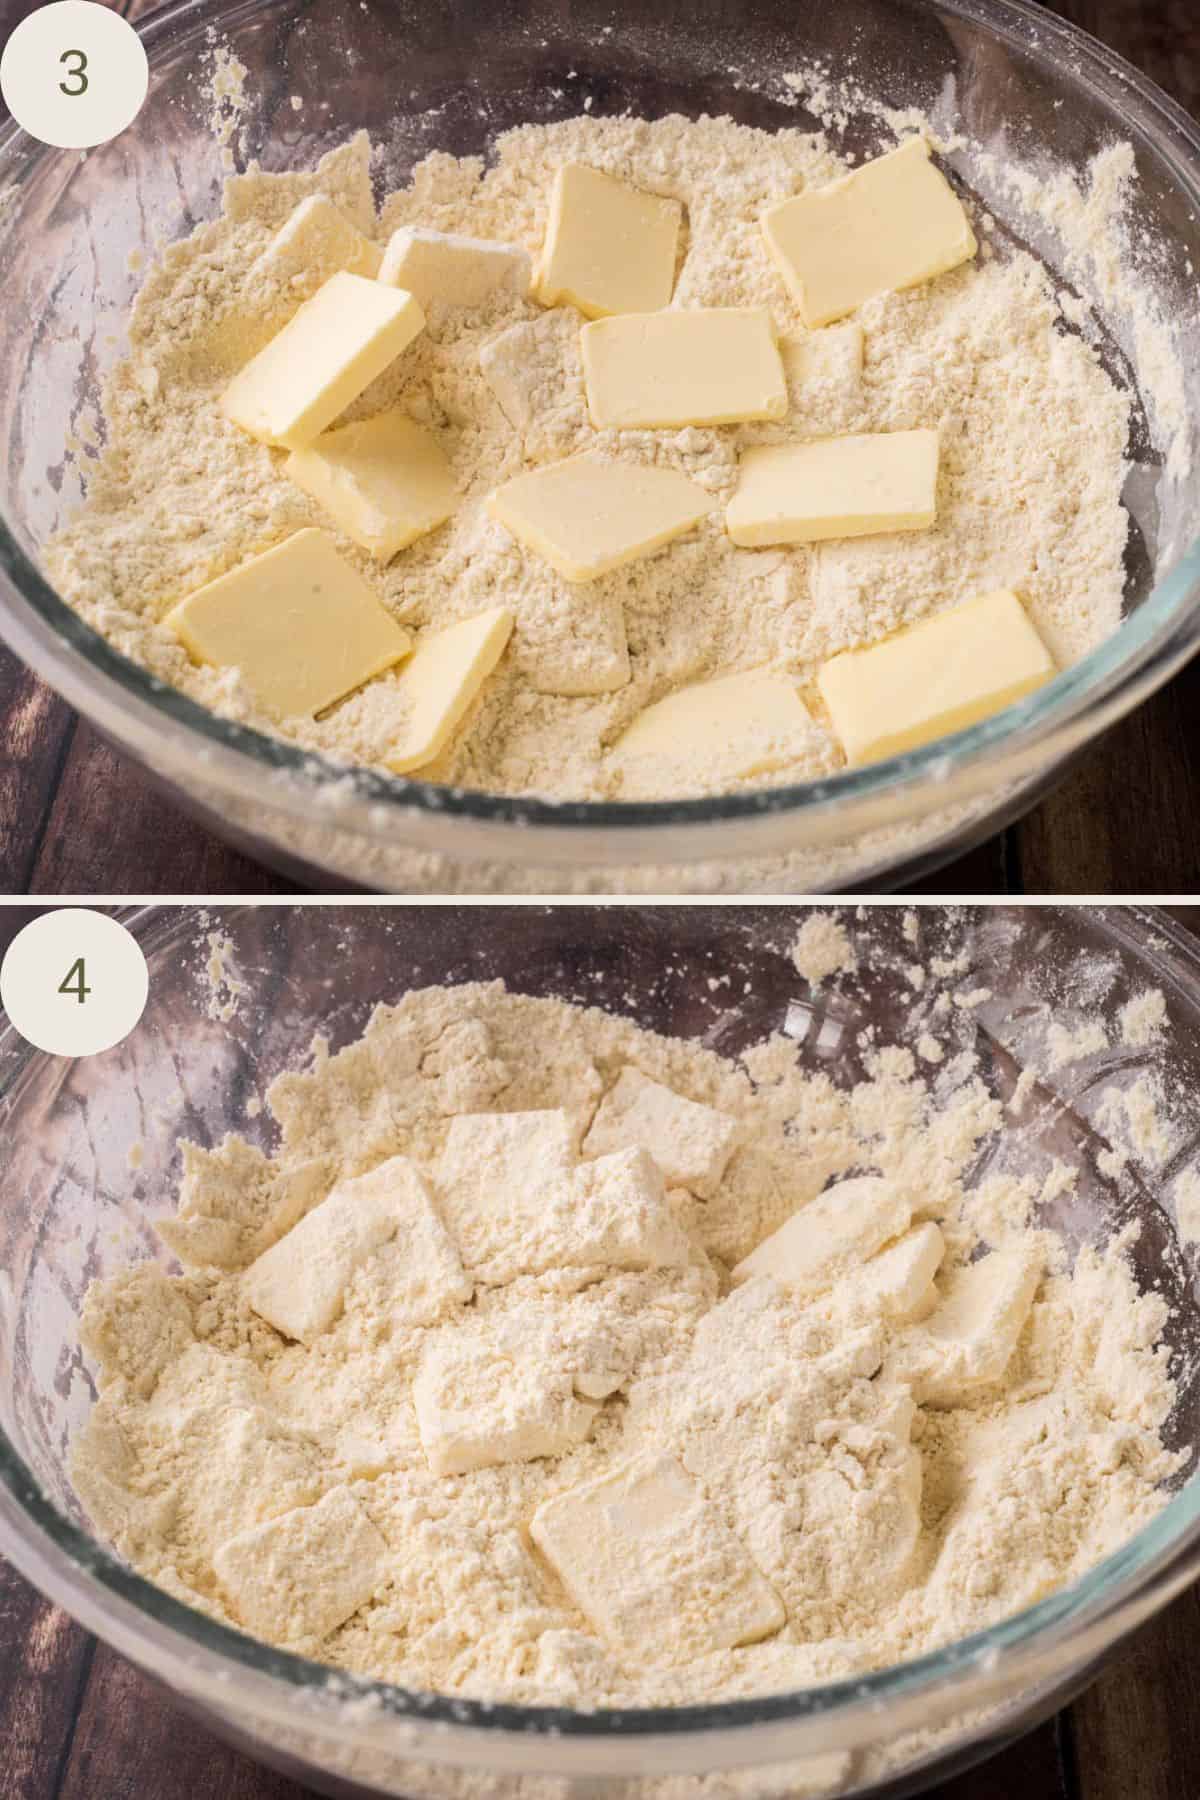
Add the Butter: Separate the cold butter slices into the flour and make sure each piece is coated with the flour.
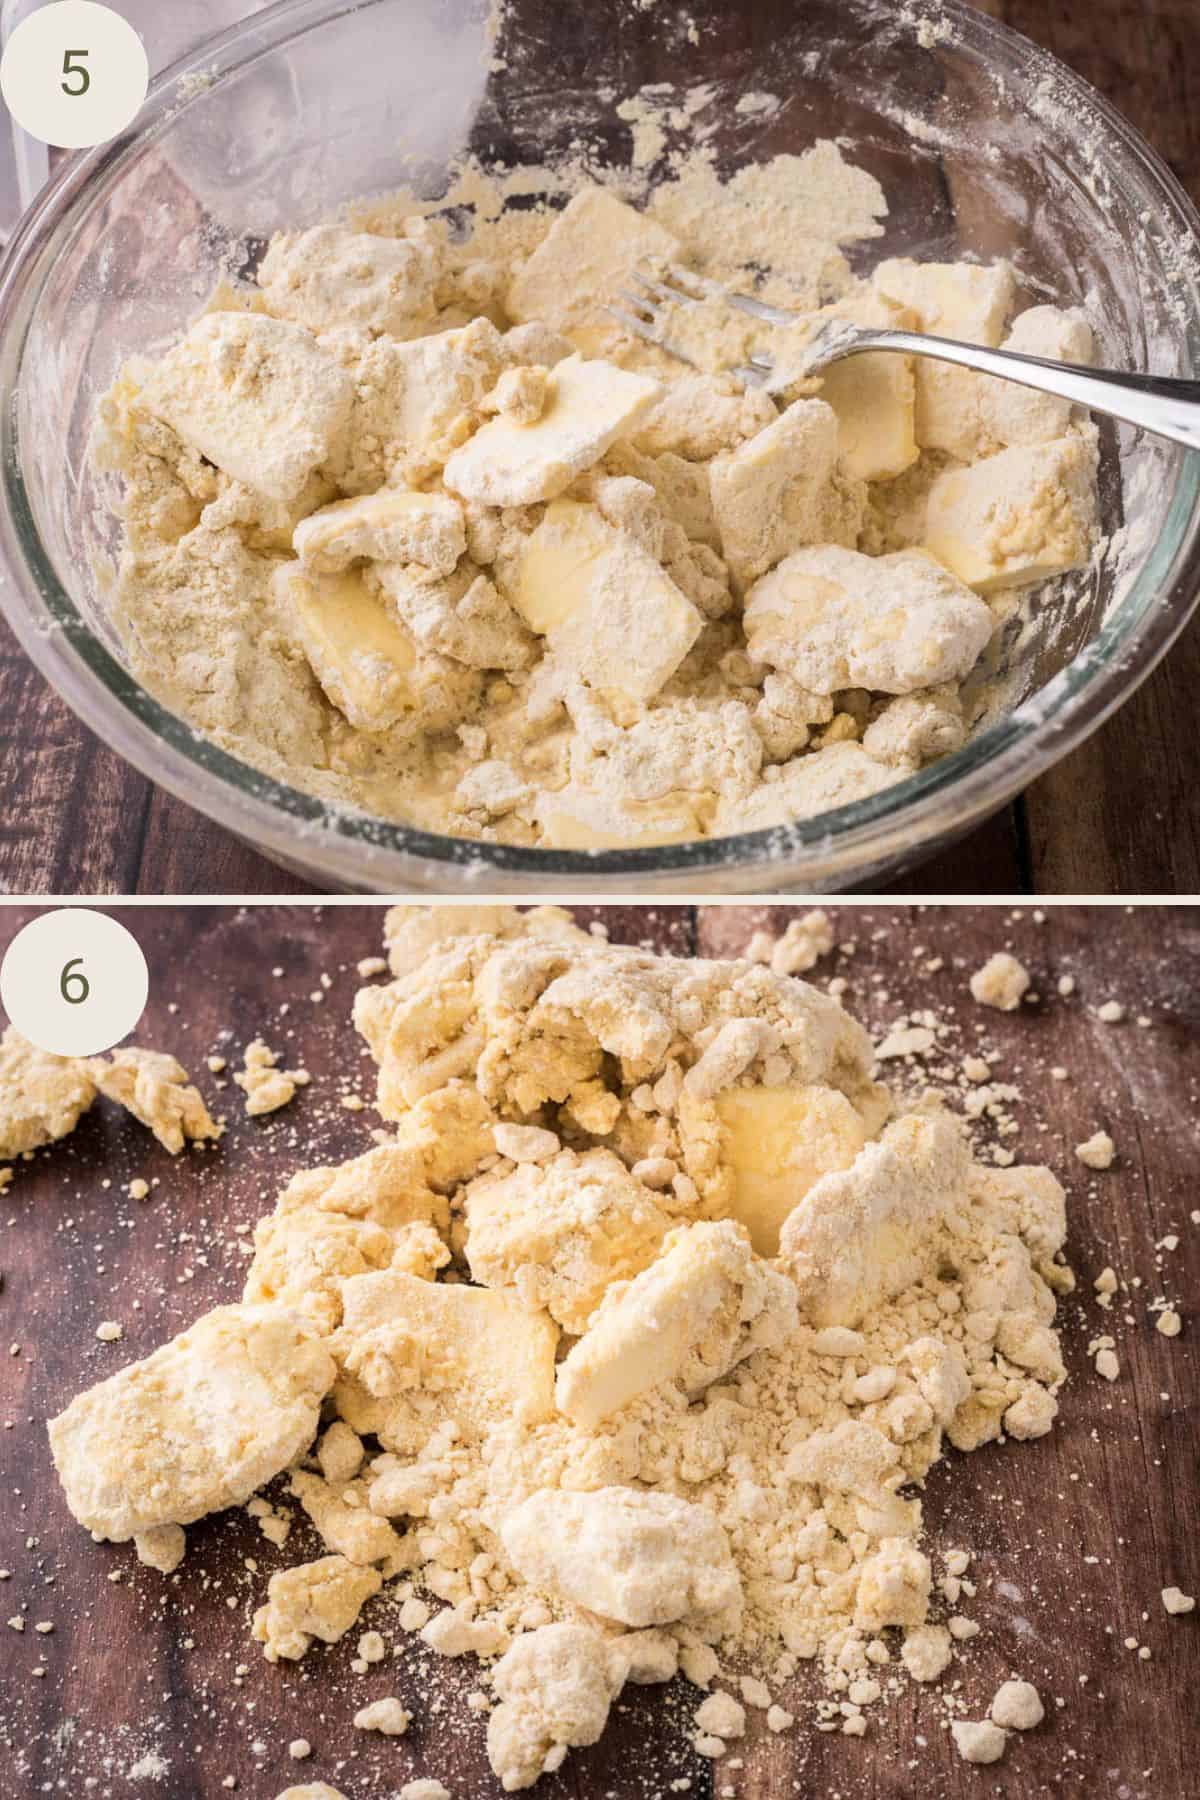
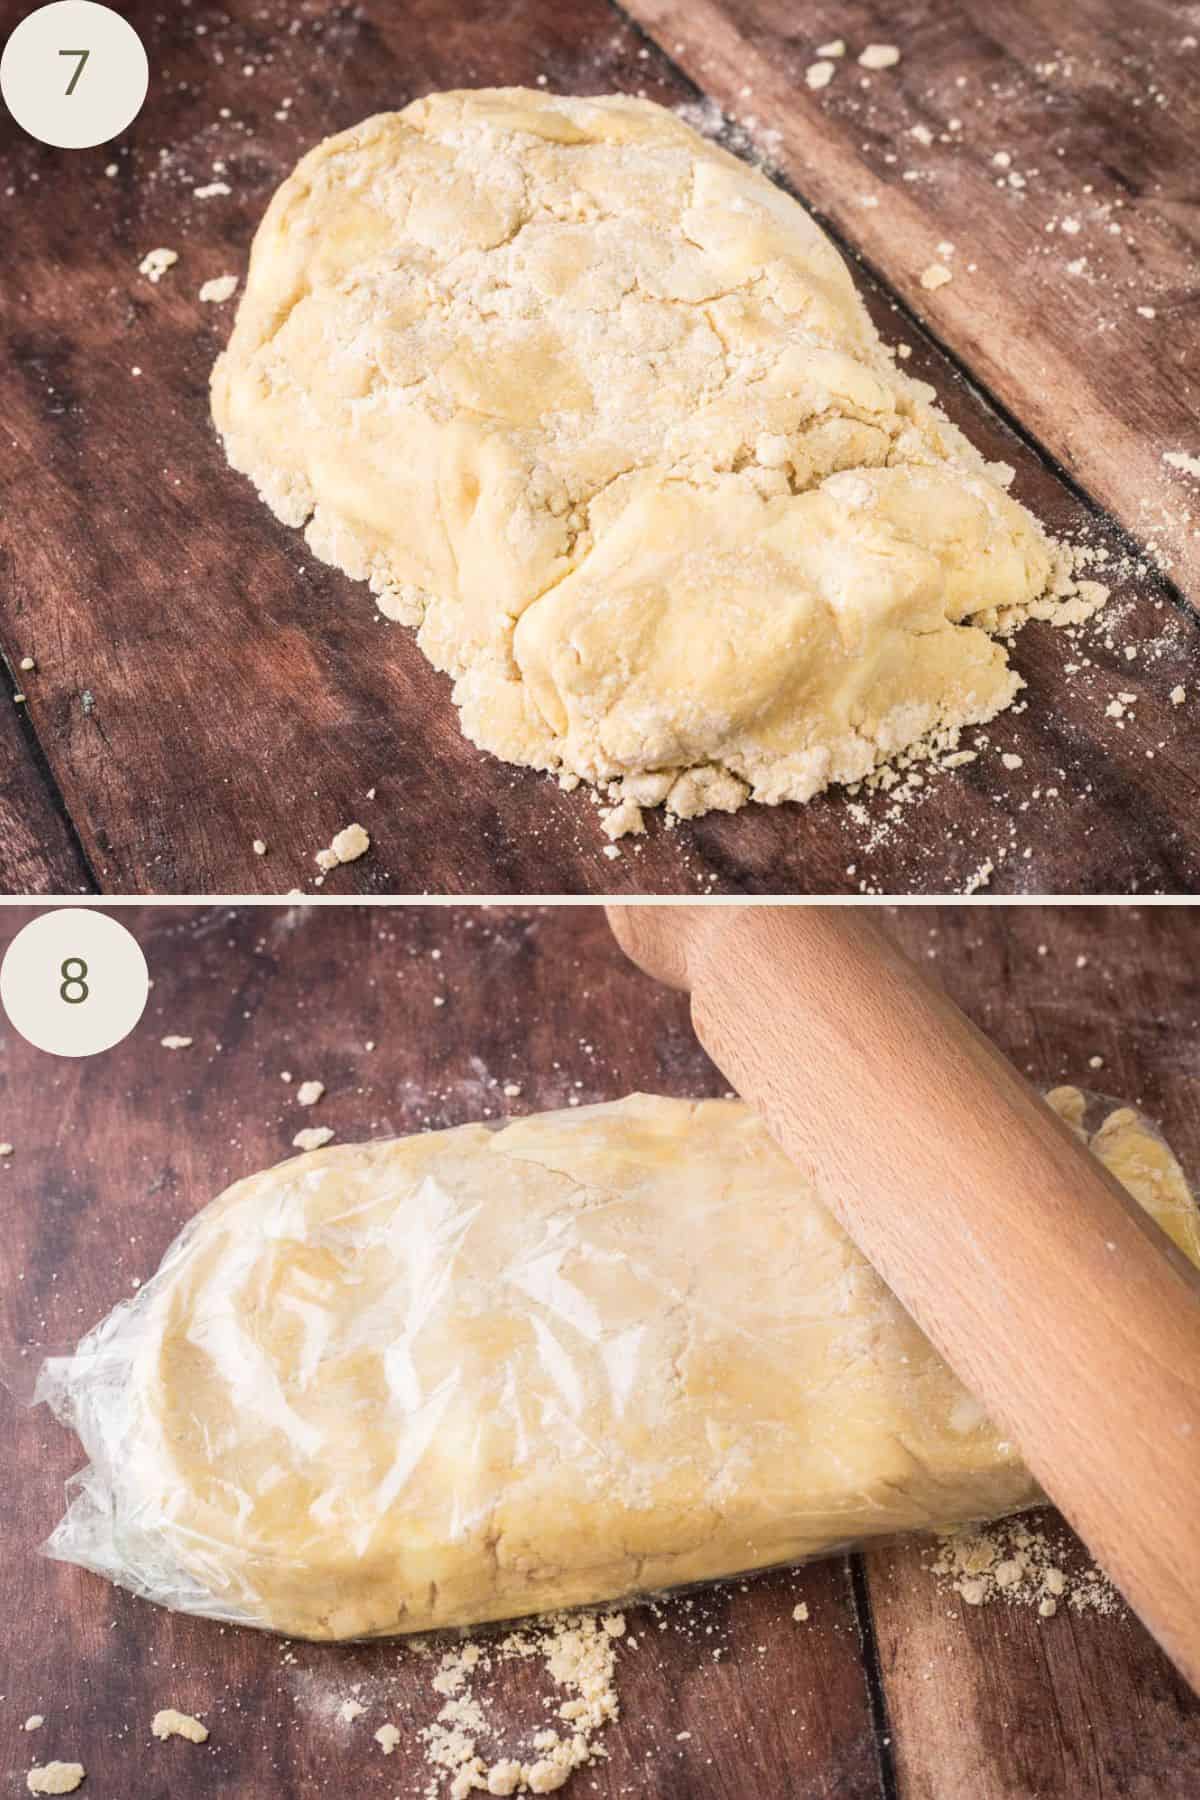
Make the Dough: Gradually add the iced water into the flour, 2 tablespoons at a time mixing in with a fork. Tip the dough out onto a clean work surface and clump together briefly using your hands into a very loose crumbly shaggy dough. Wrap in cling film (plastic wrap) and use a long rolling pin to beat the dough so it flattens slightly to 1 inch thick.
1st Chilling: Chill the wrapped dough in the fridge for 2 hours (or up to 48 hours).
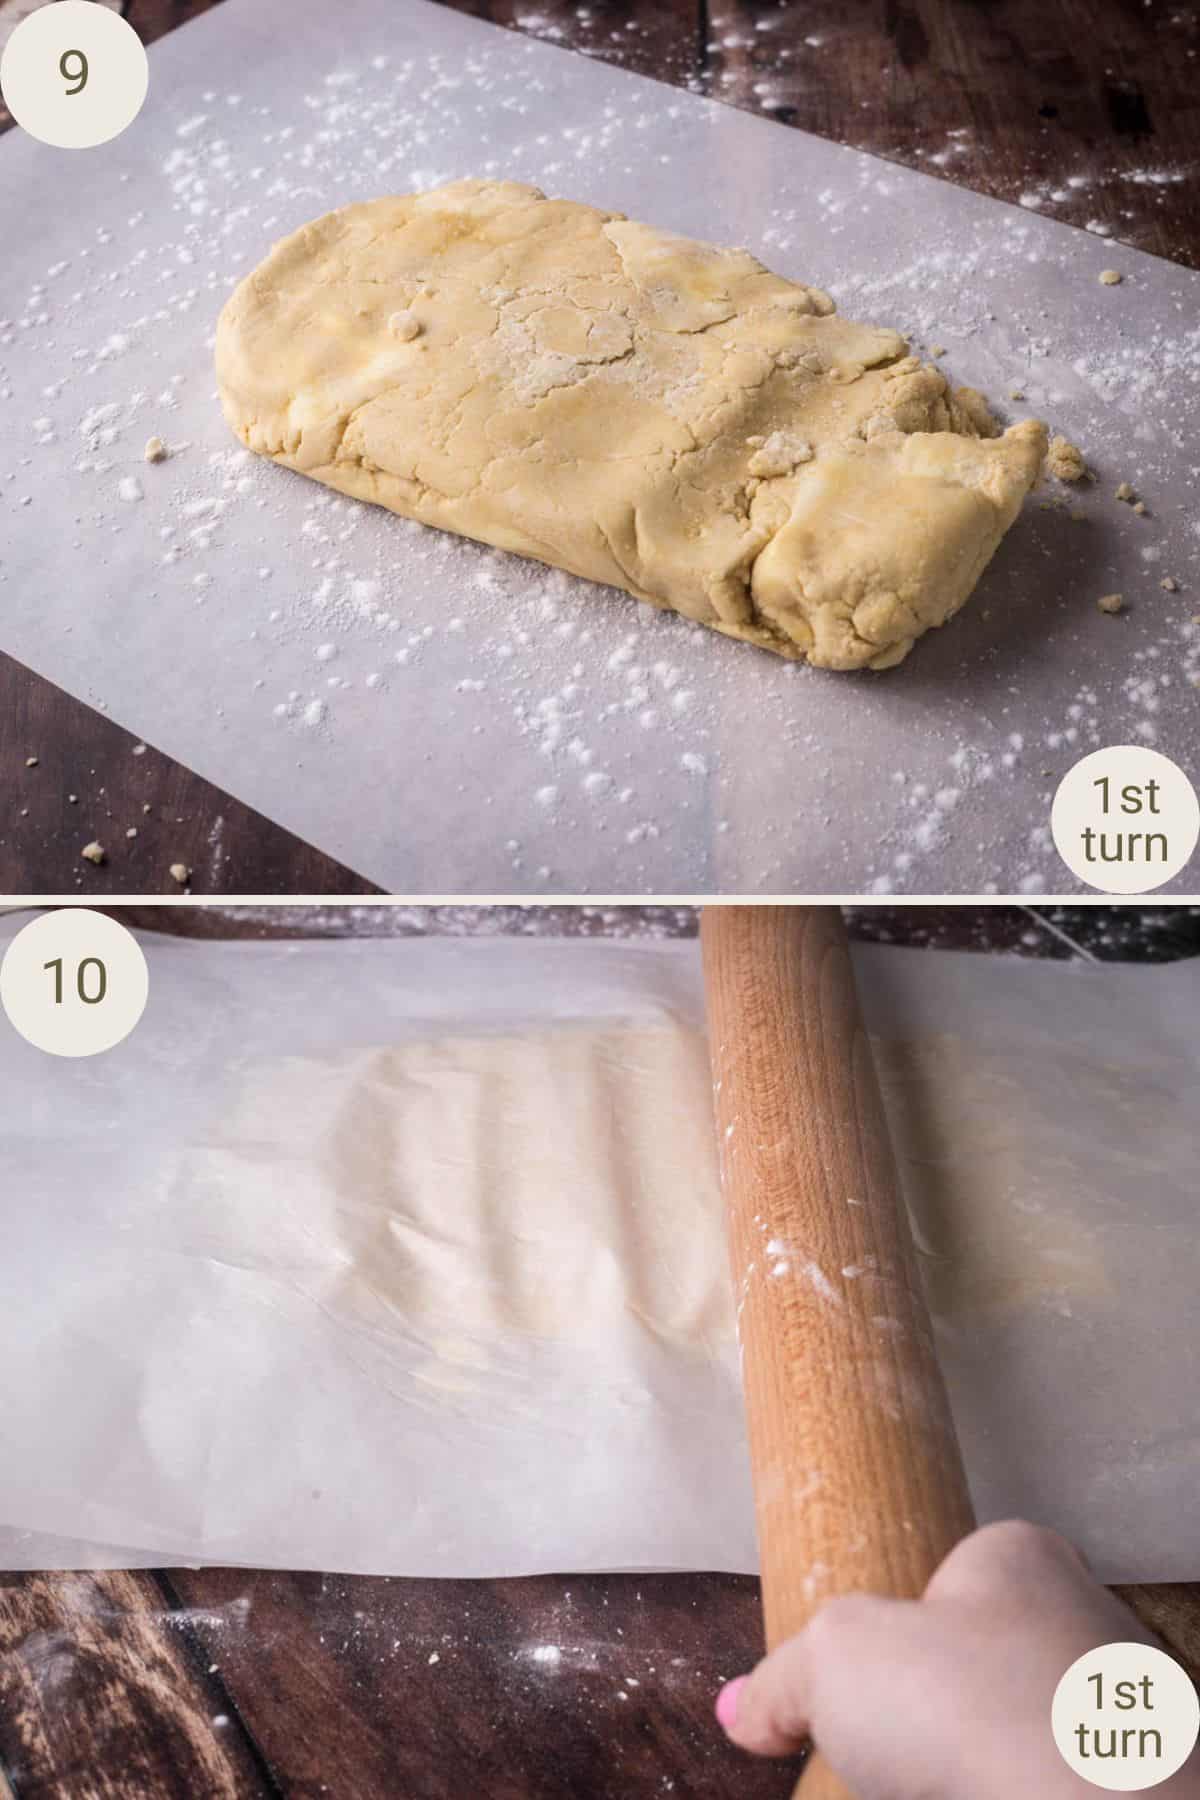
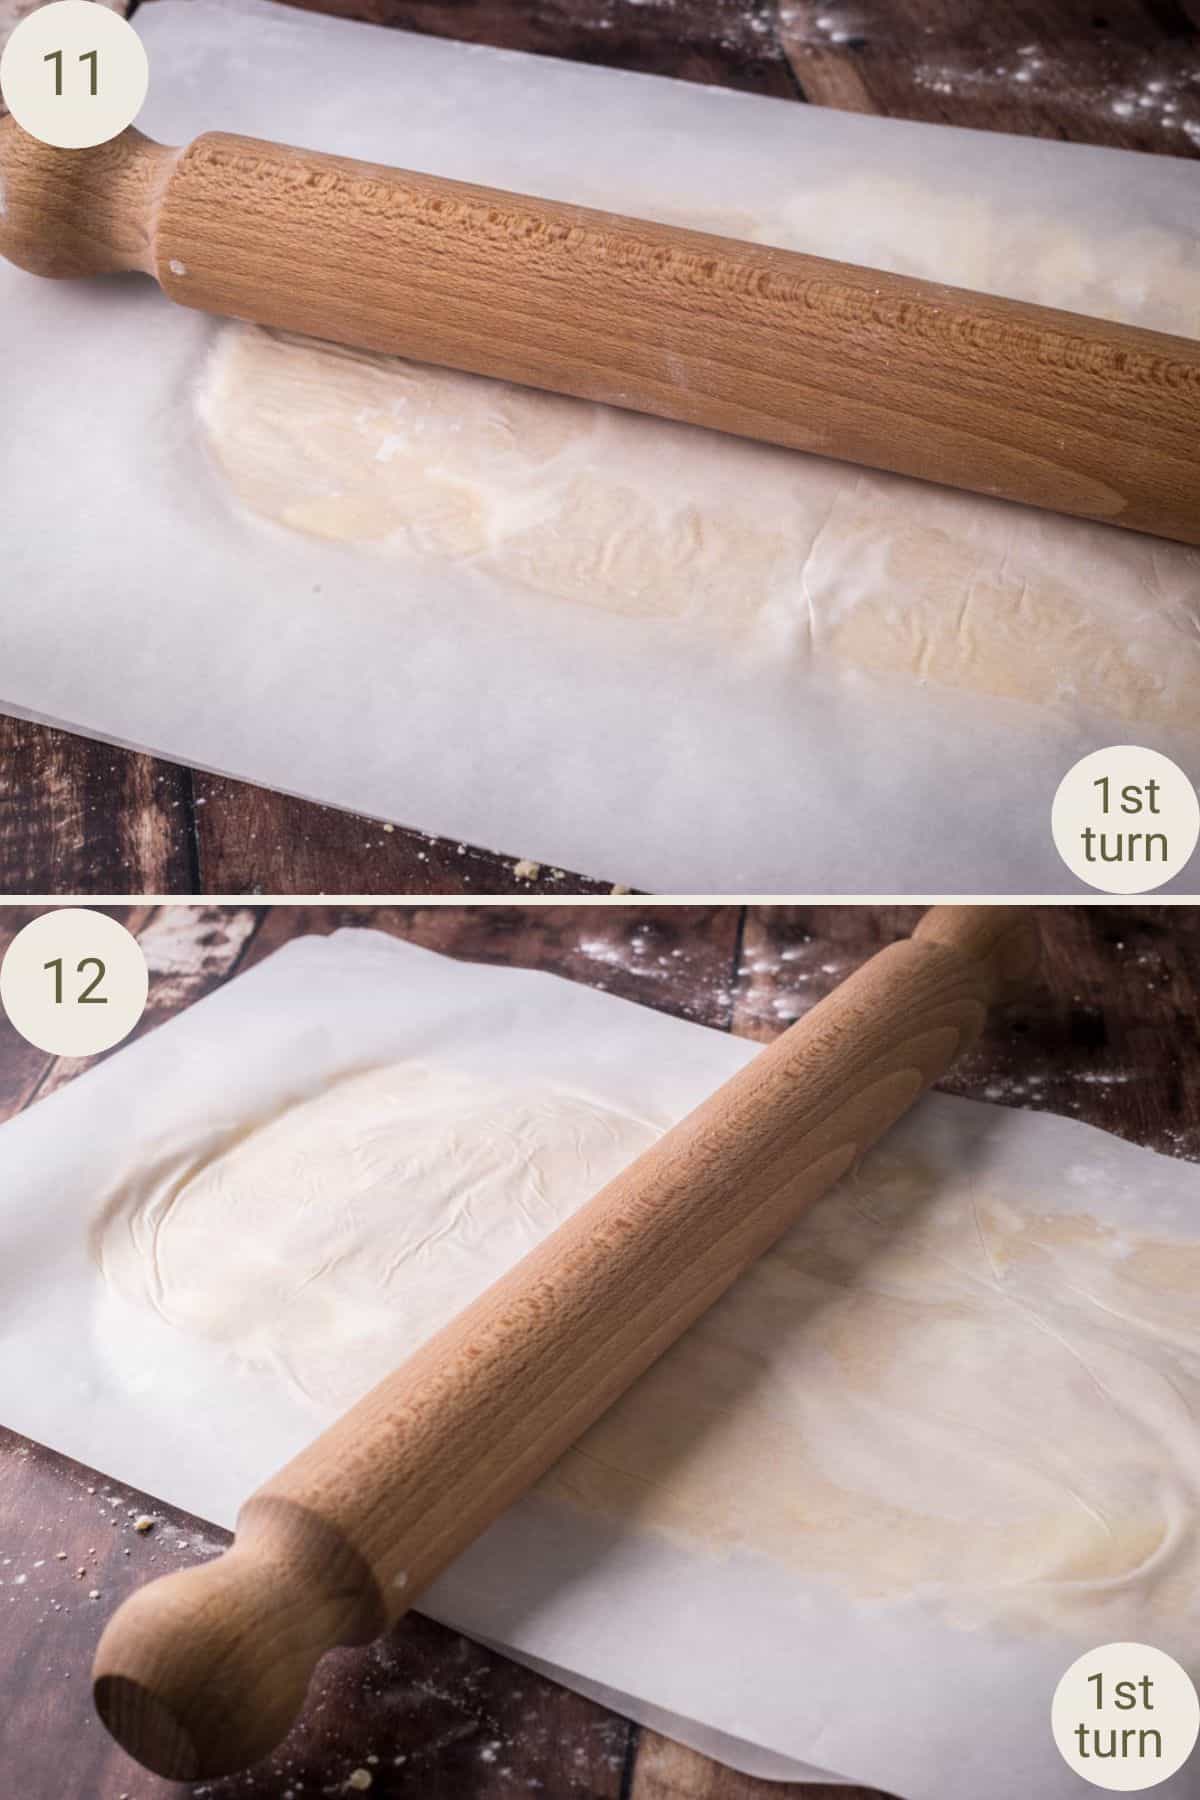
Roll out the Dough: 1st turn: Place the dough between two sheets of baking parchment, dusted lightly with tapioca flour. Position the dough with the short edge parallel to the edge of your work surface. Using a long rolling pin and smack the dough in long even strokes to start flattening out the pastry and make it a little more pliable. Then roll it out to roughly 40cm x 20cm. (twice as long as it is wide).
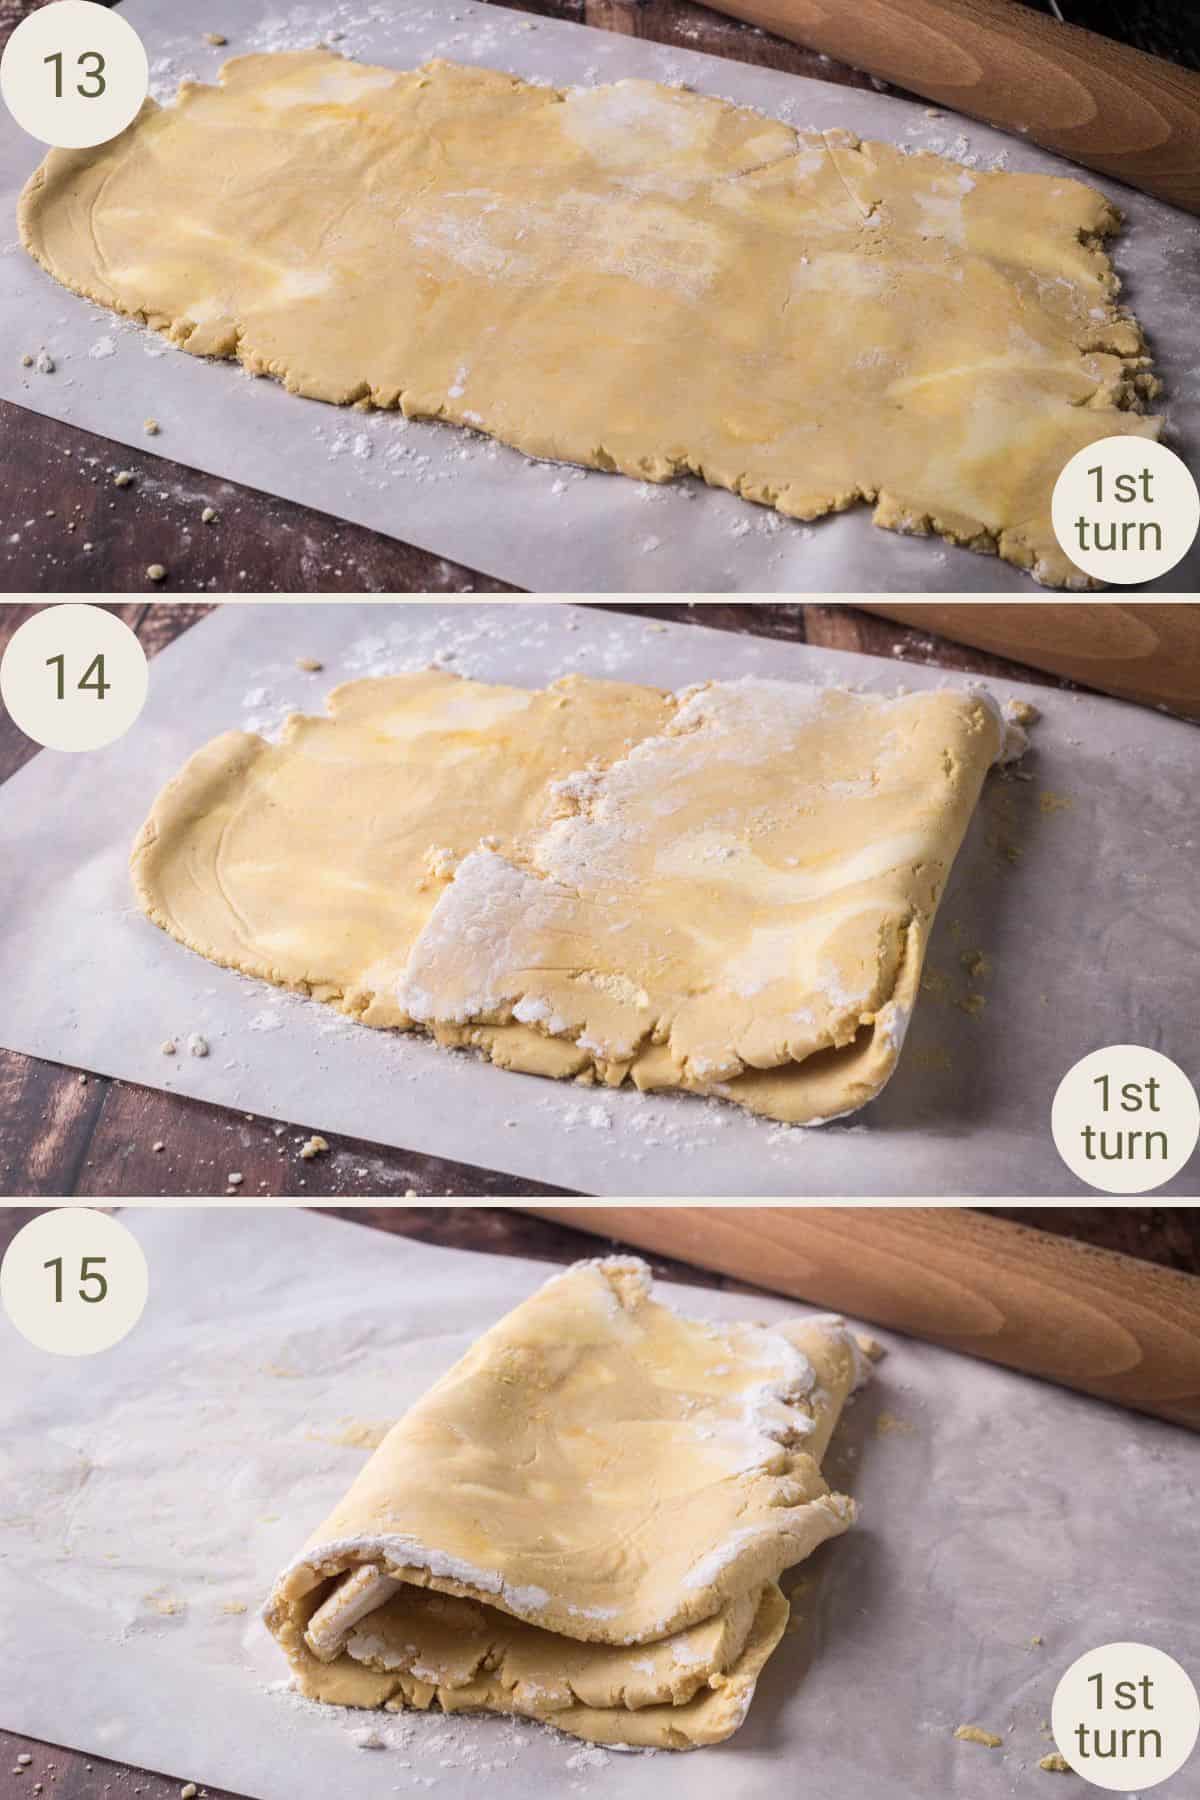
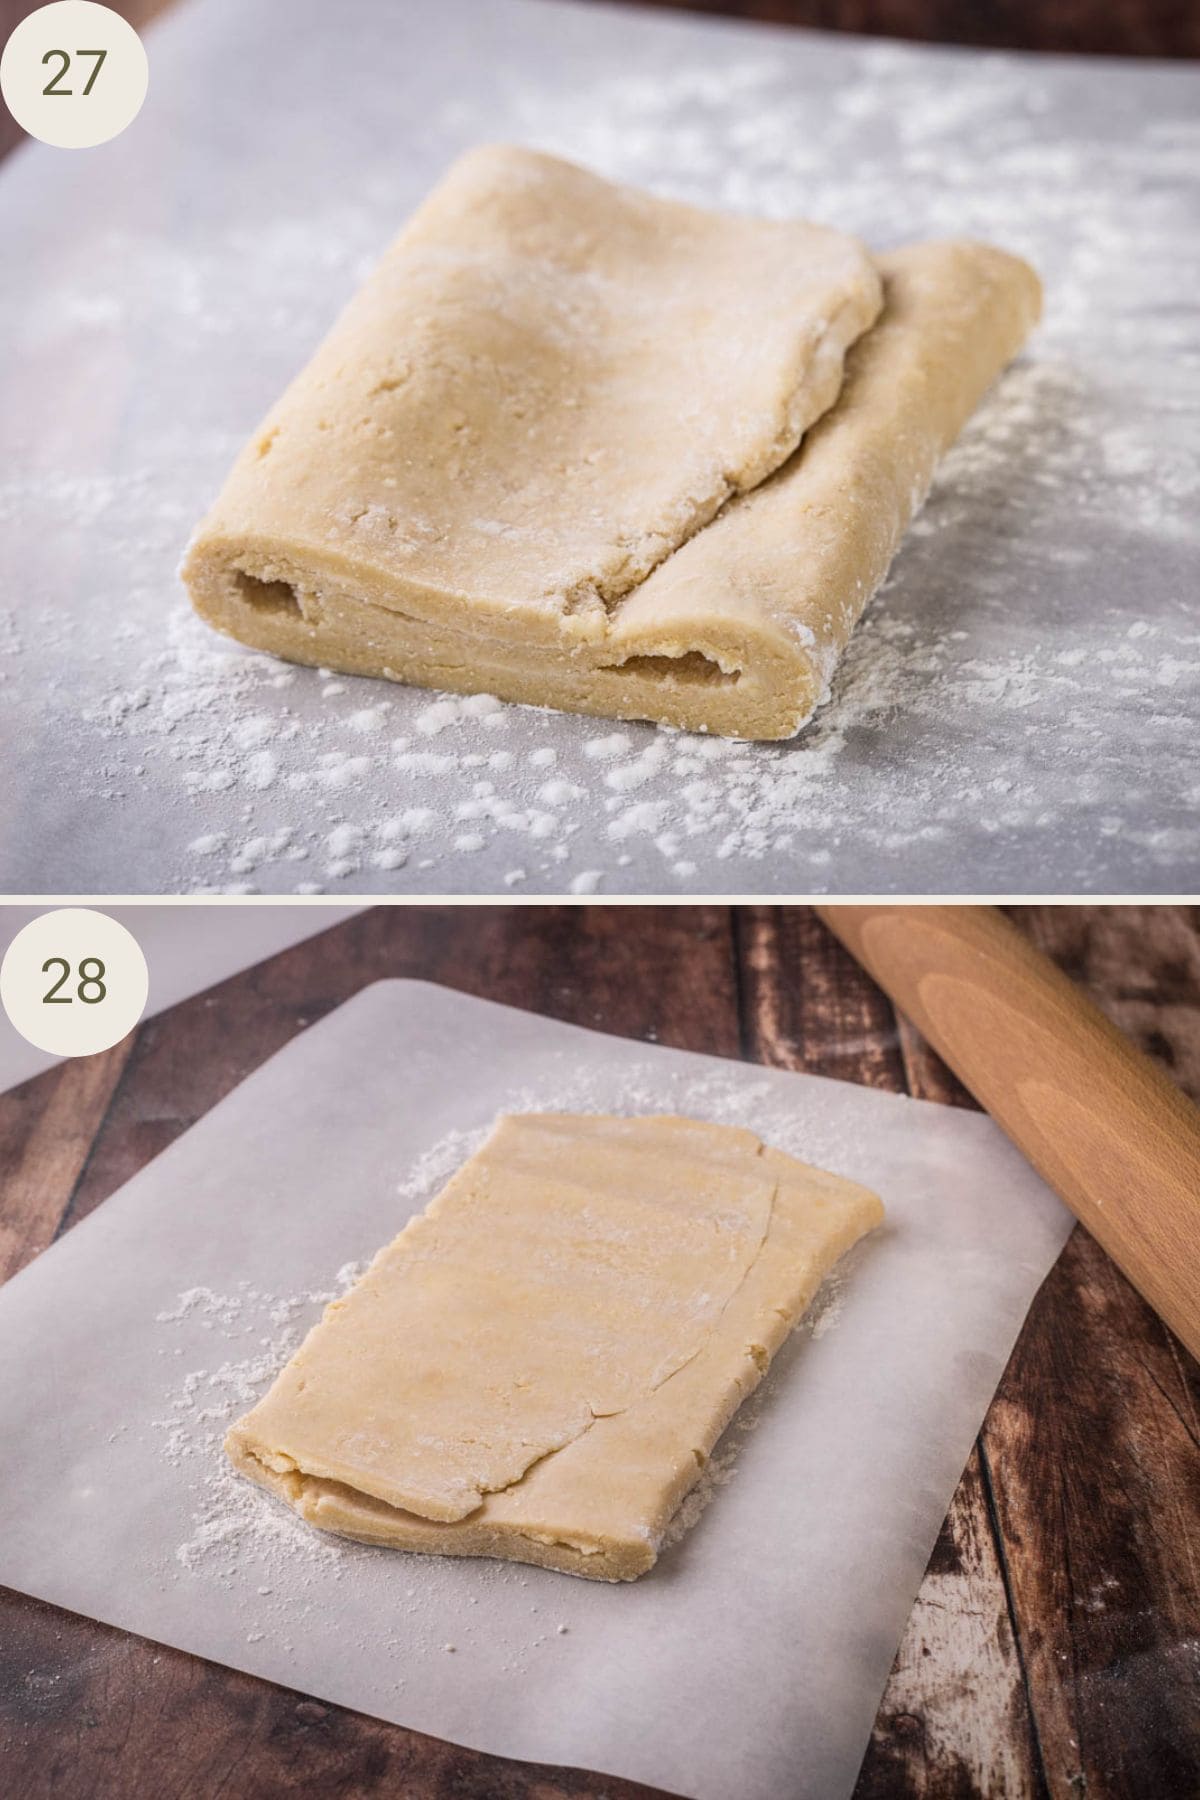
Fold the dough: Take off the top sheet of baking parchment then fold one end of the dough up to the centre, using the baking parchment to help you, then fold the other end over it, like closing an envelope.
Rotate and Repeat: 2nd turn: Turn the dough 90 degrees, so the long edge of the dough is parallel to the edge of your work surface, and place the baking parchment back over the top. Repeat the process for a second turn, beat the dough with a rolling pin first to flatten then roll the dough into a rectangle, about 40cm x 20cm. Then fold into an envelope.
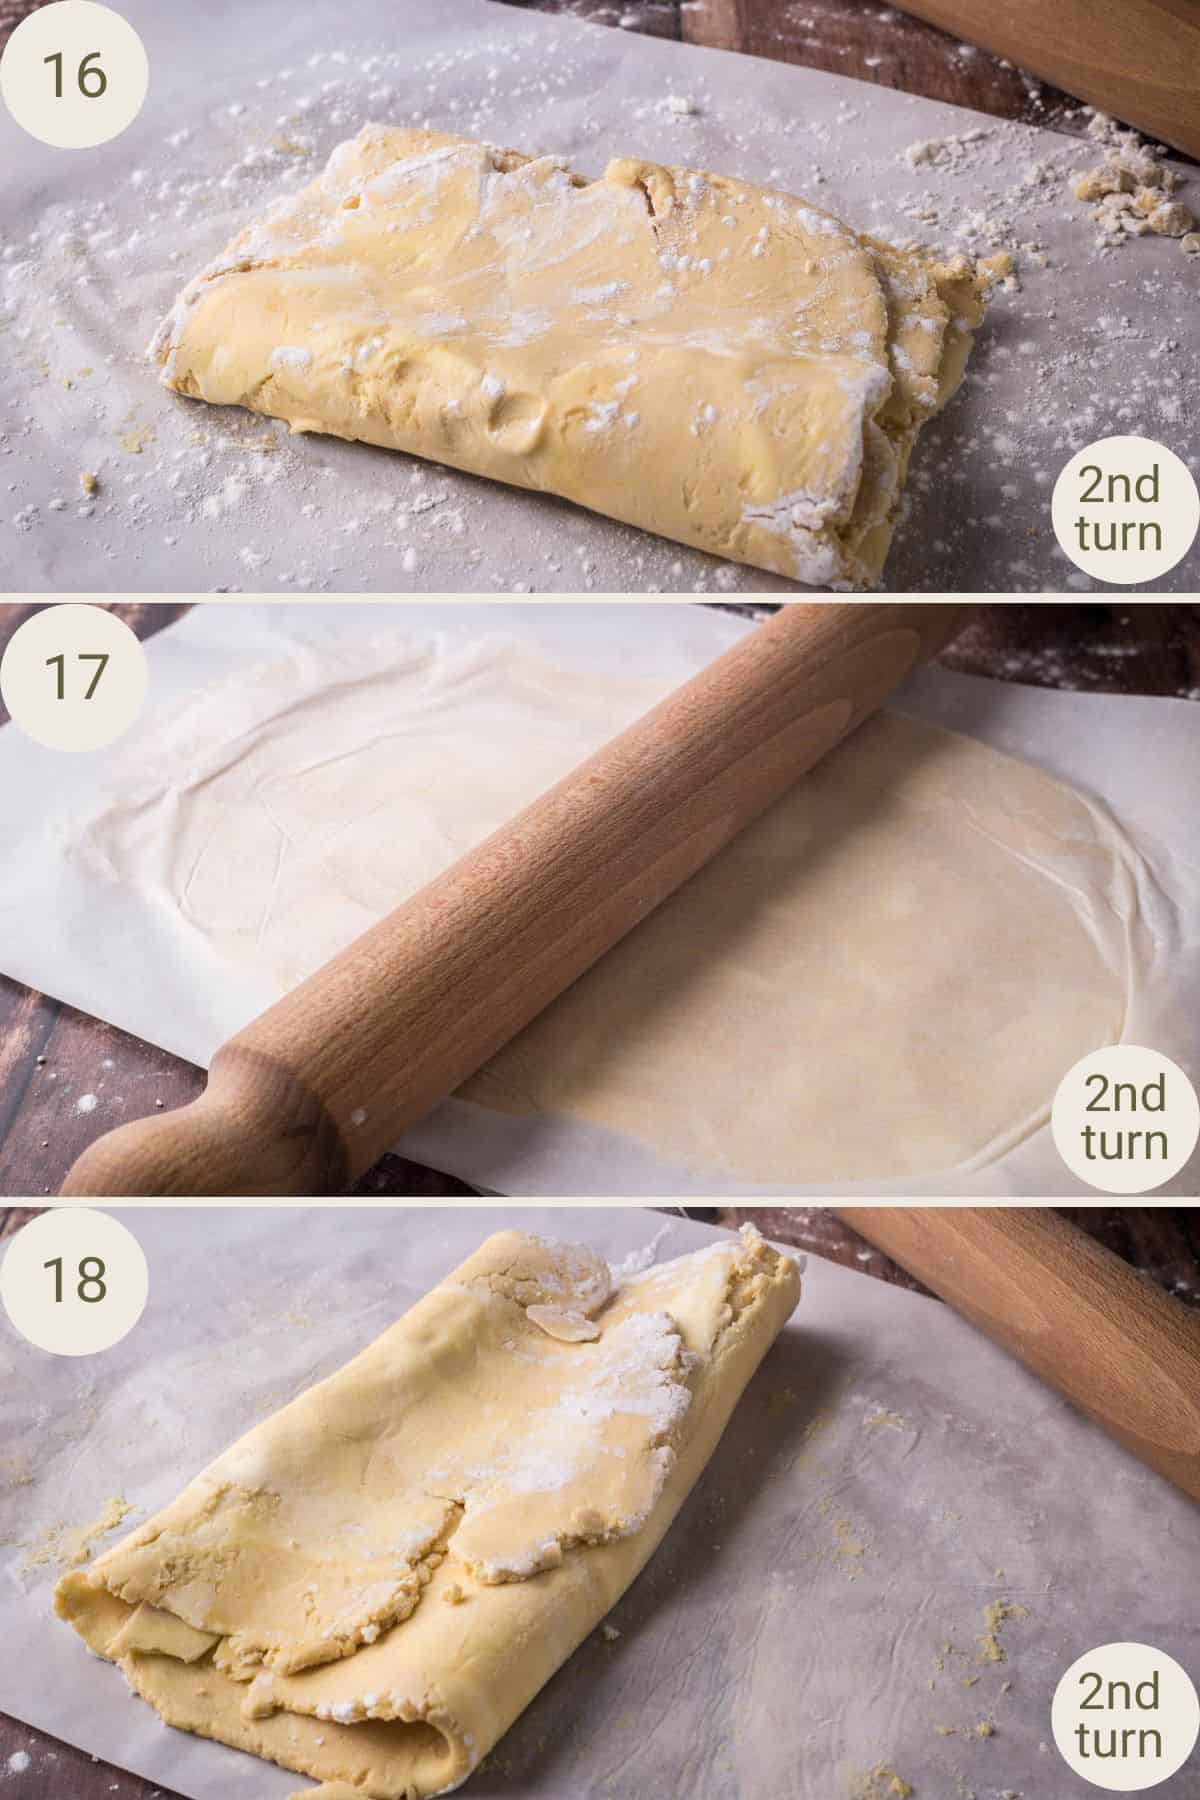
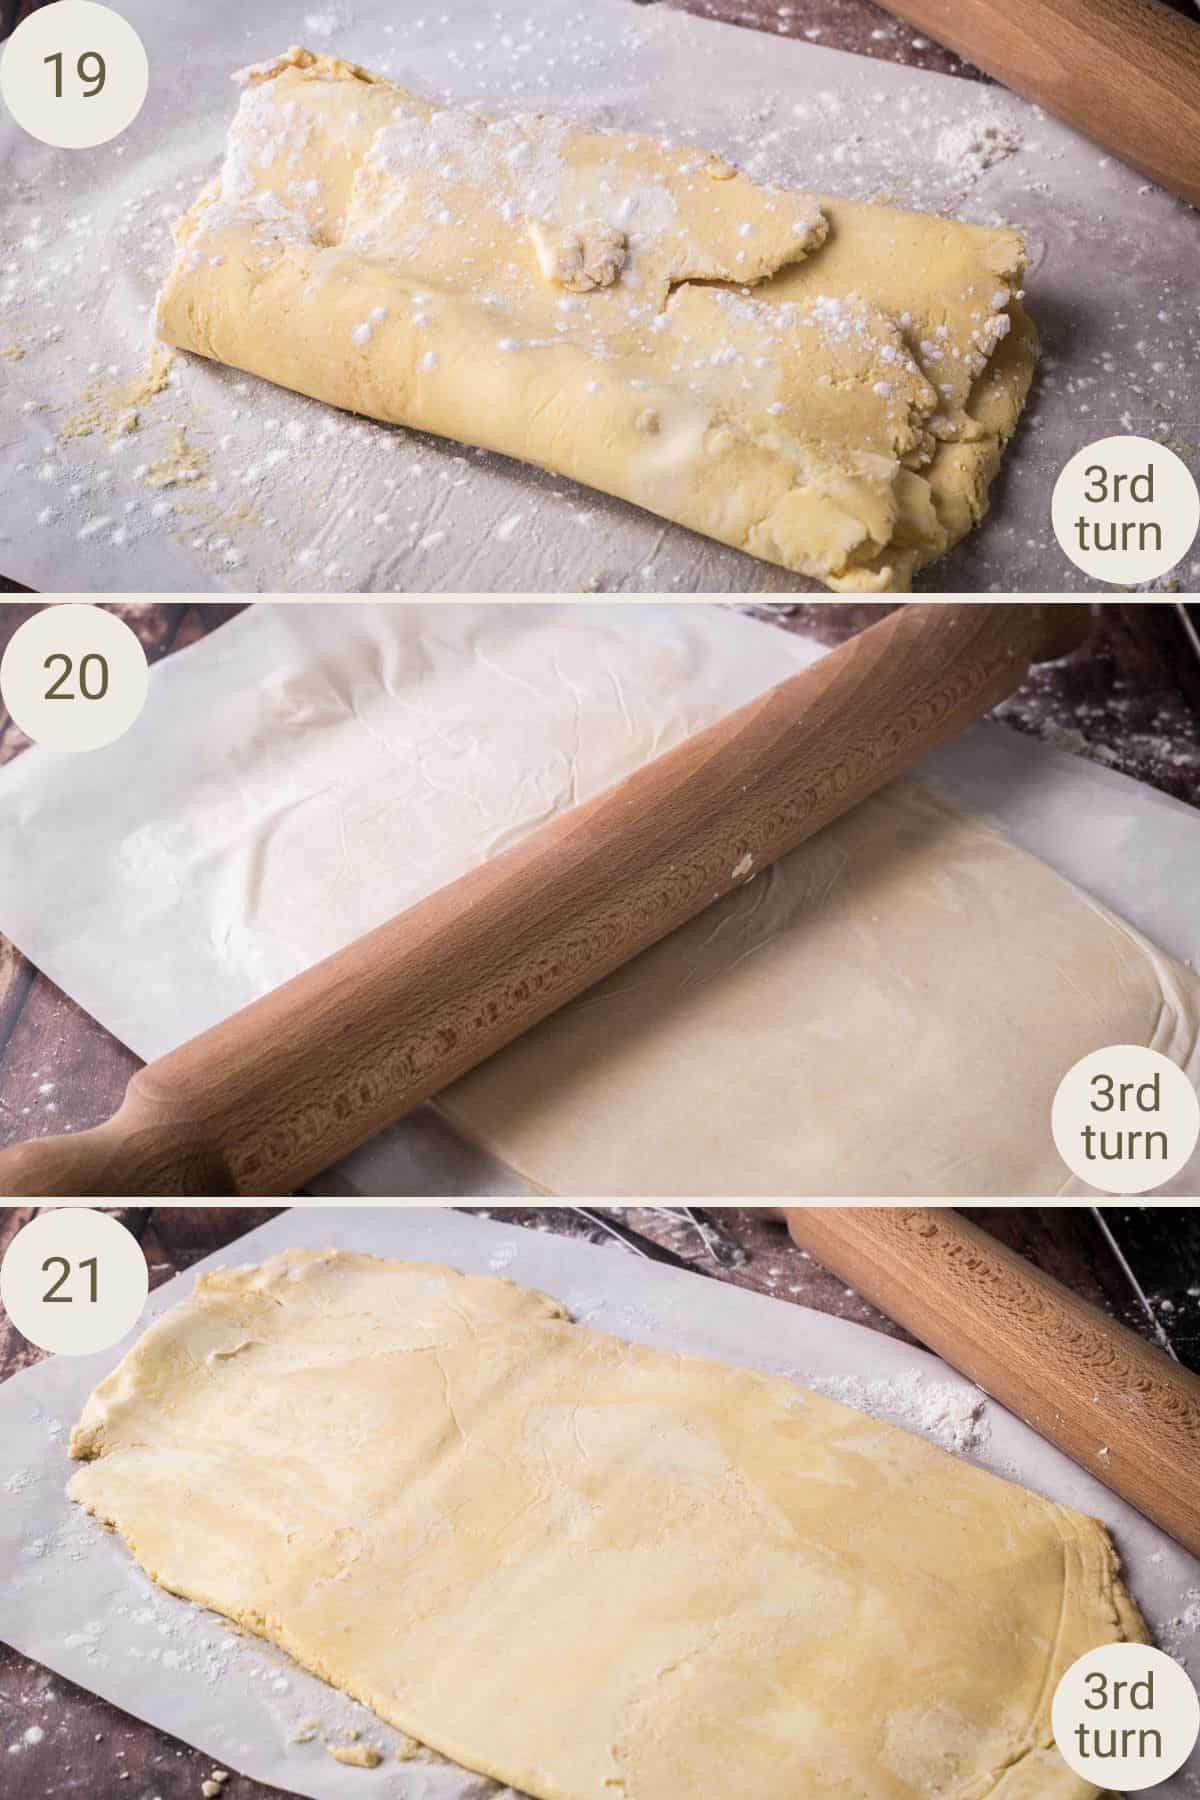
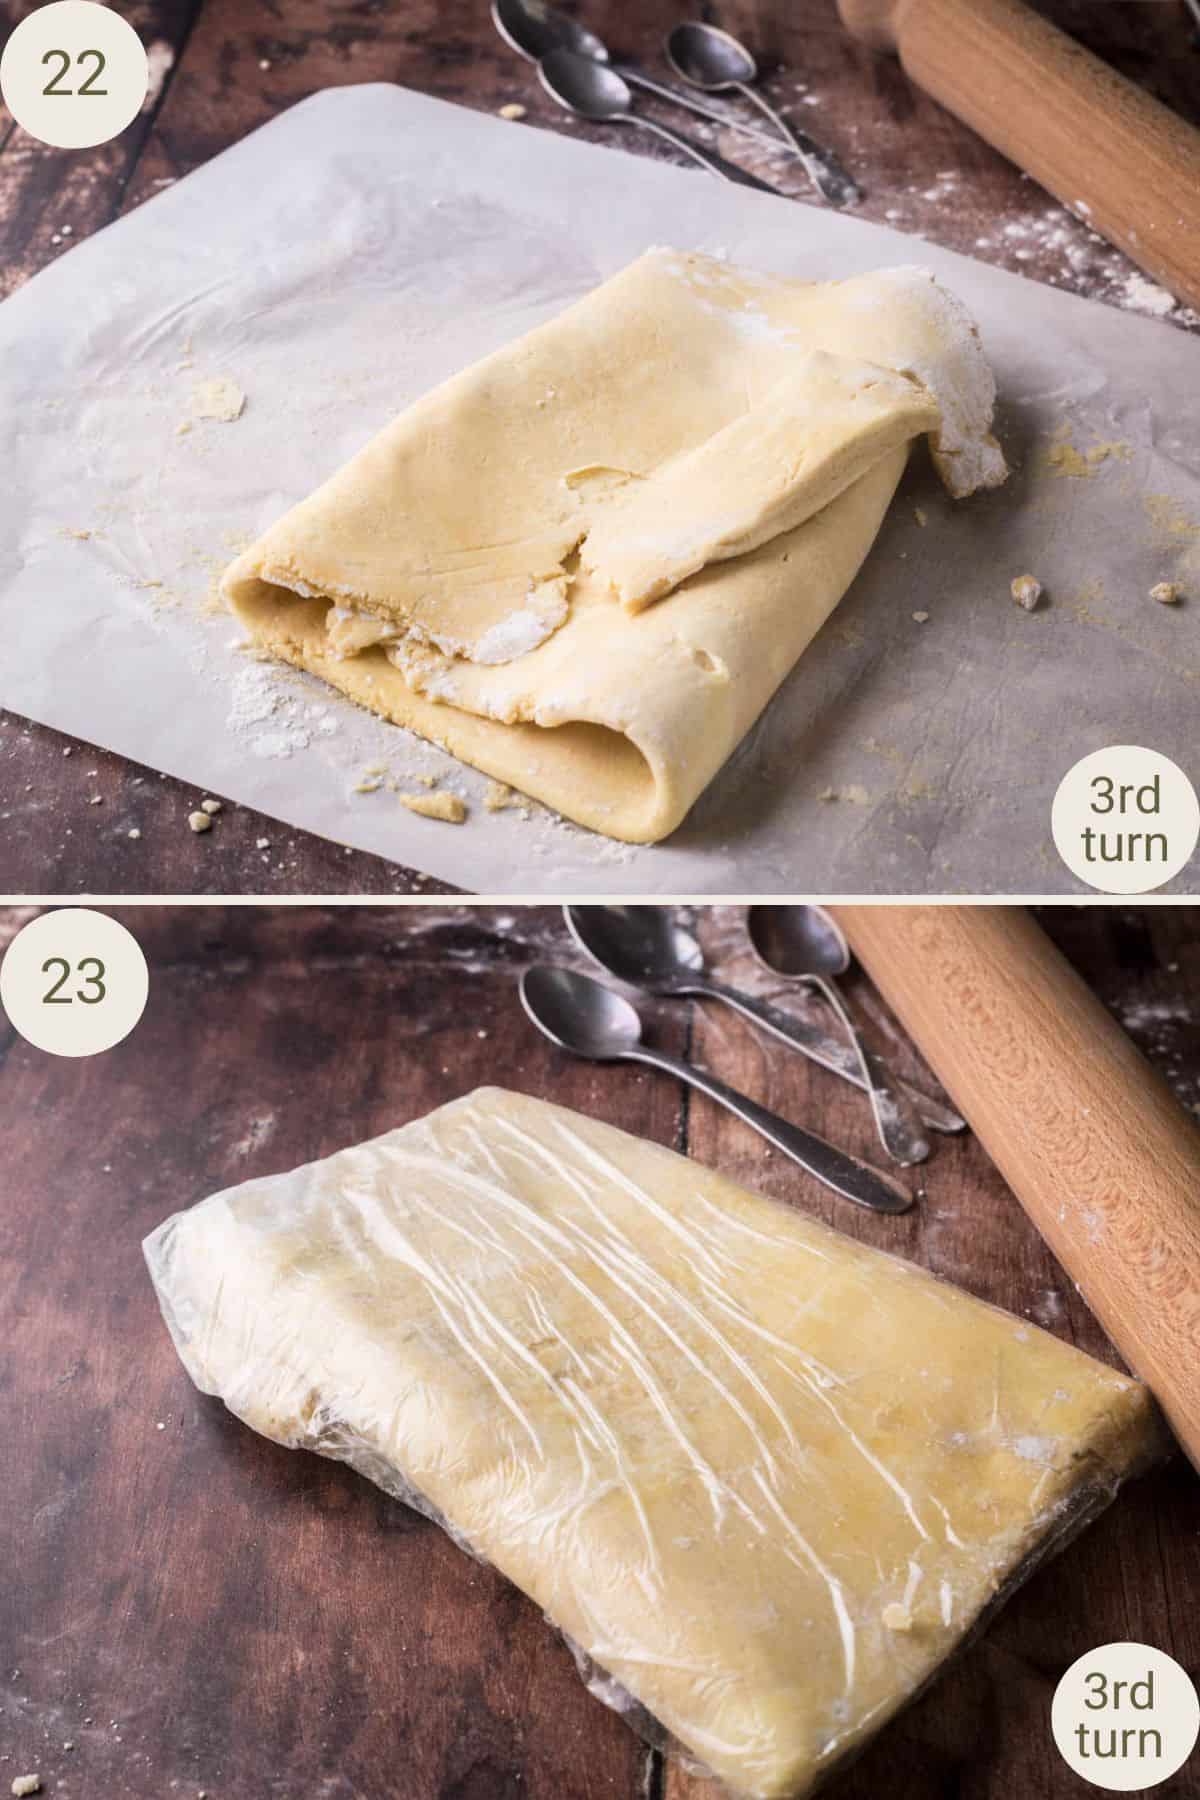
Rotate and Repeat: 3rd – 6th turn: Repeat this process of rotating, beating the dough, rolling out and folding until you have completed 6 turns. Usually after the 3rd turn the butter is starting to melt into the dough so to slow that process down, wrap up and refrigerate for 30 minutes. Once the dough has chilled again then continue the 4th, 5th and 6th turn.
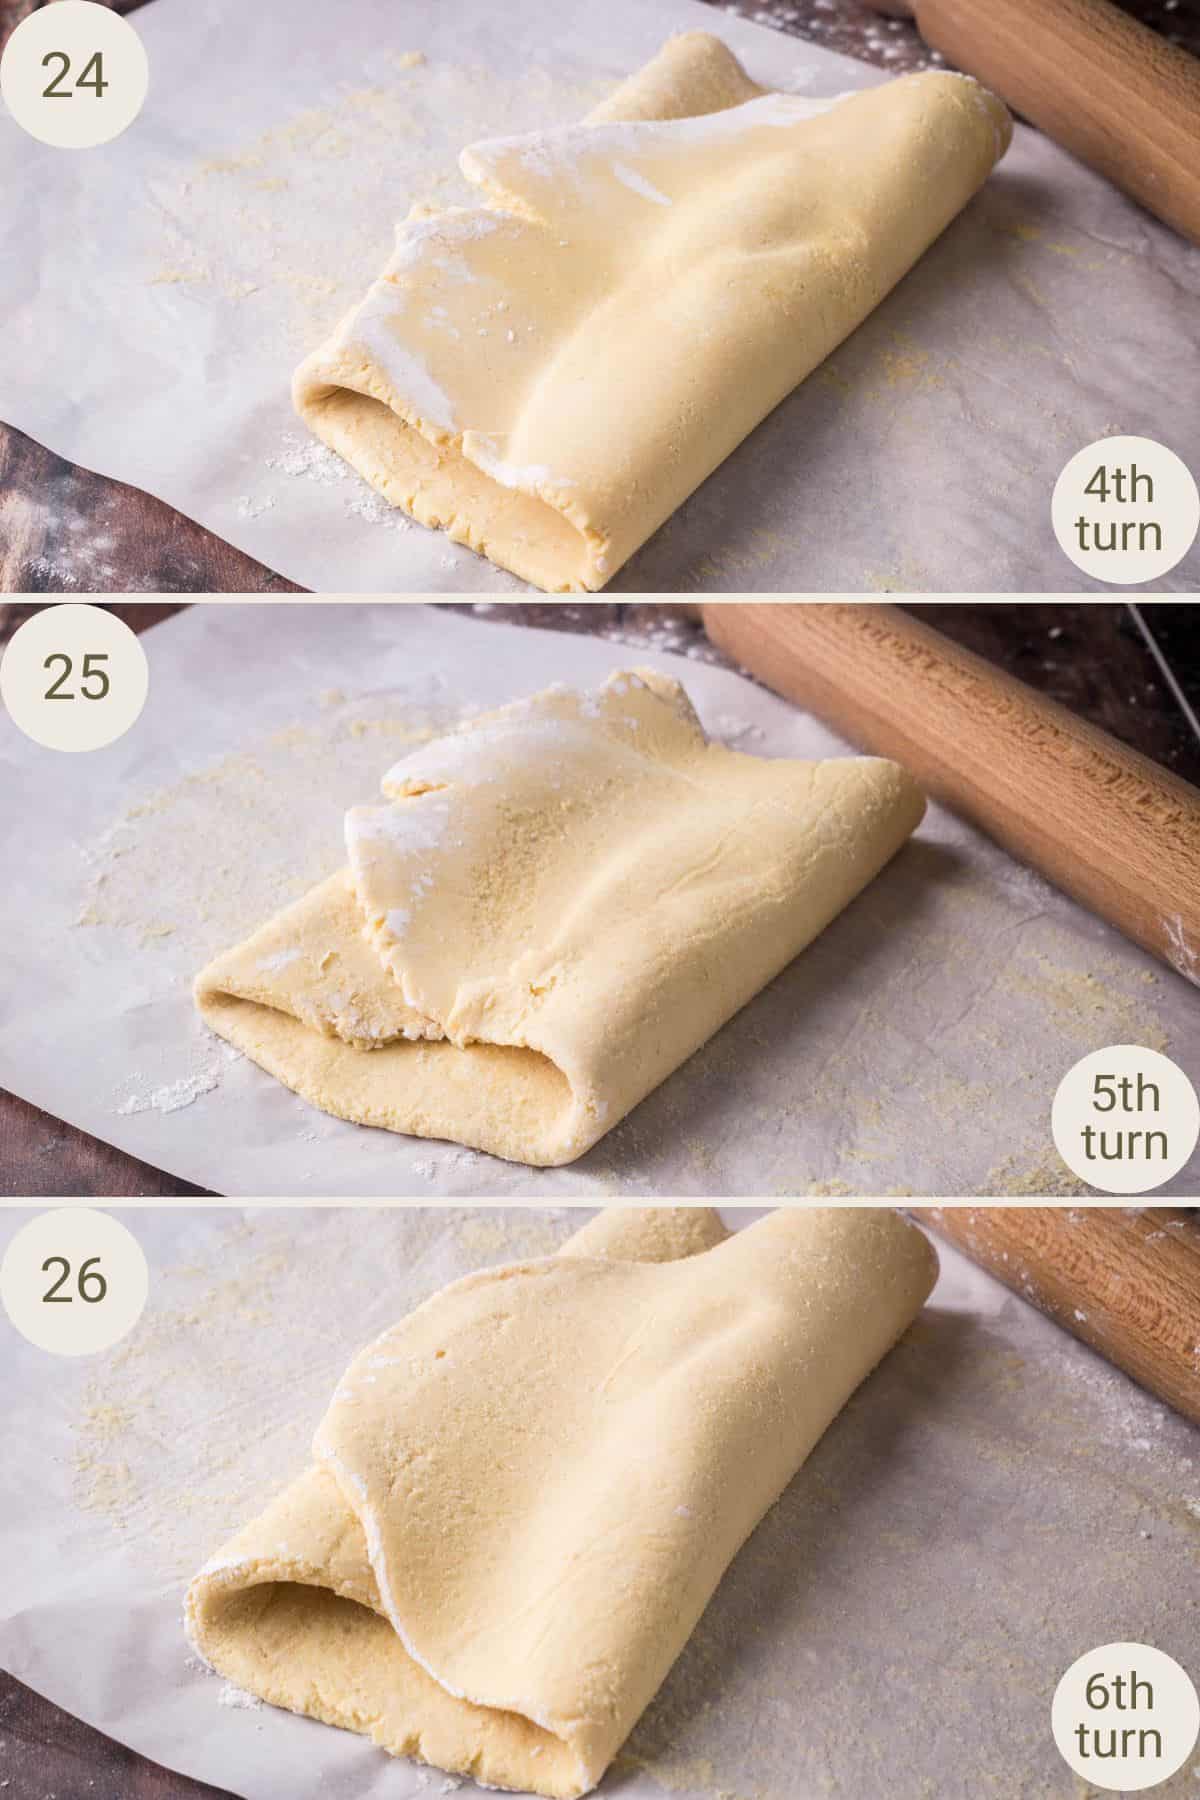
Final Chill: After the 6 turns then chill the dough for 15-30 minutes (or up to 48 hours) before using in your recipe.
Using in Your Recipe: To use the pastry, remove from the fridge, unwrap, place between two sheets of dusted baking parchment as before, beat with your rolling pin to make it more pliable and then roll out to the shape and thickness as directed in your recipe.
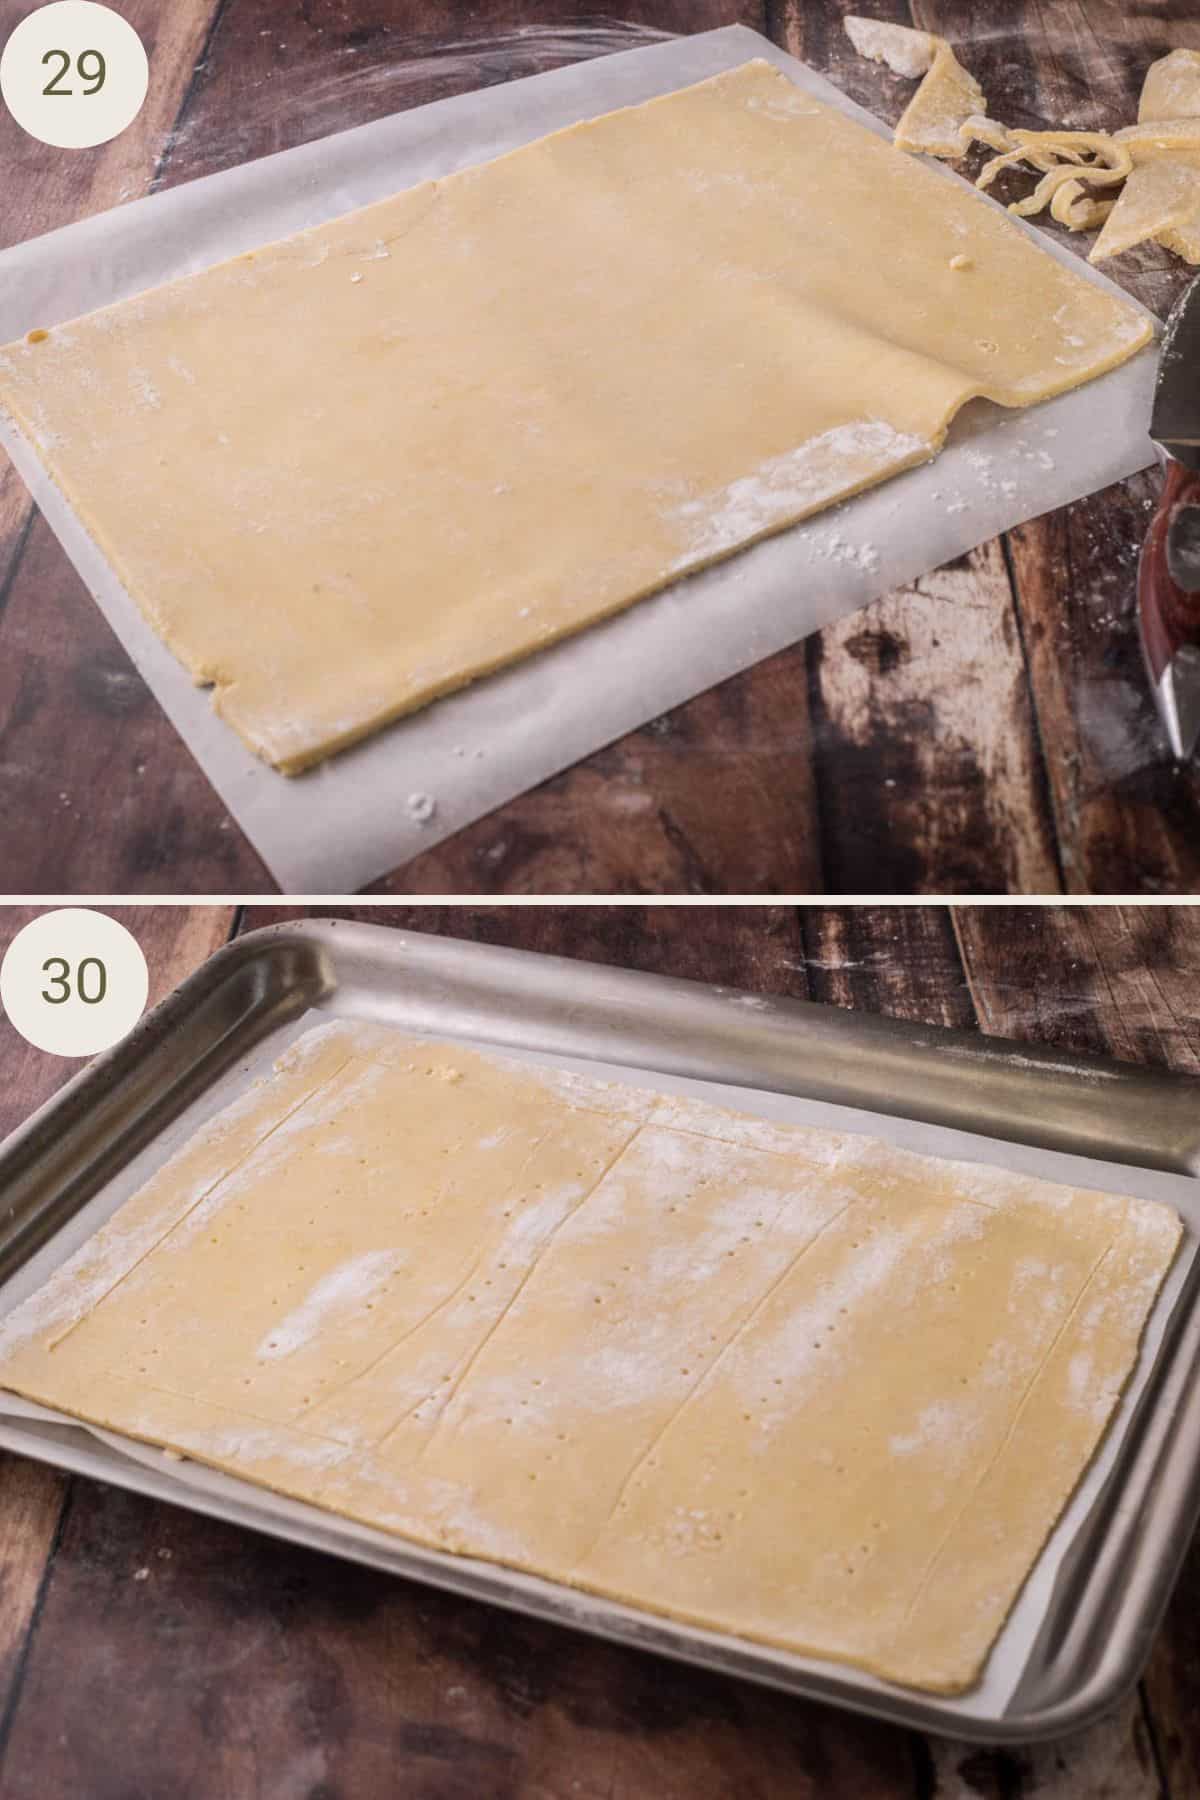
To Cook the Pastry: Chill the rolled out pastry dough for at least 15 minutes before baking. Pre-heat the oven to 220°C / 200°C fan assisted / gas mark 7 / 425°F. Brush the pastry with an egg wash then place in the oven, immediately lowering the heat to 200°C / 180°C fan assisted / gas mark 6 / 400°F and bake for 25 minutes until the pastry is crisp and golden brown.
Expert Tips
The key to this pastry is to keep the dough cold at all times. If at any time during the whole process you think the pastry is getting towards room temperature then put it back into the fridge for 15-30 minutes.
If you have warm hands then I recommend washing them in cold water before you start to keep them nice and cold as you don’t want to be warming up the butter and try to avoid handling the dough too much.
I prefer to wrap my pastry using cling film (plastic wrap) when you are chilling it in the fridge. And that’s because at first the pastry dough is really shaggy and it keeps it all together much better than baking parchment (you could use a re-useable ziplock bag).
Beating the chilled dough with your rolling pin prior to rolling it out helps to keep the butter cold whilst making the dough a bit more pliable so you can roll it out without too much resistance.
Always roll the pastry between two pieces of baking parchment, this means you won’t need to add as much extra flour for rolling out and your hands won’t be warming up the dough.
You should dust the baking parchment with just a little tapioca flour to stop the pastry from sticking. Avoid adding too much extra flour to the dough when rolling out as it will affect your final layers. Brush off any excess flour once you have rolled it out after every turn.
At first the dough will seem really crumbly and lumpy when you are rolling it out. Trust the process. This is okay as by the time you have rolled the dough out 6x it will have come together beautifully.
Roll out the dough widthways first (roll to about 15cm as it will increase to 20cm when you are rolling out the long side) before rolling out lengthways of the dough to 40cm.
It’s very easy to lose track of how many times you have rolled out the dough (or turns as it’s commonly known). There are many tricks to counting out the turns, personally I don’t find marking the pastry itself particularly helpful, instead my favourite method is using teaspoons. I count out 6 teaspoons then put one in a mug after every turn. So all my turns are complete when I have 6 teaspoons in my mug.
Keep the baking parchment sheets clean by scraping off any pastry which is sticking throughout the process.
When you are transferring the dough from the baking parchment (whether it’s because you’re preparing the dough for more chilling or you are transferring it to a lined baking tray for baking) then always peel the baking parchment from the pastry dough rather than the other way around to avoid tearing the pastry.
Use your final pastry straight from the fridge (don’t allow it to rest at room temperature at all) – work quickly as the butter melts fast and then it becomes sticky and too difficult to work with and your flaky layers of pastry won’t form as well.
Why is my puff pastry doughy in the middle when baked?
- To make sure the pastry crisps up as much as possible then the dough needs to be kept cold during preparations. Chill it in the refrigerator for at least 15 minutes before placing in the oven (whether you are making a tart, cheese straws, or puff pastry cookies).
- The problem could also be that your dough is too thick when you roll it out. For the best results roll out your pastry to 4-5mm.
- You might also not be baking your pastry for as long as necessary. It may look beautifully golden after 15 minutes but I recommend at least 20-25 to make sure those layers rise.
Why isn’t my pastry rising properly?
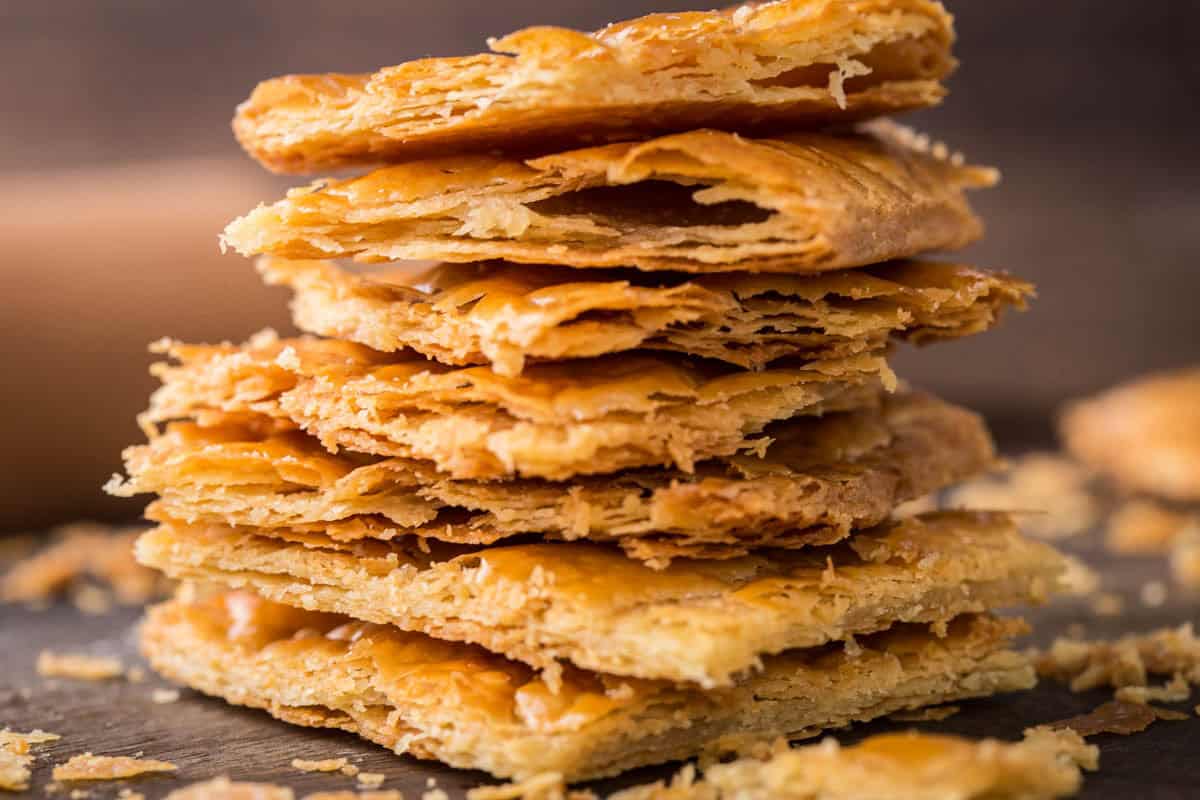
Rough puff pastry doesn’t rise as much as classic puff pastry and this gluten-free pastry recipe doesn’t rise as much as regular puff pastry. That doesn’t mean that there shouldn’t be clear distinct airy layers visible in the pastry when baked. If you are not achieving this then it could be for a couple of reasons:
- Your butter got too warm. Keep your pastry cool at all times when rolling and folding. Even if you are not sure I recommend placing it in the fridge after the third turn for 30 minutes to properly chill out again. Chill it just before you bake it too. Try not to keep it out of the fridge for very long and avoid handling it too much.
- Not enough folds. I like rolling the dough for 6 turns to really get those layers going.
- Bake in a hot oven. This pastry requires the oven to be pre-heated to 220°C / 200°C fan assisted / gas mark 7 / 425°F. Then when you place your pastry in immediately reduce the heat to 200°C / 180°C fan assisted / gas mark 6 / 400°F. This means the pastry rises quickly at a high heat to get the layers lifted swiftly but then can spend longer in the oven at the lower temperature to make sure those layers form properly.
FAQs
Puff pastry is a light and flaky pastry made by layering a flour and water dough with butter, repeatedly folding and rolling the dough to create crisp, light airy layers which flake beautifully when baked.
There are 2 types of puff pastry, classic puff pastry and rough puff pastry (this recipe is the latter). Classic puff involves repeatedly folding and rolling one solid butter block into the dough for distinct, even layers, chilling after every single roll which is more time consuming. Rough puff pastry mixes small butter pieces directly into the dough, and keeps the chilling to a minimum amount of time which creates a quicker, flakier result, albeit with slightly less rise.
This recipe makes 560g.
You need about half (280g) for a tart base to serve 4-6 people.
You need about two-thirds (360g) for a puff pastry pie lid to fit a 23cm (9 inch) pie.
This recipe is the exact amount if you are making a Beef Wellington or Salmon en Croute.
If you have leftover puff pastry recipe then you can freeze it or use it to make the following quick and easy recipes:
Cheese Straws
Cinnamon Palmiers
This pastry cooks best if the oven is pre-heated to a high heat and then turned down to a lower heat as soon as the pastry (or tart or pie) goes into the oven. For best results pre-heat the oven to 220°C / 200°C fan assisted / gas mark 7 / 425°F and lower the heat to 200°C / 180°C fan assisted / gas mark 6 / 400°F until the pastry is crisp and golden brown (about 25 minutes).
Yes, you can use this puff pastry for any sweet or savoury recipe. This recipe produces a 560g block of pastry. The pre-packaged puff pastry usually comes in a block of 500g or sheets of 320g (for the regular gluten version) or 280g for the gluten-free version for comparison’s sake.
To be safe 4mm is a general guideline and good for most uses but if you want to get more specific:
Mille-feuille & tarts: 3-4mm for thin and crisp results.
Pie lids & turnovers: 5mm which makes the pastry a little thicker and sturdier.
Yes, this pastry benefits from being really cold when you come to work with it. After you finish all the steps below, wrap up well then chill in fridge for up to 3 days before you come to bake with it.
Yes, absolutely. Complete all the steps below and then freeze the pastry block. Double wrap in plastic wrap and aluminium foil to avoid any freezer burn. The pastry can be stored in the freezer for up to 2 months. Defrost overnight in the fridge before unwrapping and then use as your recipe requires.
Puff Pastry Recipe Ideas
You’ll find this puff pastry recipe endlessly versatile, here are some popular uses for it:
- Beef Wellington
- Apple Turnovers
- Eccles Cakes (my website recipe uses a short flaky pastry but you can sub with this puff pastry)
- Sausage Rolls (my website recipe uses a short flaky pastry but you can sub with this puff pastry)
- Quick and Easy Fruit Tarts like this Apple Tart.
- Savoury Tarts like this Beetroot Feta Tart.
- Chicken and Leek Pie
- Mille-Feuille
- Tarte Tatin

More Gluten-Free Pastry Recipes You’ll Love
- All-Butter Shortcrust Pastry
- Hot Water Crust (using this pork pie recipe)
- Sweet Flaky Pastry (using this Eccles Cake recipe)
- Sweet Pastry Crust (using this Apple Pie recipe)
Enter your email below to get this recipe sent to your inbox plus get new recipes, baking tips, and updates.
Easy Homemade Gluten Free Puff Pastry
Ingredients
- 120 g chickpea flour - gram flour
- 80 g cassava flour
- 60 g tapioca flour - tapioca starch (plus extra for dusting)
- 2 teaspoons caster sugar - promotes browning
- 1 teaspoon kosher salt
- 200 g unsalted butter - sliced thinly, cold from the fridge
- 150 g ice cold water
Egg wash (depending on how you are baking the pastry)
- 1 egg yolk
- ¾ teaspoon milk
Instructions
Mix the Dough
- In a large bowl, mix the flours with the sugar and salt.
- Add the cold butter slices into the flour, one piece at the time to make sure each piece is separated and coated with the flour.
- Gradually add the iced water into the flour, 2 tablespoons at a time mixing in with a fork to hydrate the flour. When you have used up all the water, tip the dough out onto a clean work surface and clump the dough together using your (cold) hands, until it just starts to come together into a very loose shaggy dough. Pat into a rectangle about 3-4 inches, 7-10cm thick. The dough will be very crumbly with large butter pieces and plenty of cracks (and you’ll think it doesn’t look right – but it is!).
- Wrap the dough in cling film (plastic wrap) and place it so the long edge is parallel to the edge of your work surface. Using a long rolling pin, beat the dough in the cling film in long even strokes so the dough flattens slightly to 1-2 inches thick.
1st Chilling
- Chill the wrapped dough in the fridge for 2 hours (or up to 48 hours).
Roll and Fold the Dough: 1st turn
- Take two sheets of baking parchment, lay one sheet down and dust lightly with tapioca flour. Remove the dough from the fridge, unwrap, and place onto the baking parchment, with the short edge parallel to the edge of your work surface, gathering up any crumbled pieces and tuck into the dough folds, then dust the top of the dough lightly with tapioca flour. Place the second sheet of baking parchment over the pastry. Use a long rolling pin to smack the dough in the cling film in long even strokes to start flattening out the pastry and make it more pliable. Then start rolling out the dough, beginning with widthways, then ending with lengthways and roll it out to roughly 40cm x 20cm. (twice as long as it is wide).
- Take off the top sheet of baking parchment then fold one of the long ends of the dough up to the centre, using the baking parchment to help you, then fold the other end over it, like closing an envelope.
Rotate and Repeat: 2nd turn
- Position the dough 90 degrees, so the long edge of the dough is parallel to the edge of your work surface, and place the baking parchment back over the top.
- Beat the dough with a rolling pin to help flatten it out again then repeat rolling out of the dough into a rectangle, about 40cm x 20cm.
- Then, as before, fold one long end of the dough up to the centre, using the baking parchment to help, then fold the other end over it.
Rotate and Repeat: 3rd – 6th turn
- Repeat this process of rotating, beating the dough, rolling out and folding until you have completed 6 turns. After the third turn the pastry will be starting to warm up so to keep the butter cold wrap it back up in cling film (plastic wrap) and place into the fridge for 30 minutes to chill again. Then continue with turns 4, 5 and 6.
(Almost) Final Chill
- After the 6 turns chill the dough for 15-30 minutes (or up to 48 hours) before using in your recipe.
Using in Your Recipe
- To use the pastry, remove from the fridge, unwrap, place between two sheets of dusted baking parchment as before, beat with your rolling pin to make it more pliable and then roll out to the shape and thickness as directed in your recipe. Then use as directed.
- Note to chill the pastry for at least 15 minutes before you bake it in the oven.
To Cook a Simple Puff Pastry Sheet
- Pre-heat the oven to 220°C / 200°C fan assisted / gas mark 7 / 425°F.
- If you are just baking the pastry in a simple sheet then make sure the pastry has been chilled for at least 15 minutes (as above) on a lined baking tray.
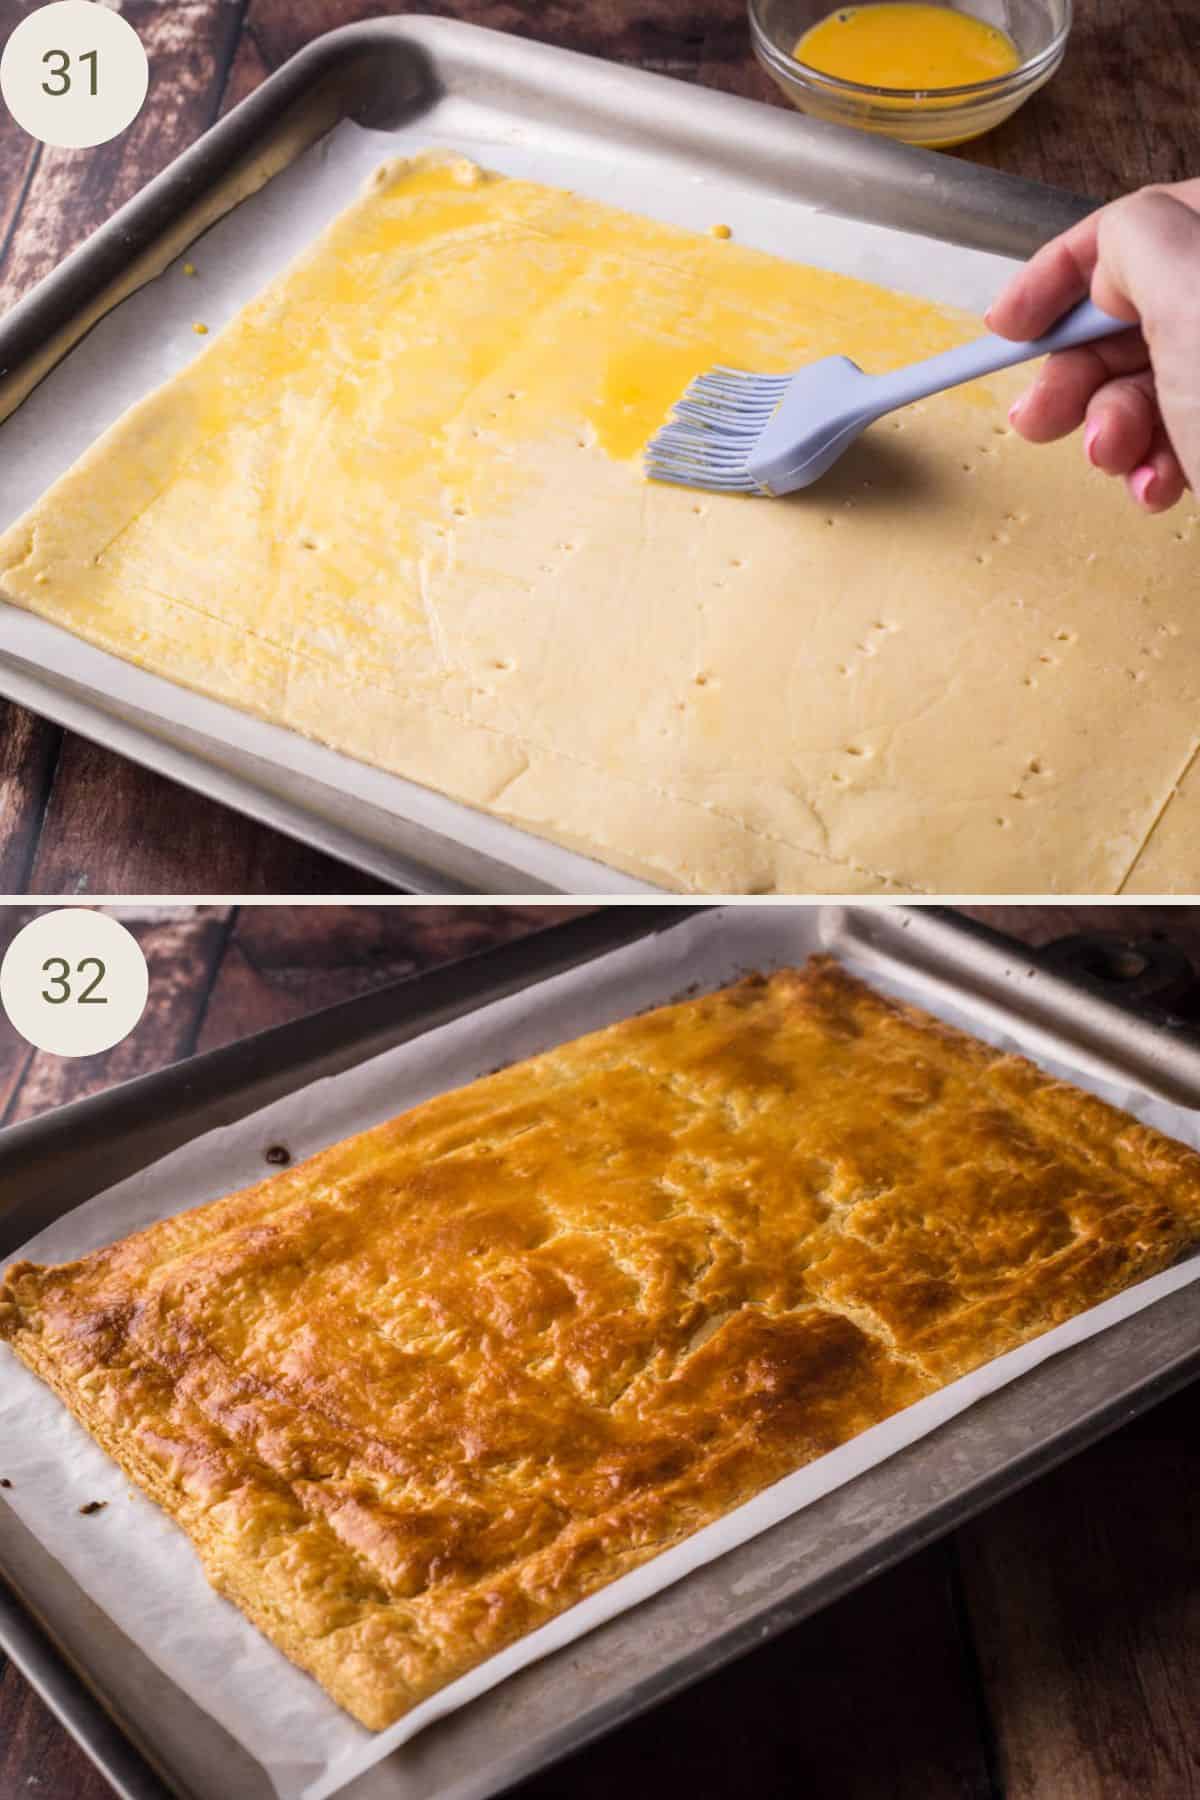
- Mix the egg yolk and milk together to make an egg wash and brush evenly over the pastry.
- Place the pastry in the oven then immediately lower the heat to 200°C / 180°C fan assisted / gas mark 6 / 400°F.
- Bake for 20-25 minutes until the pastry is crisp and golden brown.
Video
Notes
- Chickpea Flour. You can swap for defatted almond flour (not regular almond flour).
- Cassava Flour. You can swap for sweet rice flour (not regular rice flour).
- Tapioca Starch. You can swap for potato starch (not potato flour).
- The key to this pastry is to keep the dough cold at all times. If at any time during the whole process you think the pastry is getting towards room temperature then put it back into the fridge for 15-30 minutes.
- Beating the chilled dough with your rolling pin prior to rolling it out helps to keep the butter cold whilst making the dough a bit more pliable so you can roll it out without too much resistance.
- Always roll the pastry between two pieces of baking parchment, dusted lightly with tapioca flour.
- Don’t forget to mark each turn you complete – you can mark the pastry itself or use teaspoons transferred into a mug after every turn.
- This recipe makes 560g.
- You need about half (280g) for a tart base to serve 4-6 people.
You need about two-thirds (360g) for a puff pastry pie lid to fit a 23cm (9 inch) pie. - This recipe is the exact amount if you are making a Beef Wellington or Salmon en Croute.

Hi Georgina. The only thing that is holding me back from trying to make your Gluten-Free Rough Puff Pastry, is I'm dairy and gluten intolerant and your recipe says to use unsalted butter and I don't know what best to substitute it with. On another note, I have a Panasonic bread maker and would really like to have a bread recipe that isn't either like an English crumpet or a tasteless piece of cardboard if that is at all possible as the price of gluten free loaves is extortionate.
Take care.
Billy
Hi Billy, I haven't tested the puff pastry with dairy alternatives so I can't suggest substitutions yet. I'm currently working on a bread machine recipe which will be posted soon!
I’m allergic to egg, can I use something else instead? Or do you have to use an egg wash?
You don't have to use an egg, you can just use milk instead. It's good to use something as it helps with the colour, shine and browning of the pastry.