This post contains affiliate links. Please read my disclosures.
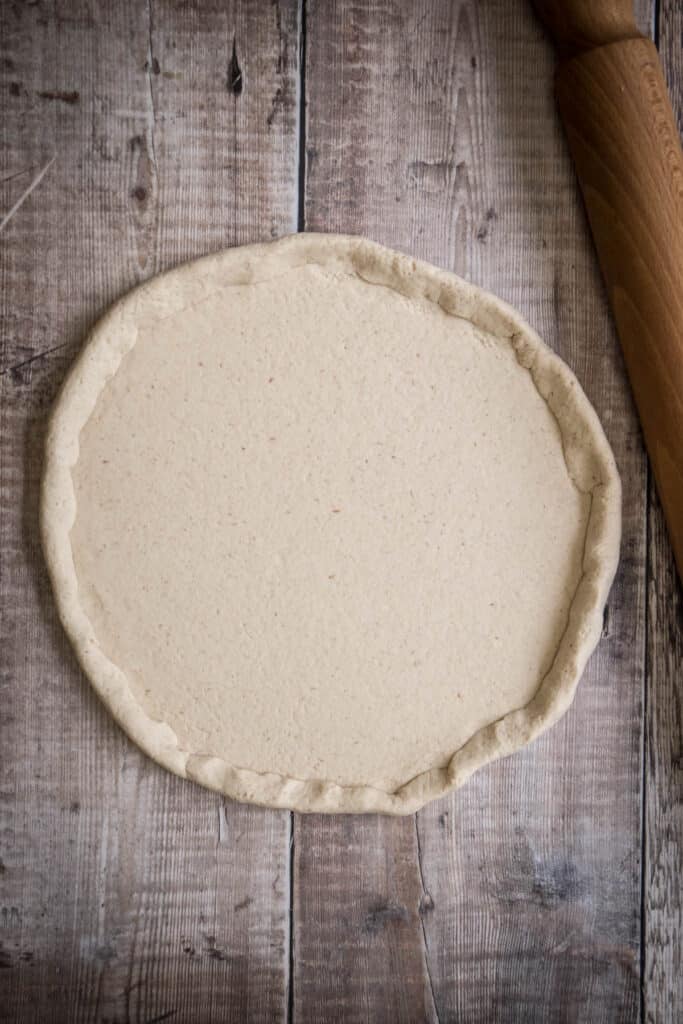
Finally you can celebrate pizza night again with this fantastic Gluten-Free Pizza Dough. It will deliver you an absolutely delicious pizza with a light, slightly crisp, slightly chewy thin crust. Made with cassava flour and your favourite gluten-free flour blend but guess what - no xanthan gum! You will be delighted with this gluten-free pizza crust and the best part is that it will even pass the non-gluten-free taste test.
Jump to:
- Watch to see how to make it
- Why you’ll love this recipe
- Does gluten-free flour work for pizza dough?
- Does gluten-free pizza dough taste different?
- How to make gluten-free pizza dough that rises
- What yeast should you use?
- Why use baking powder?
- How do you make a pizza crust without gluten?
- Full list of ingredients
- How to make Gluten-Free Pizza Dough
- Tips for best results
- How to make your pizza on a pizza stone
- Make in advance
- How to freeze
- Easy gluten-free pizza toppings
- More gluten-free recipes you’ll love
- Gluten-Free Pizza Dough
When you find an amazing gluten-free version of a recipe that you enjoyed in the days pre-gluten-free baking it really is a time for celebration. It brings all the fun back to food.
In recent years I had really begun to resent pizza. Let’s face it the gluten-free pizza crust you can buy in supermarkets or get from your local pizza place just doesn’t compare to how real pizza should taste. You know catering for the gluten-free seems to be an afterthought and not a priority for pizza enthusiasts. And as for the texture of gluten-free pizza crust – forget it! Tell me you haven’t had your fair share of either soggy, spongey or rock hard bases.
Well, I can tell you here and now that this gluten-free pizza base recipe is not an afterthought. I made it my mission over the last few months to create an excellent version of our favourite takeaway. The pizza dough needed to be easy to handle, quick to rise and roll out and produce a light crisp crust with a slight chew that holds a mountain toppings. Oh, and obviously taste good too, I didn’t want any crust curls being left on the plate.
Watch to see how to make it
And I haven’t been shy of taste testers either. Our family is mad about pizza, especially my four year old and he has been a tough nut to crack let me tell you. He most certainly will not be fobbed off by homemade cauliflower crusts or gluten-free supermarket pizza. It’s the real deal or nothing. And so when he finally gave the thumbs up I knew my mission to develop the best gluten-free pizza crust recipe was complete.
Why you’ll love this recipe
- Light, crisp, slightly chewy pizza crust which is a great base for your favourite pizza toppings.
- Simple recipe made with just 9 ingredients so straightforward for first time gluten-free bakers.
- Quick method to bring the dough together.
- Beautifully flavoured with olive oil.
- Made with easy flours – just cassava flour and your favourite gluten-free blend. (or you could use my Gluten-Free Homemade Flour Blend too – which is my personally preferred choice).
- Nut free. Almond flour is a popular choice for gluten-free pizza dough but we don’t include it here.
- No xanthan gum. Or guar gum. READ MORE >>> Why I never bake with xanthan gum.
- Works well baked on either a pizza pan or a pizza stone. Or just a metal baking tray if that’s all you have.
- This also happens to be a naturally vegan and dairy-free pizza recipe.

Does gluten-free flour work for pizza dough?
Yes, but we want to support the gluten-free flour with a little extra starch. We make this recipe using 2 gluten-free flours:
- Gluten-free flour – made up of a blend of different gluten-free flours.
- Cassava flour – a naturally gluten-free single origin flour.
We don’t use gluten-free flour by itself as it would not give a great texture to our pizza dough. Depending on the blend it could be a little too gritty or dry. Cassava flour is a starchy flour which helps give elasticity, moisture and a better structure to our recipe.
This gluten-free pizza dough recipe has been tested with the UK’s leading brand of gluten-free flour (Doves Farm Gluten-Free Plain White Flour which is a blend of white rice flour, buckwheat flour, potato starch, cornflour and tapioca starch) and it works an absolute treat.
However my favourite flour to use is my Homemade Gluten-Free Flour Blend. It gives a slightly better taste and texture which are due to the flours used in the blend (sweet rice flour, oat flour (can be subbed), sorghum flour and tapioca flour). Plus the good amount of starches in the flour produce a beautifully crispy gluten-free pizza crust.
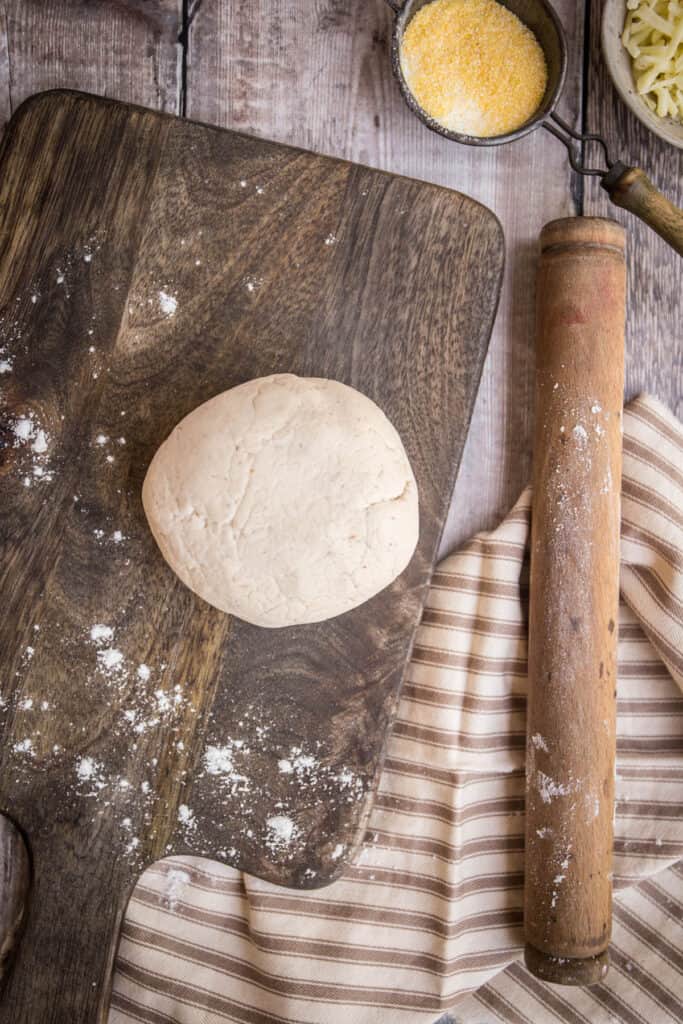
Cornmeal (polenta) is the third ‘flour’ we use in this recipe. We use 2-3 teaspoons scattered over the base of our pizza pan before we bake the pizza dough to give the crust a lovely authentic crunch. This is optional but a real treat if you do it.
Does gluten-free pizza dough taste different?
Gluten-free flours can have beautifully distinctive taste. It depends on which flours are in your branded flour blend as to the exact flavour. If you use the cassava flour and a neutral tasting gluten-free flour blend then when you make your own gluten-free pizza it should taste no different than regular pizza dough.
How to make gluten-free pizza dough that rises
This recipe uses both yeast and baking powder. I know it seems a bit weird to combine the two but they work really well together for this particular recipe as they add the rise in different times.
Yeast sets to work straight away. After you have mixed it into your dough and rolled it into a ball you will set it aside to prove where it will release all its natural gases and cause the dough to rise and double in size.
What yeast should you use?
This recipe uses dried quick yeast (make sure your brand is gluten-free). It is not added directly into the dough but activated in warm water with a teaspoon of sugar before it gets mixed in.
Make sure you check both your yeast and your baking powder are in date. In fact, even if your yeast is in date you should make sure it is activating really well before adding it into your dough. After 10 minutes of activation it should be really bubbly and frothy. If not, it might be inactive and you should replace your yeast.
Why use baking powder?
The baking powder gives our gluten-free pizza dough a little extra lift when it goes into the oven as the little bubbles of air are formed when it hits the high temperature and gives it an excellent aerated structure upon baking.
How do you make a pizza crust without gluten?
In order to replicate the elasticity and the binding power of gluten we use two methods.
Starchy flours. Cassava flour, which makes up almost 50% of our pizza dough is a great flour for binding ingredients together. It has a lovely stretchy quality. There will also be other starchy flours present in your gluten-free flour but those will vary depending on the brand you use.
Psyllium husk. This is a natural thickener which is derived from the seeds of the plant plantago ovata. It absorbs water really well so makes an excellent binder and creates a gel like substance once added to liquid. This recipe uses whole psyllium husk rather than powder.
Full list of ingredients
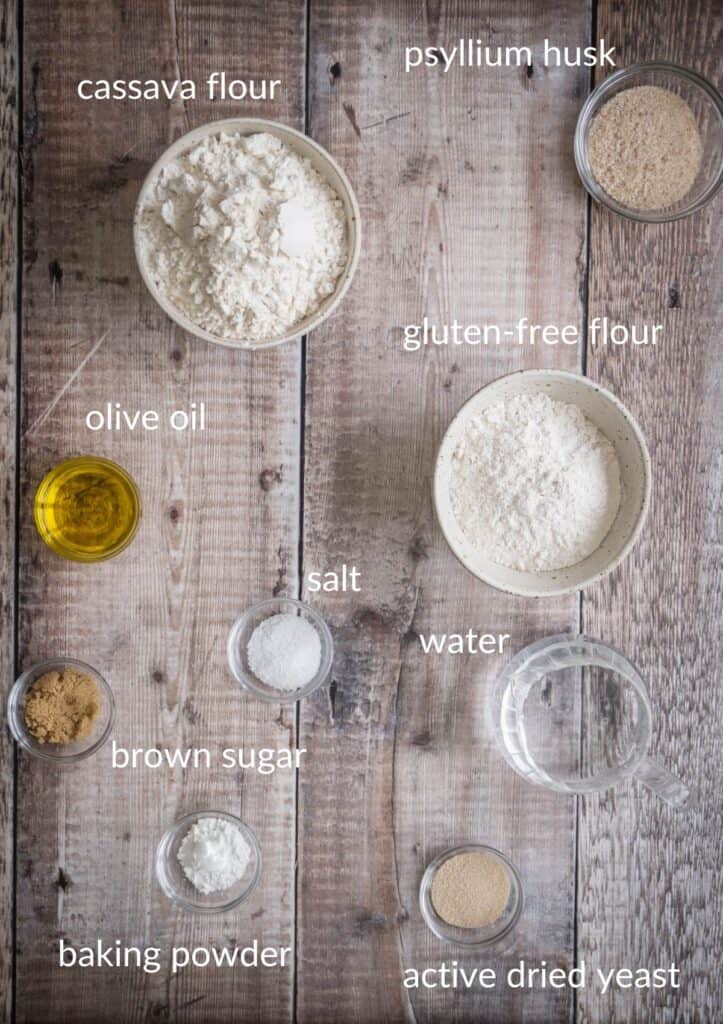
- Active dried yeast. This recipe uses Doves Farm Dried Quick Yeast.
- Water. Warm water is needed to activate the yeast and water is also needed to mix with the psyllium husk to create a gel.
- Soft light brown sugar. A teaspoon is used to help activate the yeast.
- Psyllium husk. This recipe uses whole psyllium husk (not powder) to bind the dough and give it elasticity.
- Extra virgin olive oil. You can use regular olive oil but EVOO gives it more flavour.
- Cassava flour. A starchy flour which gives an excellent structure to our gluten-free pizza dough.
- Gluten-free flour. This recipe has been tested both with my Homemade Gluten-Free Flour Blend and with Doves Gluten-Free Plain White Flour.
- Baking powder. It may seem strange to add baking powder to a yeasted recipe but it does help with the rise and tenderness of the dough.
- Salt. Use a soft salt like kosher salt and not table salt.
How to make Gluten-Free Pizza Dough
For full recipe instructions go to the recipe card at the end of this post.
- Yeast. Activate the yeast by mixing it with warm water and sugar.
- Psyllium husk. Create a thick gel by mixing the psyllium husk with water.
- Mix the dough. Mix the psyllium husk gel with olive oil, the flours, baking powder, salt and the yeast.
- Roll the gluten-free dough into a smooth ball.
- Prove. Place the dough ball in a glass bowl brushed with olive oil, roll it around to coat in the olive oil and cover the bowl with plastic wrap. Prove in a warm damp environment for 2 hours.
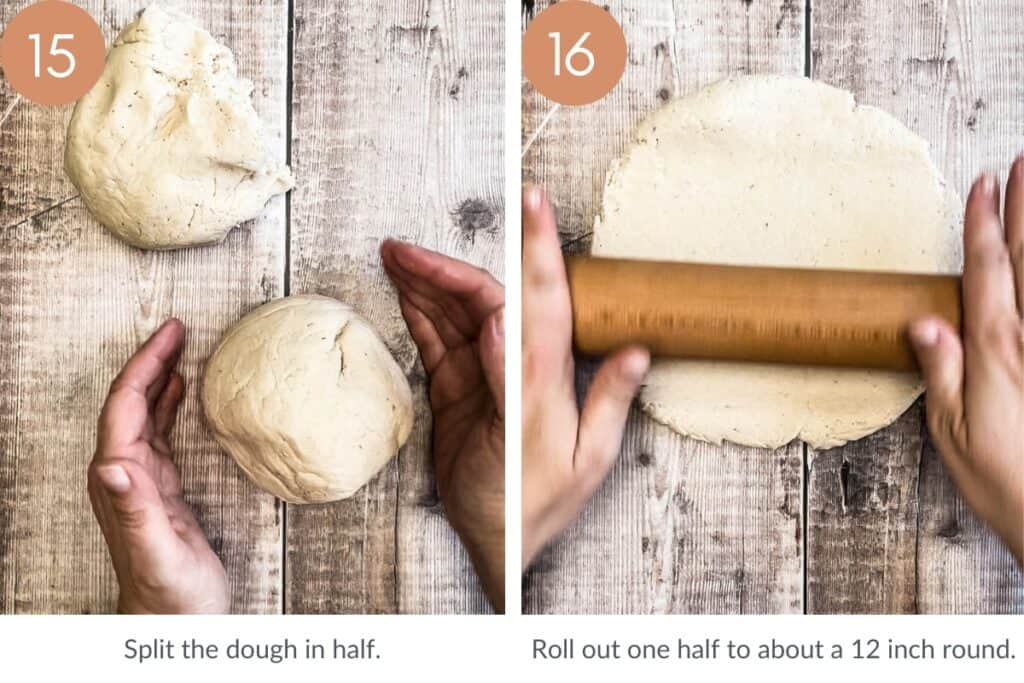
- Split in half. This recipe makes enough dough for 2 crusts so once proved take one half to roll out and save the other dough ball for next time.
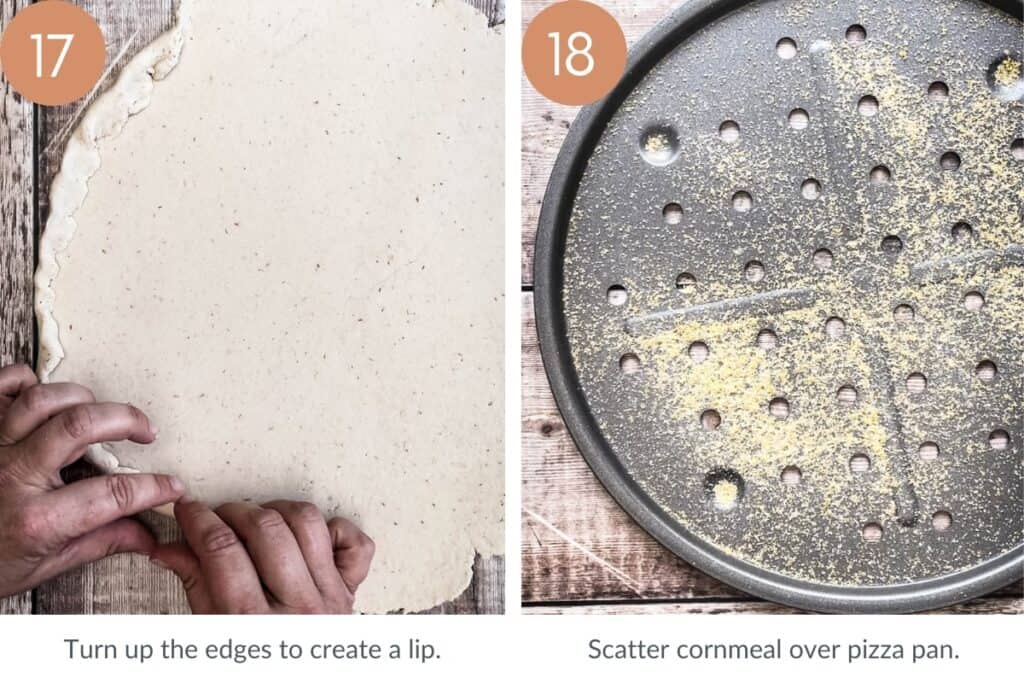
- Roll out. Roll the dough out onto a smooth clean work surface with a rolling pin into a 12 inch round. Then curl the edges of the dough back over to create a lip which neatens up your dough round and provides a great thick outer crust.
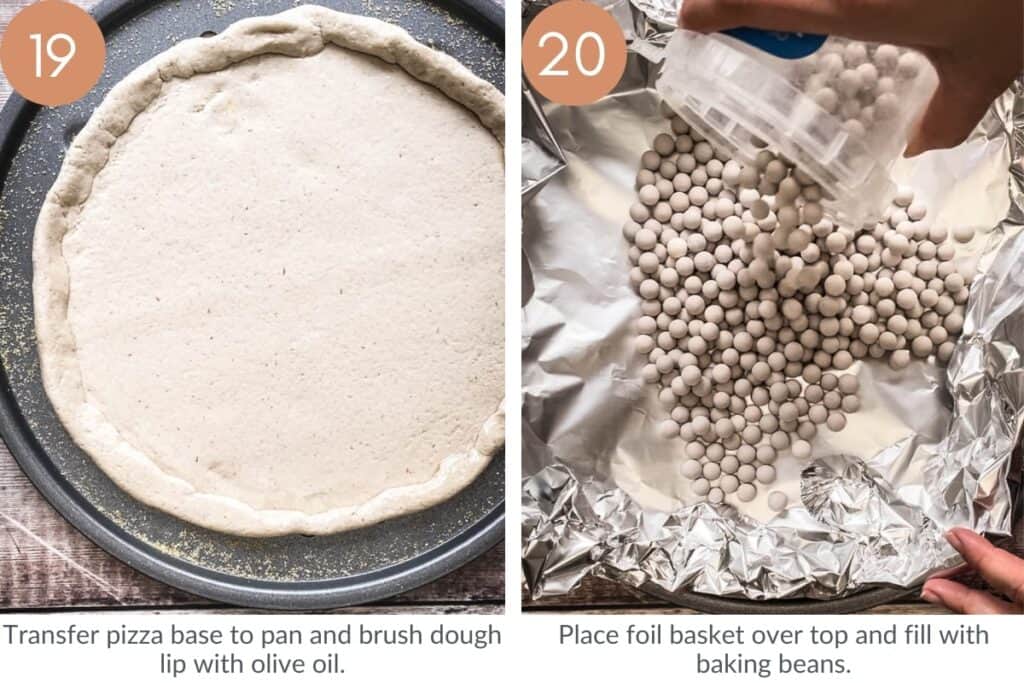
- Pizza Pan. Sprinkle cornmeal over the base of your pizza pan and transfer the pizza dough to lay on top.
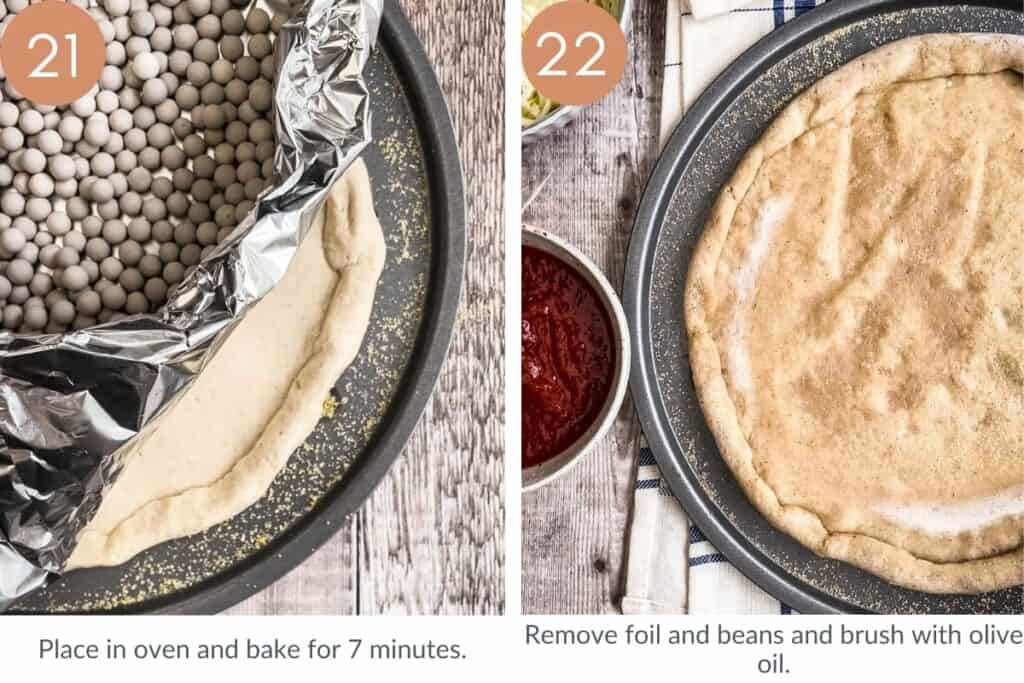
- Par-bake. Take a sheet of aluminium foil (or piece of parchment paper), fold up the edges to make a foil basket and then place lightly on top of the pizza dough. Fill with baking beans. Bake in a pre-heated oven for 7 minutes.
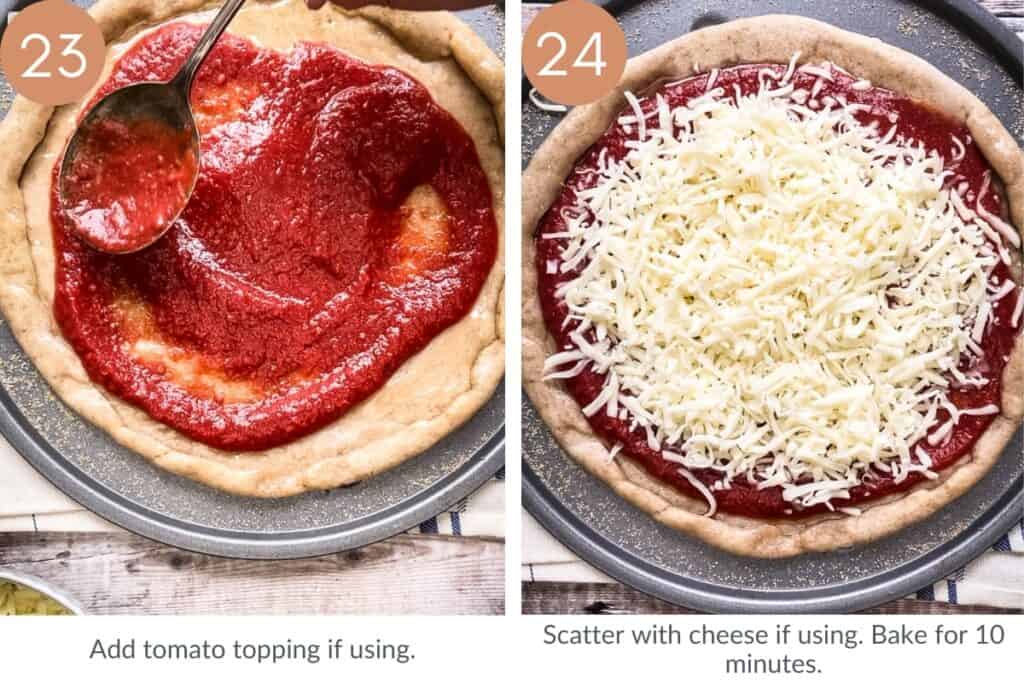
- Add your toppings. Remove the foil and baking beans. Brush the surface of the pizza dough with olive oil then add your toppings.
- Bake. Place back in the oven for 10 minutes.
- Serve immediately.


Tips for best results
- The yeast requires warm water to activate it. Do measure the temperature of the water with a digital thermometer – it should be between 100-115 F / 38-46C.
- You can make the pizza dough in a stand mixer with either a dough hook or a regular paddle beater.
- Use a good quality olive oil for the most authentic flavour.
- Is gluten-free pizza dough sticky? It will be slightly sticky as it comes out of the stand mixer but will come together easily to form a soft smooth ball which won’t stick to your work surface.
- Roll the dough in oil after it has come together and just before you prove it to keep it soft and prevent a crust from forming.
- Prove the dough in a warm damp environment. Either an airing cupboard or laundry room is a great place. My favourite method though is placing it in the centre of a turned off oven. Half fill a baking tray with boiling water, place on the bottom of the oven and shut the door. This provides your warm damp environment perfectly. But do tell people the oven is out of bounds!
- After proving, and splitting the dough in half, make sure to cover the second half of the dough with plastic wrap or a kitchen towel to keep from drying out.
- Use your rolling pin to transfer the pizza dough onto your pizza pan.
- If you don't have baking beans you can substitute for dried rice or lentils.
- Bake in very hot oven.

How to make your pizza on a pizza stone
This recipe was tested on both a pizza pan and pizza stone. I prefer the pizza pan method as it is a lot less cumbersome and it doesn’t need to oven to be pre-heated as long.
However, if you prefer to use a pizza stone, here is what you do.
- Pre-heat the pizza stone for at least 30 minutes before you want to cook your pizza (so about 1 ½ hours into the pizza proving time).
- Once you have rolled out your pizza dough, remove the pizza stone from the oven and place on a heat proof surface.
- Scatter with the cornmeal.
- Transfer the pizza dough to the stone using the rolling pin and then par-bake for 7 minutes with the foil and baking beans as per the original recipe.
- Remove the pizza stone from the oven and place on a heatproof surface so you can add the toppings to your pizza. Finish baking for another 10 minutes.
- Use a pizza peel to transfer the cooked pizza to a board to cut and serve.
Make in advance
You can make the dough and allow it to rise in the fridge overnight. Bring it to room temperature before dividing up and rolling out.
This recipe produces enough pizza dough to make two 10 inch crusts. If you only want to make one pizza then roll your second dough half into a ball, cover in plastic wrap and store in the fridge for up to 24 hours. Or you can freeze the dough.
How to freeze
Make the dough and prove it for 2 hours as per the original recipe. Half the risen dough and roll into smooth balls. Place the dough balls into freezer bags, squeezing out as much air as you can. Freeze the dough for up to three month.
Defrost overnight in the fridge. Remove from the fridge, allow to rest at room temperature for 30 minutes before rolling out.
Easy gluten-free pizza toppings
This gluten-free pizza dough can be used for any of your favourite toppings. Here are some of our family favourites:
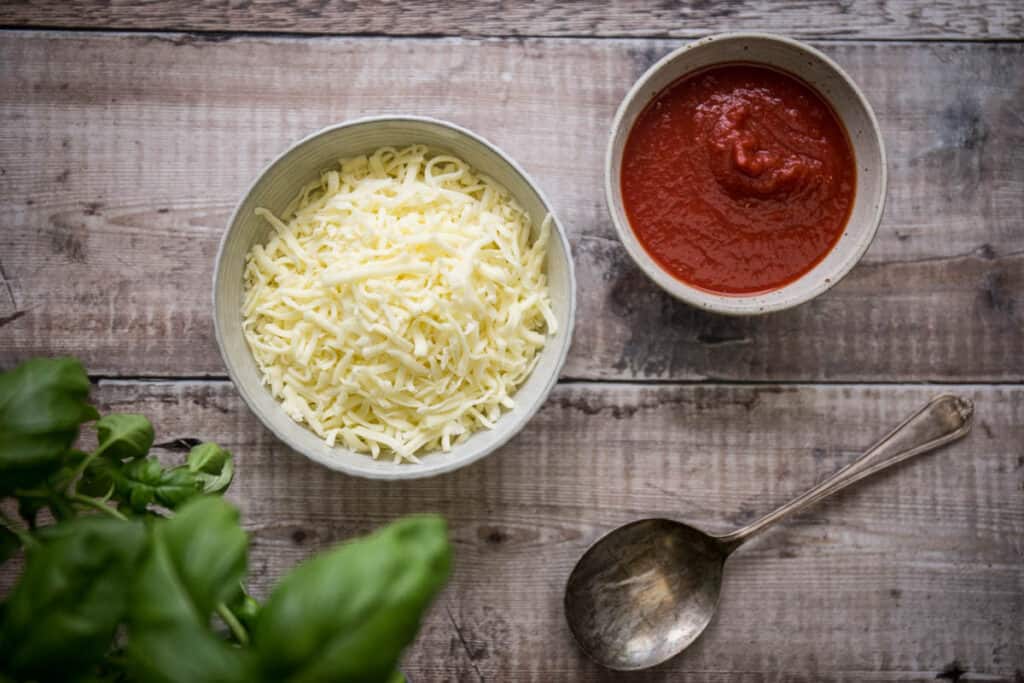
- Easy Margherita Pizza. Made with a homemade tomato sauce base of passata, red pesto and tomato puree. Scattered with mozzarella (full recipe in recipe card).
- Pepperoni Pizza. Follow the recipe above then add a handful of sliced pepperoni over the top of the cheese prior to baking.
- Garlic Pizza Bread. Crush 2 peeled garlic cloves, and mash them with 1 tablespoon unsalted butter and ½ teaspoon sea salt. Once your pizza base has finished par baking then brush with the garlic butter (instead of the olive oil). Bake for 10 minutes.
More gluten-free recipes you’ll love
- Gluten-Free White Sandwich Loaf
- Gluten-Free Sourdough Starter
- Gluten-Free Artisan Sourdough Bread
- Gluten-Free Soda Bread
- Gluten-Free Brazilian Cheese Bread Rolls
- Gluten-Free Naan Bread
- Gluten-Free All Butter Pastry
✨Have you tried this Gluten-Free Pizza Dough? Please leave a 5-star ⭐️ ⭐️ ⭐️ ⭐️ ⭐️ rating on the recipe card and consider leaving a comment as well! I would love to hear about how your recipe turned out and your feedback also helps other readers✨

Gluten-Free Pizza Dough
Ingredients
- 7 g active dried yeast
- 200 g water
- 1 teaspoon soft light brown sugar
- 12 g psyllium husk
- 150 g water
- 20 g extra virgin olive oil
- 190 g cassava flour
- 120 g gluten-free flour - see notes
- 1 teaspoon baking powder
- 1 teaspoon salt
Easy margherita pizza topping
- 150 g passata
- 30 g red pesto
- 20 g tomato puree
- ¼ teaspoon salt
- 200 g shredded mozzarella
- ½ teaspoon Italian garlic seasoning
- Small handful of fresh basil leaves
- Add pepperoni slices for pepperoni pizza
Instructions
- Fill a small glass bowl with 200g of warm water (between 100-115 F / 38-46C).
- Stir in the dried yeast and sugar with a wooden spoon. Allow to rest for 10 minutes for the yeast to activate. It should become very frothy and bubbly.
- Add the psyllium husk to the bowl of a stand mixer (or a large mixing bowl). Stir in 150g water until combined and allow to rest for 3-4 minutes. It should form a thick gel.
- Pour the olive oil into the gelled psyllium husk, followed by the flours, baking powder, salt and them finally the forthy yeast with all its accompanying water.
- Attach the paddle beater and mix the dough for about 5 minutes until it comes together. It should still be a little sticky as you remove it from the mixer.
- Roll the dough into an even ball on a clean dry surface where you should smooth out its stickiness.
- Place the dough ball in a glass bowl brushed with olive oil and roll the dough around to coat in the olive oil. Cover the bowl with plastic wrap and set to prove in a warm damp environment for 2 hours. It should rise and almost double in size.
- Pre-heat the oven to 240C / 220C fan assisted oven / gas mark 8.
- Remove the dough from the bowl and split into half, rolling into two balls. Save one of the dough balls for later (see notes below on how you can store this dough if you are not going to be baking a second pizza straight away).
- Roll out the first dough ball onto a smooth clean work surface with a rolling pin into a 12 inch round. Then curl the edges of the dough back towards the centre of the circle to create a lip. This will neaten up your dough round and handily provides a great thick outer crust.
- Sprinkle cornmeal over the base of your pizza pan and transfer the pizza dough (with the aid of your rolling pin) to lay on top. Brush the lip of the dough with olive oil.
- Par-bake your pizza crust by taking a sheet of aluminium foil (or piece of parchment paper). Fold up the edges to make a round foil basket, about the size of your pizza crust (using 2 crossed pieces of foil if they are not wide enough) and then place lightly on top of the pizza dough. Fill with baking beans. Bake the pizza crust for 7 minutes.
- Remove the pizza crust from the oven and remove the foil and baking beans.
- Brush the surface of the pizza dough with olive oil then add your toppings.
- Place the pizza back in the oven for 10 minutes.
- Serve immediately.
Easy margherita pizza topping
- Whisk the passata, red pesto and tomato puree and salt in a small bowl until smooth to form your tomato sauce.
- After your pizza base has been par-baked, then spoon the sauce over the base, spreading out evenly to the lip of the crust.
- Scatter over the shredded mozzarella and finish with a sprinkling of Italian garlic seasoning.
- Bake the pizza for 10 minutes (as per the recipe above) until the cheese is bubbling and turning golden.
- Serve scattered with the fresh basil leaves.
Video
Notes
- This recipe produces enough pizza dough to make two 10 inch crusts.
- This recipe uses Doves Farm Dried Quick Yeast.
- Whole psyllium husk has been used in this recipe (rather than powder).
Gluten-Free Flour
This recipe has not been tested with a substitute for cassava flour, I cannot give a substitution recommendation without re-testing the recipe. This recipe has been tested with two different variations of the gluten-free flour. Both garnered excellent results. Doves Farm Gluten-Free Plain White Flour. And my Homemade Gluten-Free Flour Blend.Vegan version
The pizza dough recipe itself is naturally vegan. You can make a vegan pizza by choosing your favourite vegan toppings.Important tips
I have included even more in depth tips and troubleshooting in the full post above.- Prove the pizza dough in a warm damp environment. Either an airing cupboard or laundry room is a great place. My favourite method though is placing it in the centre of a turned off oven. Half fill a baking tray with boiling water, place on the bottom of the oven and shut the door. This provides your warm damp environment perfectly.
- Pre-heat the oven at least 20 minutes before you want to bake your pizza.
- After proving, and splitting the dough in half, make sure to cover the second half of the dough with plastic wrap or a kitchen towel to keep from drying out.
- Instructions for baking with a pizza stone included in written post above recipe card.
Make ahead
You can make the dough and allow it to rise in the fridge overnight. Bring it to room temperature before dividing up and rolling out. This recipe produces enough pizza dough to make two 10 inch crusts. If you only want to make one pizza then roll your second dough half into a ball, cover in plastic wrap and store in the fridge for up to 24 hours. Or you can freeze the dough.Freeze
Make the dough and prove it for 2 hours as per the original recipe. Half the risen dough and roll into smooth balls. Place the dough balls into freezer bags, squeezing out as much air as you can. Freeze the dough for up to three month. Defrost overnight in the fridge. Remove from the fridge, allow to rest at room temperature for 30 minutes before rolling out.Ingredient measurements
- Please note when you see ‘grams’ listed as opposed to ‘millilitres,’ or any other term of measurement, that is not incorrect. I weigh all of my ingredients, including liquids, for accuracy.
- US customary measurements for the ingredients provided are based on a conversion calculator. This recipe was tested with metric measurements and I recommend using a digital scale to weigh ingredients for the most accurate results. READ MORE >>> Why you should always weigh vs measuring with cups


Beck Heath says
Hello Georgina,
Do you use psyllium husk powder or whole psyllium husk in this recipe? Thank you!
Georgina Hartley says
I use whole psyllium husk - I'll make it more clear in the ingredients - thank you!
Teri says
Absolutely perfect pizza base, it manages to be chewy and crunchy at the same time, and it doesn’t flop under the weight of the topping. Excellent texture, scattering polenta ( I used coarse mandioca flour instead) on the baking tray before baking really adds to the typical pizza texture. So much better than any gf pizza I have been offered anywhere before, five stars!
Georgina Hartley says
Thank you for leaving your feedback Teri - I'm so happy you enjoyed the pizza!!
Penny says
Finally amassed the required ingredients to add to my collection. So glad I did as it was delicious. I even ate all the crust.
Georgina Hartley says
That's great! Thank you for letting me know you enjoyed it!
Jen says
This pizza dough turned out so good! It was the best gluten free pizza dough that I have made and easiest to work with. My children enjoyed this immensely! I did not have cassava flour and used the tapioca flour instead. Thank you for this great recipe!
Georgina Hartley says
I'm so happy you enjoyed your pizza!! Thank you for leaving your feedback.
david says
Thanks for this. This is the best pizza dough I've found so far. The tip for a moist wet place is also excellent.
Georgina Hartley says
You are welcome!!
DebS says
This looks really good. I just made your rice free blend. Would it work in this recipe?
Georgina Hartley says
I have only tried this flour mix in this recipe so I can't guarantee there won't be tweaking.
Eva says
Hi Georgina, thank you so much for this pizza recipe! It’s simply delicious
Georgina Hartley says
Hi Eva - you are so welcome - thank you so much for leaving feedback and a star rating!!
Kelsie says
Hi! That I you for your blog, I’ve just come across it as been diagnosed with IBS and cannot eat wheat flour for now.
I am a hobbyist cake decorator and love to bake so this feels detestation g for me. So firstly thankyou for you blog!
I wanted to know can I used Tapioca Flour in place of Cassava seeing as they are the same plant (but different part of the plant). Reason I ask is because I already have lots of different flours like oat, buckwheat and tapioca flour in my pantry and would love to make use of these where I can before going out to purchase yet more types of flours.
Thank you, Kelsie
Georgina Hartley says
Hi Kelsie, I totally understand how frustrating it can be when you need to cut wheat flour out of your diet. I hope you are finding some recipes you enjoy on the blog. For this pizza dough though I don't recommend swapping the cassava flour for tapioca starch - yes you are right that they come from the same plant. However, cassava flour gives more structure to baked goods than tapioca flour so it will make this pizza dough more stable.