This post contains affiliate links. Please read my disclosures.
This comprehensive guide on How to make a Gluten-Free Sourdough Starter without yeast and using gluten-free flours will kickstart your journey into gluten-free sourdough bread making. We will discuss the range of flours you might want to use, the best way to activate your starter quickly, easy directions on how to maintain your starter and all the troubleshooting and tips you need to ensure your starter is ready to bake the perfect loaf.
If you love the idea of creating bounteous loaves of freshly baked gluten-free sourdough then you will first require a starter.
Making a Gluten-Free Sourdough Starter from scratch may seem overly complicated at first, but I assure you, once you get into the swing of your daily feeding schedule with your starter you can relax into it. It's an incredibly comforting process and there is a reason so many bakers choose to name their starters, because you come to think of it as a member of the family. The more care and attention you give it the more you will get out of the whole process.
Most of all, making your own gluten-free sourdough starter should be fun and exciting. And even if you have to wait almost 2 weeks before you can start using it for baking homemade gluten-free sourdough bread, I promise you the journey to get there will be really enjoyable.
Table of contents
- What is a starter?
- Watch the video to see how to make it
- How long does it take to make a gluten-free starter?
- Which gluten-free flour to use
- Ingredients for making your starter
- Equipment you need
- How to make your starter step by step
- Maintaining your starter
- Discard
- Tips and Troubleshooting
- What should a healthy gluten-free starter look like?
- Does a gluten-free starter float?
- Starter is slow to activate
- Climate allowances
- Smell your starter
- Water layer on top of your starter
- Mould on your starter
- How do you know if your starter has gone bad?
- Can you use a gluten starter and turn it into a gluten-free starter?
- What size should your starter be kept at?
- Going on holiday
- Forgetting to feed your starter
- The daily progress of your starter
- Glossary of terms
- Extra resources
What is a starter?
A starter is the building block for creating sourdough bread. The process of creating sourdough is the most ancient form of bread baking and doesn't require commercially produced yeast to yield a rise. Instead a sourdough recipe requires a starter which is a mixture of flour + water which has been cultivated to produce natural yeast + bacteria.
A starter is fed regularly with flour and water to keep it alive and active for bread baking.
Watch the video to see how to make it
How long does it take to make a gluten-free starter?
To achieve a thriving gluten-free sourdough starter which will form the basis of a successful gluten-free sourdough loaf then you need to give it at least 14 days to mature.
However, the older the starter the stronger it becomes and the loaves you produce will just get better and better.
Your starter can thrive indefinitely as long as you maintain a regular feeding schedule.
The work involved in making your new starter is actually very little. You only need to care for it for 5 minutes every morning and every evening. Once your starter is well established then you can keep it in the fridge during the week and remove at the weekends to bake or just to feed.
Which gluten-free flour to use
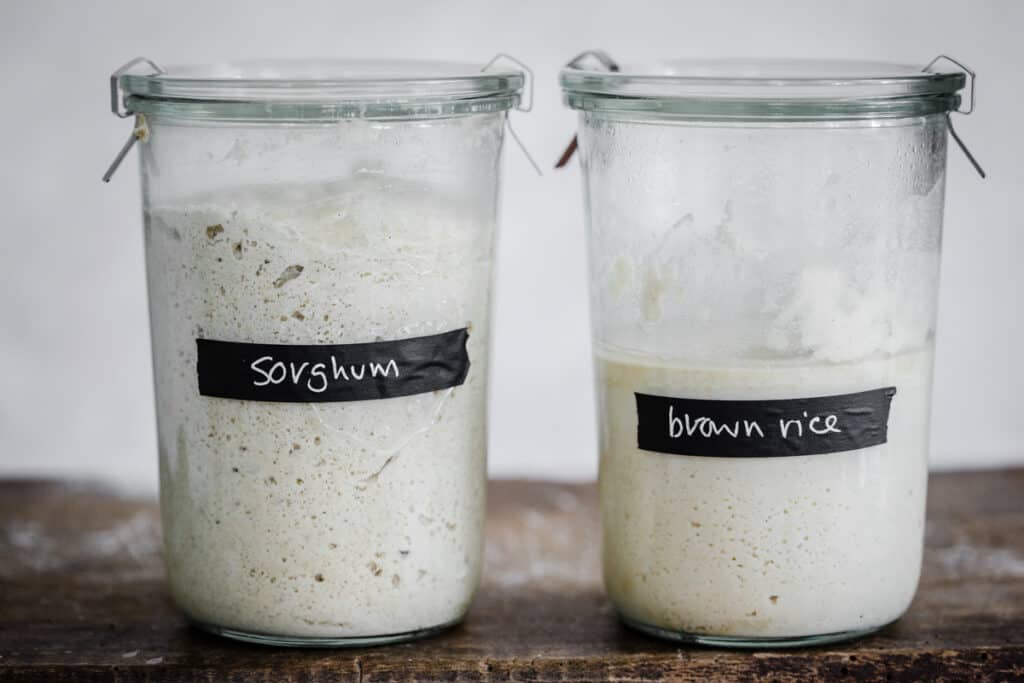
You can use any wholegrain flour to make a starter as the wild yeast in the flours is what will kickstart the activation of the starter. You might not achieve as lively a starter using starchy flours or a plain gluten-free blend.
Brown rice flour
This is a perfect flour to kickstart your gluten-free starter journey. This flour is available nearly everywhere and is more economical than a lot of gluten-free flours. Feeding your starter with solely brown rice flour will produce good solid results.
Sorghum flour
This is my favoured starter flour, simply because I love the flavour that sorghum flour imparts into the finished sourdough recipe. It produces an active starter that once it is mature is quick to get going whenever you are ready to bake with it. I think of it like an eager-to-please puppy. It can require a splash more water in its feeds.
READ MORE >>> The Ultimate Guide to Sorghum Flour
Teff flour
This flour produces a lovely active starter with a great base of flavour. It can be prone to oxidisation though and develop a darker brown tinge on the surface. This is safe and you can either stir it back in for your feeds but I usually spoon it off as part of the discard.
READ MORE >>> The Ultimate Guide to Teff Flour
Quinoa flour
The high protein content of quinoa produces a flour that is energetic and lively. I find the flavour incredibly strong though and a little bitter. You can temper it by using half quinoa flour and half brown rice flour (or sorghum flour) but there is not denying it produces a great starter.
Other flours
You could even make a starter with buckwheat flour, oat flour or millet flour among a plethora of other choices. Don't feel you need to feed just one type of flour either, you can blend them together to produce a flavour and an energy that suits your purposes.
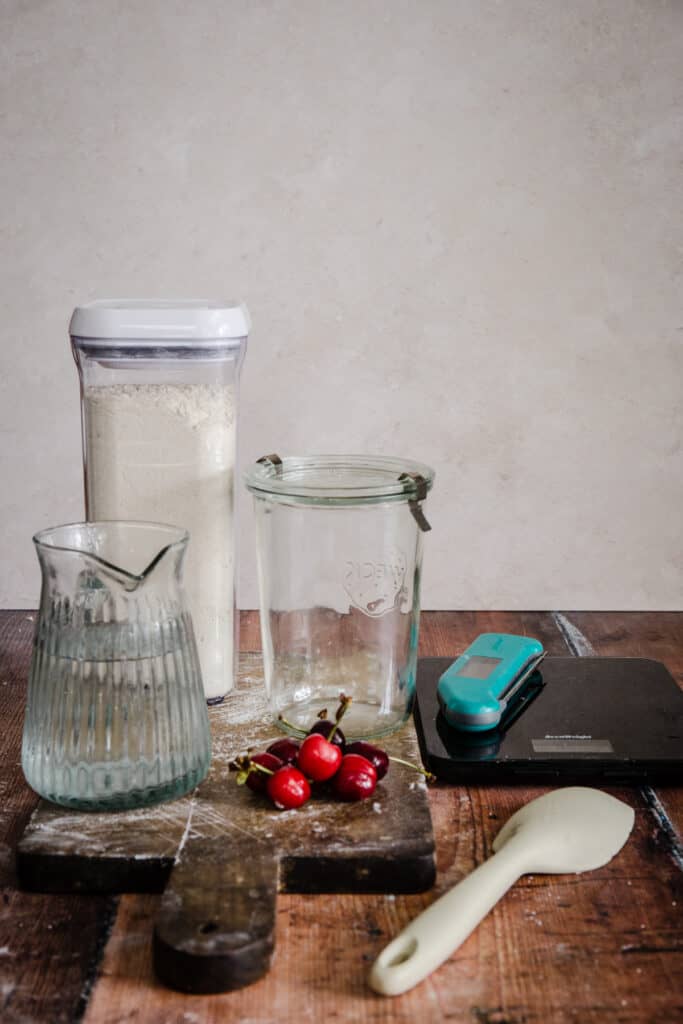
Ingredients for making your starter
- Gluten-free flour. Options listed above
- Filtered water.
- Organic fruit. Just a small handful of unwashed organic cherries, grapes or berries to add a little wild bacteria which will encourage the yeast to grow.
Equipment you need
- Glass preserving jar. The Weck jars 850ml are perfect as they have smooth sides so it is easy to mix your starter. They clip tightly but there is the option of not having it totally airtight. Eventually when you come to regularly baking bread it's useful to have 2 sizes of jar. I recommend Weck Jars 580ml for storing your starter in the fridge.
- Digital weighing scales. Imperative to ensure accurate weighing of ingredients.
- Digital thermometer. Very useful when you are starting out so you can take the temperature of the water so you know it is exactly right before adding to your starter. With experience you may not need this.
- Silicone spoon. Metal is not a preferred choice for stirring your starter. Many like wooden spoons but these silicone spoons are the best choice as they get into the corners of the jar to ensure even mixing.
How to make your starter step by step
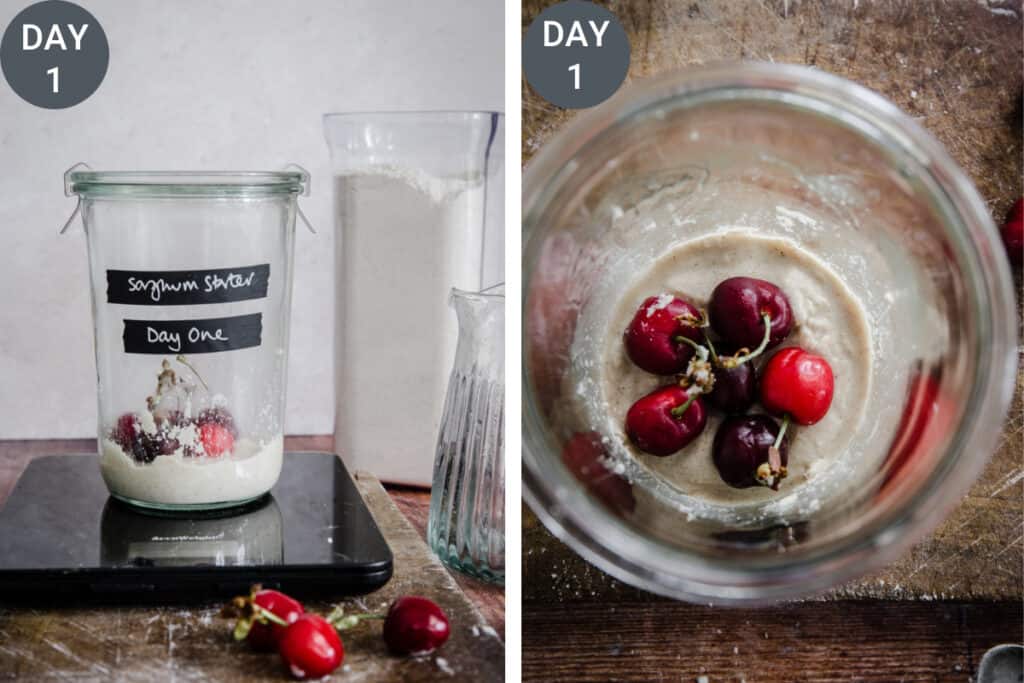
Day 1: A.M
- Weigh out 40g wholegrain flour into a glass jar and mix it with 40ml filtered water.
- Place organic fruit on top of the mixture and cover the jar, not too tightly as the starter needs to breathe.
- Allow to stand for 24 hours at room temperature, away from direct sunlight.
Pro tips
Mixing. Make sure the starter has been thoroughly mixed so there is no dry flour.
Consistency of the starter. The flour and water should form a slightly loose paste, not too thick and not too runny.
Water amount. Yes, I recommend weighing the water for accurate results. Some flours may require a little more water than others to achieve this consistency. For example sorghum flour seems to need 5-10g more water, brown rice flour needs the exact amount.
Water temperature. The filtered water should be between 38-40°C. Try not to use tap water as the chlorine will inhibit the process.
Day 2: A.M
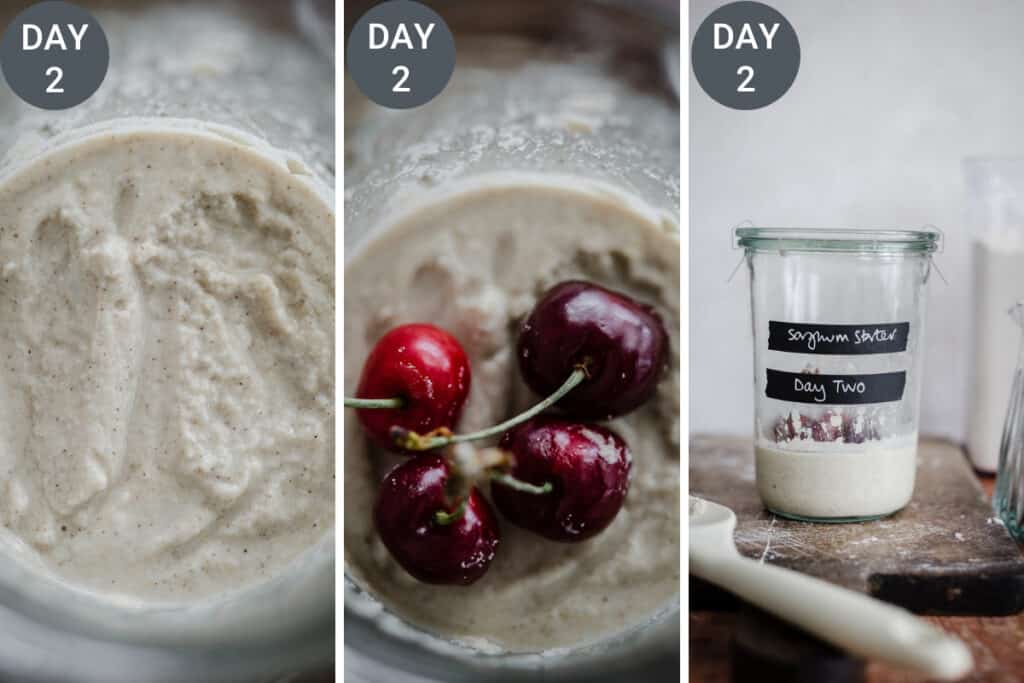
There won't be very much change from the day before.
- Open the jar and remove the fruit.
- Add into the jar 40g gluten-free flour + 40g filtered water. Mix together and smooth down the surface.
- Replace the fruit and cover the jar, not too tightly.
- Allow to stand for another 24 hours at room temperature, away from direct sunlight.
Day 3: A.M
You might start to see signs of fermentation through a few bubbles in the mixture and a thin layer liquid may have formed on the top. Don't worry if neither of those things are apparent yet, it's still early days.
- Open the jar and remove the fruit.
- Add into the jar 40g gluten-free flour + 40g filtered water. Mix together and smooth down the surface.
- Replace the fruit and cover the jar, not too tightly.
- Allow to stand for another 24 hours at room temperature, away from direct sunlight.
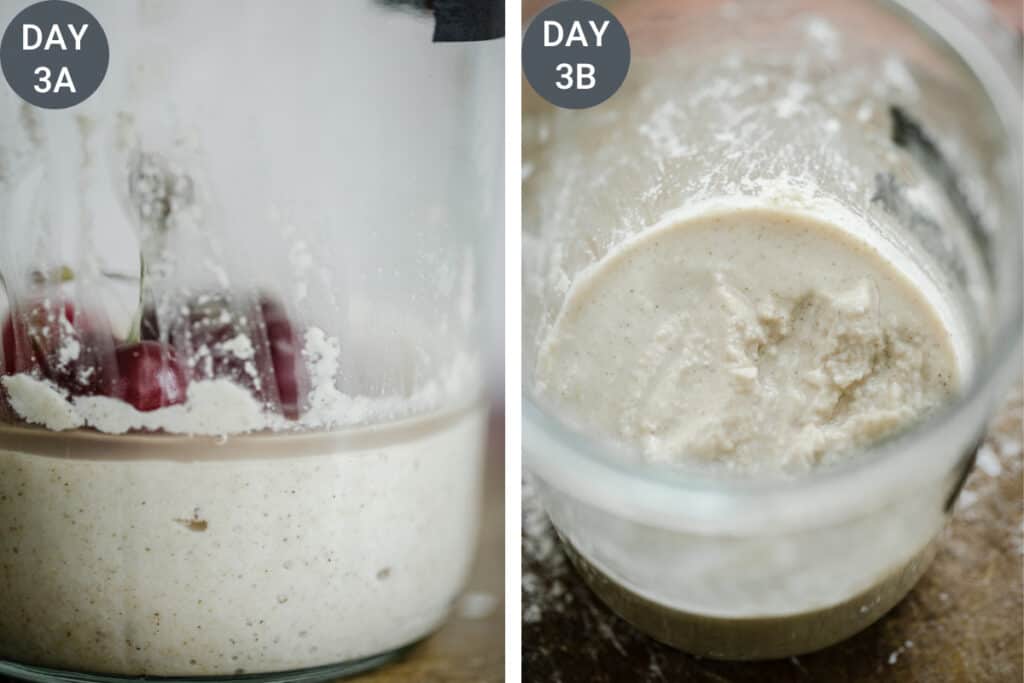
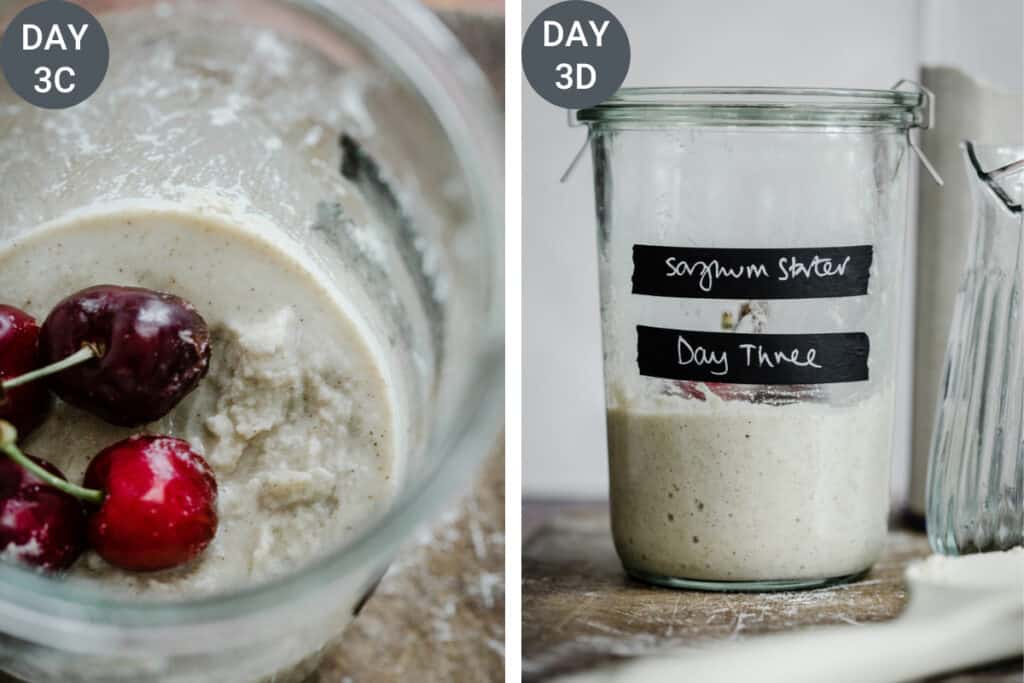
Day 4: A.M
Your starter will hopefully now be looking quite different. There should be lots of activity with many bubbles which you can see from the side of the jar. When you open the jar the starter should look quite spongey with a mousse like texture.
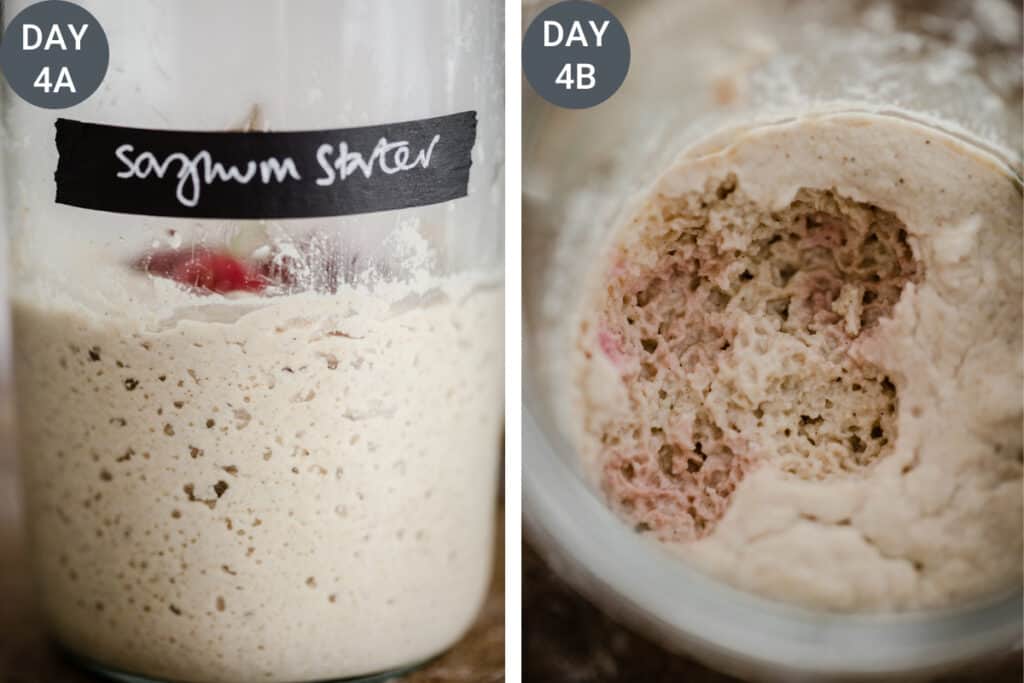
Today you will be feeding your starter but you will be doing two things differently:
- You will begin to feed your starter in the morning and the evening, this will then be your daily routine for the next 10 days.
- You will also need to start discarding some of your starter at every feed.
Discard. The reason to discard some of your starter is that unless you are going to be baking a loaf of bread every single day the volume of your starter will keep growing and growing and it will become impossible to store. By keeping your starter small and manageable it also allows the starter to maintain strength. Although I usually stress that you should never throw your discard away as it's great to bake with, until the starter reaches its 14 day maturation then the discard won't taste particularly nice so it's fine to throw away in this early stage.
- Open the jar and remove the fruit. Discard the fruit as it's done its job and we can carry on now without it.
- Remove all of the starter except for 40g.
- Add into the jar 40g gluten-free flour + 40g filtered water. Mix together and smooth down the surface.
- Cover the jar but not too tightly.
- Allow to stand for 12 hours at room temperature, away from direct sunlight.
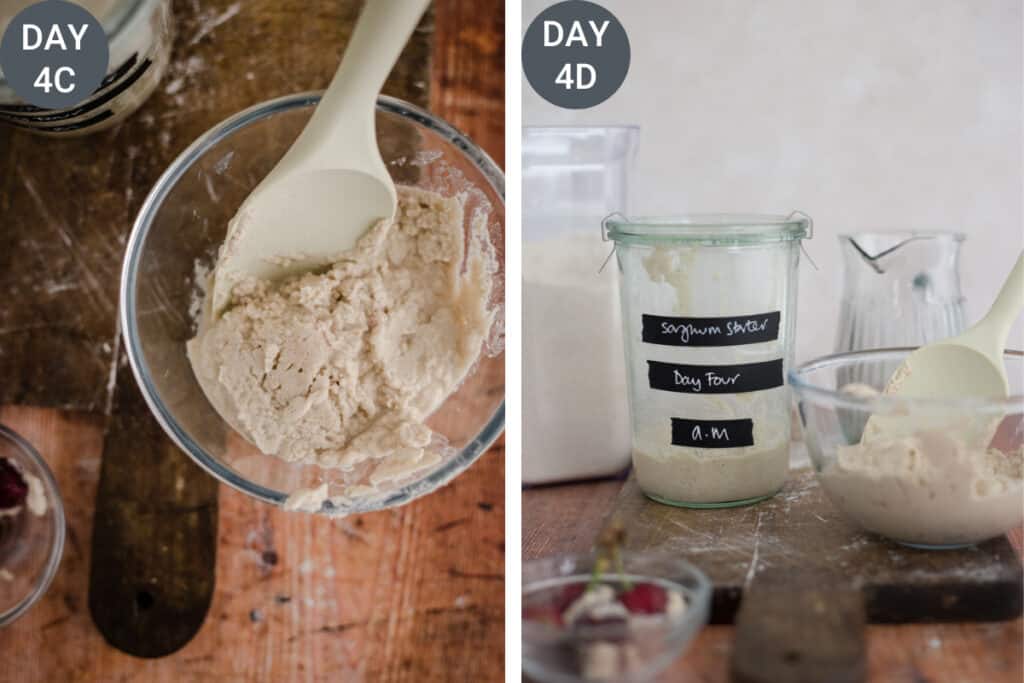
Day 4: P.M
Your starter should be looking bubbly from the side of the jar. When you open the jar at first the surface might seem firm but when you break the surface gaseous bubbles might rise to the surface.
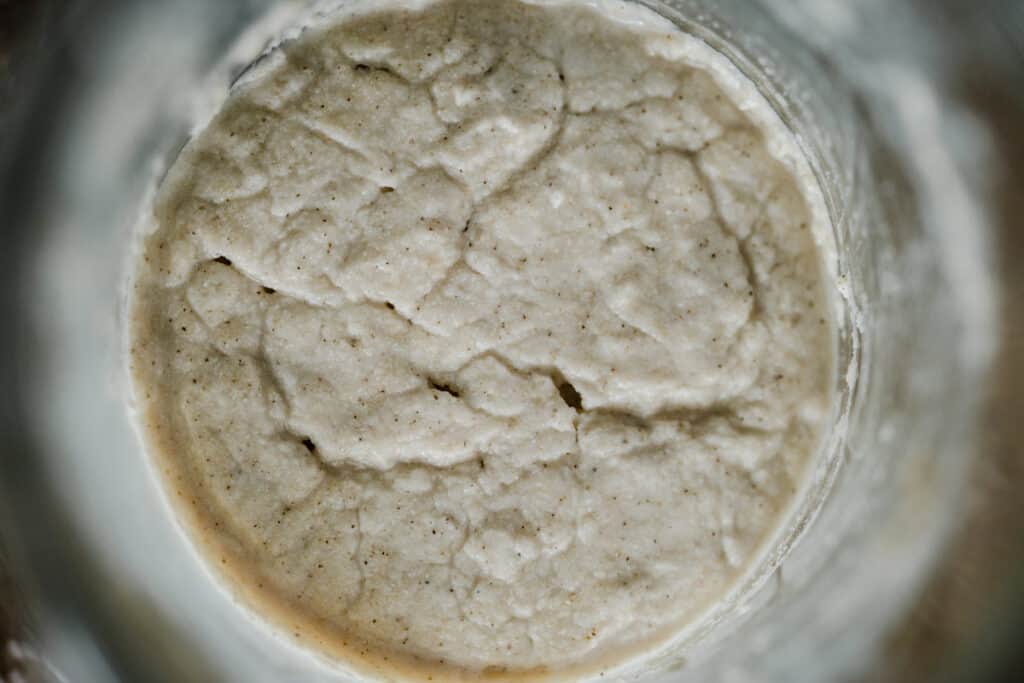
- Open the jar and remove all of the starter except for 40g.
- Add into the jar 40g gluten-free flour + 40g filtered water. Mix together and smooth down the surface.
- Cover the jar but not too tightly.
- Allow to stand for 12 hours at room temperature, away from direct sunlight.
It is best to feed your starter the same times in the morning and evening to keep the starter regulated and avoid it becoming too hungry.
From this point on, when you begin to feed your starter twice a day, that is when you will really notice more and more activation between feeds. Lots of bubbles and a lovely moussey texture.
Days 5-14
Feed your starter twice a day the same as on Day 4, discarding at every feed. Your starter should be getting stronger and stronger. By Day 14 your starter should be ready to make your first loaf of sourdough bread.
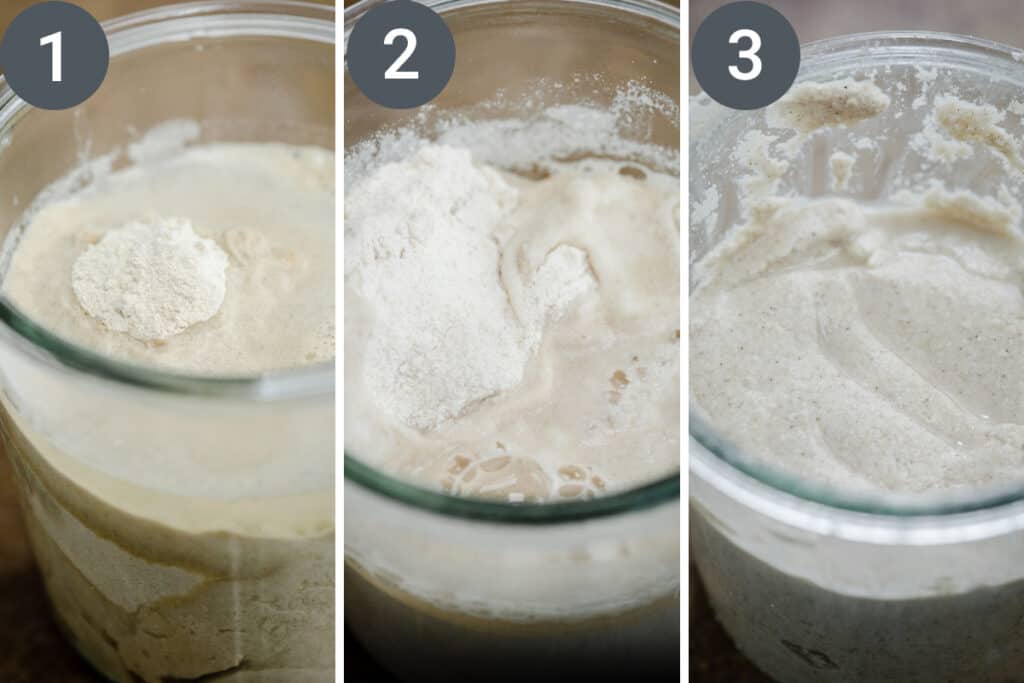
Maintaining your starter
Once your gluten-free starter has reached a 14 day maturation it is ready to start practicing baking with. It probably won't start producing decent loaves for the first month though but it will be fun finessing your recipe in the meantime.
You should continue to feed your starter twice daily in order that it maintains optimum health and readiness for baking.
Now, this is an awful lot of feeding, not to mention discarding of expensive gluten-free flour, especially if you are only planning on baking at least one loaf of sourdough bread a week. If this is the case you may like to store your starter in the fridge so that you only need to feed it once a week.
If you are going to be practicing baking a lot of bread and if you are able to find time to bake with the discard then you may choose to keep your starter at room temperature for at least the first month so that it gets good and strong before you begin storing it in the fridge in between feeds.
Discard
Do you need to discard?
Absolutely, or you will be inundated with starter. Unless you bake everyday then you won't be producing any discard as that starter will be used to create the levain for your daily loaves.
What can you do with the discard?
Store your discard in an airtight container in the fridge for up to a week. Keep adding more discard to the container as your starter produces it during the course of the week. The discard can be used in recipes such as banana bread, scones, pancakes, waffles, brownies. It's a lovely baking ingredient to have as it gives bakes a lovely sour tang and is a special bonus from your sourdough kitchen.
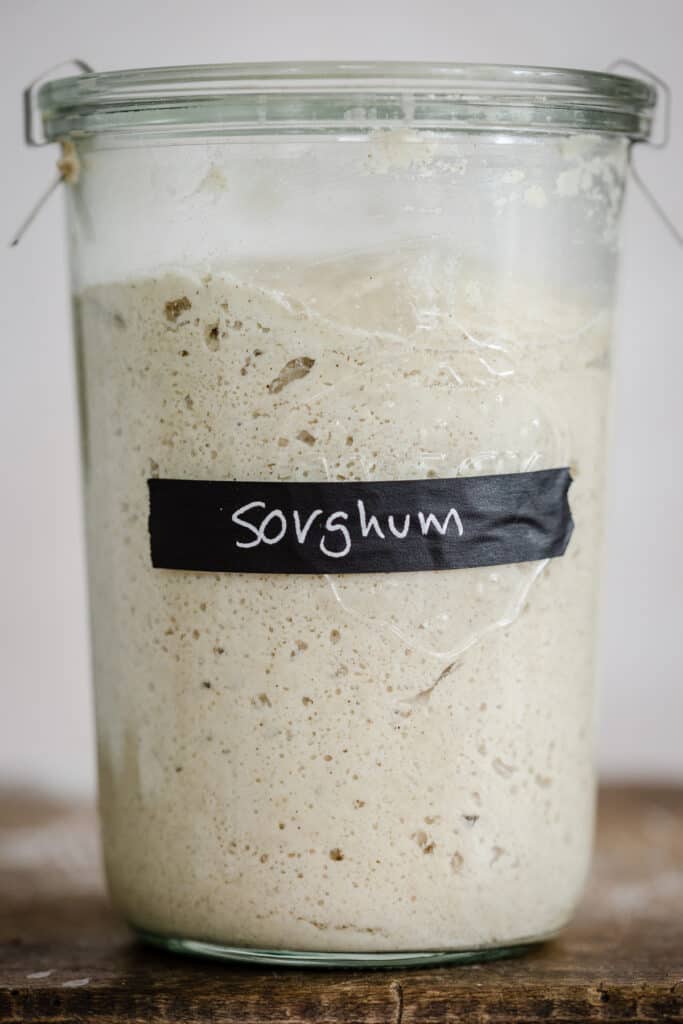
Tips and Troubleshooting
What should a healthy gluten-free starter look like?
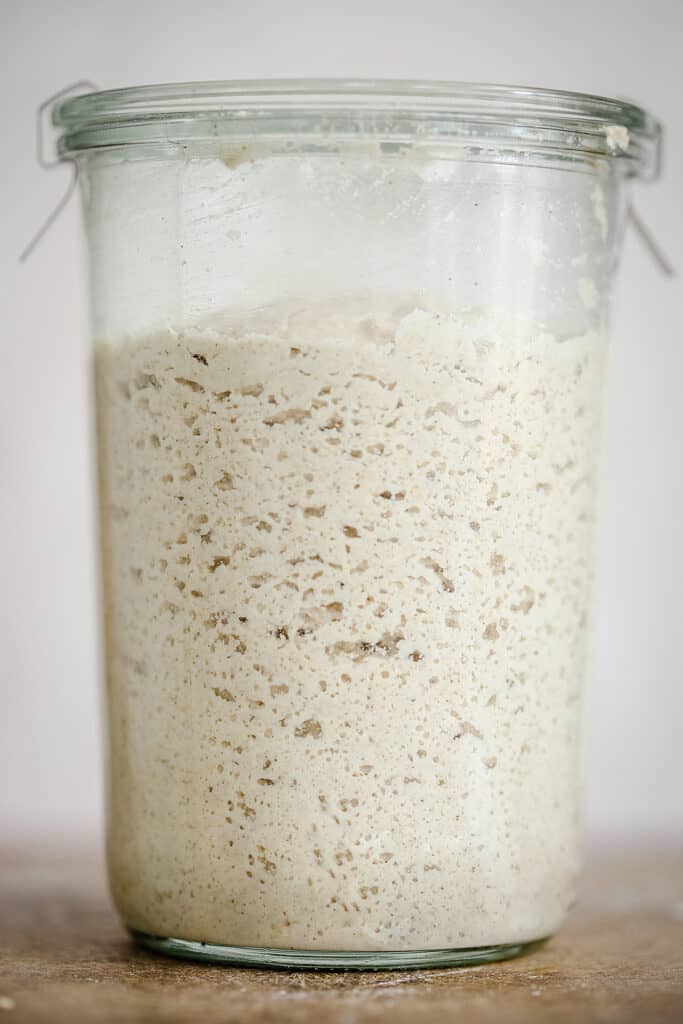
A healthy starter at peak activity should have a sponge-like fluffy texture.
If your starter has a lovely airy quality with large air bubbles and a fluffy texture this will be reflected in the bread that it eventually produces.
Does a gluten-free starter float?
If you are familiar with regular sourdough starters then you will probably be accustomed to the knowledge that a test for showing a good healthy starter which is ready for baking is that a small amount will float on water.
Sorry to be the bearer of bad news but this isn't the case for gluten-free starters and you will just have to rely on the look of its fluffy texture and its nice yeasty smell.
Starter is slow to activate
Please note that gluten-free starters do not get as active or bubbly as regular wheat starters. It may seem a little sluggish at the beginning of the process. Different climates, the type of water used and the brand of flour can all have an impact on the personality of your starter. You might find your starter needs an extra feed here and there.
Solutions
- You can use a drop of organic honey in your starter which will super charge the activation.
- Feed your starter more flour + water at each feed.
Climate allowances
If you live in a country where the weather can be changeable (hello UK!!) then you will find your starter may need slightly different care throughout the year. Starters work best in the summer since yeast grows best at 21-24°C (70-75 °F).
Warm weather. Your starter will generally be hungrier as it feeds more quickly and becomes more active in the heat. You may want to slow down the activation by feeding with room temperature water (as opposed to heated) or place in the fridge between feeds, or give larger feeds to compensate.
Cool weather. In the winter or if it's cooler then your starter might need more of a helping hand with activation. Store somewhere warm between feeds and away from drafts, like an airing cupboard or in a turned off oven. Make sure the water you feed it with is warm.
Smell your starter
There is no more powerful indication of how your starter is getting on then the smell of it. I encourage you to smell your starter every day as a quality control check. It should smell lovely - rich and yeasty.
The more you smell your starter the more you will get to know it and then you will quickly realise when something is amiss.
Starter smells of acetone
If your starter smells vinegary or of acetone then it means that it is hungry and it's time for its next feed. If it's smelling like this in between feeds then you need to feed it more flour + water. This often happens when the weather is warmer.
Water layer on top of your starter
This water layer is called 'hooch' and it's a natural byproduct of the fermentation process. It usually means your starter is hungry and needs feeding. You might notice it more when your starter has been stored in the fridge or if you are waiting a long time in between feeds. You can stir it in and feed as usual or pour it off and feed as usual.
If your starter is producing a layer of hooch just after feeding then it means that you have not fed it enough flour. You can stir in a little more flour. If this is happening regularly after you are feeding it then try feeding your starter 1 part starter: 2 parts flour : 2 parts water. This can happen in a warmer climate when your starter is extra hungry.
Mould on your starter
This is so unfortunate and does happen from time to time. I consider a starter spoiled if it starts to grow mould and it's best to throw it all out and start again. (I'm sorry!!)
To prevent mould you should rinse out your starter jar (no soap) every day. Make sure you keep the rim of your jar above where your starter is resting good and clean. Wipe with a clean damp cloth after every feed.
How do you know if your starter has gone bad?
Your starter will not smell right, it might have developed mould, it might have changed colour and have grey or pink dots.
Can you use a gluten starter and turn it into a gluten-free starter?
You can start feeding a regular starter with gluten-free flours. However, it is not safe for coeliacs as a trace of gluten will always remain in its history. It is safer to start from scratch.
What size should your starter be kept at?
The size you keep your gluten-free sourdough starter at isn't terribly important. This recipe suggests feeding the starter at a ratio of 40g starter: 40g flour: 40g water. Therefore your mother starter will be kept at a weight of about 120-130g (depending if you have needed to add a little extra water to achieve the right consistency).
We keep the amount of starter low as gluten-free flours are expensive and there is a lot of discard in maintaining a larger starter. Plus a fairly newish starter (less than 6 months old) takes a couple of good feeds before it is ready to start baking and you don't want to be feeding it a mound of flour every time.
Sourdough recipes can require anything from between 50g-250g starter per recipe, therefore when you want to bake with it you might need to feed your starter with more flour + water to increase the weight and make enough suitable for your recipe (don't ever forget to keep some of your starter back for the next bake!)
Going on holiday
There will be times throughout the year when you need to leave your starter for longer periods of time in between feeding.
During this time you should refrigerate your starter where it should reside perfectly happily for up to 2 weeks. (Although this should only be on the odd occasion. If you usually store your starter in the fridge then I recommend removing to feed once a week).
You might need to give it a little more attention on your return by giving it extra feeds. You can tell it needs extra feeding as it may form a layer of hooch or start to smell of acetone.
Forgetting to feed your starter
It happens! You can forget a feed or life gets in the way and it stays in the fridge for longer than usual. Don't worry, your starter is more resilient than you know and it can usually be refreshed.
If it normally resides at room temperature then some good strong feeds will usually refresh it.
If you store it in the fridge then a dry crusty layer might have formed. Remove this and mix your starter together. Feed it in the usual way but it may take 2 -3 feeds before you begin to see activity again. Starters get more sluggish the longer they are kept in the fridge.
The daily progress of your starter
Just after you have fed your starter it will look a little flat as it begins its feeding cycle but 2-4 hours after feeding your starter it will be at peak activity again and should have risen almost a third in size (this depends on each individual starter) have large air bubbles in and a sponge-like fluffy texture. Over the next few hours the starter will begin to fall a little and the surface will look deflated. Then it's ready for its next feed and for the cycle to being again.
It is best to bake with a starter when it is at peak activity, so the 2-4 hours after feeding.
Glossary of terms
It may help you to know that a few sourdough baking terms are interchangeble which can get confusing if you are researching recipes across different authors. This is a short glossary of the terms I use.
- Mother. This is your original starter consisting of flour + water. You will be feeding this starter regularly to keep it alive and it
- Levain. (also called preferment or sponge). Creating your levain is the stepping stone between maintaining your mother starter and getting it ready to bake with. It is a mixture of active starter (siphoned from the mother starter) + flour + water. This is the building block of your sourdough loaf. You do not need to use the same flour which you use to feed your flour regularly as you can change it according to the flavour you wish your bread to have.
- 100% hydration. This is when you use an equal amount of flour and water to feed your starter.
Extra resources
My journey creating my perfect gluten-free sourdough starter has been through a huge amount of research from experts in regular sourdough baking and gluten-free sourdough baking as well as my own trial and error. If you want to read more on the subject (and I highly encourage you to do that) then check out the following resources:
- The Boy Who Bakes
- The Perfect Loaf
- The Clever Carrot
- George Eats
- Gluten-Free Sourdough Baking Facebook Group
If you make your Gluten-Free Sourdough Starter using this recipe then please leave a comment below and give the recipe a rating which helps others find the recipe on Google. If you then go on to use this recipe as a launch pad for your own culinary creation then I’d also love it if you’d share it and tag me on Instagram. It is so lovely for me to see your versions and variations of my recipes.
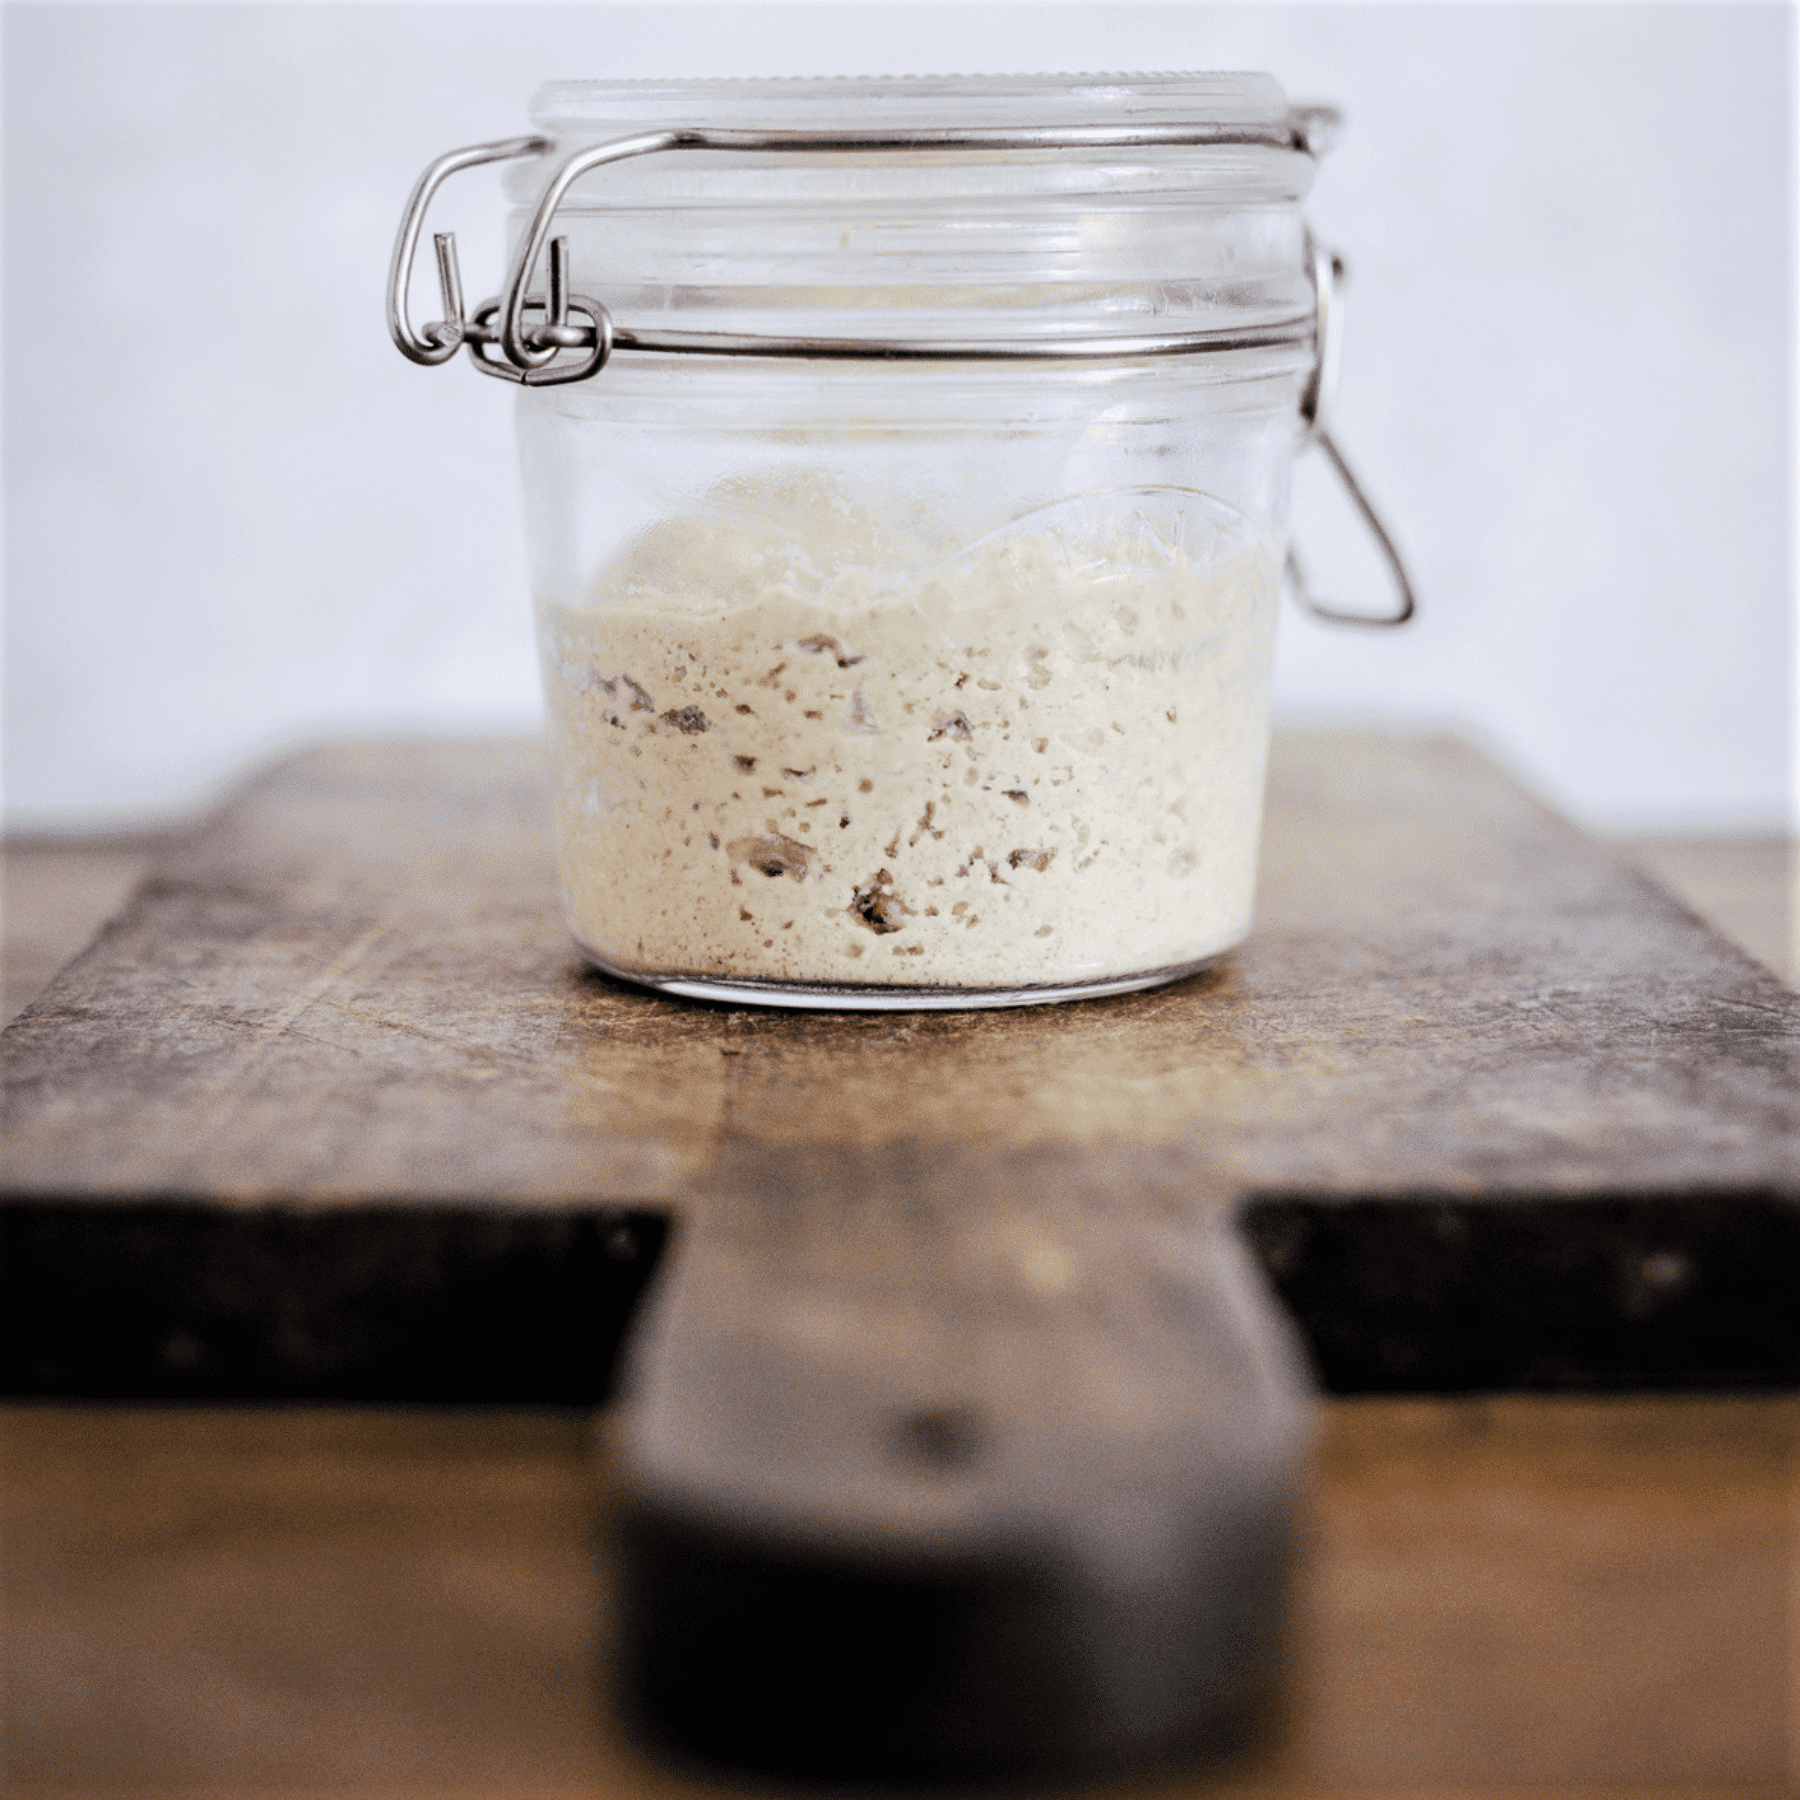
How to make a Gluten-Free Sourdough Starter
Equipment
- Glass preserving jar
- Digital weighing scales
- Digital thermometer
- Silicone spoon
Ingredients
- 1 kg sorghum flour over the course of 14 days - for alternative flour choices see notes
- 1 litre filtered water - over the course of 14 days
- organic berries - handful
Instructions
Day 1: A.M
- Weigh out 40g wholegrain flour into a glass jar and mix it with 40g filtered water.
- Place organic fruit on top of the mixture and cover the jar, not too tightly as the starter needs to breathe.
- Allow to stand for 24 hours at room temperature, away from direct sunlight.
Day 2: A.M
- Open the jar and remove the fruit.
- Add into the jar 40g gluten-free flour + 40g filtered water. Mix together and smooth down the surface.
- Replace the fruit and cover the jar, not too tightly.
- Allow to stand for another 24 hours at room temperature, away from direct sunlight.
Day 3: A.M
- Open the jar and remove the fruit.
- Add into the jar 40g gluten-free flour + 40g filtered water. Mix together and smooth down the surface.
- Replace the fruit and cover the jar, not too tightly.
- Allow to stand for another 24 hours at room temperature, away from direct sunlight.
Day 4: A.M
- You will begin to feed your starter in the morning and the evening, this will then be your daily routine for the next 10 days.
- You will also need to start discarding some of your starter at every feed.
- Open the jar and remove the fruit. Discard the fruit as it's done its job and we can carry on now without it.
- Remove all of the starter except for 40g.
- Add into the jar 40g gluten-free flour + 40g filtered water. Mix together and smooth down the surface.
- Cover the jar but not too tightly.
- Allow to stand for 12 hours at room temperature, away from direct sunlight.
Day 4: P.M
- Open the jar and remove all of the starter except for 40g.
- Add into the jar 40g gluten-free flour + 40g filtered water. Mix together and smooth down the surface.
- Cover the jar but not too tightly.
- Allow to stand for 12 hours at room temperature, away from direct sunlight.
Days 5-14
- Feed your starter twice a day the same as on Day 4, discarding at every feed. Your starter should be getting stronger and stronger. By Day 14 your starter should be ready to make your first loaf of sourdough bread.
Onward
- If storing your starter at room temperature it should be fed twice a day. For long-term maintenance you can choose to store your starter in the fridge. If stored in the fridge your starter will need to be fed once a week.
Video
Notes
Weighing your ingredients
Weighing all the ingredients, including the water, is essential to creating a sourdough starter from scratch. As you become more adept at understanding quantities you may choose to measure by eye but at the beginning of this process weighing is imperative.Flour choices
You can use any wholegrain flour to make a starter as the wild yeast in the flours is what will kickstart the activation of the starter. You might not achieve as lively a starter using starchy flours or a plain gluten-free blend. Other good options are Brown rice flour, Quinoa flour, Buckwheat flour, or a blend of different wholegrains to achieve a customised flavour.Troubleshooting
For details notes on troubleshooting I recommend reading the whole of this post as there is a lot to discuss.Tips
- Mixing. Make sure the starter has been thoroughly mixed at every feed so there is no dry flour.
- Consistency as you are mixing the starter. The flour and water should form a slightly loose paste, not too thick and not too runny.
- Water amount. Some flours may require a little more water than others to achieve this consistency. For example sorghum flour seems to need 5-10ml more water, brown rice flour needs the exact amount.
- Water temperature. The filtered water should be between 38-40°C. Try not to use tap water as the chlorine will inhibit the process.
- Feeding. Feed your starter the same times in the morning and evening to keep the starter regulated and avoid it becoming too hungry.
- Discard. Do not throw your discard away, you can store in the fridge for up to a week in an airtight container and use it for many different recipes which I will be linking to soon!


Claire says
Hi Georgina, is it possible to make the sourdough starter with fresh yeast? And if so, what quantities would you use? Thanks, Claire
Georgina Hartley says
I haven't tried making the sourdough with fresh yeast before I'm afraid so I'm not sure of the quantities.
Maria Scrivner says
Hi Georgina,
Thank you for this recipe. I am in the US. I am planning to try it, but I am confused about two things.
1- What kind of wild berries is needed here?
2- What organic fruit?
Can you please clarify?
Thanks.
Maria
Georgina Hartley says
Hi Maria, any kind of berries or organic fruit will do. So I used cherries as they were in season when I initially made my starter but grapes also work too. You don't want anything too squishy that will dissolve into the starter as it doesn't get mixed it - it just sits on top to release its natural bacteria.
helen says
hello there, I have not yet tried gf sourdough although I do bake bread a lot - but have just enthusiastically read your page here. And am very keen to try!
My question is its easy to get Sorghum flour here (UK!) but it's not labelled organic, does this matter a lot? (Rob's sweet sorghum flour is the one I mean. ) I'm guessing it does..
It's so weird, you get so far as to find Gf goods but they then seem to lose the organic status. Thanks and look forward to your reply, Helen
Georgina Hartley says
Hi Helen, I have used regular sorghum flour for this starter and it has worked just fine. Either Bob's Red Mill or Your Health Store brands are good.
Jacqui Reeves says
Hi, I am very keen to try this recipe, is it ok to use fruit that isn’t organic? I have moved from a city to a town and organic fruit is proving difficult to purchase. I do have strawberries in my garden but they aren’t ripe yet - btw I Amin the Southern Hemisphere.
Cheers
Jacqui
Georgina Hartley says
Hi Jacqui, it is the organic part of the fruit that is the most important as you are looking to add wild bacteria to kickstart the process. You don't need to use the fruit - it is possible to just omit, or you could add a very small drop of wild local honey if you have access to that which does the same thing.
Lee Ann says
This recipe is very encouraging. I have been wanting to do a sorghum sourdough recipe ....Thank you!
Georgina Hartley says
That's a pleasure!!
Inna says
Hello!
I started my Sourdough starter 2 weeks ago, but I'm not sure why I don't get peak activity at 2-4 hours. It usually peaks whenever I leave it overnight and in the morning it has a rise of 1/3. But for the first 5ish hours, there is no rise just small bubbles forming. Is this normal and is there any recommendations to getting better activity? I've been feeding it 100 g brown rice flour, 100 g waters , and discarding until there is 100-120 g starter. Thank you!
Georgina Hartley says
Hi Inna, this is a great question. I have several starters that I nurture and I have to say that my brown rice flour starter is the one that takes the longest to get to peak activity - so don't worry! That was especially the case when I first began the starter - I was convinced my brown rice flour starter was not as good as my sorghum one. However as it has matured it reaches peak activity a lot quicker. So everything is fine. It's still early days for your starter, persevere with it. Your starter sounds completely normal. You can get faster peak activity by placing it in a warmer place. Sometimes I put it in a turned off oven with a tray of just boiled water beneath which gives it a good climate. Keep me updated!