This post contains affiliate links. Please read my disclosures.
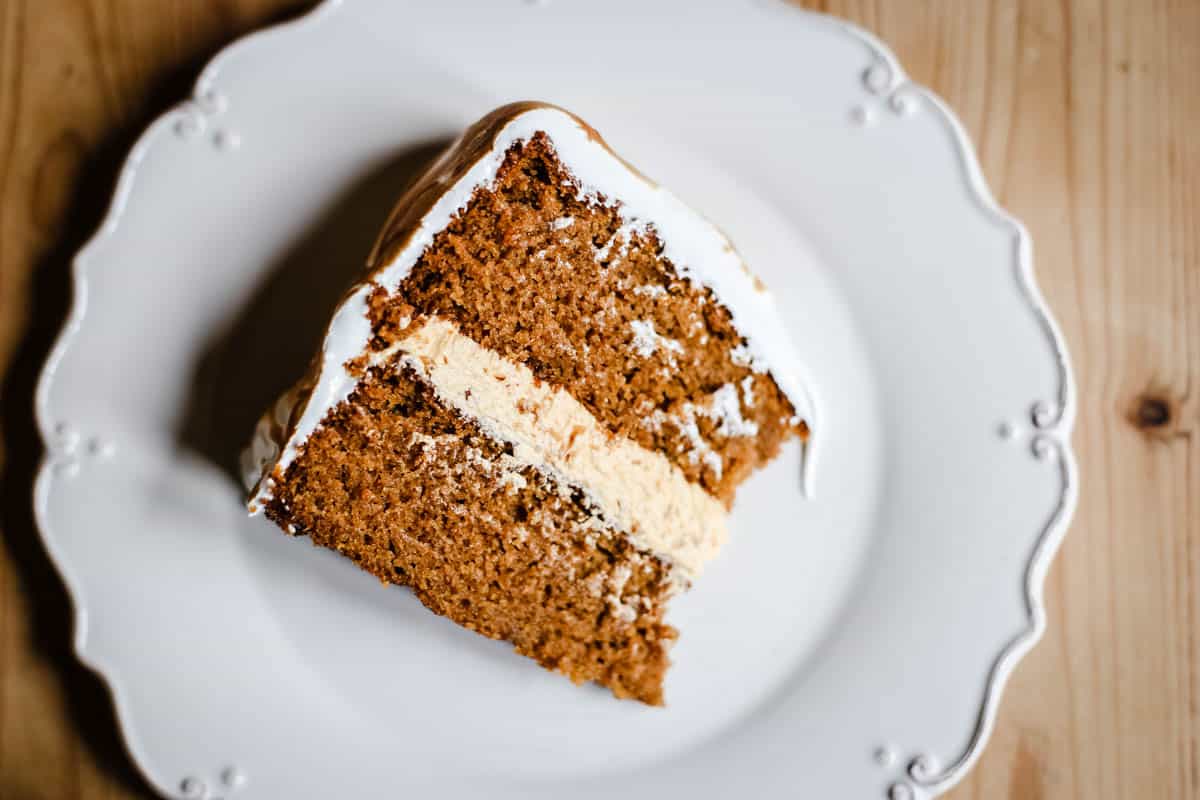
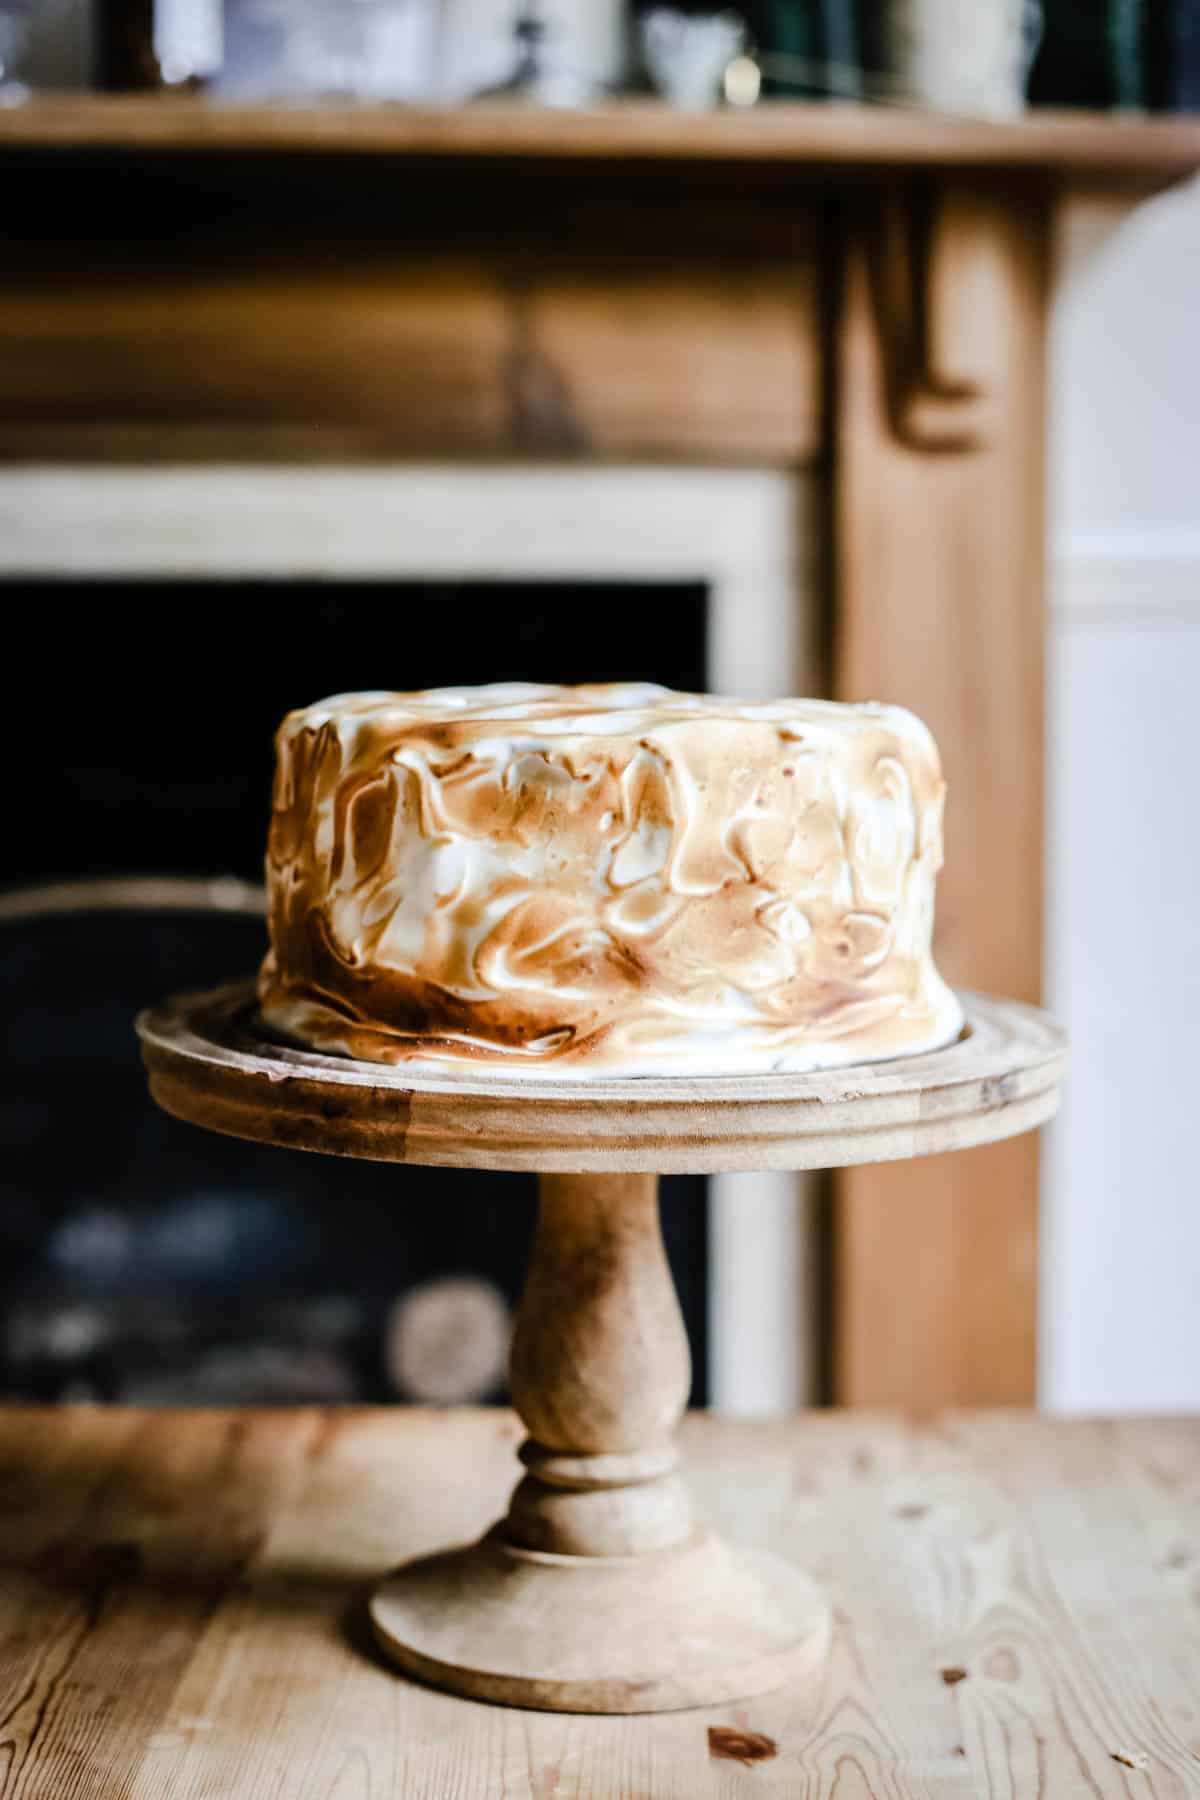
This Gluten-Free Spiced Pumpkin Cake is a real celebration of our favourite Autumn vegetable. Layers of gluten-free spiced pumpkin sponge are filled with a brown butter pumpkin buttercream and covered in toasted marshmallow clouds. The cake is baked with our own blend of lovely gluten-free flour and because of that it needs no xanthan gum.
Jump to:
- Why you’ll love this cake
- What gluten-free flours you need
- Can you use all-purpose gluten-free flour instead?
- Full list of ingredients needed
- How to make the Gluten-Free Spiced Pumpkin Cake
- How to make the toasted marshmallow
- How to make the brown butter swiss meringue buttercream
- Buttercream tips
- How to assemble the whole cake
- Shop the recipe
- Make in advance
- How to store
- How to freeze
- More gluten-free pumpkin recipes you'll love
- Gluten-Free Spiced Pumpkin Cake with Toasted Marshmallow
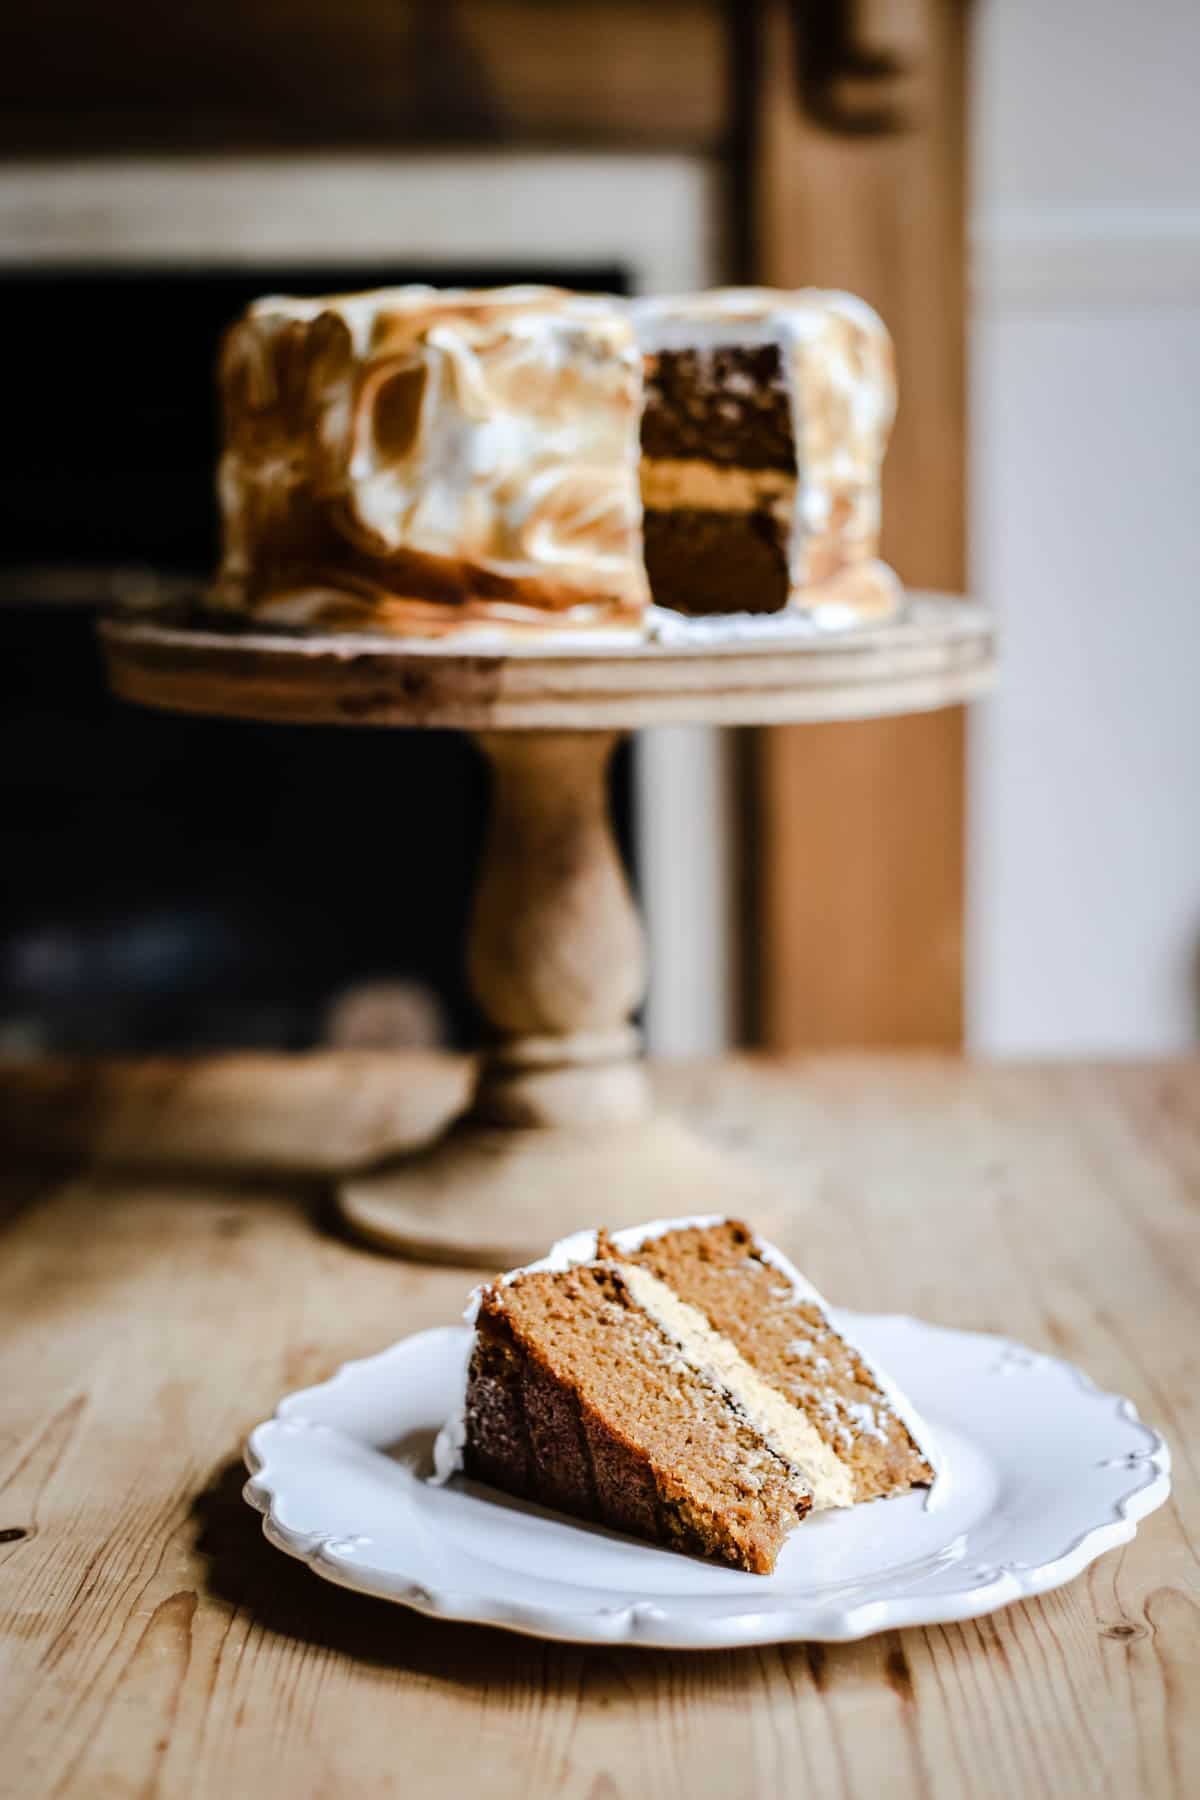
This Gluten-Free Spiced Pumpkin Cake with Toasted Marshmallow is an absolute triumph. The pumpkin sponge is moist and delicious with so many layers of flavour due to our favourite pumpkin spices and the carefully chosen blend of gluten-free flours.
This simple fluffy marshmallowy meringue is a wonderful texture and very easy to make. We cover our cake with it liberally and then use our chef’s blowtorch to give it a beautifully toasted look. Its simple sweet flavour is the perfect foil for the rich pumpkin sponge.
Instead of going for a full on Pumpkin Marshmallow Cake we are going to use some of the marshmallow filling to create an incredible swiss meringue buttercream. You will fall head over heels for this brown butter pumpkin buttercream which is rich, caramelly and creamy with plenty of full pumpkin flavour.
Why you’ll love this cake
- A real celebration of pumpkin.
- Rich with pumpkin flavour and lovely spices.
- That creamy brown butter buttercream made with more pumpkin deserves to be eaten with a spoon.
- No xanthan gum, this cake simply doesn’t need it because we have chosen the right blend of gluten-free flours. READ MORE >>> Why I don’t bake with xanthan gum.
What gluten-free flours you need
Sweet rice flour (glutinous rice flour)
This starchy flour is also known as glutinous rice flour, even though it contains no xanthan gum. It binds really well and gives the cake a lovely bounce and great structure.
READ MORE >>> The Ultimate Guide to Sweet Rice Flour
Substitution: If you can’t have rice then you can substitute with almond flour.
Oat flour
This wholegrain flour has a mellow toasty buttery flavour and gives a light fluffy texture to our sponge.
READ MORE >>> The Ultimate Guide to Oat Flour
Substitution: If you can’t have oats then you can substitute with sorghum flour or buckwheat flour.
Millet flour
This is another wholegrain flour which is mellow in flavour. However, too much millet flour can taste a little bitter so we keep the quantities down here. It pairs well with the oat flour and using the two different wholegrains avoids any gumminess.
Substitution: If you can’t find millet flour then you can substitute with buckwheat flour.
Potato starch (not potato flour)
This starchy flour has excellent binding properties but is also extremely light so the cake rises well.
Substitution: If you can’t have potatoes then you can substitute with more tapioca flour. The sponge will be a little heavier but it will still be delicious.
Tapioca starch (tapioca flour)
Our final starchy flour which is another great binder. It’s a halfway house between the sweet rice and the potato starch so balances the other two well. It also gives our cake a lovely golden colour.
READ MORE >>> The Ultimate Guide to Tapioca Starch
Substitution: You can use arrowroot powder instead of tapioca starch
If you have my Homemade Gluten-Free Flour Blend to hand then you can swap all the above flours for the same amount of this flour. It works perfectly with cakes.
Can you use all-purpose gluten-free flour instead?
I don’t recommend it for this Gluten-Free Spiced Pumpkin Cake. Shop bought gluten-free flours vary wildly in which flours are included in the blend. This recipe has a perfectly balanced mix of flours which give a texture that is light, fluffy and with a good structure that has no need for xanthan gum.
Full list of ingredients needed
- Pumpkin Puree. Use your favourite brand of tinned/canned pumpkin.
- Sweet rice flour (glutinous rice flour).
- Oat flour.
- Millet flour.
- Potato starch (not potato flour).
- Tapioca starch (tapioca flour).
- Butter. Unsalted is the best choice here.
- Brown sugar. Gives lovely rich flavour to the pumpkin sponge.
- Caster sugar. This is needed for the marshmallow. It’s a fine baking sugar, you can substitute for granulated white sugar.
- Eggs. This recipe uses medium size, about 60g each with shell (50g each without shell).
- Vanilla extract. Use a good quality extract, I like Nilsen Massey.
- Pumpkin Pie Spice. If you find it hard to buy pumpkin pie spice then try my version >>> Homemade Pumpkin Spice Mix.
- Baking powder. For rise and a tender crumb.
- Bicarbonate of soda. For extra lift and a tender crumb.
- Salt. I like to use kosher salt in my baking as it has a round gentle flavour.
How to make the Gluten-Free Spiced Pumpkin Cake
- Mix the sugar and melted butter together.
- Add the eggs one at a time, then the vanilla extract.
- Pour in the pumpkin puree and mix well.
- Sift together the dry ingredients, then add to the pumpkin mixture until just combined.
- Divide between two cake tins and bake for 35–40 minutes.
- Allow to cool completely before filling with the buttercream and covering with the marshmallow.
How to make the toasted marshmallow
Make the toasted marshmallow before you make the buttercream as you’ll be using some of the marshmallow to make the buttercream.
- Heat egg whites and caster sugar in a bain marie, stirring constantly until the sugar has dissolved and the temperature has reached 71°C.
- Remove the egg whites and sugar from the heat and pour into a stand mixer with whisk attachment. Whisk until the mixture forms stiff peaks.
- Set aside 325g to create the toasted marshmallow and leave the rest in the mixer to make the buttercream.
How to make the brown butter swiss meringue buttercream
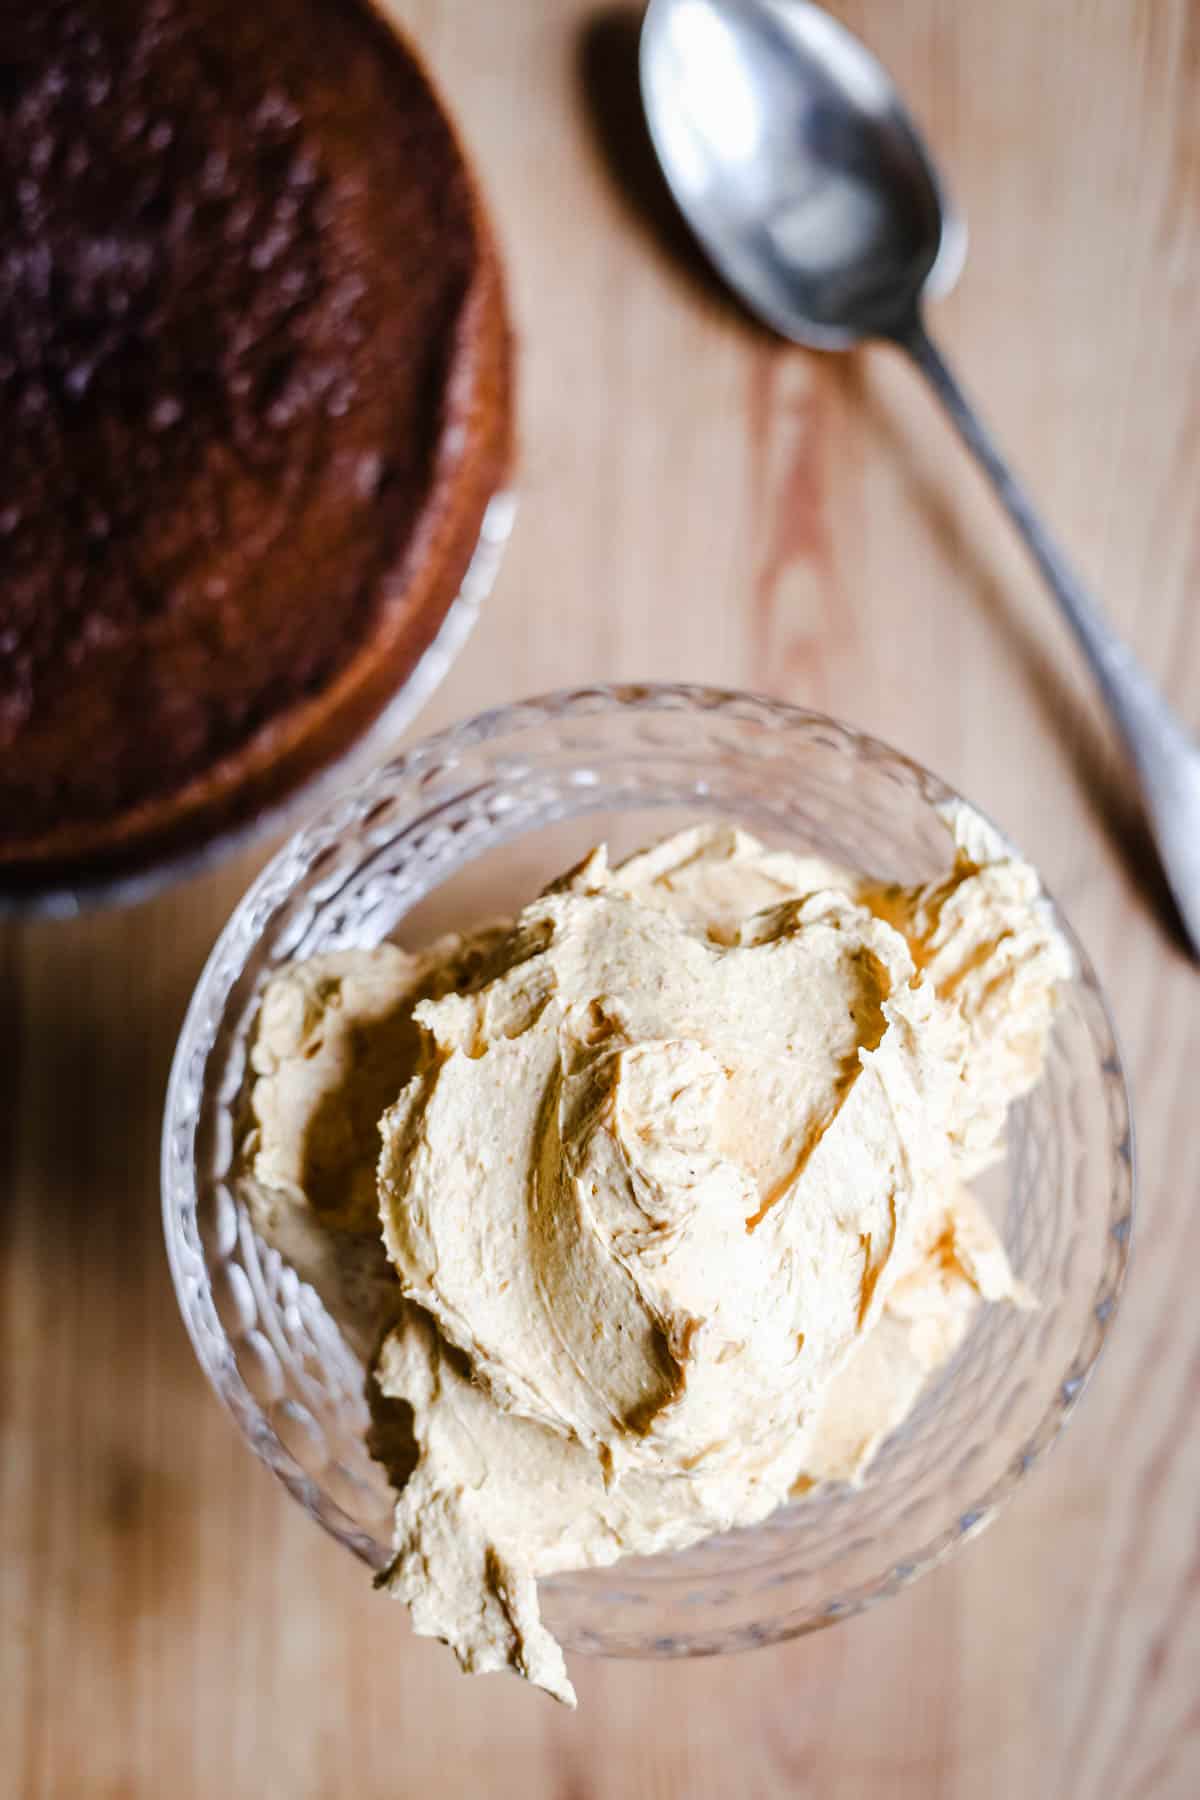
You need to make the brown butter required for the buttercream at least 2 hours before using it for the buttercream as the butter needs to chill.
- Place the butter in a saucepan and heat over a medium flame. The butter will melt. Listen carefully and the butter will start hissing and cracking and forming little brown bits at the bottom of the pan. You want to wait until the noises start to subside, the butter smells toasty and is turning a darker colour. Remove from the heat as soon as it’s ready so it doesn’t begin to burn. Pour the butter into a heatproof container and chill in the fridge for 2 hours or until it solidifies to the consistency of room temperature butter. Cut the butter into cubes.
- Place the marshmallow in the bowl of a food mixer fitted with a paddle attachment. Then on a low speed beat the butter in one cube at a time until it's totally incorporated.
- Add the pumpkin puree, vanilla extract and salt and beat until completely combined.
Buttercream tips
- Any problems with the buttercream are usually down to certain ingredients being the wrong temperature - don't worry, we can fix it! - The problems will always seem to arise when you add the butter.
- The butter should be at room temperature - just slightly soft.
- If you are doing everything right then when you have almost added all the butter the mixture will look curdled. Do not fret – this is supposed to happen and just means you are nearly done. Just continue to add all the butter. Once the butter is totally incorporated the buttercream will miraculously become a smooth velvety consistency.
- If when you add the butter the buttercream turns to soup then your butter was too warm. Place the whole mixing bowl in the fridge for 15 minutes then try mixing it again.
- If the butter is too cold then it won't whip nicely into the marshmallow. The mixture will seem greasy and the butter won't incorporate. Put the mixing bowl over a pan of simmering water, when the butter melts at the edges, remove and beat it up again.
How to assemble the whole cake
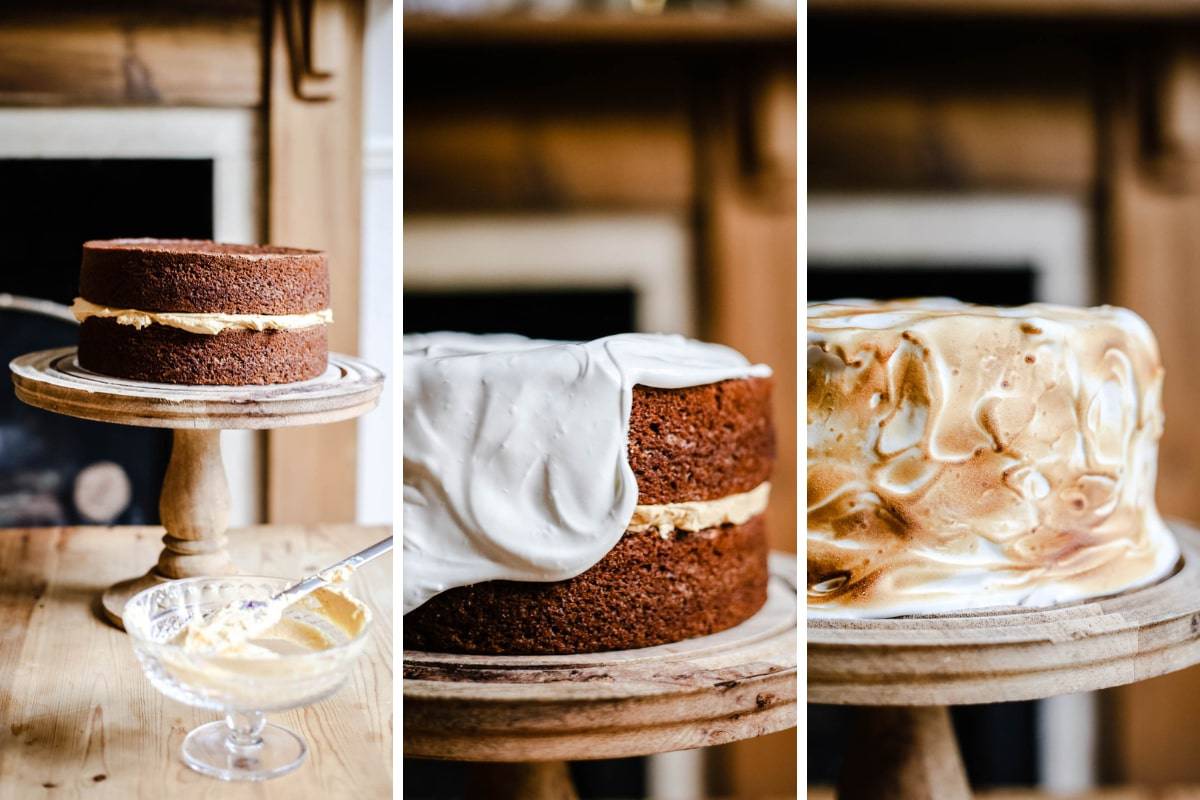
- Place one of the sponge layers on a cake board and spread the brown butter pumpkin buttercream filling on top of the cake, smoothing evenly with a palette knife.
- Place the second sponge layer on top and cover the top and the sides of the cake with the marshmallow using an offset spatula to spread the marshmallow around evenly.
- Toast the marshmallow with a chef's blow torch. Hold the blow torch a little distance away so as not to burn the cake.
Shop the recipe
 Buy Now →
  Buy Now →
  Buy Now →
  Buy Now →
  Buy Now →
  Buy Now →
  Buy Now →
  Buy Now →
  Buy Now →
  Buy Now →
  Buy Now →
  Buy Now →
 Make in advance
The gluten-free pumpkin sponges can be made up to 2 days in advance of assembling the cake. Keep at room temperature in an airtight tin.
How to store
The cake can be stored in the fridge for up to 3 days once it is completely assembled.
How to freeze
I recommend freezing the individual sponges before decoration, not the whole cake.
Once the sponges have been baked allow to cool completely. Then wrap each sponge well in plastic wrap and aluminium foil to ensure there is no freezer spoilage. The cake can be frozen for up to 2 months.
Thaw overnight at room temperature before unwrapping.
More gluten-free pumpkin recipes you'll love
- Spiced Pumpkin Cookies
- Pumpkin Spice Mix
- Gluten-Free Pumpkin Pie
- Easy Pumpkin Oatmeal Muffins
- Pumpkin Jam
- Pumpkin Pancakes with Almond Maple Syrup
- Gluten-Free Pumpkin Bread
I urge you to give this Gluten-Free Spiced Pumpkin Cake a try. If you do then please leave a comment below and give the recipe a rating which helps others find the recipe on Google. If you then go on to use this recipe as a launch pad for your own culinary creation then I’d also love it if you’d share it and tag me on Instagram. It is so lovely for me to see your versions and variations of my recipes.

Gluten-Free Spiced Pumpkin Cake with Toasted Marshmallow
Ingredients
Spiced Pumpkin Cake
- 500 g light brown sugar
- 280 g unsalted butter - melted then cooled
- 5 eggs - medium size, see notes
- 425 g pumpkin puree
- 1½ teaspoons vanilla extract
- 110 g sweet rice flour - glutinous rice flour
- 80 g oat flour
- 65 g millet flour
- 35 g potato flour
- 30 g tapioca flour
- 1¾ teaspoons bicarbonate of soda
- 1¾ teaspoons baking powder
- 1 teaspoon salt
- 1 tablespoon pumpkin pie spice - see notes
Toasted Marshmallow
- 7 egg whites - 210g
- 350 g caster sugar
- A pinch of salt
- 1 teaspoon vanilla extract
Brown Butter Pumpkin Buttercream
- 175 g unsalted butter
- 150 g of the marshmallow frosting
- 5 tablespoons pumpkin puree
- ¼ teaspoon vanilla extract
- pinch of salt
Instructions
Spiced Pumpkin Cake
- Pre-heat the oven to 180°C / 160°C / gas mark 4 and line and grease two 8x4 inch round cake tins.
- Blend together the sugar and butter until thick and well combined.
- Add the eggs one at a time, then the vanilla extract.
- Pour in the pumpkin puree and mix well.
- Sift together the rest of the dry ingredients, then add to the pumpkin mixture until just combined.
- Divide the batter between the two cake tins and bake for 35–40 minutes until an inserted cocktail stick comes out clean.
Toasted Marshmallow
- Heat egg whites and caster sugar in a bain marie, stirring constantly until the sugar has dissolved and the temperature has reached 71°C.
- Remove the egg whites and sugar from the heat and pour into a stand mixer with whisk attachment. Whisk until the mixture forms stiff peaks.
- Set aside 325g to create the toasted marshmallow and set the rest aside to make the brown butter pumpkin buttercream.
Brown Butter Pumpkin Buttercream
- Place the butter in a saucepan and heat over a medium flame. Once the butter has melted listen for the hissing and crackling. As soon as this has subsided remove from the heat so it doesn’t begin to burn.
- Pour the brown butter into a heatproof container and chill in the fridge for 2 hours or until it solidifies to the consistency of room temperature butter. Cut the butter into cubes
- Pour the leftover marshmallow into the bowl of a food mixer. Use the paddle attachment of the food mixer and add the butter into the leftover marshmallow one cube at a time and beating continually until a smooth velvety buttercream has formed.
- Add the pumpkin puree, vanilla extract and salt and beat until completely combined.
Assembly
- Place one of the sponge layers on a cake board and spread the brown butter pumpkin buttercream filling on top of the cake, smoothing evenly with a palette knife.
- Place the second sponge layer on top and cover the top and the sides of the cake with the marshmallow using an offset spatula.
- Toast the marshmallow with a blow torch.
Notes
Flour substitutions
For a full list of flour substitutions visit the above post where I give a comprehensive breakdown of all your options.Eggs
The eggs used in this recipe are medium size, 60g with shell and 50g without shell. If you can't get hold of medium eggs I suggest you weigh the amount.Pumpkin Pie Spice
If you don't have Pumpkin Pie Spice to hand then use my Homemade Pumpkin Spice MixTips
- Make the toasted marshmallow before you make the buttercream as you’ll be using some of the marshmallow to make the buttercream.
- You need to make the brown butter required for the buttercream at least 2 hours before using it for the buttercream as the butter needs to chill.
- You will need a digital thermometer for both the marshmallow and the buttercream.
- The buttercream will look curdled once you have added all the butter but continue to beat and it will come together to a velvety smooth buttercream. For a comprehensive list of buttercream tips, visit the post above.
How to store
The cake can be stored in the fridge for up to 3 days once it is completely assembled.How to freeze
- I recommend freezing the individual sponges before decoration, not the whole cake.
- Once the sponges have been baked allow to cool completely. Then wrap each sponge well in plastic wrap and aluminium foil to ensure there is no freezer spoilage. The cake can be frozen for up to 2 months.
- Thaw overnight at room temperature before unwrapping.


Renee says
I am systemically allergic to wheat and potatoes, so potato starch is out for me. What do you recommend instead. Gluten free does not mean wheat free so I have to be very careful. I haven’t found an oat brand that does not pose a problem for me. What is an alternative you could recommend for the oats?
Georgina says
Hi Renee, I do understand that gluten-free oat flour can be a difficult ingredient. You could try substituting the oat flour for sorghum flour. It has a different flavour profile and can be slightly gritty depending on which brand you use, but it may work nicely. Sorry that potatoes are out for you as well. Use more tapioca starch to compensate