Homemade Orange Curd
This post contains affiliate links. Please read my disclosures.

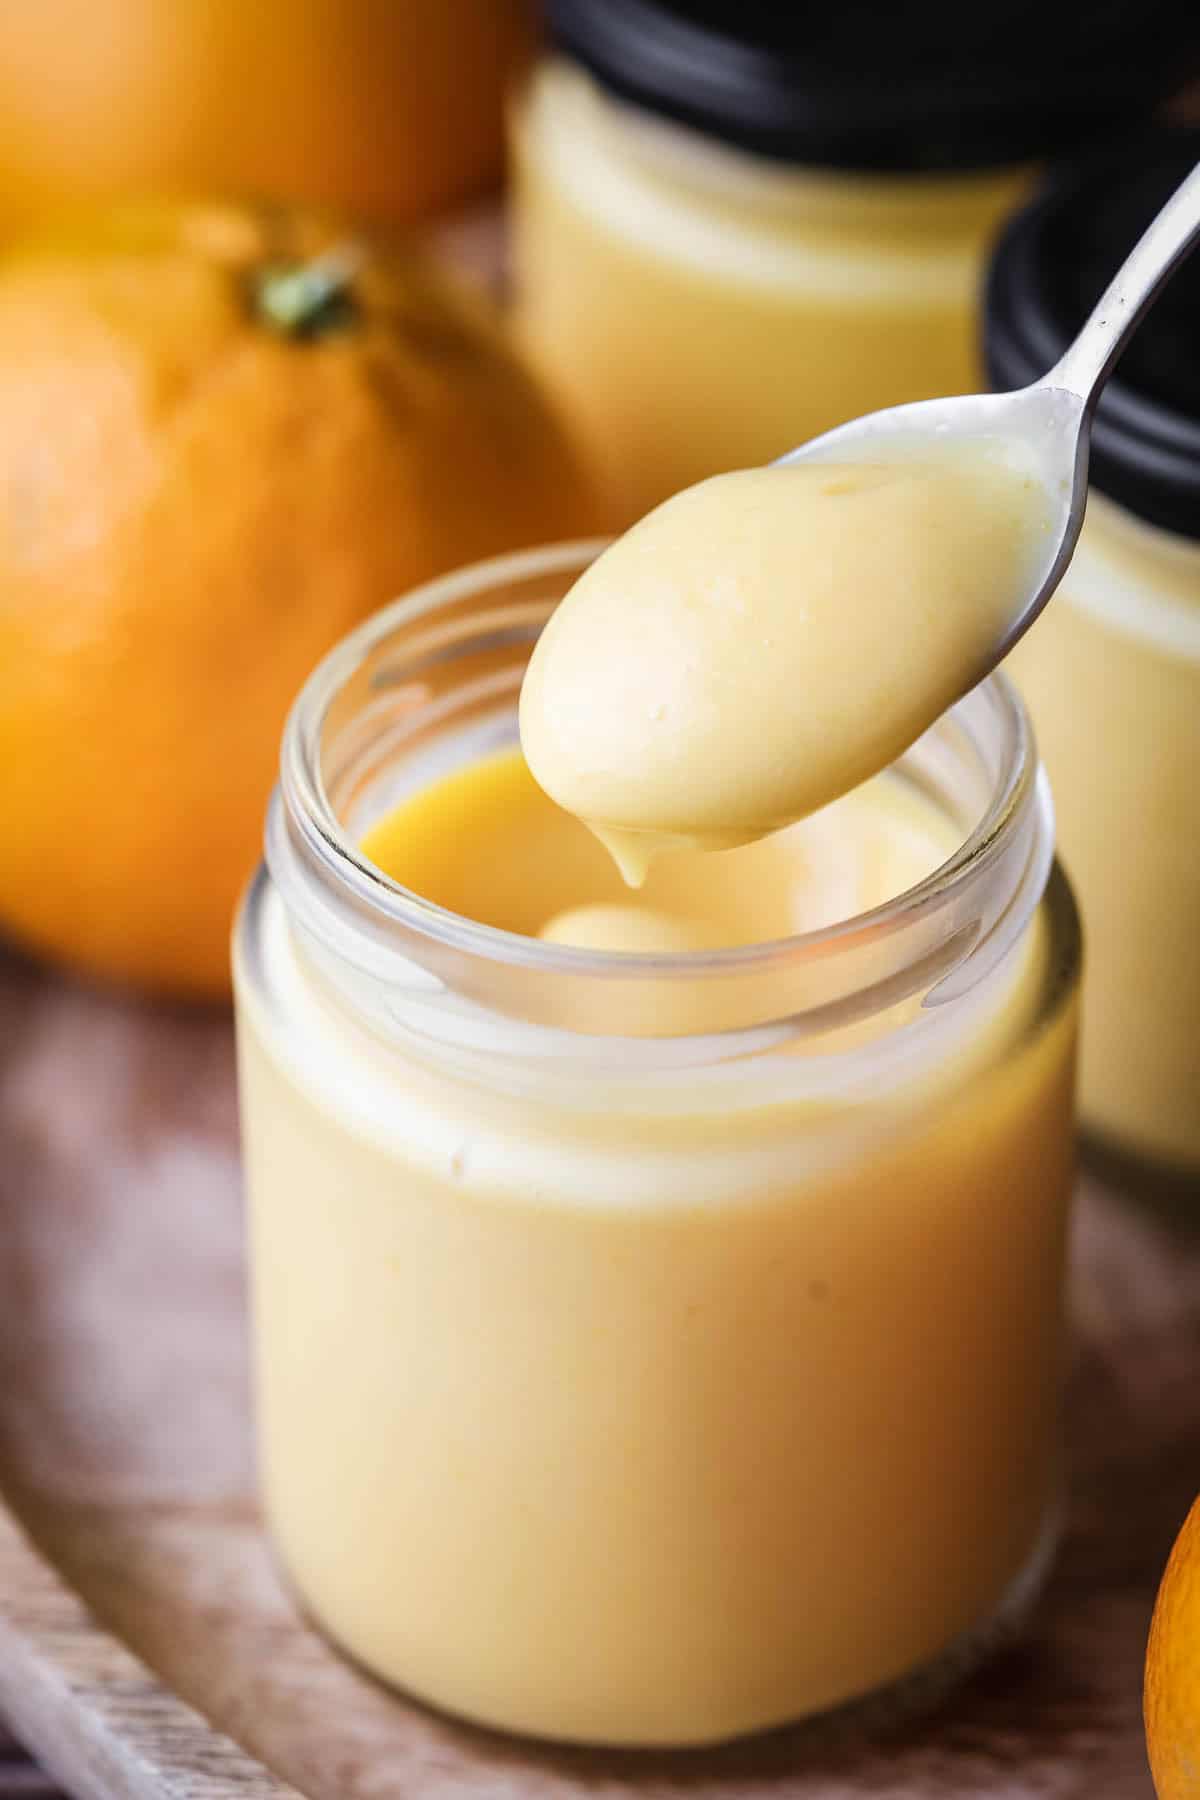
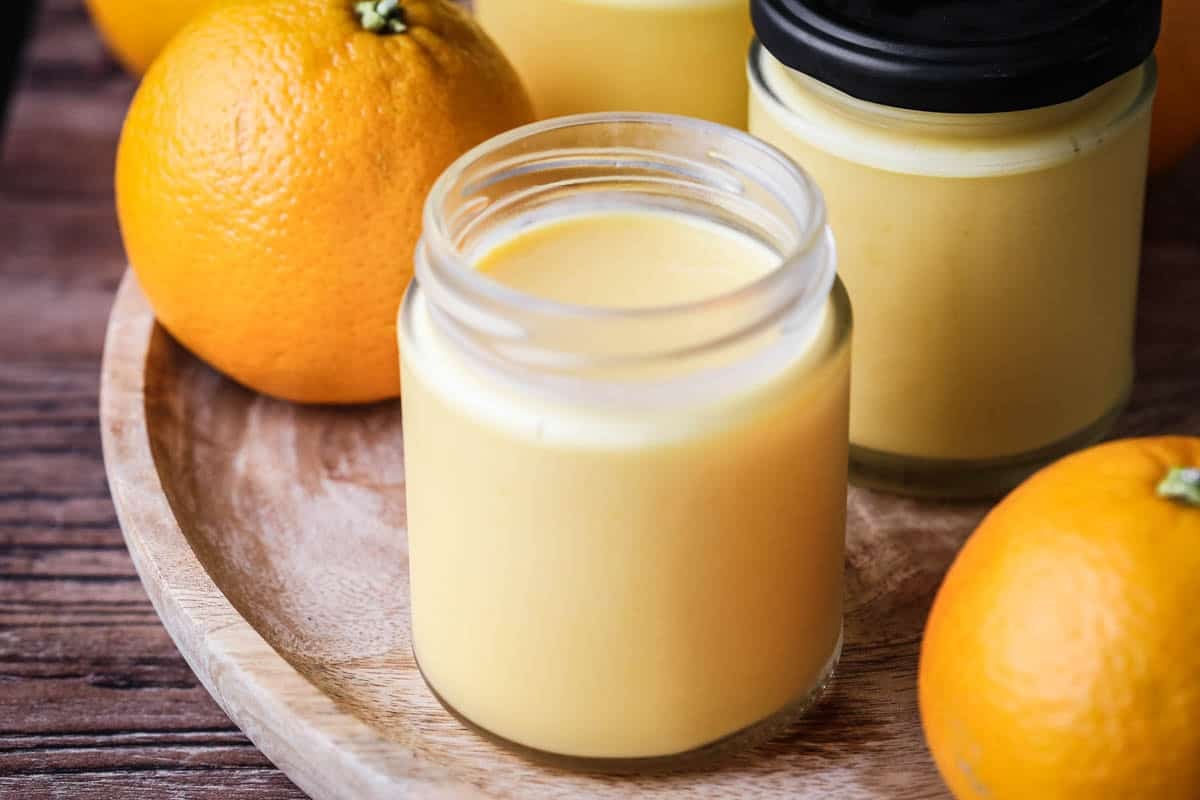
Bursting with citrus flavour this buttery Orange Curd is simply made in small batches to make the most of the season. Together we’ll choose the best oranges, stir our bright creamy curd to glossy perfection and achieve a foolproof set.
Orange Curd is often overlooked in favour of its tangier Lemon Curd, but this is a mistake as Orange Curd is often the wintry preserve I turn to every year to add a ray of sunshine to our dark gloomy mornings.
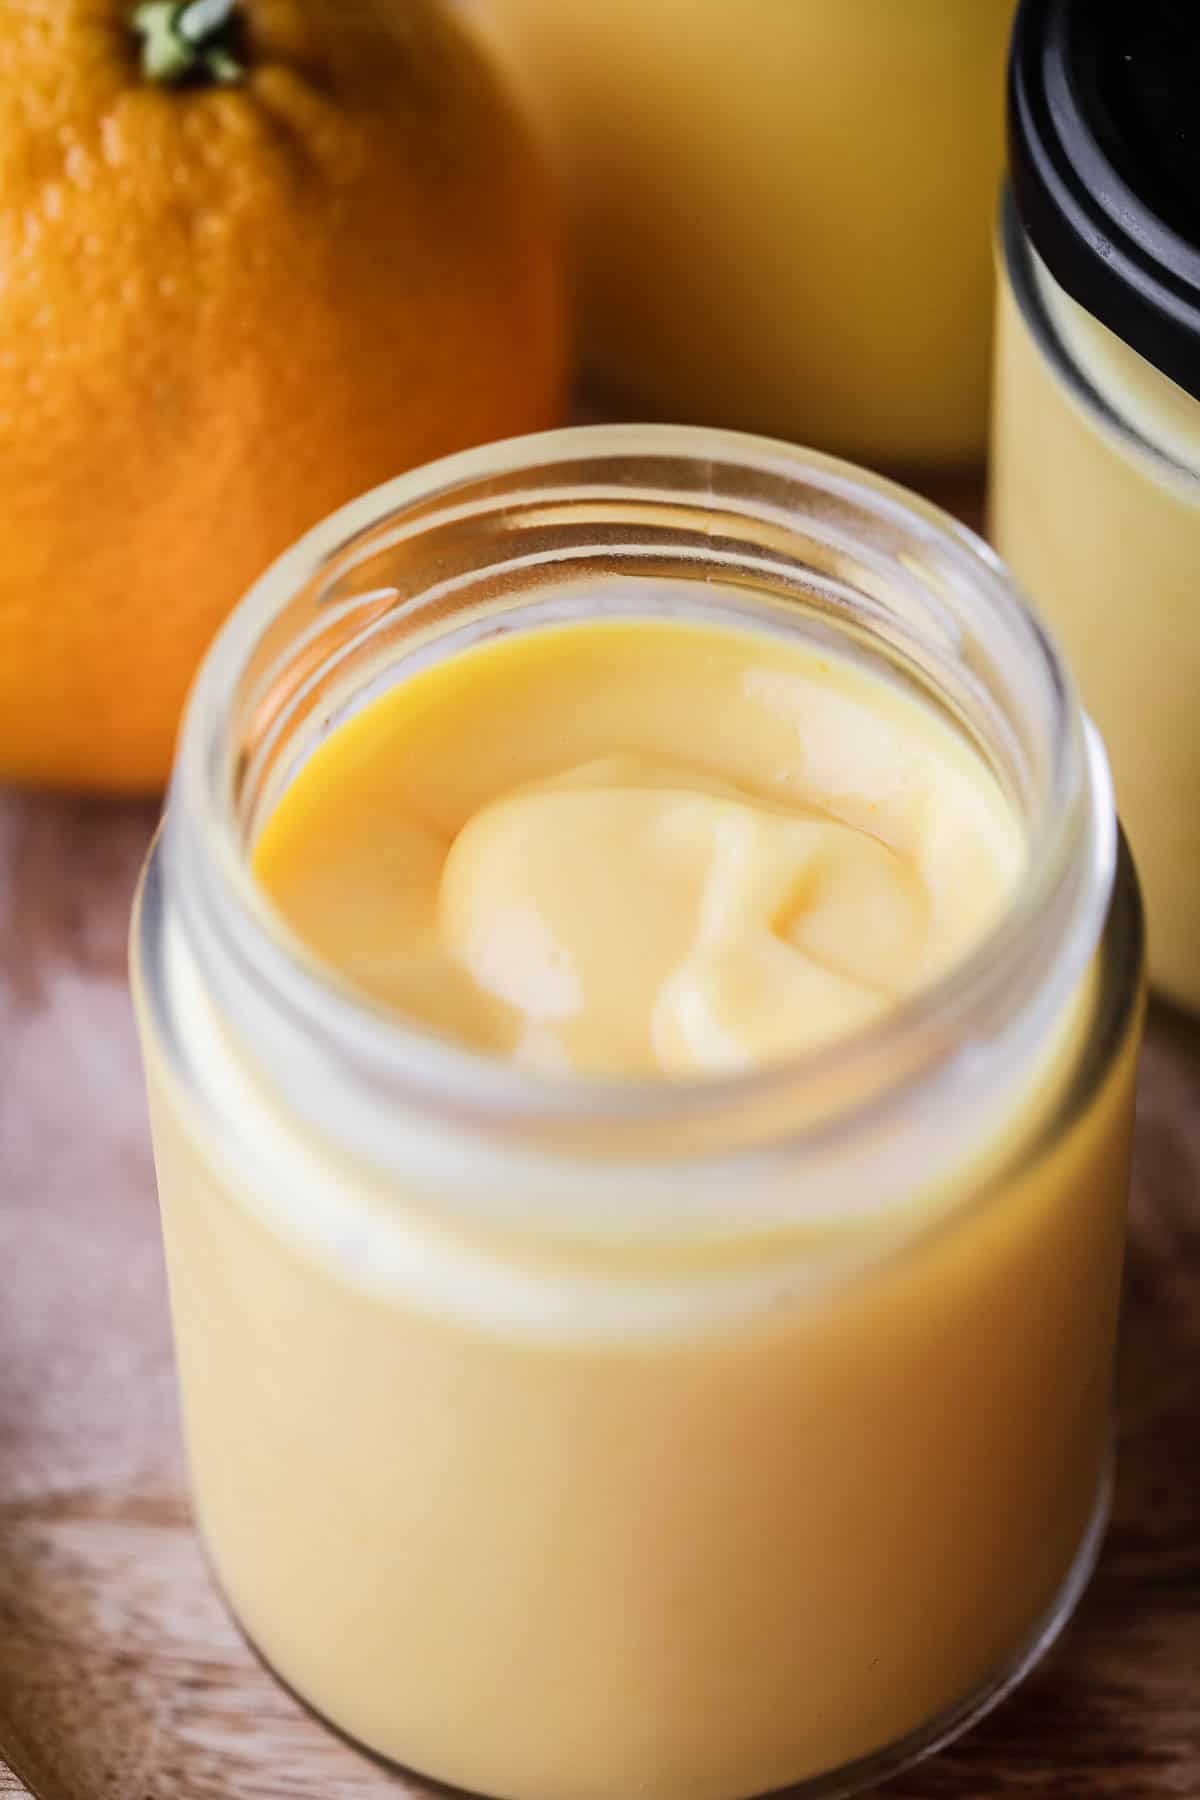
Your cosy pot of curd is like a buttery custardy marmalade and a complete joy at breakfast time where you can incorporate it into your morning feast in a myriad of ways. It spreads and drizzles like a dream. It’s also an underrated baking companion, happily sandwiched between the fluffy layers of a Victoria Sponge, nestled into Thumbprint Cookies or rolled up into a Swiss Roll.
Potting a perfect jar of sharp citrus curd means understanding which oranges to choose, how to achieve a good set (have patience) and troubleshooting any slightly scrambled egg.
Why You’ll Love This Orange Curd Recipe
- Easy. There are minimal ingredients here as we’re keeping it simple. However, there are a few tweaks we can try out to vary and furnish our flavour.
- Fast. Just because this curd seems like a quick recipe doesn’t mean you should attack this recipe with speed though. Curd is best approached with a clear hour so you can ensure a smooth thick set without any scramble.
- Versatile. This curd stretches further than a crumpet topping. We can bake it into cookies, ripple it through ice cream and whip it into cream for a tart filling.
Which Oranges are Best to Use?
Orange curd can be made with a variety of oranges depending on the season. All the oranges in the UK are imported, the supermarkets don’t have a huge selection in store and tend to focus on the Navel orange. If you are lucky enough to have a great greengrocer locally then you might have more variety, that’s usually where I pick up my Sevilles, Cara Caras and Blood Oranges.
Peak orange season tends to be winter to spring so this is when the oranges will be of the best quality and your orange curd will be the most flavourful.
Navel. This is the most common variety of orange available year round in UK supermarkets. It is a perfectly lovely large orange and gives a good all-round flavour and yields a lot of juice.
Seville. This is a bitter orange more common in marmalade and I don’t recommend you use all Sevilles for your curd. However maybe try out swapping a navel for a Seville if you want to incorporate its signature flavour. Available from late December through mid-February.
Cara Cara. These oranges have a light blush colour and are small and sweet. You can use all Cara Caras for your curd, I do find the blush mostly disappears but the flavour certainly remains. You might need more Cara Caras than other orange varieties as the ones I tested didn’t juice very well. Available from mid-November through to April.
Blood oranges. These are really juicy and sweet oranges at their peak. I don’t find the end result of the curd is too heavily red or pink though. Available from late December through to April.
Ingredients Needed
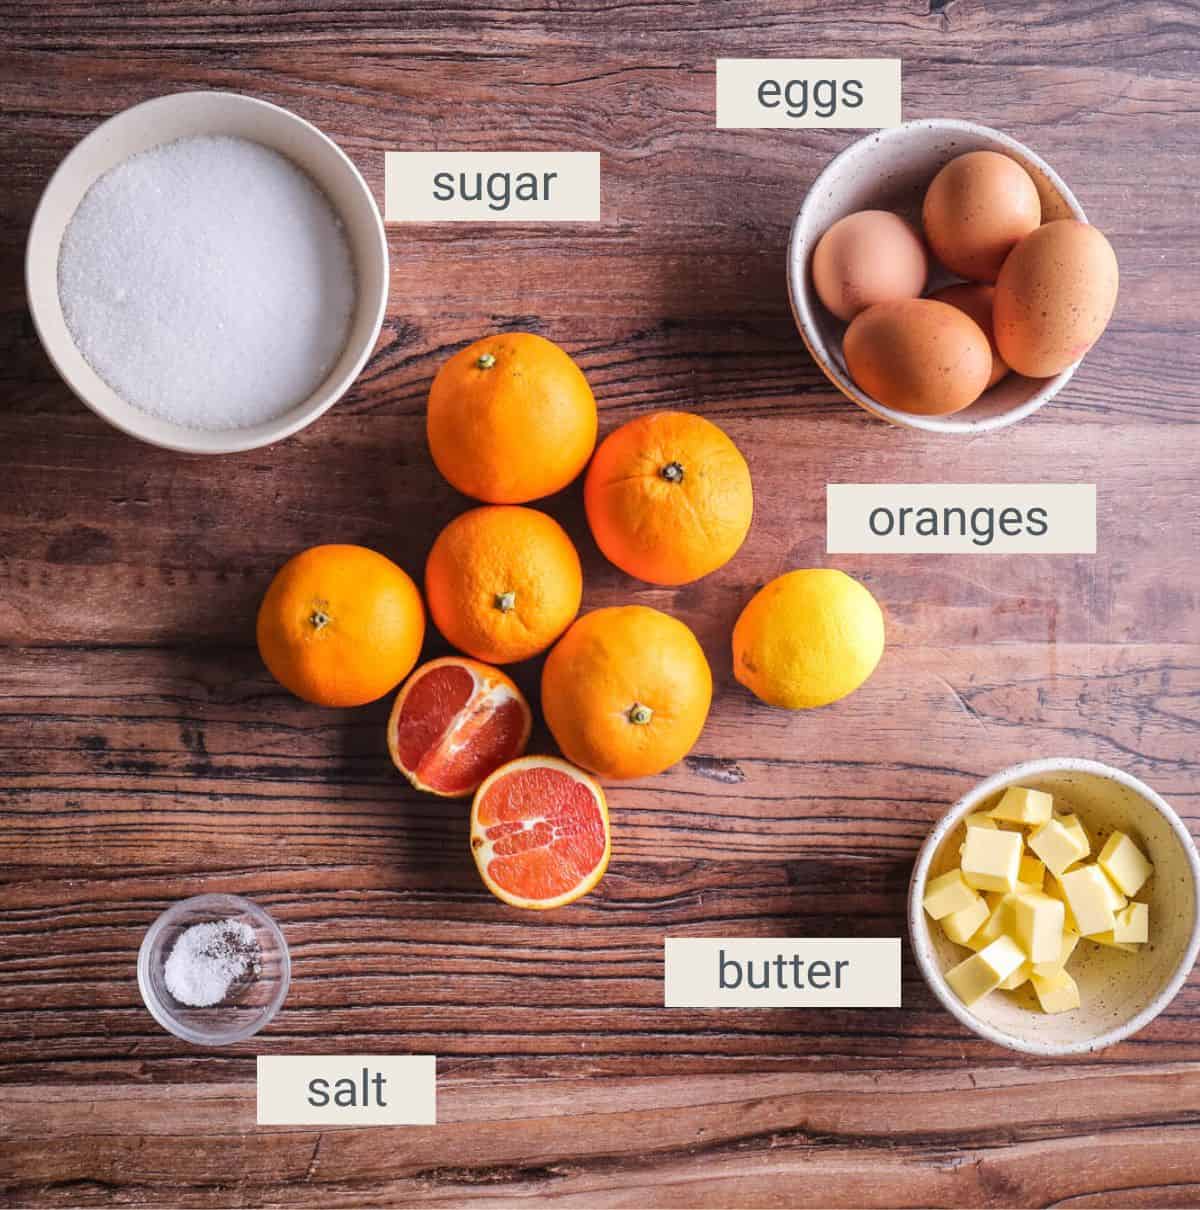
Oranges. Choose unwaxed oranges and since this recipe is all about our orange flavour then organic too if you can. See above for deciding which oranges to use. You need to use the zest of 4 oranges and a total amount of 200ml freshly squeezed juice.
Lemon. We are just using half a lemon to sharpen the flavour of our oranges and also to add more acid to the juice so you can achieve a better set. Don’t worry the curd won’t taste lemony. Again, choose unwaxed.
White sugar. You can use caster sugar if you like but granulated is just fine and more economical.
Eggs. We are using 3 whole eggs here plus 3 egg yolks to enrich the curd. However, double check the total weight of the eggs as we want 220g in total. If you weigh the eggs and they fall short then top up with a little extra egg white. If it’s too much then once they are all beaten together you can remove some of the total weight so it is reduced to 220g.
This recipe uses medium sized eggs which weighs up as 50g each for the whole egg without shell and 20g for each egg yolk. These are often classified as large eggs in the US. I recommend weighing your eggs to ensure the correct amount.
Unsalted butter. We need unsalted so we can control the salt content of the recipe. Make sure it is cut into small cubes and then chilled in the refrigerator. You need the butter to be lovely and cold to make our curd beautifully glossy. Adding the butter off the heat ensures it emulsifies perfectly.
Sea salt. You only need a small pinch and it just helps to lift the flavours.
How To Make Orange Curd
For full recipe instructions go to the recipe card at the end of this post.
Zest and juice your oranges and half a lemon then pour into a saucepan and whisk together with the sugar.

Heat the mixture gently until the sugar has melted into the juice and it’s just coming up to a low simmer.

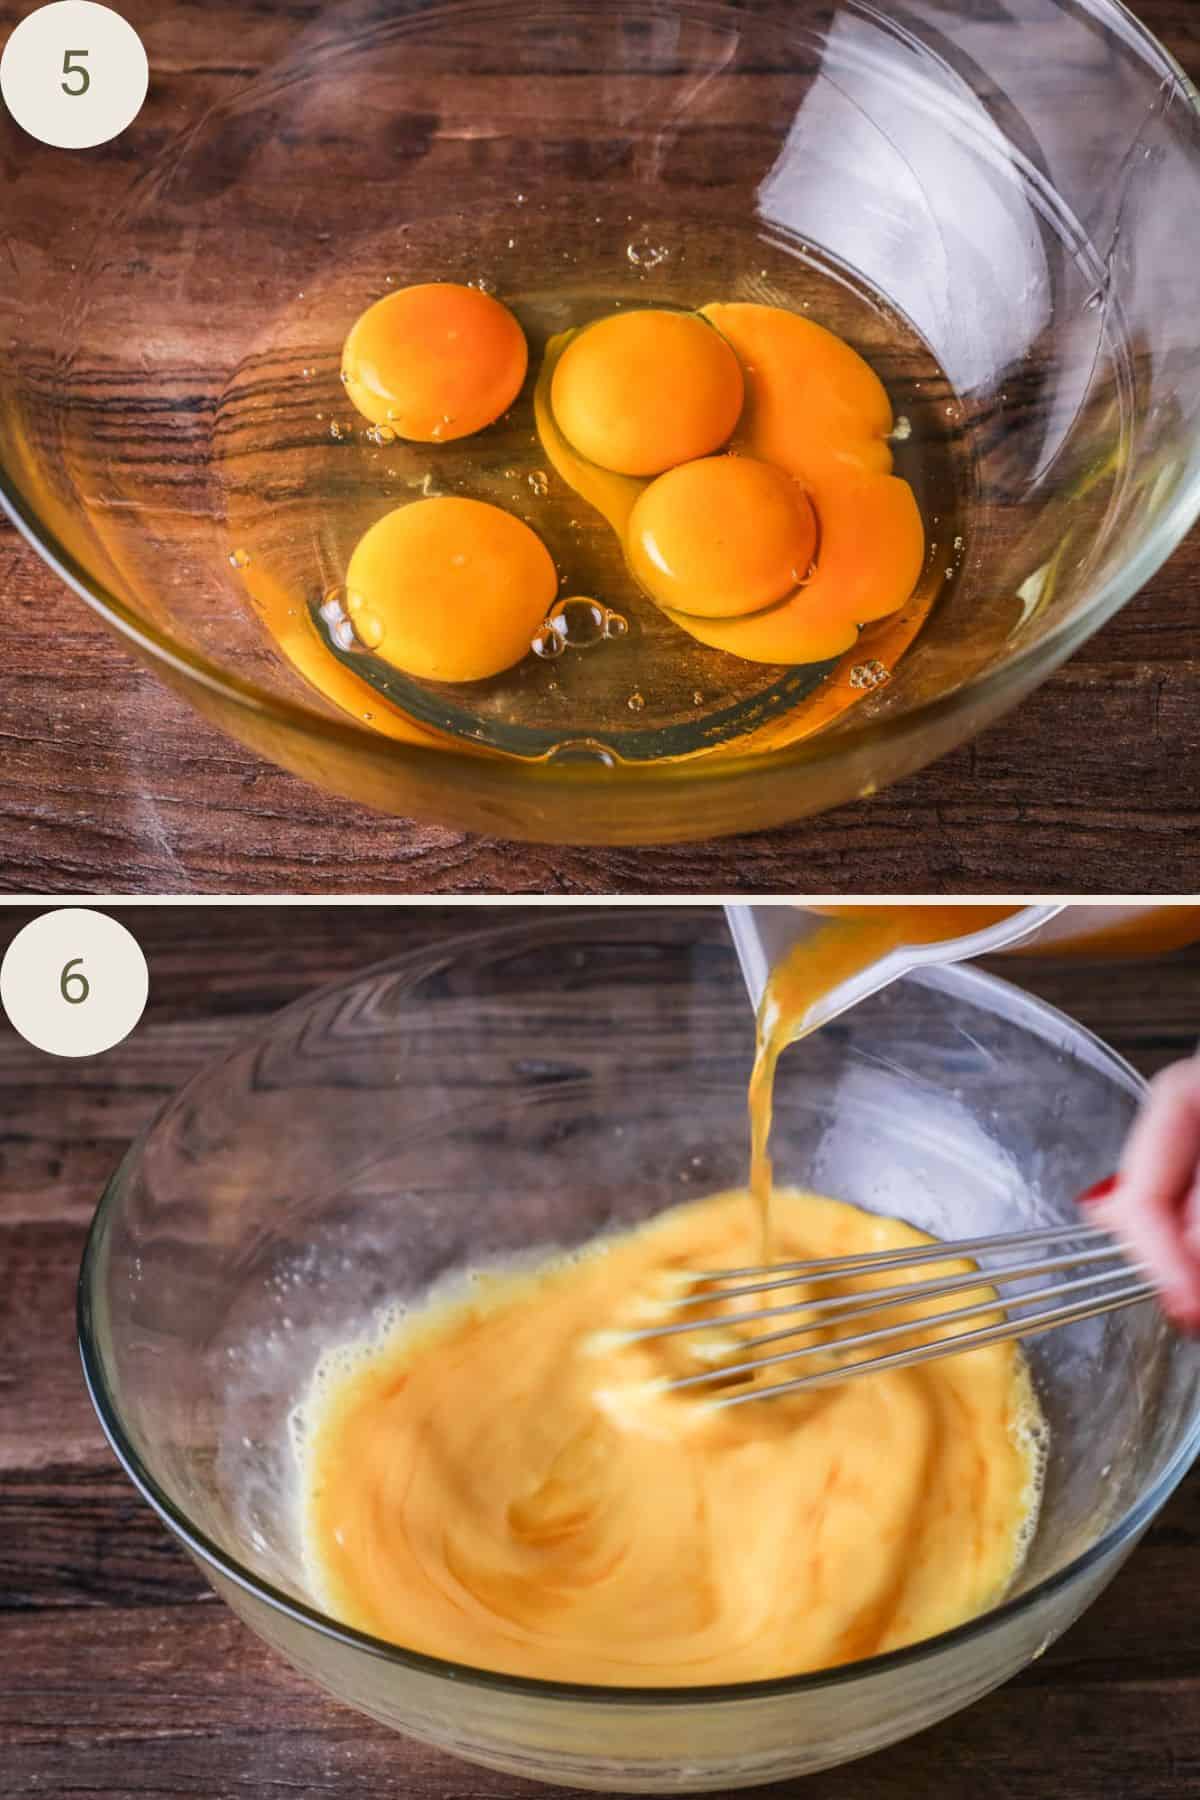
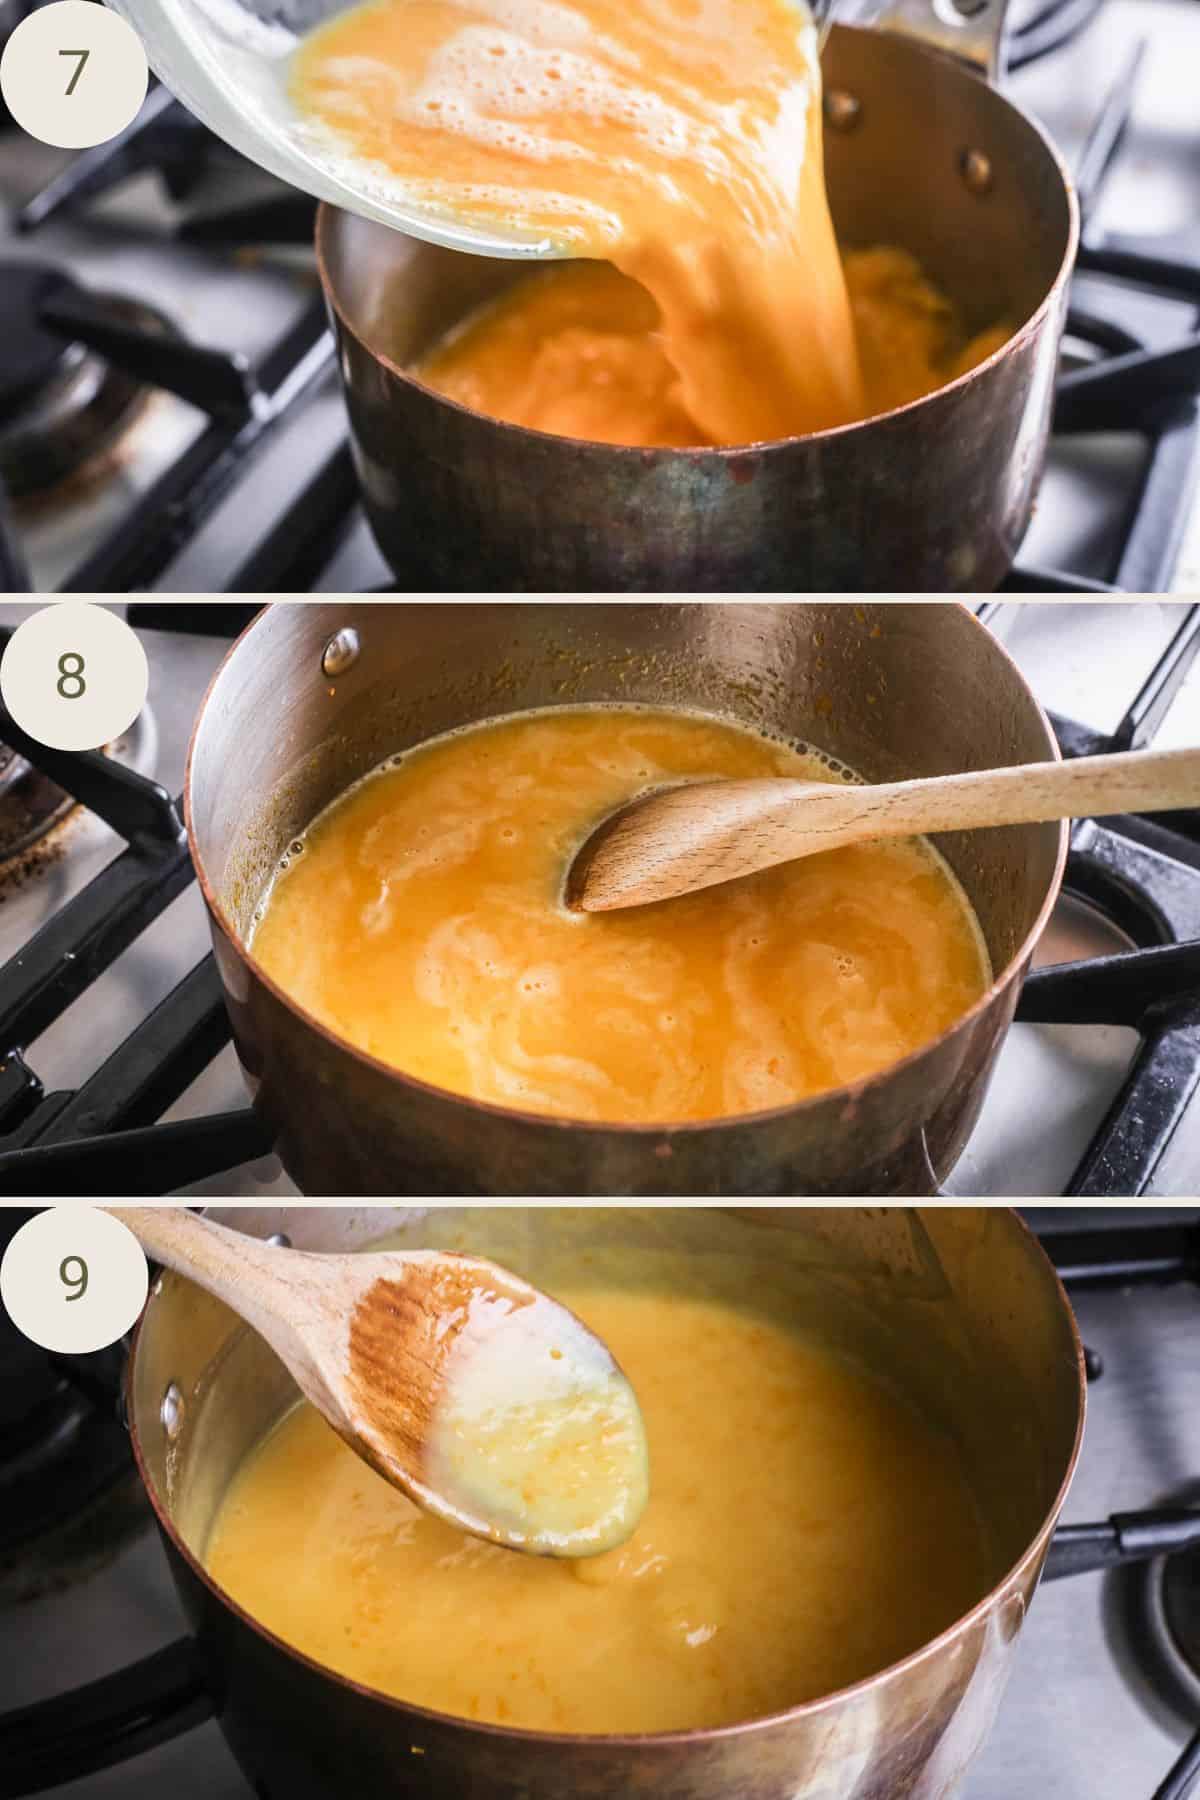
Whisk the eggs and egg yolks together in a large bowl then pour in the hot orange juice in a very slow and steady stream so as not to scramble the eggs.
Pour the mixture back into the saucepan and heat on the lowest heat, gently stirring all the while, until the curd has thickened. It will take at least 15 minutes.
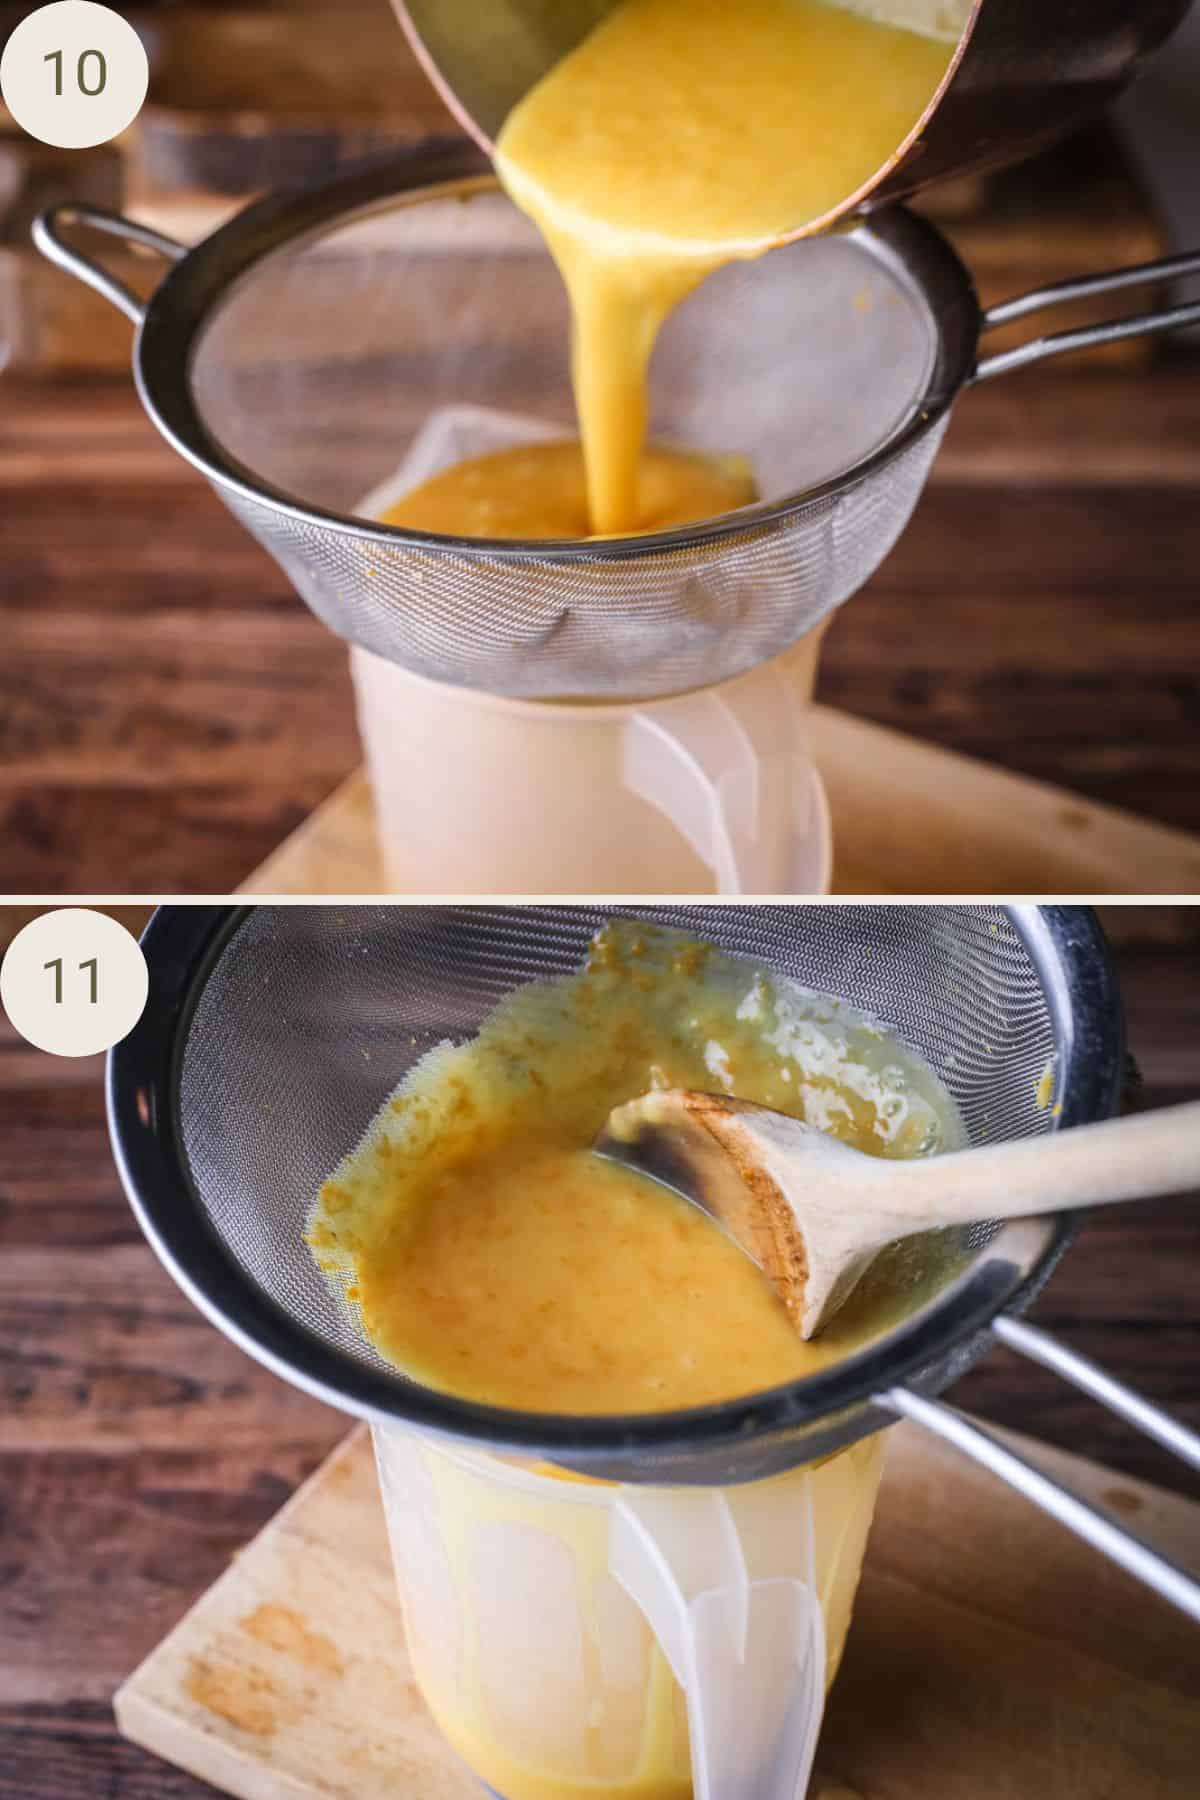
Strain the curd into a large 2 lt measuring jug.
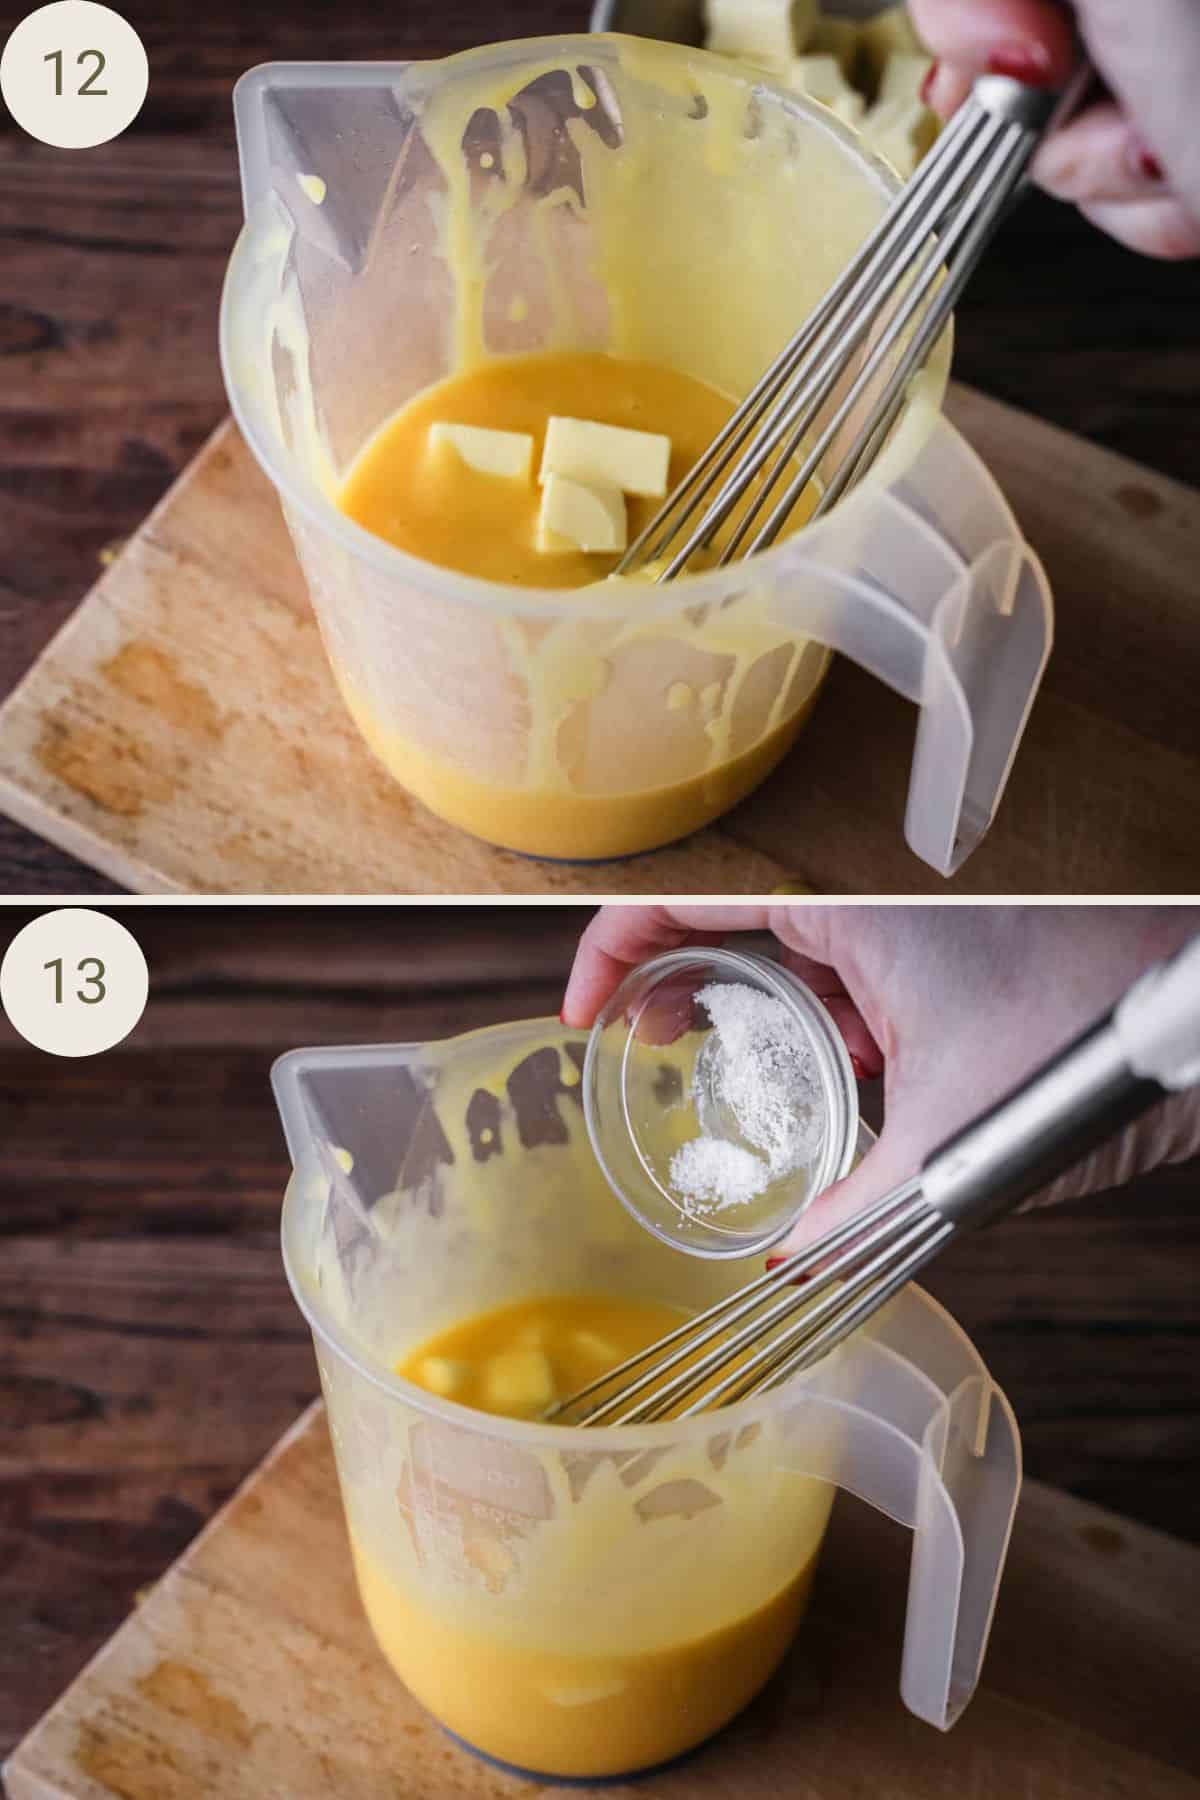
Whisk in the cold cubed butter and sea salt until melted and glossy. The image shows a whisk below but actually I've started using an immersion (handheld) blender to create an ultra smooth curd.
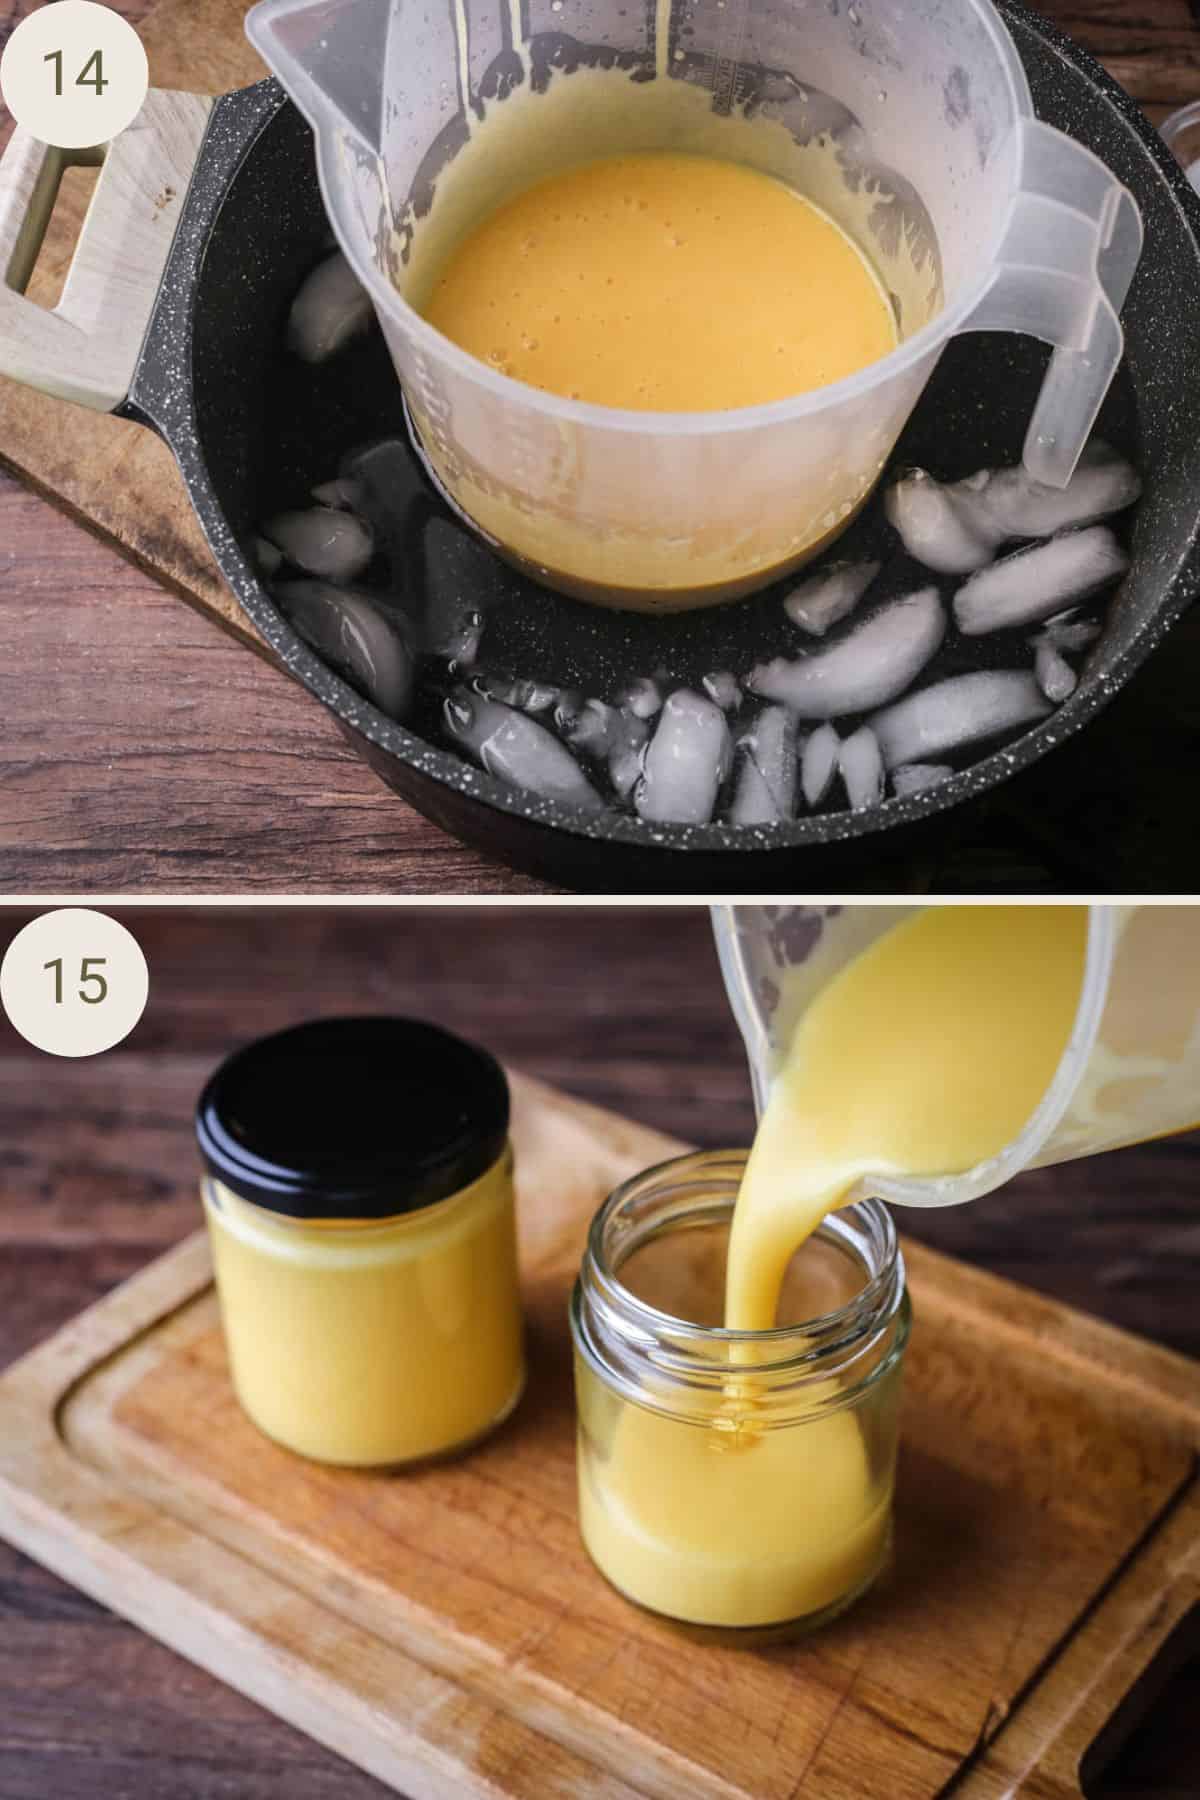
Place the measuring jug in an ice bath for 15 minutes to start cooling rapidly. This encourages a good set and is also beneficial from a food safety point of view. Pour into sterilised jars and store in the fridge to cool and completely set.
Tips and Troubleshooting
Zest the citrus before you juice them, it’s just easier that way.
To juice the oranges my favourite tool is the Mexican Elbow Orange Squeezer. You can also use the same one for juicing the lemon.
Use a saucepan with a solid heavy base for even cooking.
Transfer the hot orange mixture into a large jug so you can pour it into the eggs more carefully rather than direct from the saucepan. This way you can control the flow much better in a slow and steady stream so the eggs come up to temperature slowly, whisking all the time. This is to avoid the eggs to start scrambling. Start with a small splash of the hot liquid to temper the eggs whisking well to combine before pouring in the rest of the liquid in a steady stream. I also transfer it into a jug to strain it.
Set the egg bowl on a damp cloth to steady it and avoid the bowl spinning around the work surface.
If the eggs do scramble a little, don’t worry, you will be straining the curd at the end of the process so any small strings of cooked egg will be discarded.
If the egg completely scrambles then you may need to begin again.
When you pour the curd back into the saucepan to thicken switch to using a wooden (or silicone) spoon. You will get a feel for the curd a lot better than a whisk and also you’ll be scraping the bottom of the pan lightly as you stir so it’s better for the pan.
The spoon is also useful in gauging the texture of the curd. You don’t want the mixture to boil so feeling it is the best way to know when it’s ready.
I like to keep a digital thermometer with me just to check the temperature. Above 80°C (176°F) and it begins to boil so keep it between 75-79°C, stirring until it thickens. It should start to feel heavy and thick on the spoon as you are stirring. This can take at least 15 minutes but keep the heat on the lowest setting. If you try and heat the curd up too quickly it simply won't set.
Don’t leave your curd unattended, stir all the time otherwise it will start to scramble at the bottom of the pan and can suddenly boil in an instant.
If it does start to bubble then immediately remove from the heat, stirring all the while to make sure the egg isn’t scrambling. If it's still not thick enough then you can always place it back onto the heat when it's cooled a little and continue cooking and stirring.
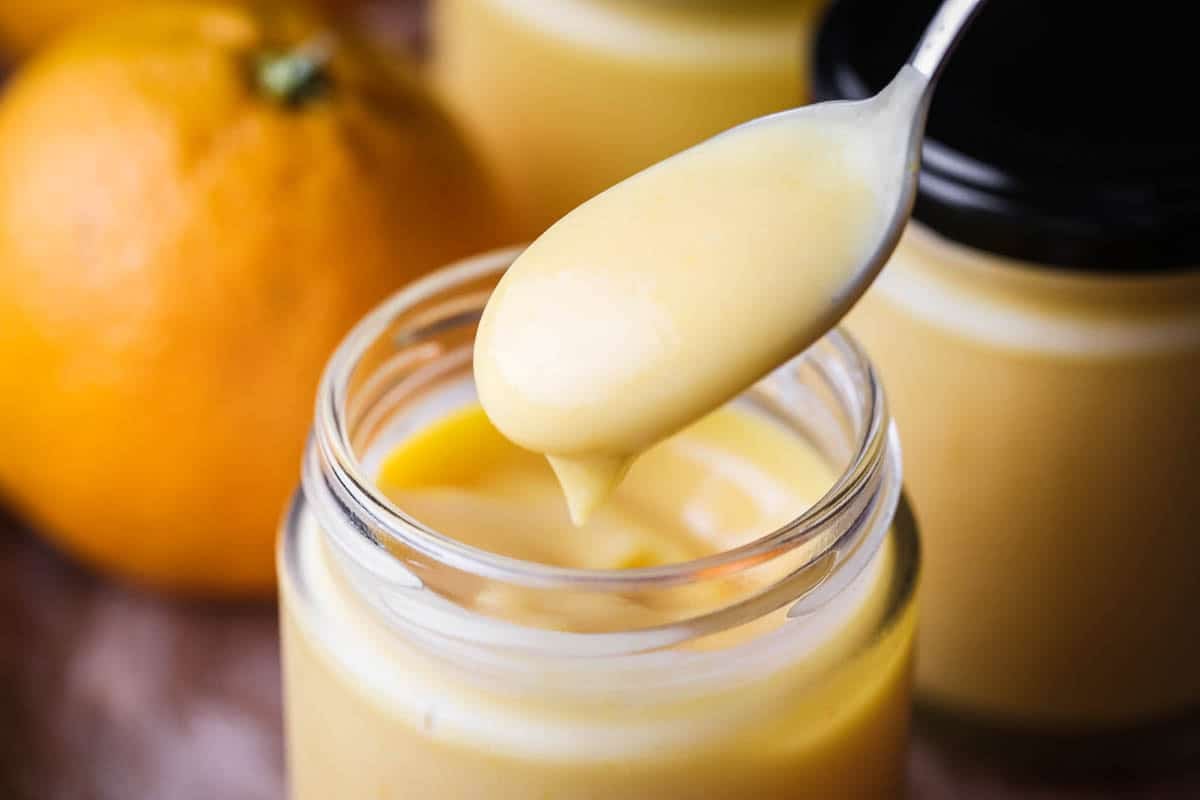
You know it's ready as the curd will get to a custard light texture and stick to the back of your wooden spoon. It won't be the thick solid texture you’ll recognise from a bought curd, still pourable. This is correct as your curd will set and thicken further as it cools.
To sterilise the jars place the very clean jars you would like to use in an oven pre-heated to 160°C / 140°C fan assisted / gas mark 3 / 320°F for 20 minutes. Sterilise the lids by dropping them into a saucepan of boiling water for 10 minutes with a splash of vinegar. I don’t recommend sterilising lids in the oven as they tend to ruin.
After you have poured the curd into the jars leave them unlidded for 10 minutes to avoid any steam being trapped into the jars. You need the curd to cool quickly to encourage a good set.
Recommended Equipment: balloon whisk, mixing bowls, silicone spoon, 2 litre measuring jug, conical sieve / chinois, 190ml glass jars.
Why Isn't Your Curd Setting?
Orange curd is more tricky to set as firm as lemon curd as oranges have a higher water to acid ratio than lemons. It's the acid which react with the eggs and butter for a good solid set. You just need a bit of patience here though on the heating, it will get there.
There are a few reasons why your curd might not be as firm a set as you would like:
The primary reason is that you didn’t cook it for long enough in the saucepan, heat the curd on the lowest setting and slowly bring up to temperature so it can hold just under the 80°C (176°F) mark for as long as possible.
Your curd needs to cool rapidly to allow the emulsion to stabilise quickly which will lead to a firmer set. If the butter stayed warm for too long then your curd will have a looser texture.
Chill in an ice bath before decanting. Try use a wide jug with a large surface area when you’re whisking in the butter then before you decant into the jars rest the jug in an ice bath for 15 minutes to encourage a quicker set. Then pour the curd into the jars and chill overnight to finish the set.
More FAQs
It depends on how juicy your oranges are to how many oranges you need to make your curd. 3-4 large Navel oranges or Blood oranges provide the most juice. You may need up to 6-7 smaller Cara Cara oranges. The most important thing is how much juice you yield from your oranges as you need 200ml (including the juice of half a lemon). Use the zest from 4 of the oranges and half the lemon.
Orange curd will keep for about 2 weeks chilled in the refrigerator.
If you curd hasn’t set after a few hours chilling then you can fix it. Pour the curd back into a clean saucepan. You could even whisk an extra egg in before turning the heat on. Heat on the lowest setting for as long as possible until it reaches its pouring custard like thick texture. This time you’ll probably notice the mixture thickens more than it did previously. Pour into sterilised jars and chill when it’s ready.
You don’t need to use cornflour, another type of starchy flour or gelatine to thicken. The eggs will be enough.
If your curd has pieces of cooked egg floating around in it that’s because either the hot orange juice was added too quickly to the egg and the shock of the heat immediately cooked it. Or your curd was cooking at too high a heat in the saucepan or the curd wasn’t stirred enough so the egg stuck to the bottom of the pan and scrambled.
Don’t worry if your curd only has a little bit of cooked egg in it as you can strain it out at the end. If your egg has totally scrambled I do suggest you begin again.
Freezing homemade curd is a good way of prolonging the life of your curd. You can use a stackable airtight container rather than a jar to store, then allow to cool and chill completely. Tuck into the freezer where it can reside happily for up to 2 months. Thaw overnight in the fridge before use.
Orange Curd Uses
Breakfast
- Spread over toast, crumpets, English muffins or Hot Cross Buns.
- Stir into Greek yoghurt, chia pudding or porridge.
- Drizzle over granola, waffles or pancakes.
Baking
- Use to fill a Victoria Sponge or a Swiss Roll.
- Make an Orange Curd Cake
- Fill pre-baked tart shells.
- Bake into thumbprint cookies.
- Use to top classic scones.
- Stir through rice pudding.
- Spread thinly under chocolate ganache in a Chocolate Orange Tart.
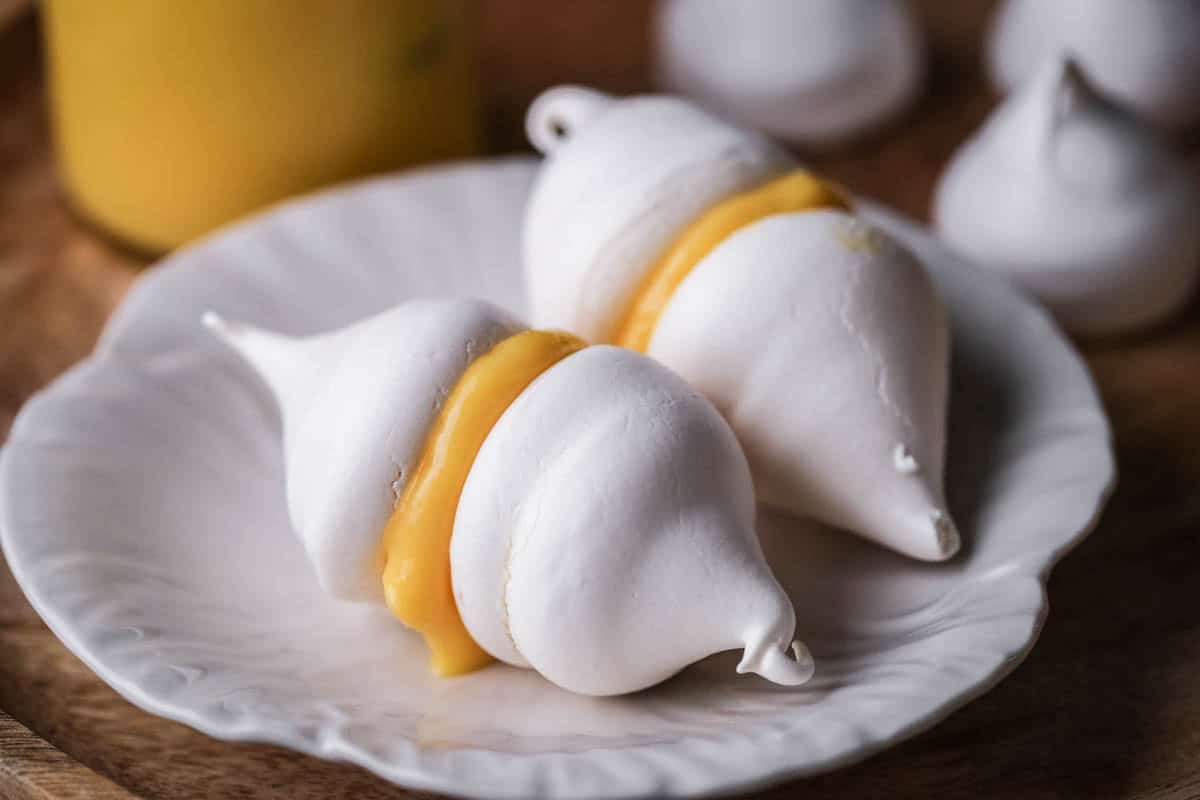
- Orange Meringue Kisses
More Preserve Recipes You’ll Love
A classic Lemon Curd is incredibly easy to make with only four ingredients. It’s fresh and tangy and wonderful spread on crumpets, stirred into porridge or yoghurt or sandwiched into the most delicious sponge cake.
This Seville Orange Marmalade is a traditional marmalade, rich and slightly bitter with a zesty sweetness.
Enter your email below to get this recipe sent to your inbox plus get new recipes, baking tips, and updates.
Orange Curd
Ingredients
- 3-4 large oranges - unwaxed, about 600-700g
- ½ lemon - unwaxed
- 150 g white sugar
- 200 g whole eggs - 4
- 40 g egg yolks - 2
- 120 g unsalted butter - cold and cut into small cubes
- Pinch of sea salt
Instructions
- Zest and juice the oranges and half the lemon. You need to end up with 200g fresh juice.
- Pour the citrus juice, zest and sugar into a medium saucepan. Turn the heat on and whisk everything together whilst bringing to a gentle simmer then remove from the heat.
- Break the eggs and egg yolks into a medium sized mixing bowl, weigh to make sure they make up to 240g. Lightly beat together then pour a splash of the hot orange mixture into the beaten eggs, whisking vigorously to avoid the egg scrambling.
- Gently pour the rest of the mixture into the eggs in a steady stream whisking all the time until the eggs and citrus mixture is completely combined.
- Pour it all back into the saucepan, along with the salt, and turn the heat to lowest setting. Stir the curd with a wooden (or silicone) spoon, making sure to swirl gently into the corners, touching the bottom of the saucepan so the curd doesn’t settle there otherwise it will start to curdle.
- Continue stirring until the curd starts to thicken which can take at least 15 minutes. You don’t want it to boil which will be when the mixture gets past 80°C (176°F) so if you have a digital thermometer you can keep an eye on it as well as feel for the turn in texture. The curd is ready when it starts to feel a little heavier and thicker to stir, almost like a pourable custard. It should coat the back of your wooden spoon. Dip it into the curd and run a finger down the back of it, if a clear line is left on your spoon then your curd is ready.
- Remove the orange curd from the heat and strain into a large measuring jug so the curd is very smooth.
- Drop the cold cubed butter into the curd and blend with an immersion (handheld) blender until glossy and smooth.
- Place the measuring jug in a large saucepan and fill the sides with ice and cold water to create an ice bath. Allow the curd to cool in the measuring jug set in the ice bath for 15 minutes.
- Pour the curd into sterilised jars, seal and place in the fridge to cool and set overnight.
Notes
- Pour the heated citrus sugar into a measuring jug to pour over the beaten eggs, that way you add the hot liquid in an ultra slow stream. The eggs will slowly temper and get incorporated into the citrus sugar. This avoids potential egg scramblage.
- If the eggs do scramble a little, don’t worry, you will be straining the curd at the end of the process so any small strings of cooked egg will be discarded.
- If the egg completely scrambles then you may need to begin again.
- Set the egg bowl on a damp cloth to steady it and avoid the bowl spinning around the work surface.
- When you remove the finished curd from the heat it will still be pourable and not the thickly set consistency. This is normal, your curd will set and thicken as it cools.
- Orange Curd will keep for up to 2 weeks in the fridge.
