Gluten-Free Chocolate Fudge Cake
This post contains affiliate links. Please read my disclosures.

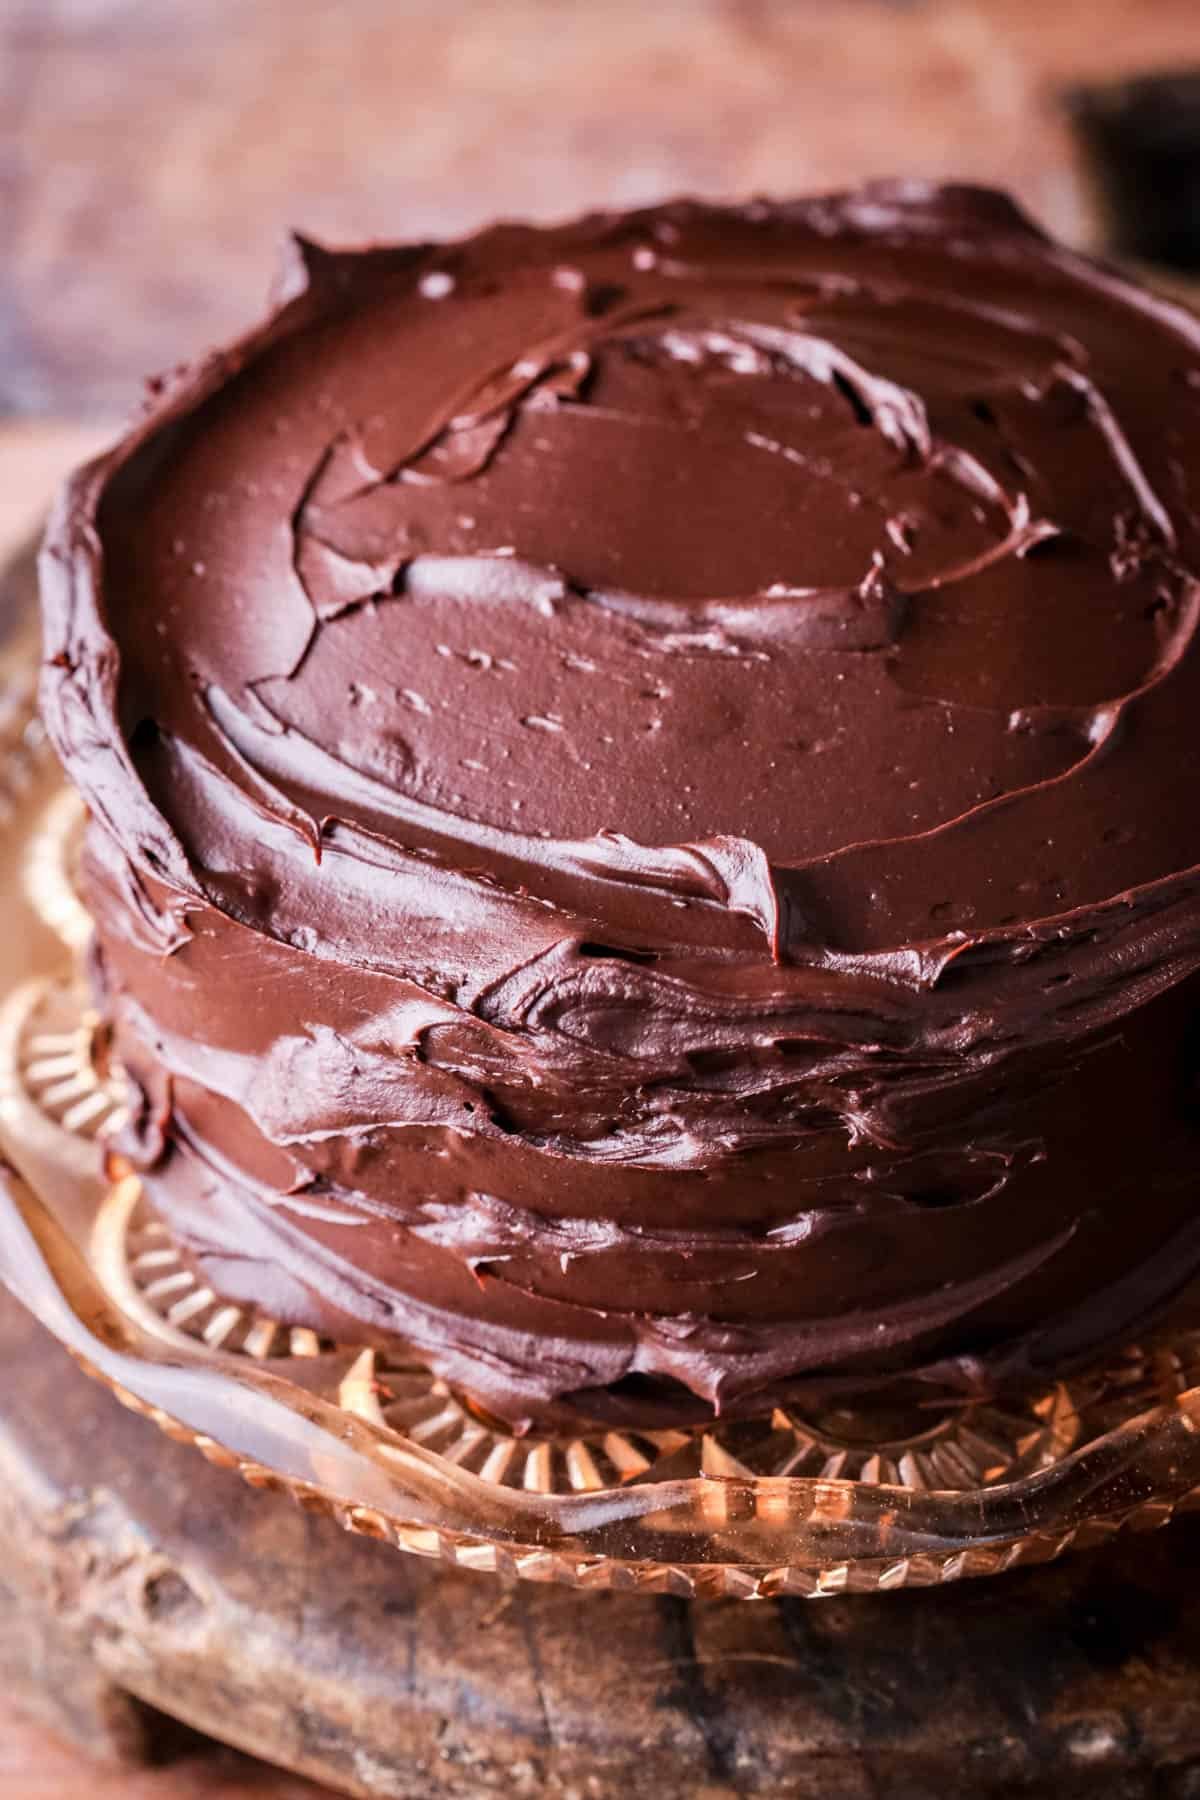
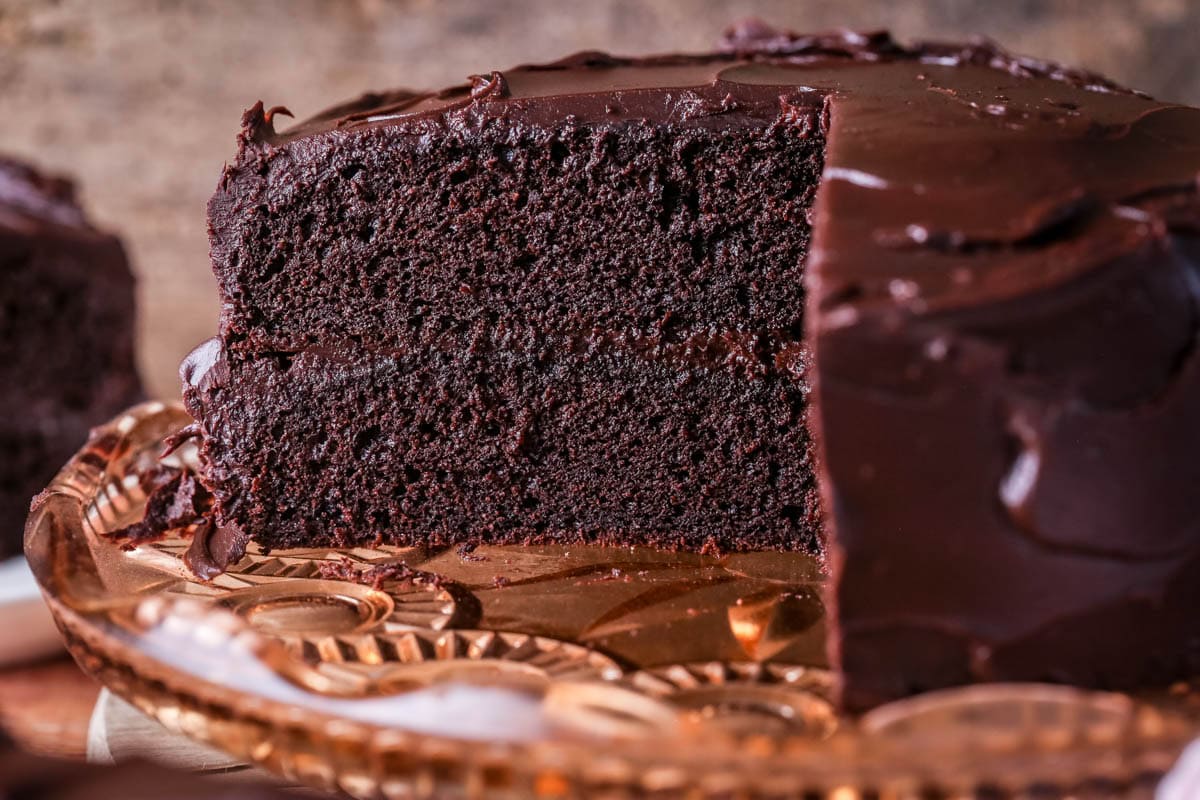
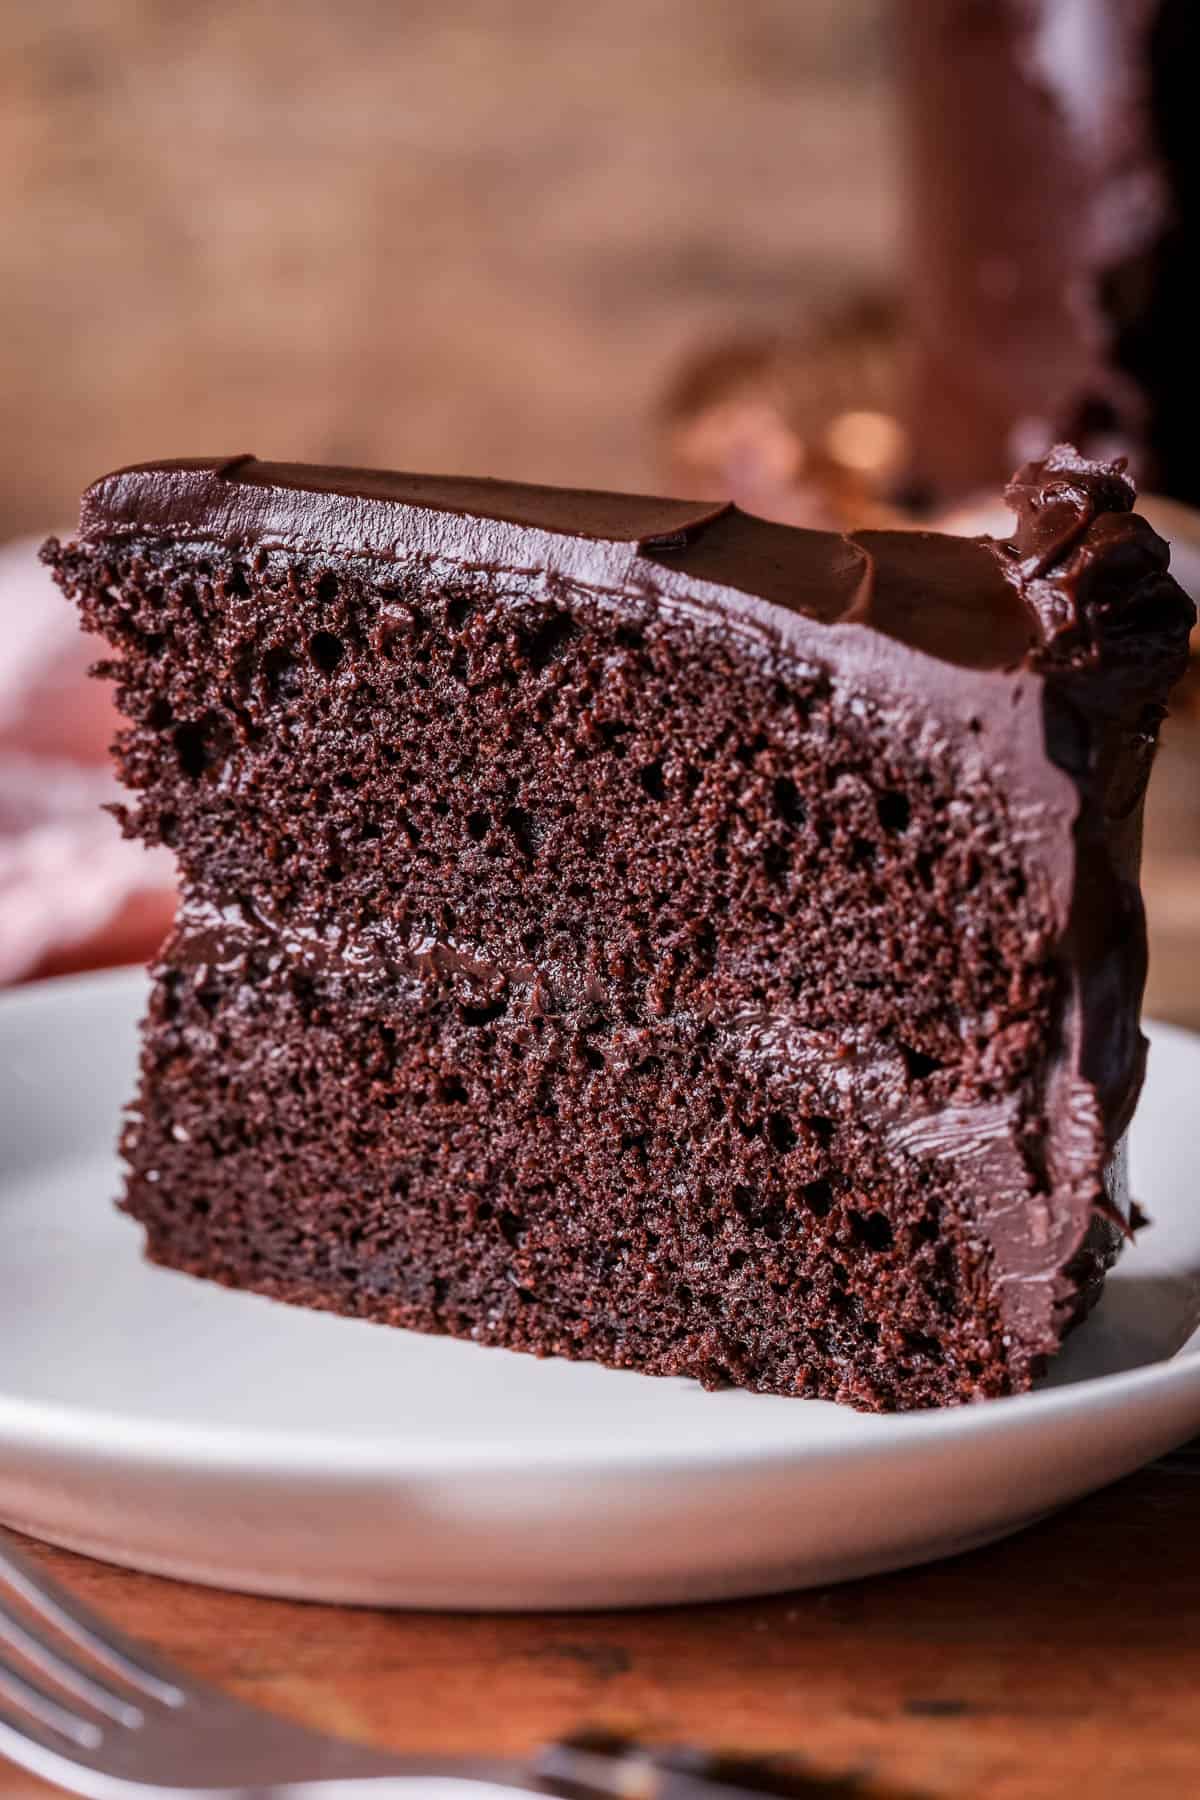
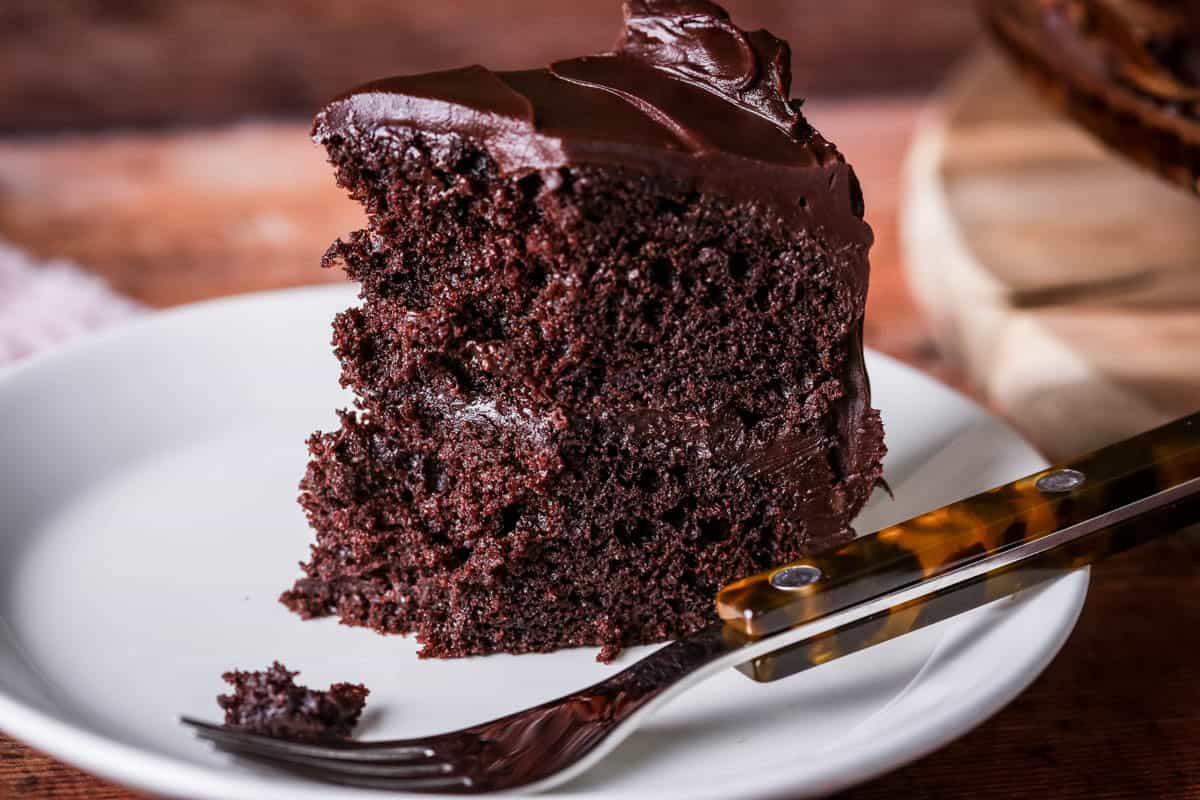
This Gluten-Free Chocolate Fudge Cake is rich, moist and deeply chocolatey, frosted with a smoothly fudgy ganache. Made with a homemade gluten-free flour and no xanthan gum. It’s an easy to make birthday cake or celebration bake.

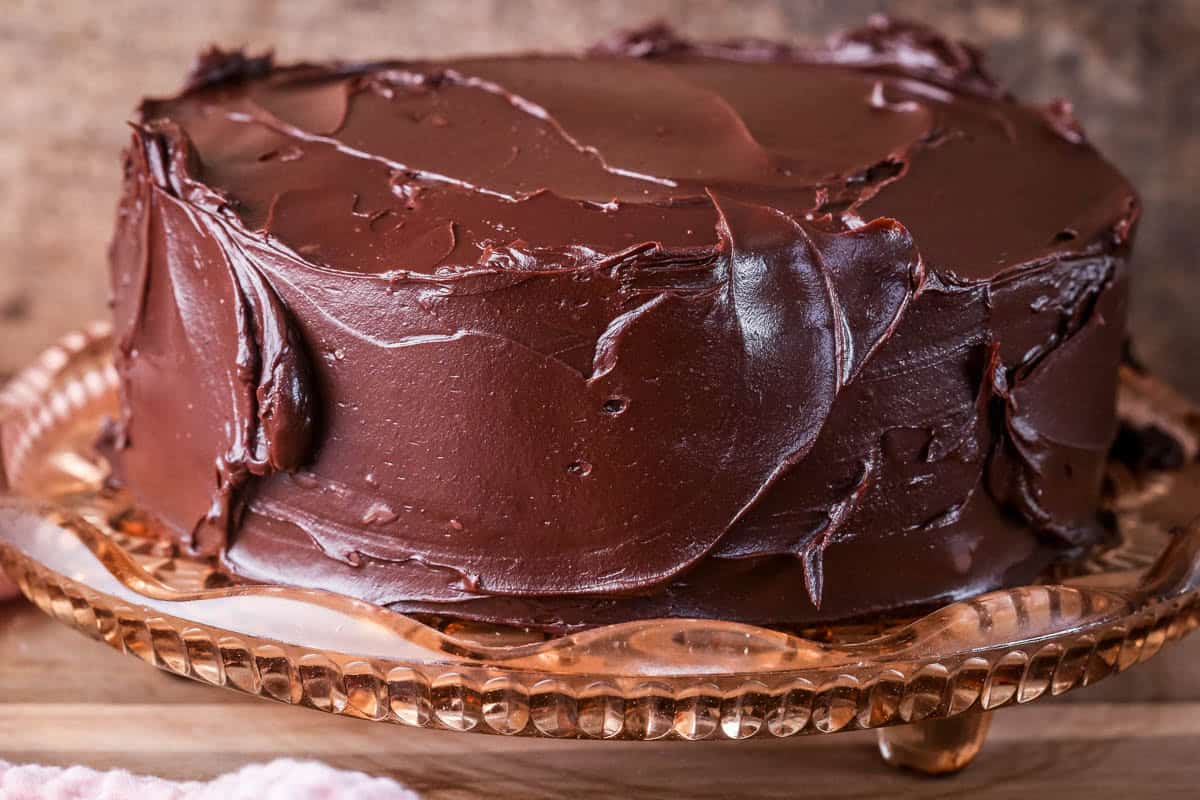
This Gluten-Free Chocolate Fudge Cake is a different kind of cake to my Best Gluten-Free Chocolate Cake and quicker to pull together. It still has a richly moist texture but the buttercream frosting is swapped for the fudginess of the truffle like chocolate ganache which covers and fills the cake.
Chocolate cakes are big in our house (it’s my favourite food) and I have a different cake for every occasion. I’ve said it before and I’ll say it until the end of time. The best kind of chocolate cake, in my opinion, is one which you can microwave ever so slightly so its warm and then serve with the best vanilla ice cream. It’s sheer heaven.
This is the perfect cake for that because the ganache frosting softens and melts into the densely rich chocolately cake.
You’ll find this chocolate cake very easy to make but we’ll go through all the simple steps so you can make this perfectly first time. If you need extra hand holding for the ganache then you can also visit my dedicated ode to ganache to ensure everything is totally foolproof.
Why You’ll Love This Gluten-Free Chocolate Fudge Cake
- Moist, rich and truly fudgy due to using melted chocolate in the sponge batter and a thick creamy ganache frosting.
- This is a very quick cake to make. The sponge comes together in no time, it cools quickly after baking and the ganache can be made and used for the frosting in about 20 minutes. It’s on the smaller size at 7 inches round which leads to perfectly sized slices which don’t become sickly despite the richness of the cake.
- No xanthan gum needed.
Watch The Video
Sometimes it helps to see a visual of what I'm talking about. So watch the video to see what it looks like to make your Chocolate Fudge Cake.
Ingredients Needed
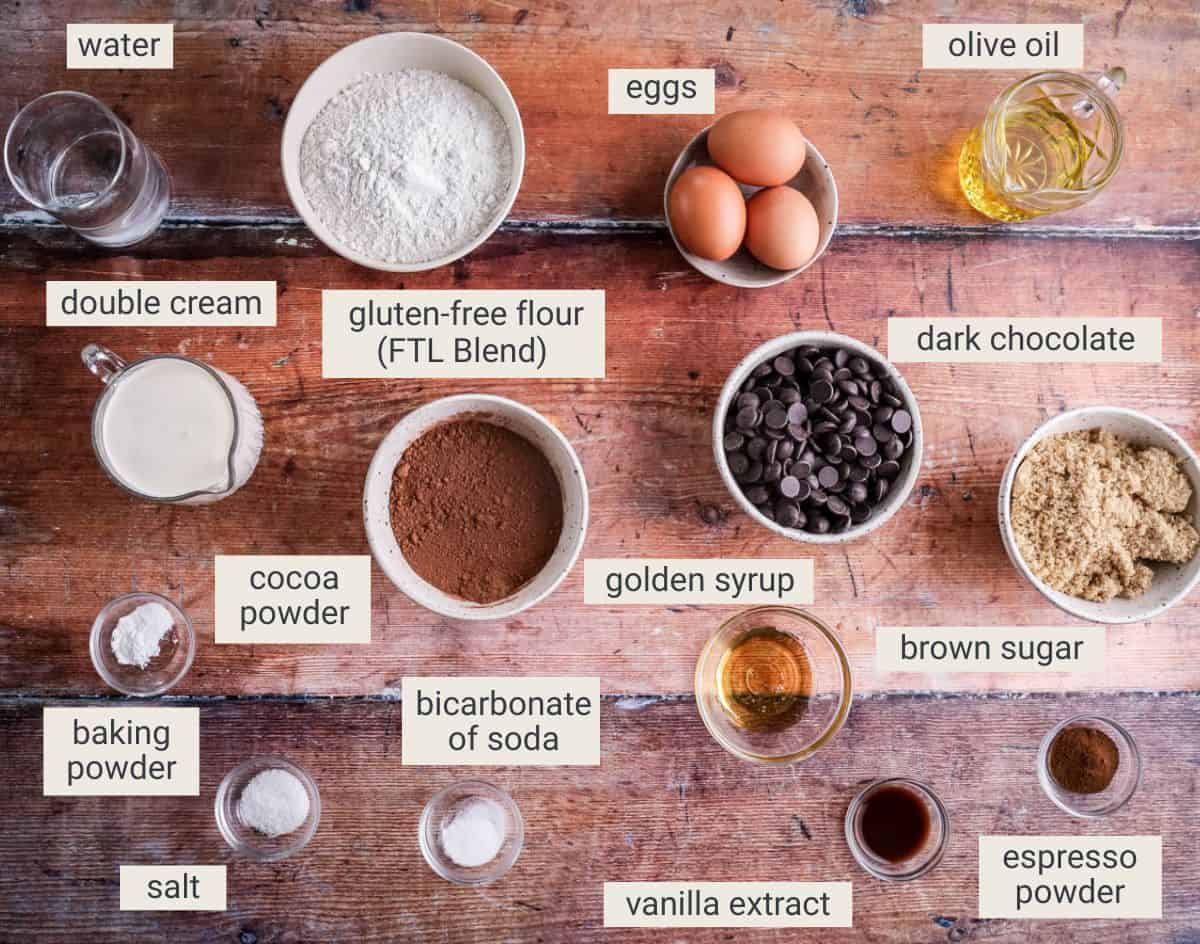
Chocolate. We’re using 70% dark chocolate here for both adding into the chocolate batter and the chocolate ganache. A bar of your favourite good quality supermarket chocolate works just fine but I like to use Callebaut dark chocolate chips due to the superior flavour. You could use a 50-60% dark chocolate in the sponge for a softer creamier flavour but the lower percentage of cocoa solids will make a softer ganache but it’s still fine to use.
Gluten-Free Flour – FTL Blend. This recipe uses my Homemade Gluten-Free All Purpose Flour which works really well here as the flour ratio has been carefully tested to ensure the mix between wholegrain flours and starchy flours is balanced. This also means we don’t need to use xanthan gum as the blend is strong enough and produces a well structured and textured bake which can hold together without needing any extra binders.
This flour blend is a mix of 4 different flours: sweet rice flour (glutinous rice flour), sorghum flour, oat flour, tapioca flour (tapioca starch).
Cocoa powder. Choose a high quality organic brand if possible. This recipe was tested with Dutch-processed cocoa powder (which is the more common type in the UK – but do check the labels) which means it has been treated with an alkalizing agent to neutralize its acidity, resulting in a smoother, milder flavour and allowing for a better rise in tandem with the baking powder.
Baking powder. A leavening agent which causes the cake to rise and become light and fluffy. Do check your baking powder is gluten-free before use.
Bicarbonate of soda. Also known as baking soda, this is a white crystalline powder that is commonly used as a leavening agent in baking.
Eggs. This recipe uses medium size, about 60g each with shell (50g each without shell). These are often classified as large eggs in the US. I recommend weighing your eggs to ensure the correct amount.
Light Soft Brown Sugar. Using brown sugar adds a gentle molasses flavour and moisture to the batter, enhancing the depth of taste and providing a subtle caramel undertone, contributing to a more flavourful and moist bake.
Olive oil. This is my preferred oil in cakes rather than vegetable oil or coconut oil. But to avoid a strong flavour use a flavourless mild and light olive oil.
Vanilla extract. You don’t need to use the best quality vanilla extract here as there's already a lot going on with the flavours and it won't make a difference. A supermarket brand is just fine.
Espresso powder. Brings out the chocolate flavour rather than giving a coffee flavour.
Water. We add just boiled water directly to the chocolate batter just before it goes into the oven. We’re mixing the coffee with it to add a coffee flavour but the idea behind adding hot water is that it starts ‘blooming’ the cocoa powder immediately. This strengthens the chocolate flavour and also thins the batter which deepens its soft moist tender crumb.
Double Cream. Ideally you need the fat content of your cream to be at least 30% fat content for a stable ganache. The higher the fat the better. This means double cream is perfect to use at 48%-50% for this recipe.
Golden syrup. This isn’t just used for sweetness but provides a lovely shine and stability to the ganache. You can swap for maple syrup or honey.
Salt. I need salt with my chocolate, it’s just a fact. I use kosher salt here (and for all my baking) as it has a soft gentle flavour.
How To Make Your Gluten-Free Chocolate Fudge Cake
For full recipe instructions go to the recipe card at the end of this post.
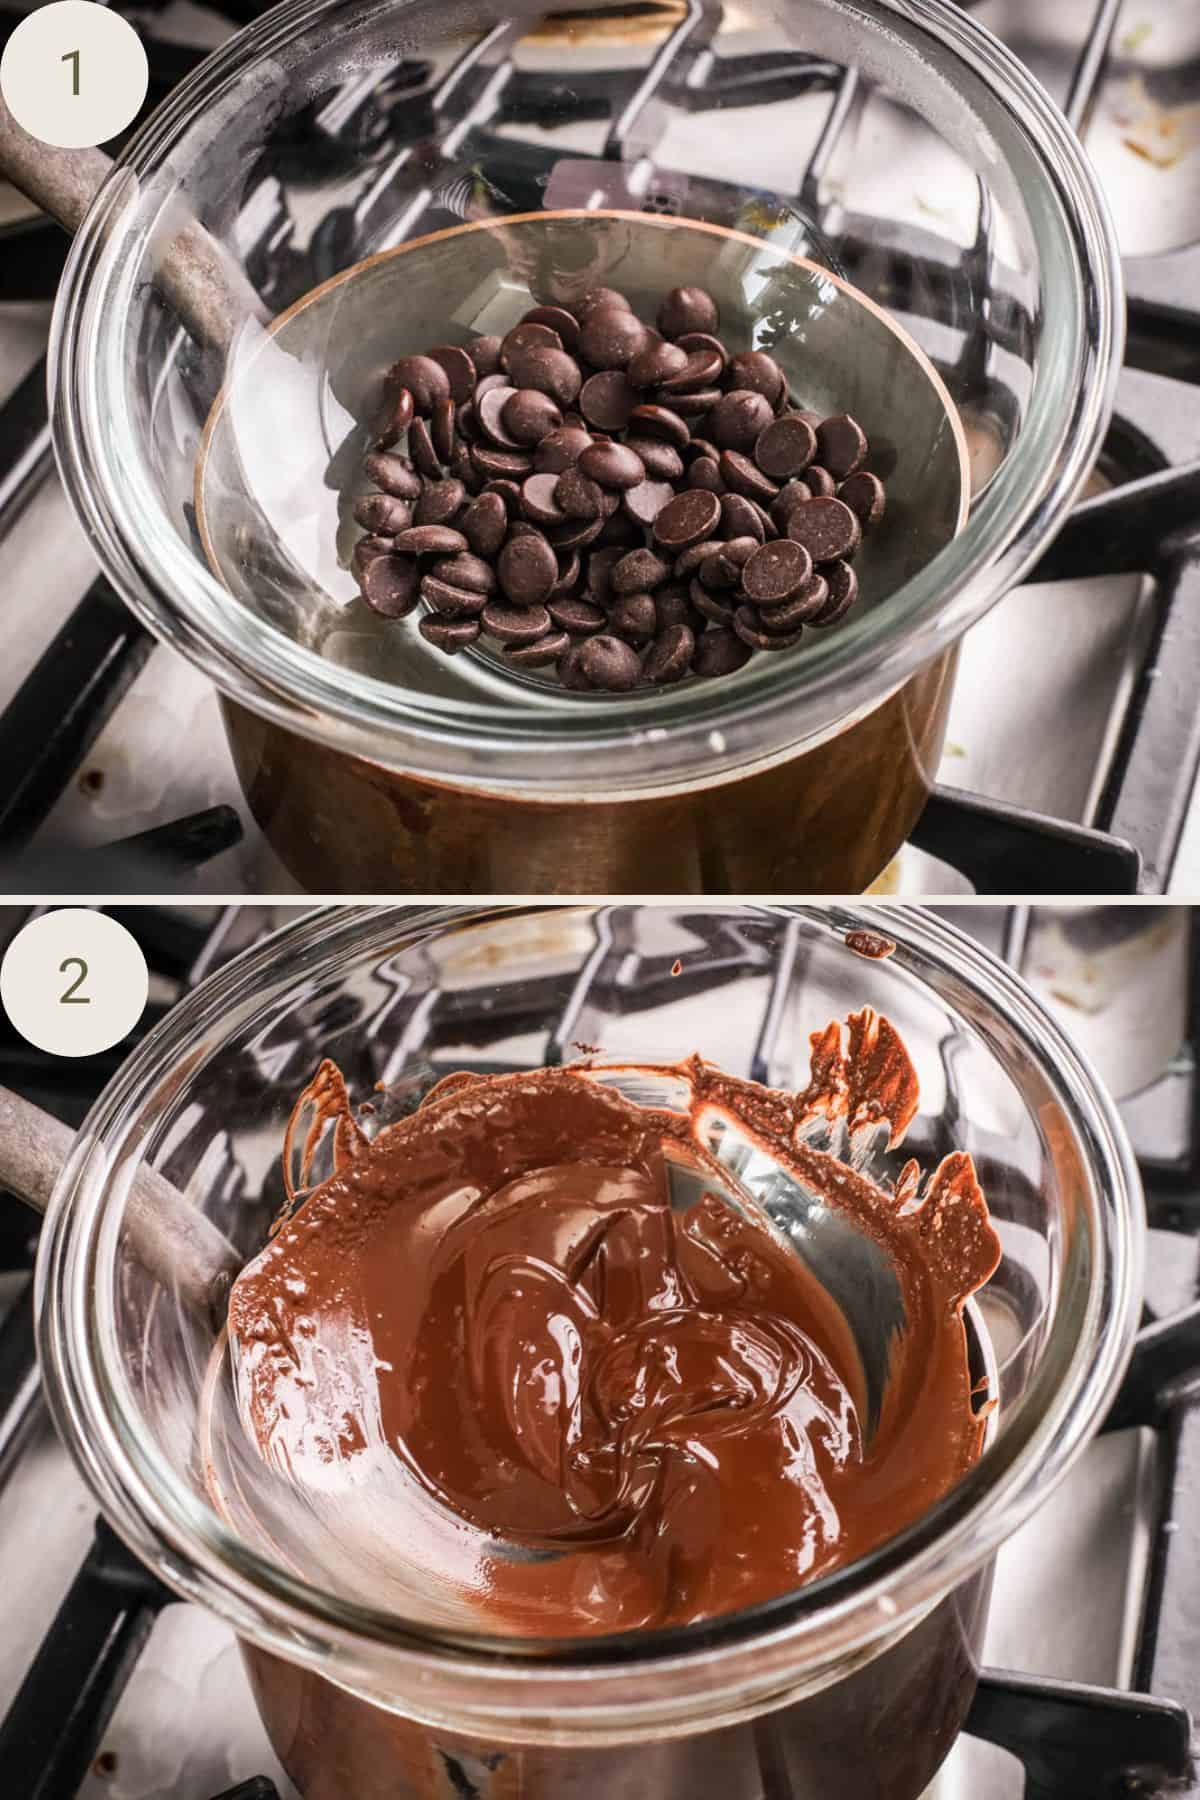
Melt the chocolate in a double boiler or a small bowl set over a pan of simmering water. Set aside whilst you prepare the rest of the batter.
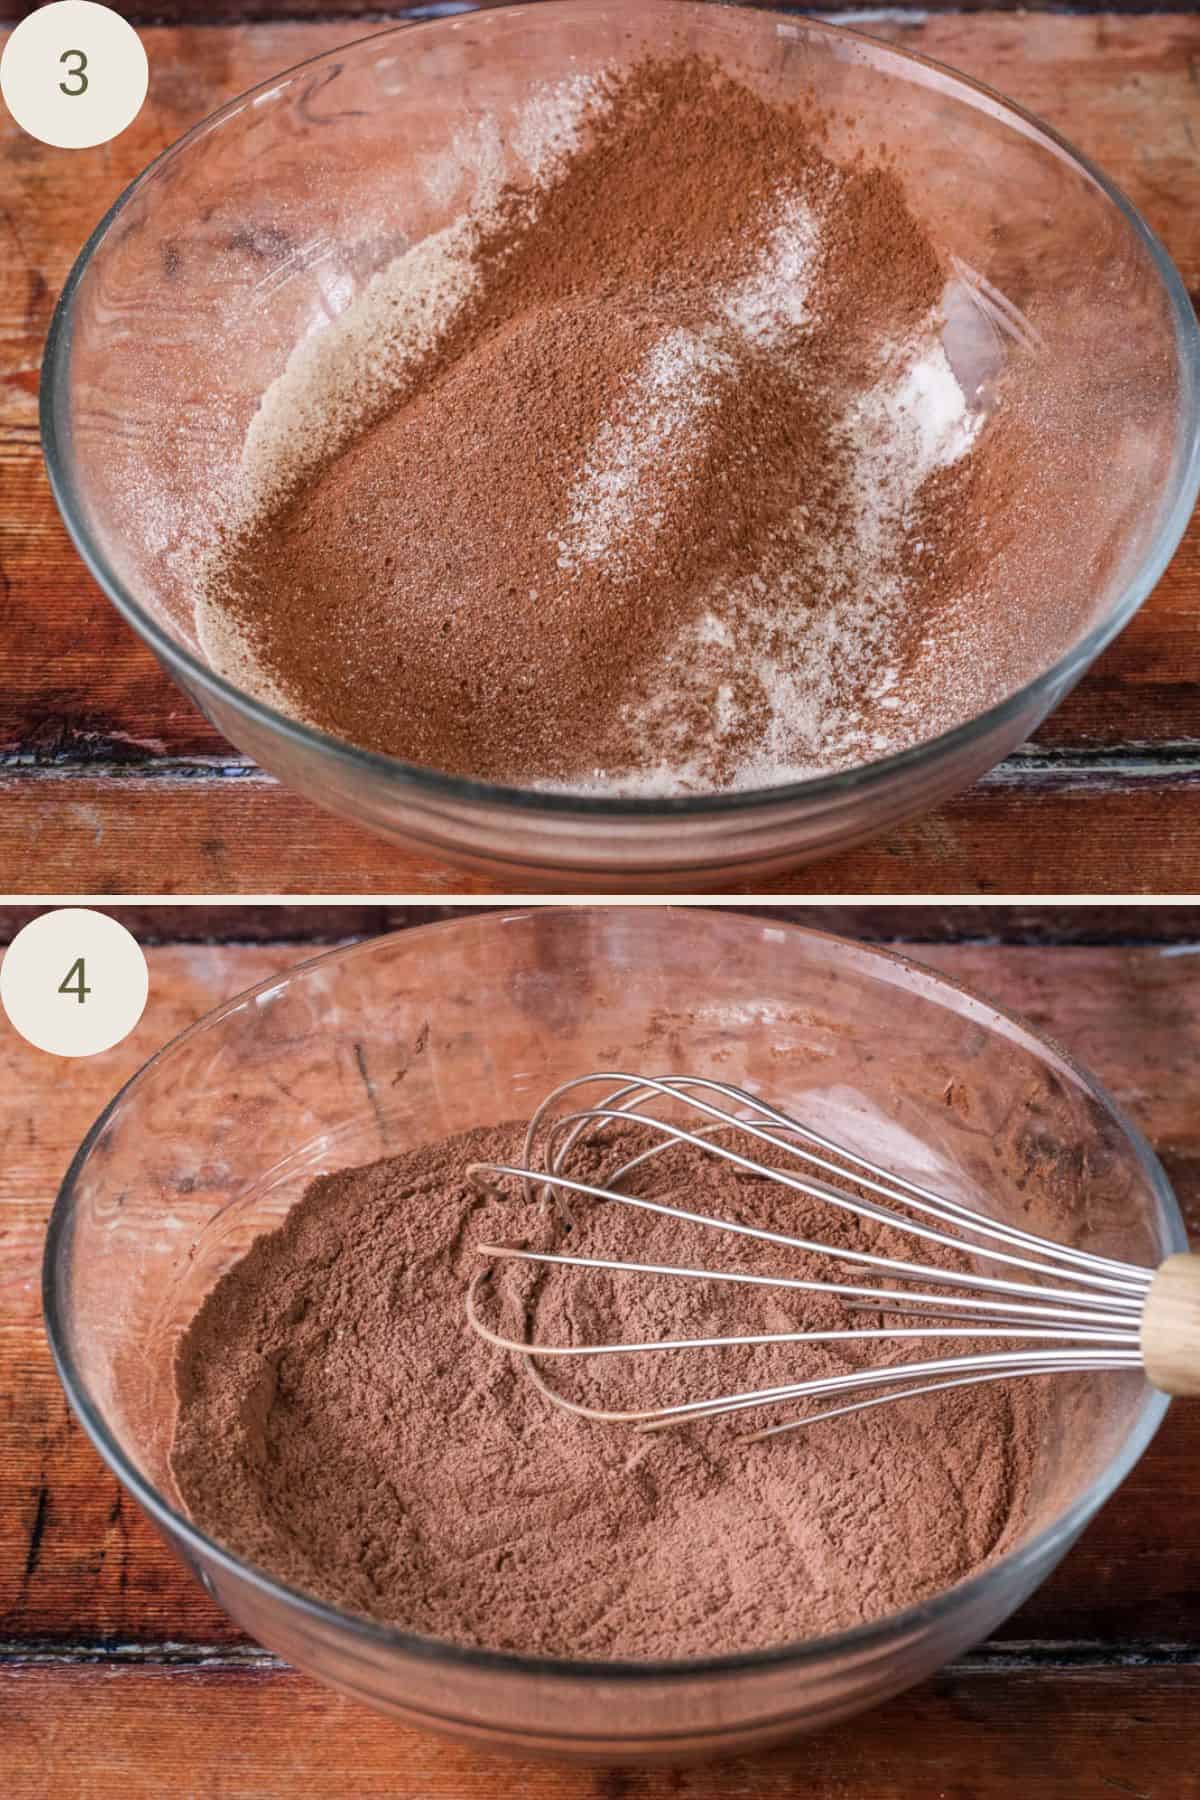
Sift together the flour, cocoa, bicarbonate of soda, baking powder and salt in a medium sized mixing bowl then set aside.
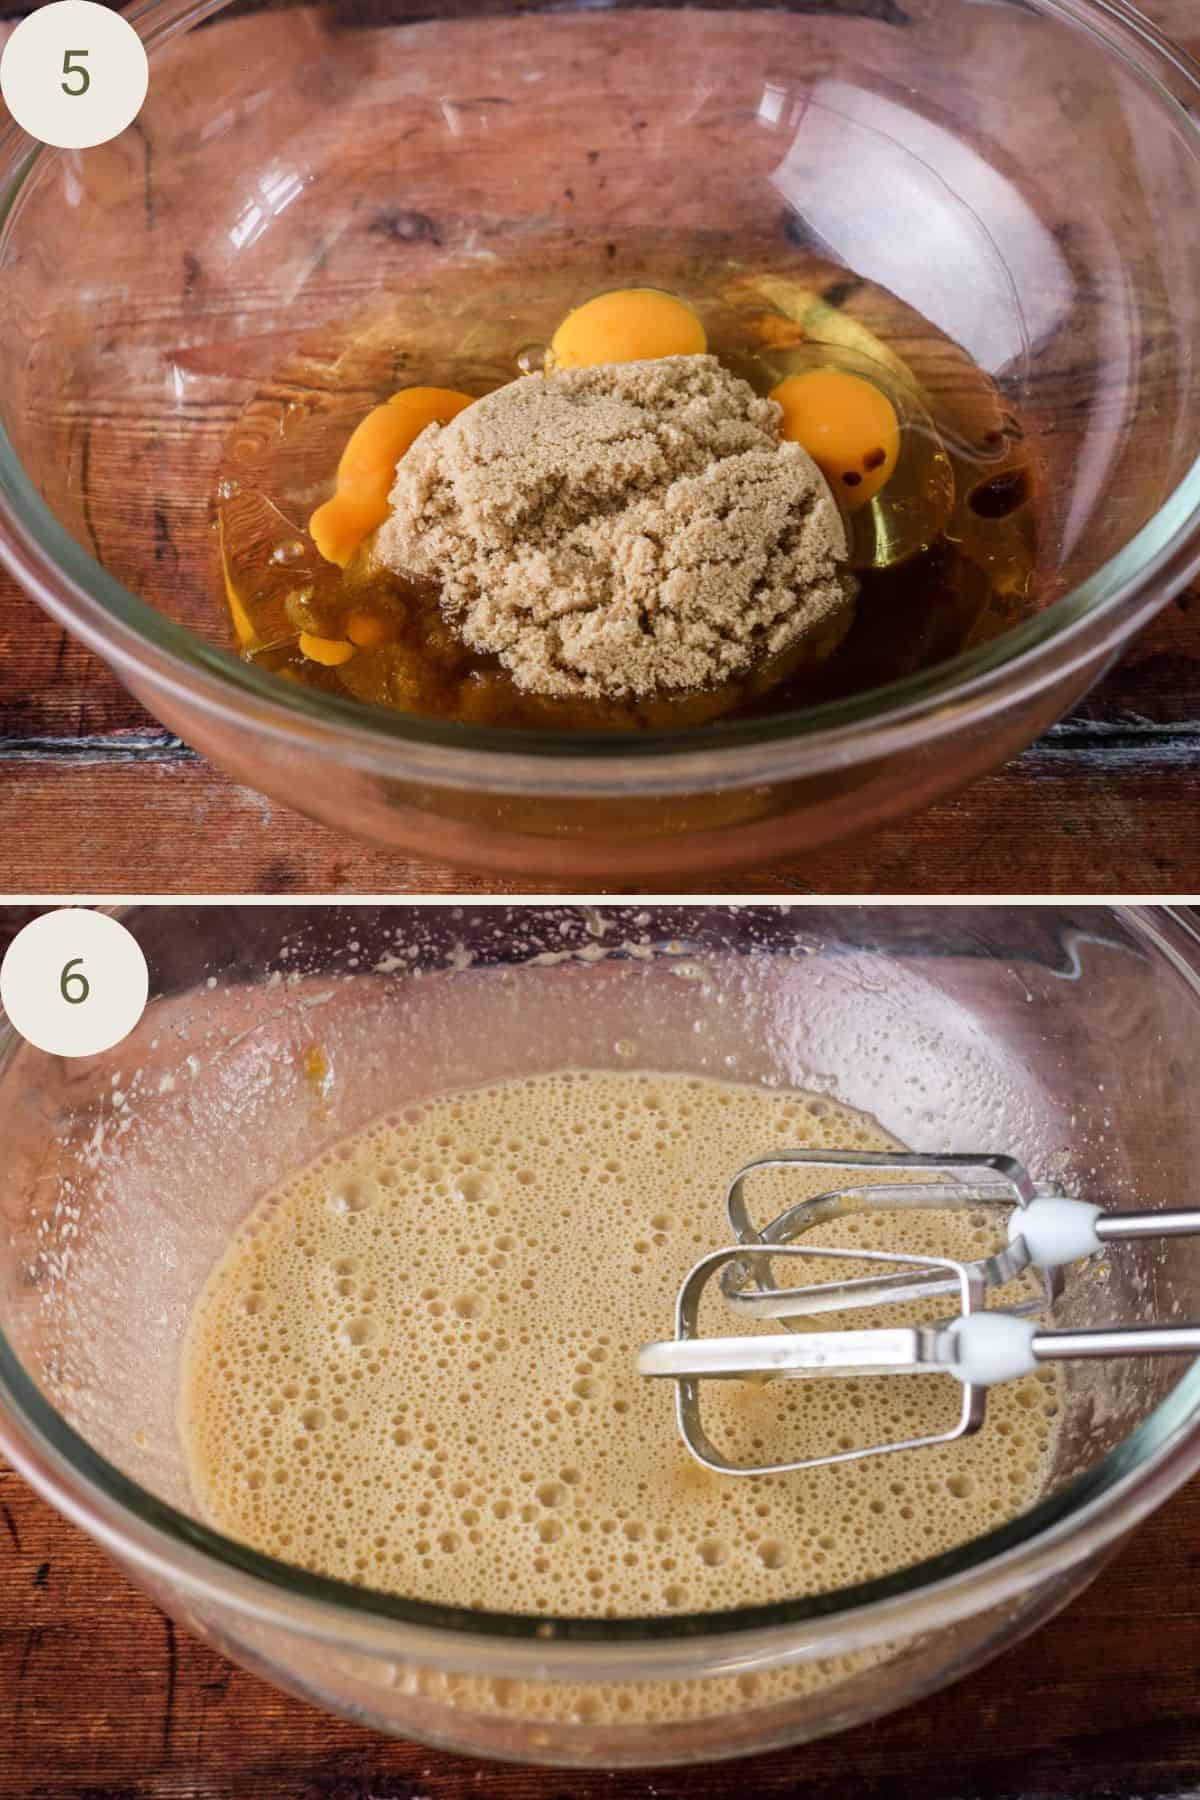
Break the eggs into a large mixing bowl and add in the brown sugar, olive oil and vanilla extract. Whisk together until smooth.
Pour the melted chocolate into the rest of the wet ingredients.

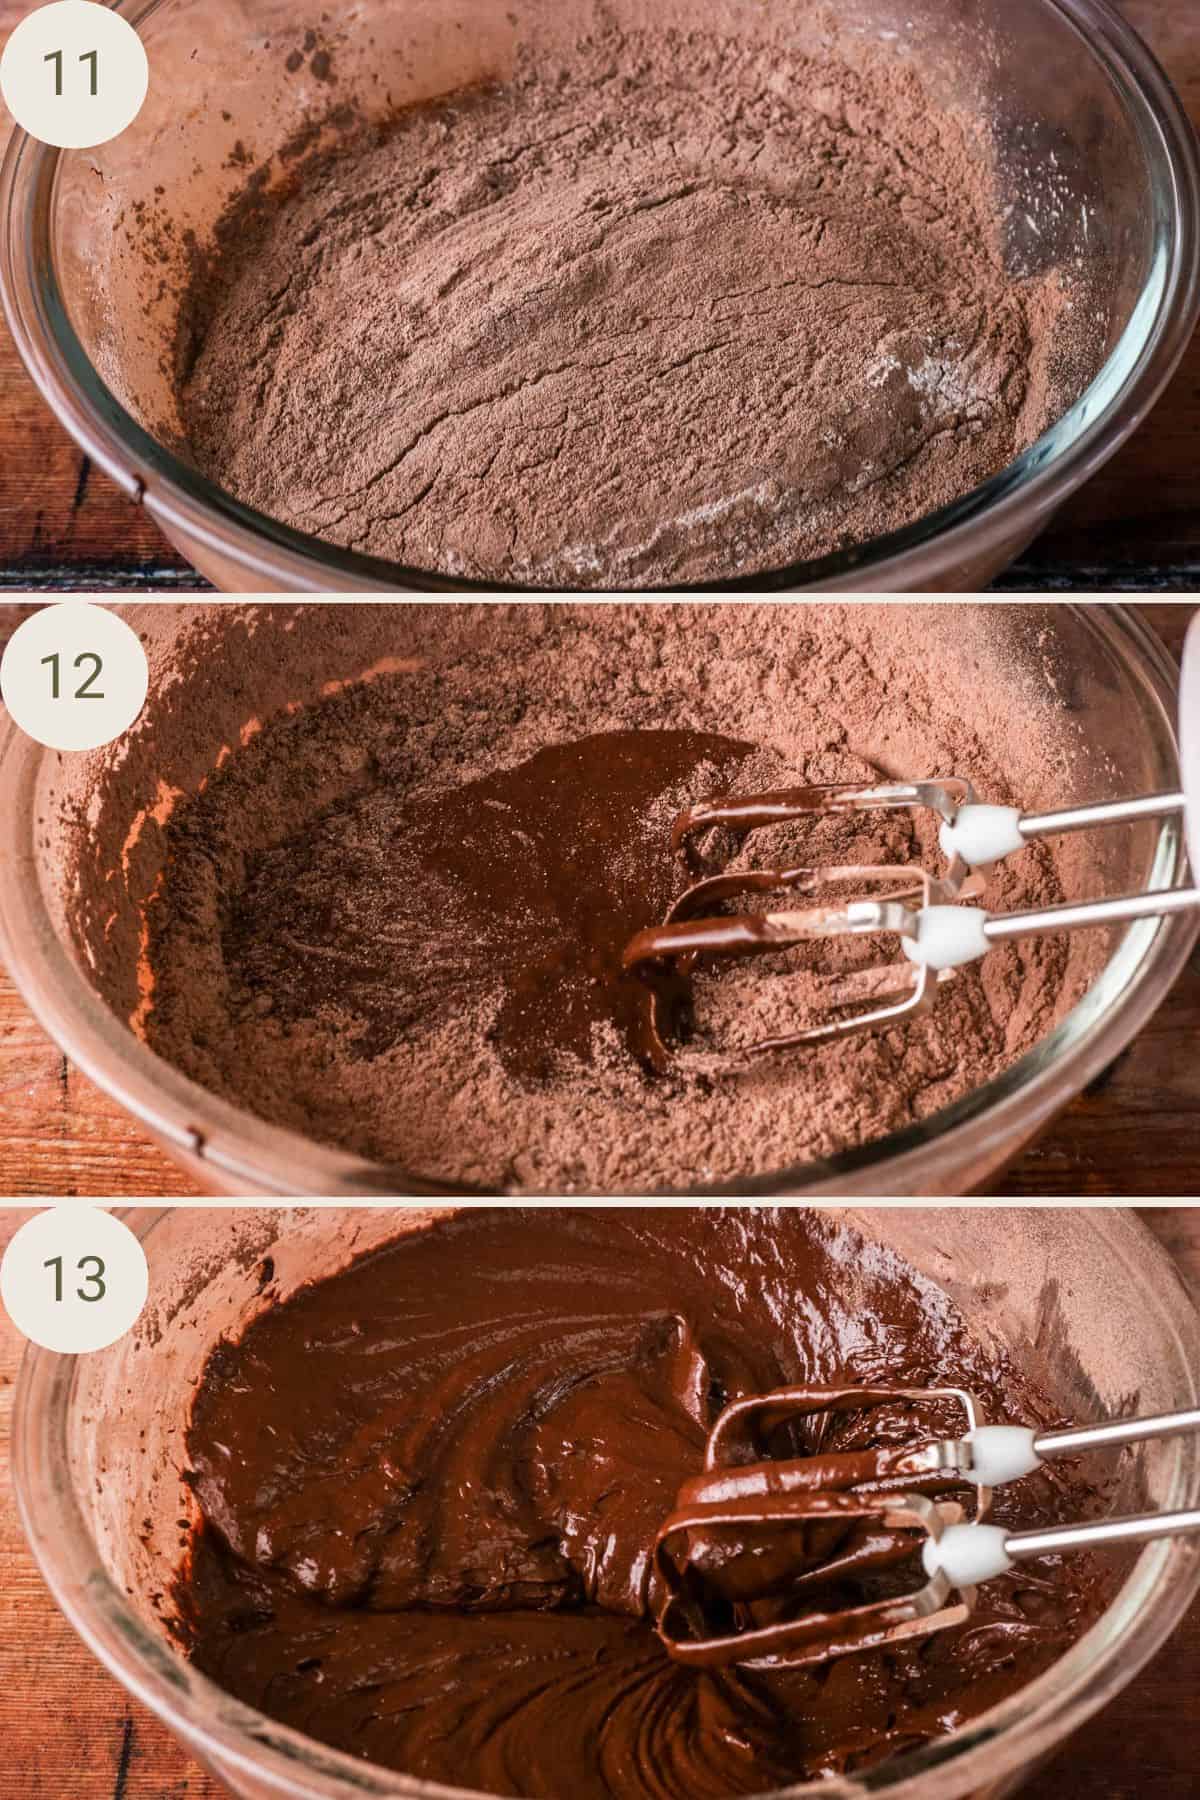
Add in the flour mixture and mix to create a thick chocolate batter.
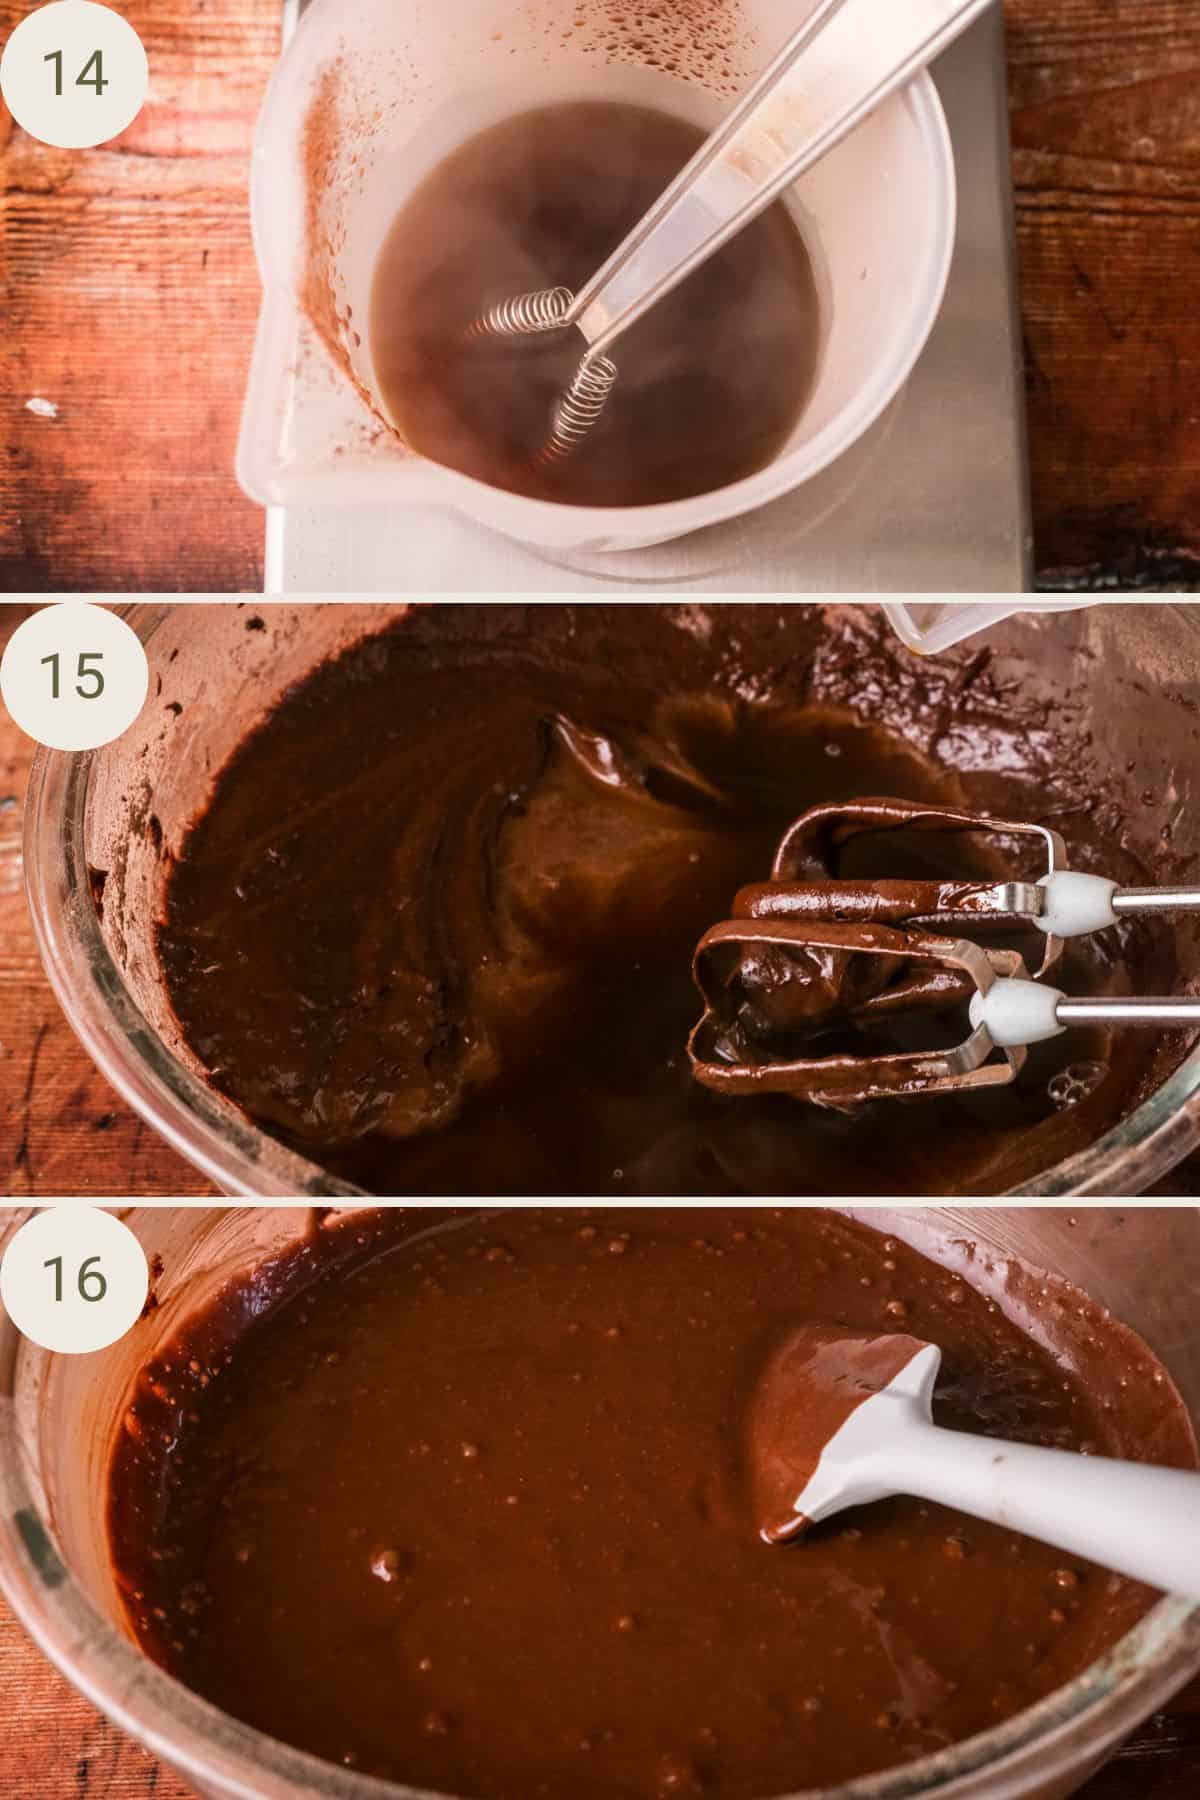
Pour hot coffee into the chocolate batter and mix until smoothly combined.
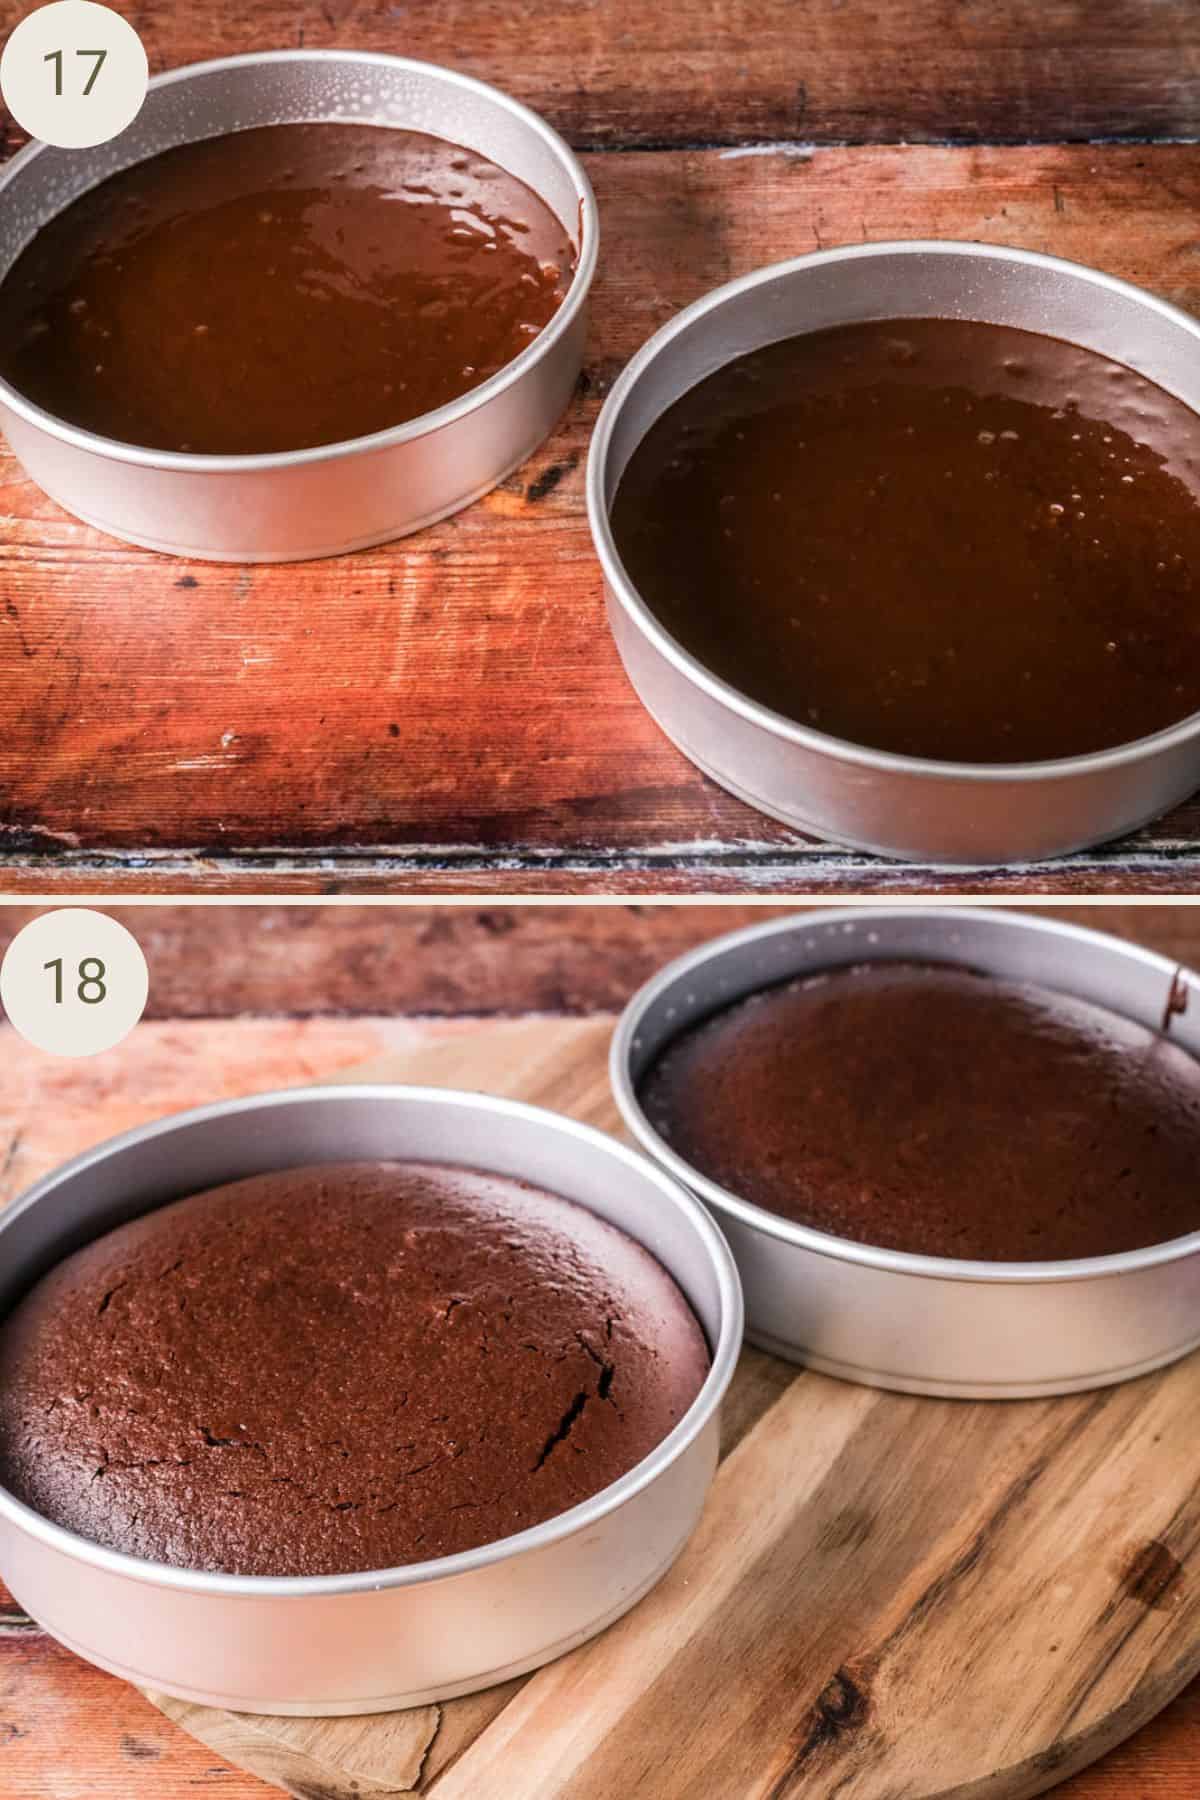
Divide the chocolate batter into your prepared cake tins and bake for 25 minutes.
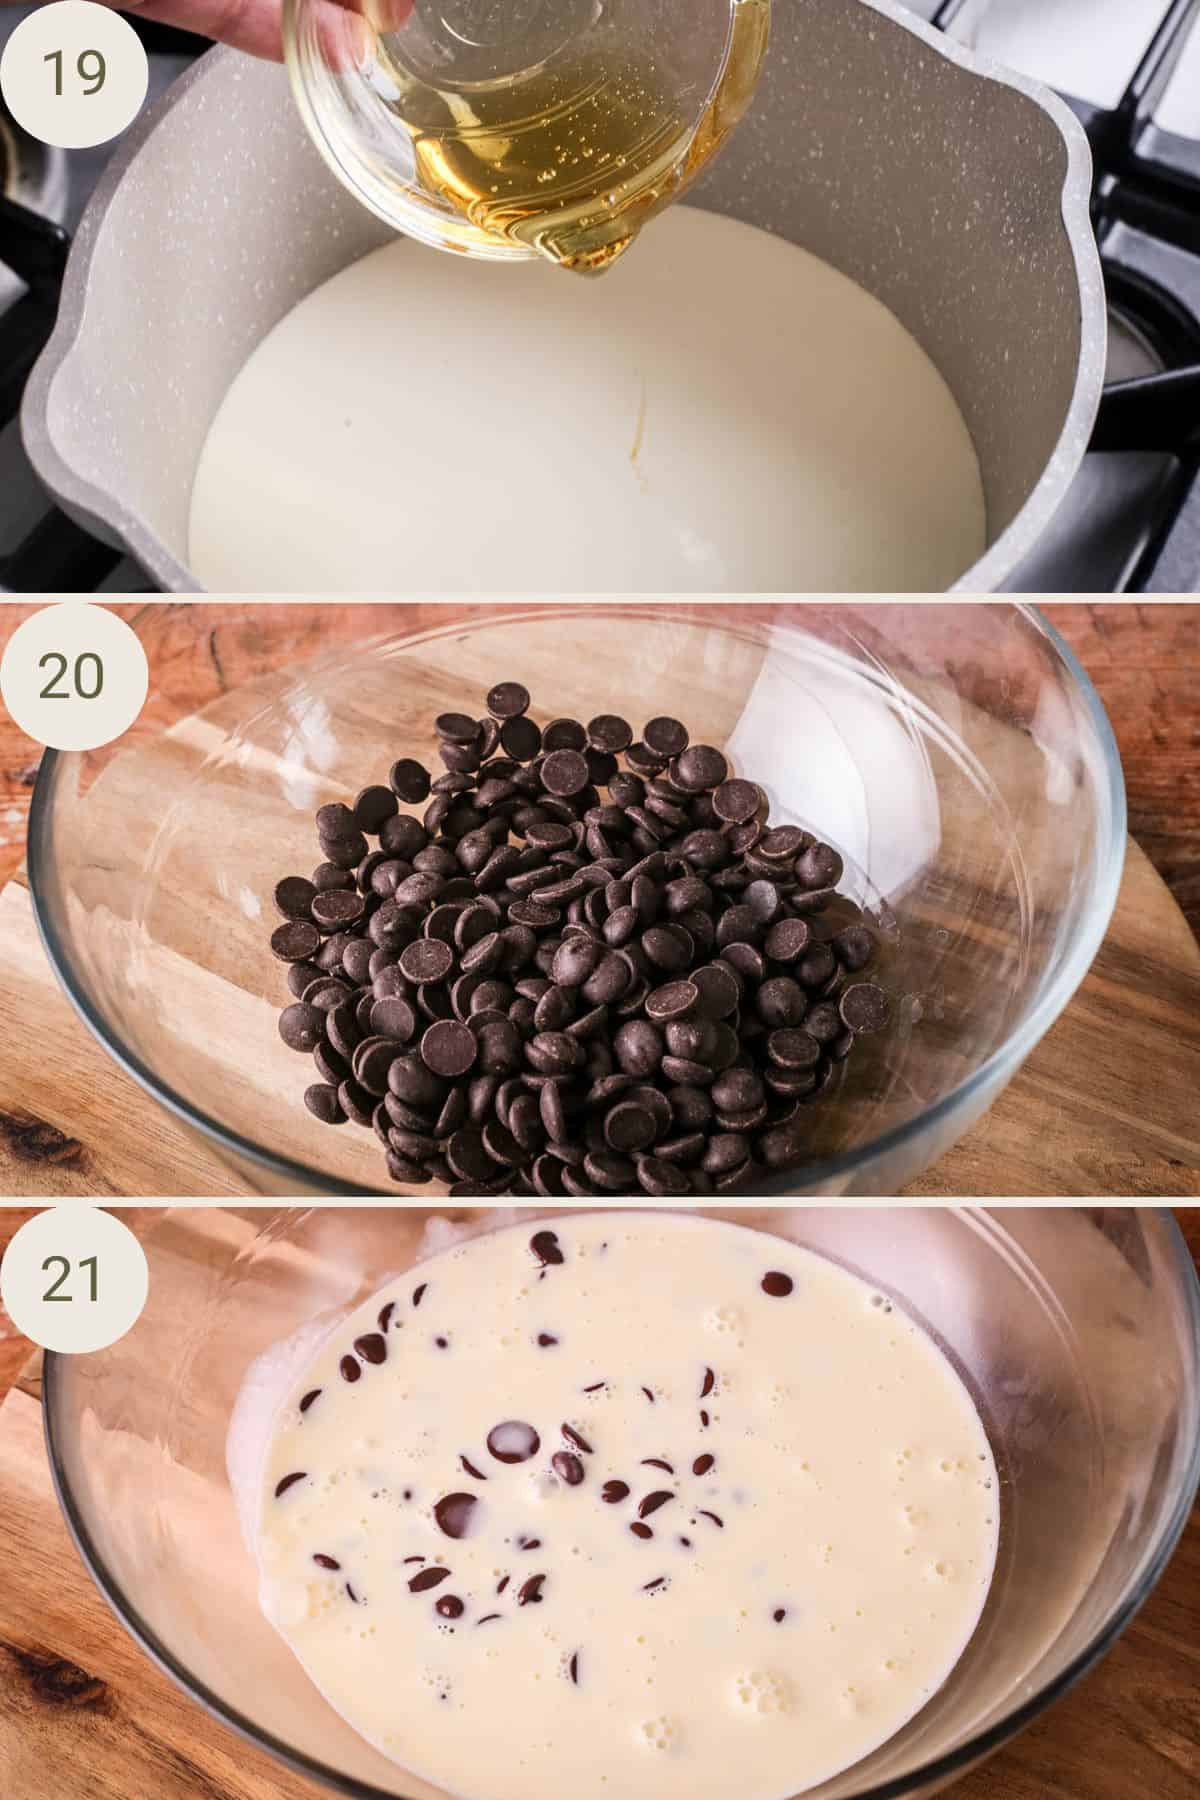
Chocolate Ganache: Heat the cream, the golden syrup and the salt into a medium sized saucepan until it comes to a gentle simmering boil. Pour the cream over the chocolate and rest for 3-5 minutes.
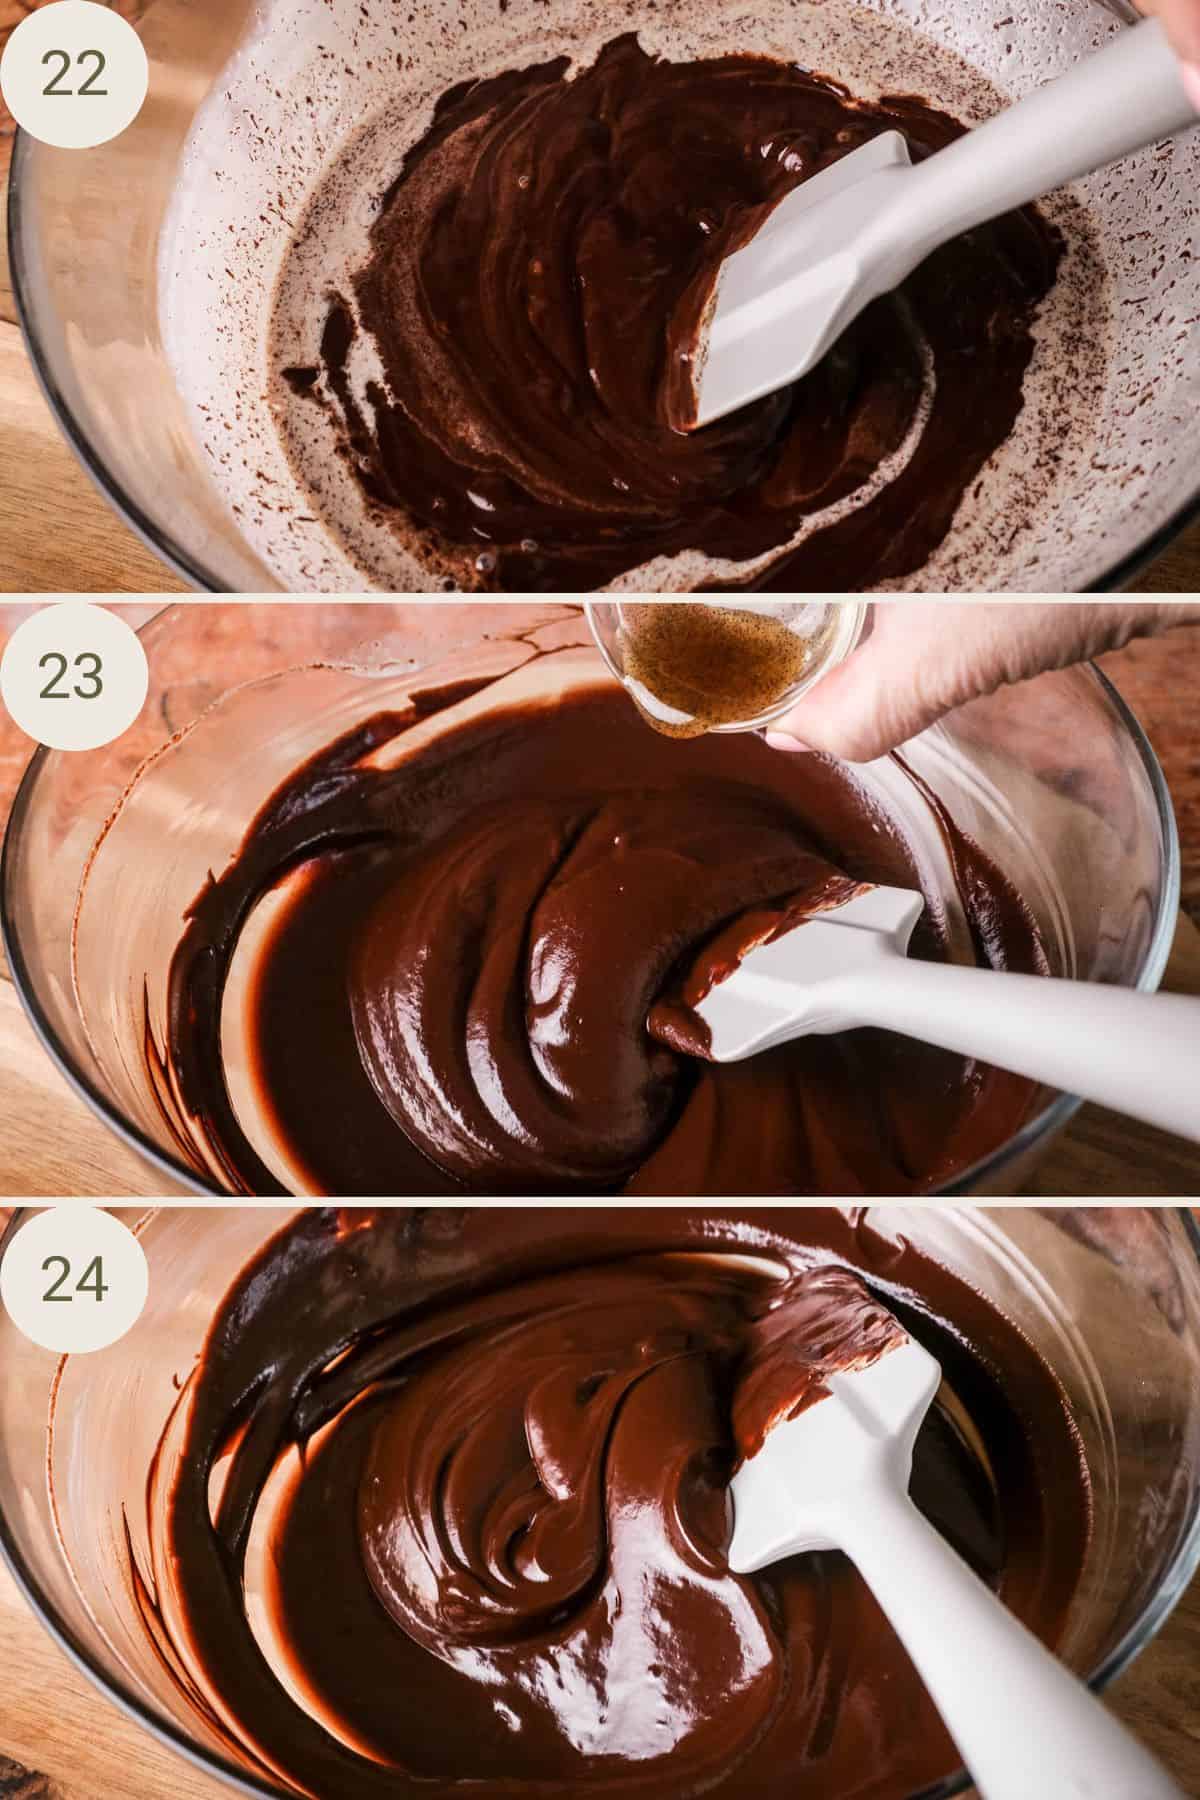
Stir from the centre or the bowl to the outer until the chocolate ganache has emulsified and is smooth and glossy. Add vanilla extract and stir to combine.
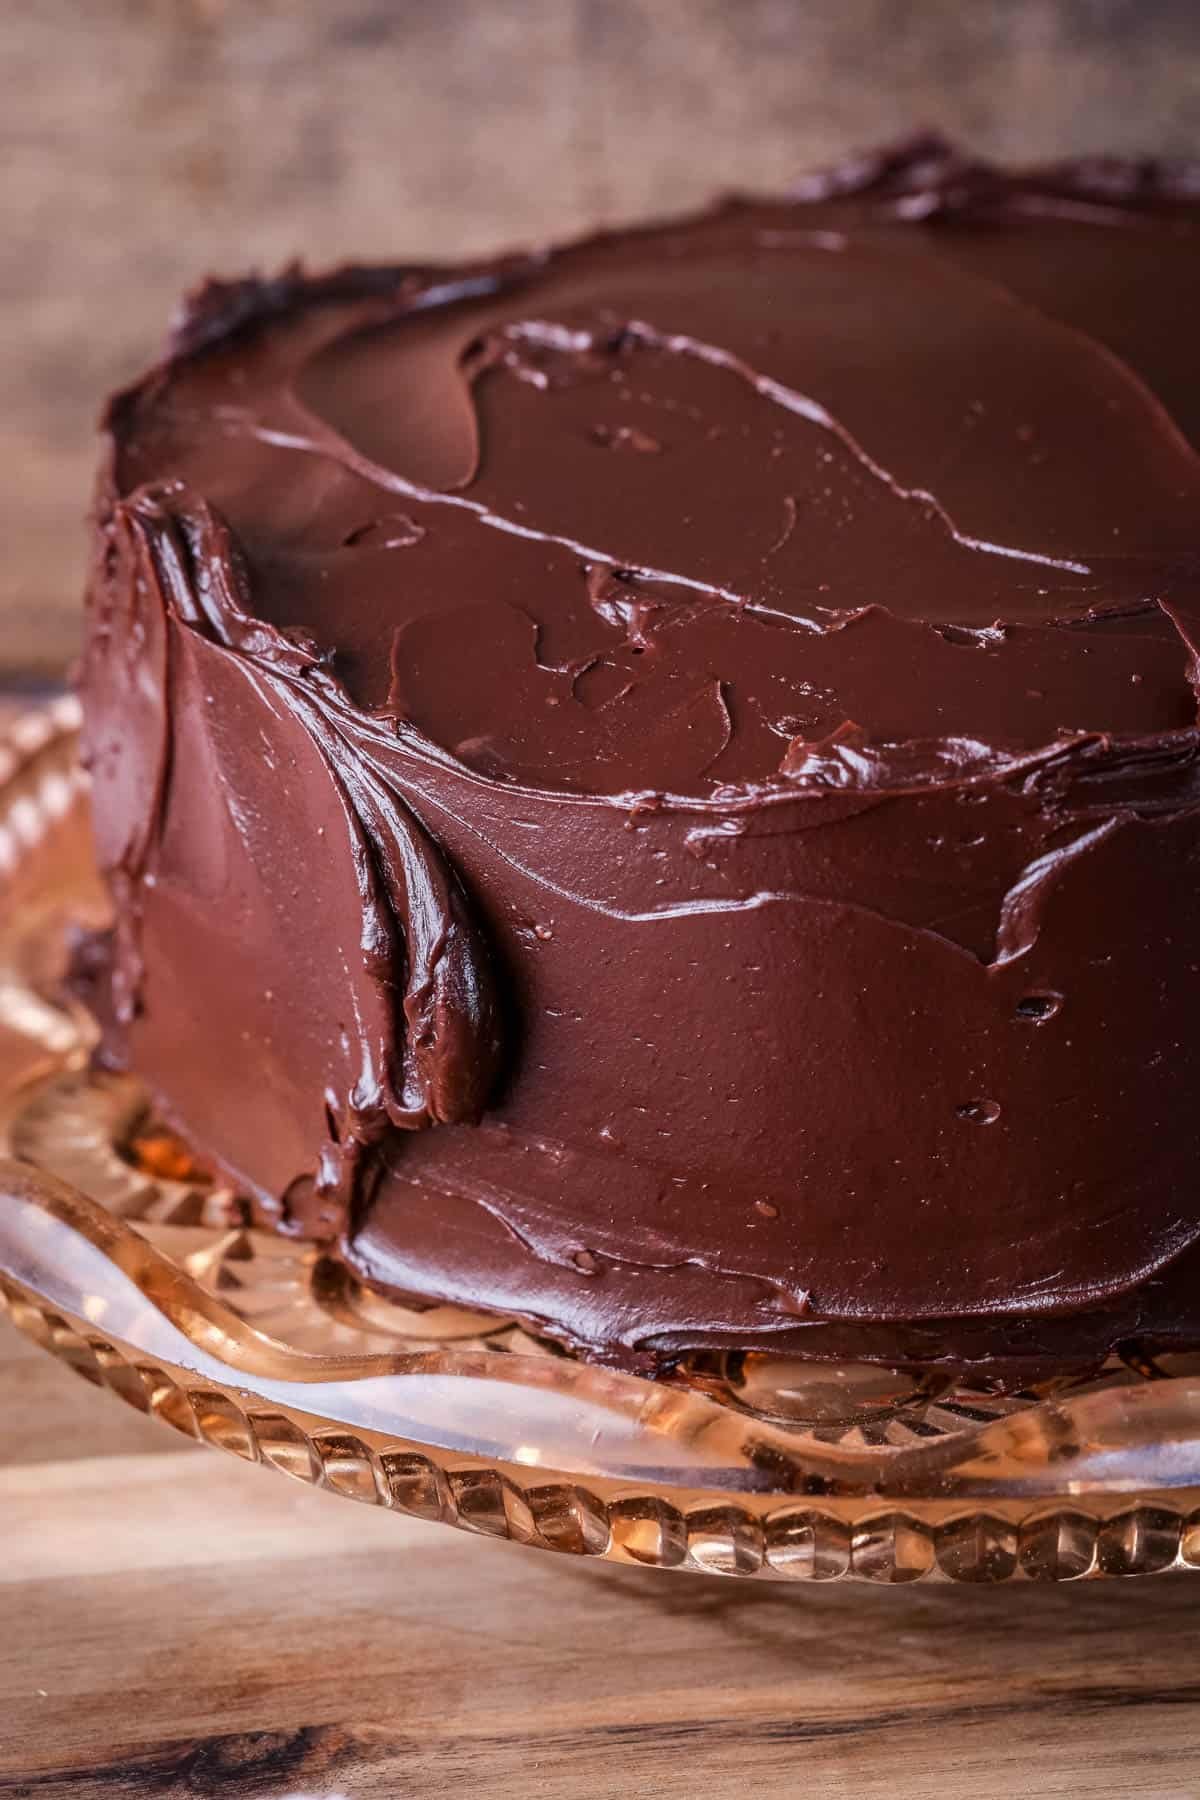
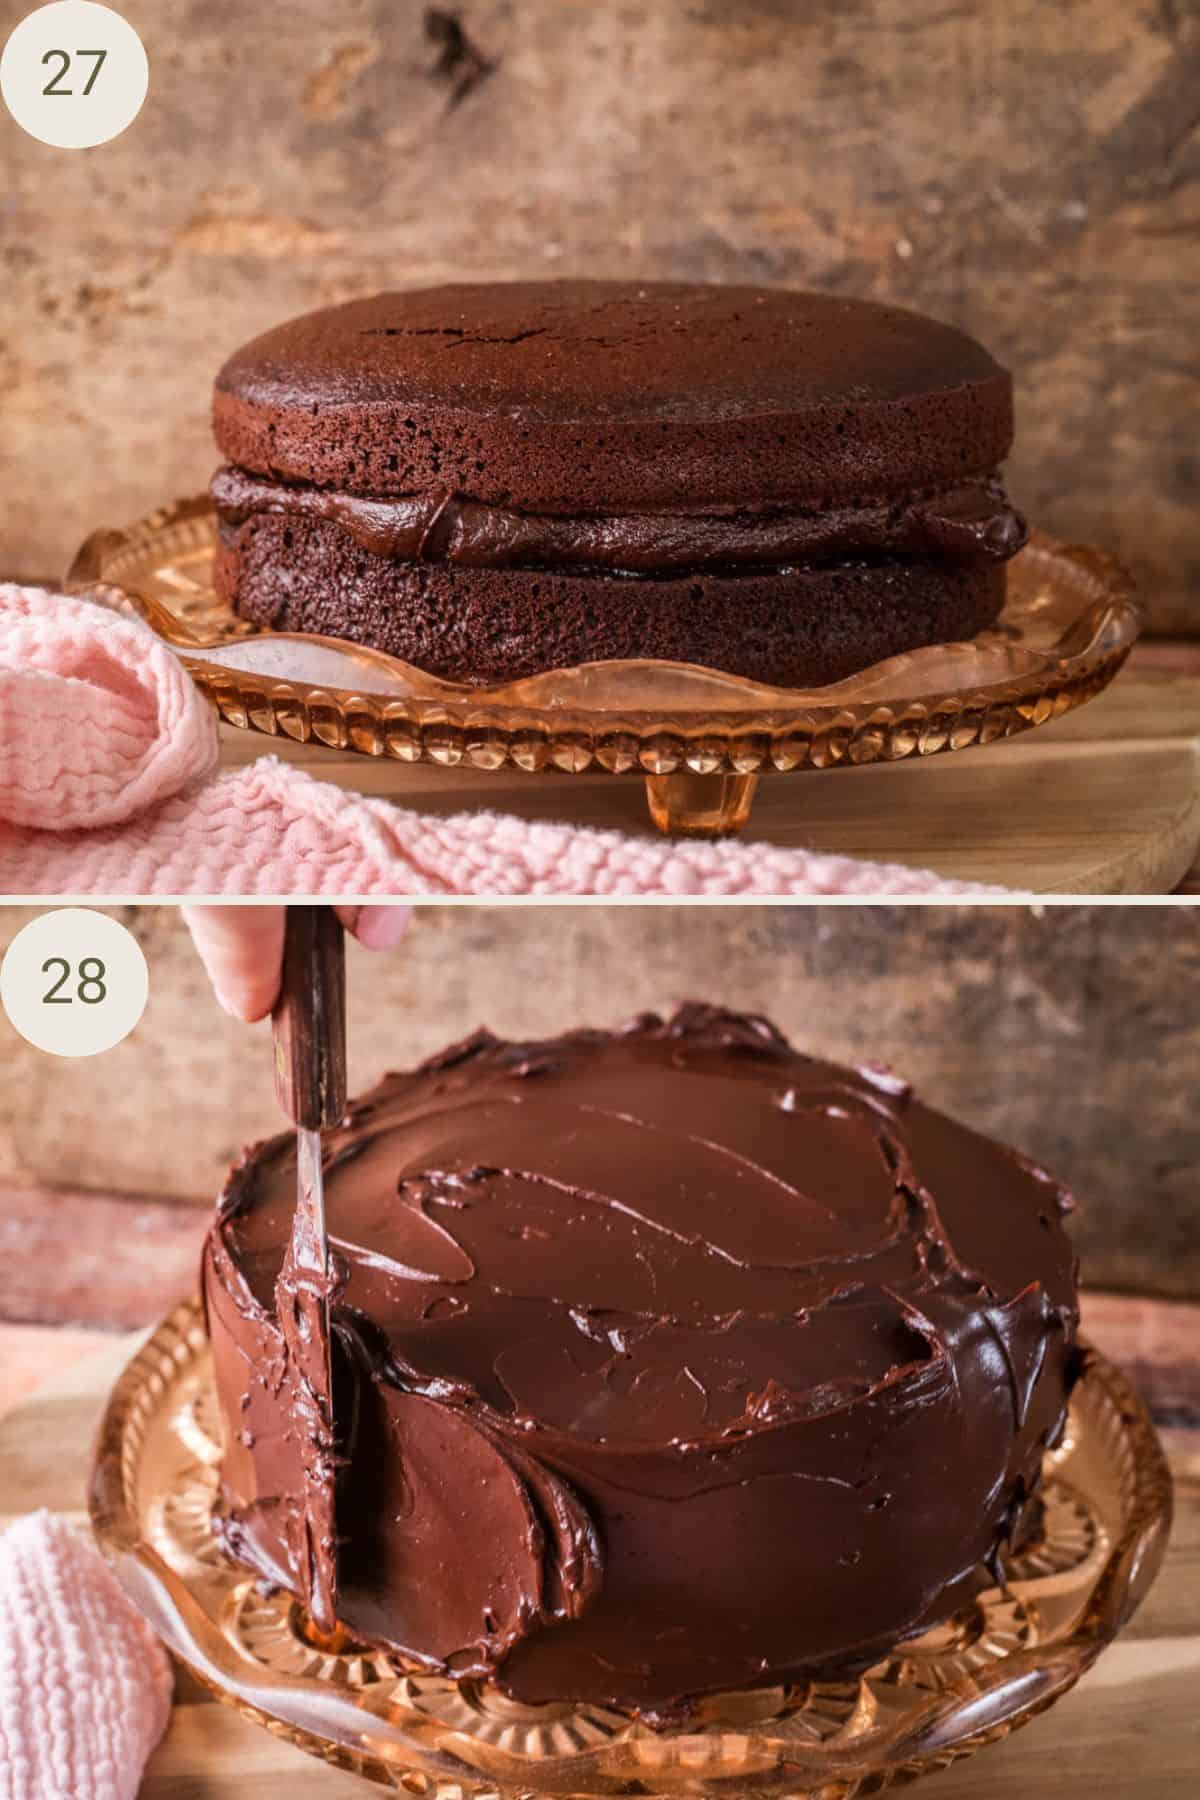
Assembly: Place one of the chocolate sponges on a plate or cake board. Spread over ¼ of the ganache over the first cake layer until it evenly covers the surface.
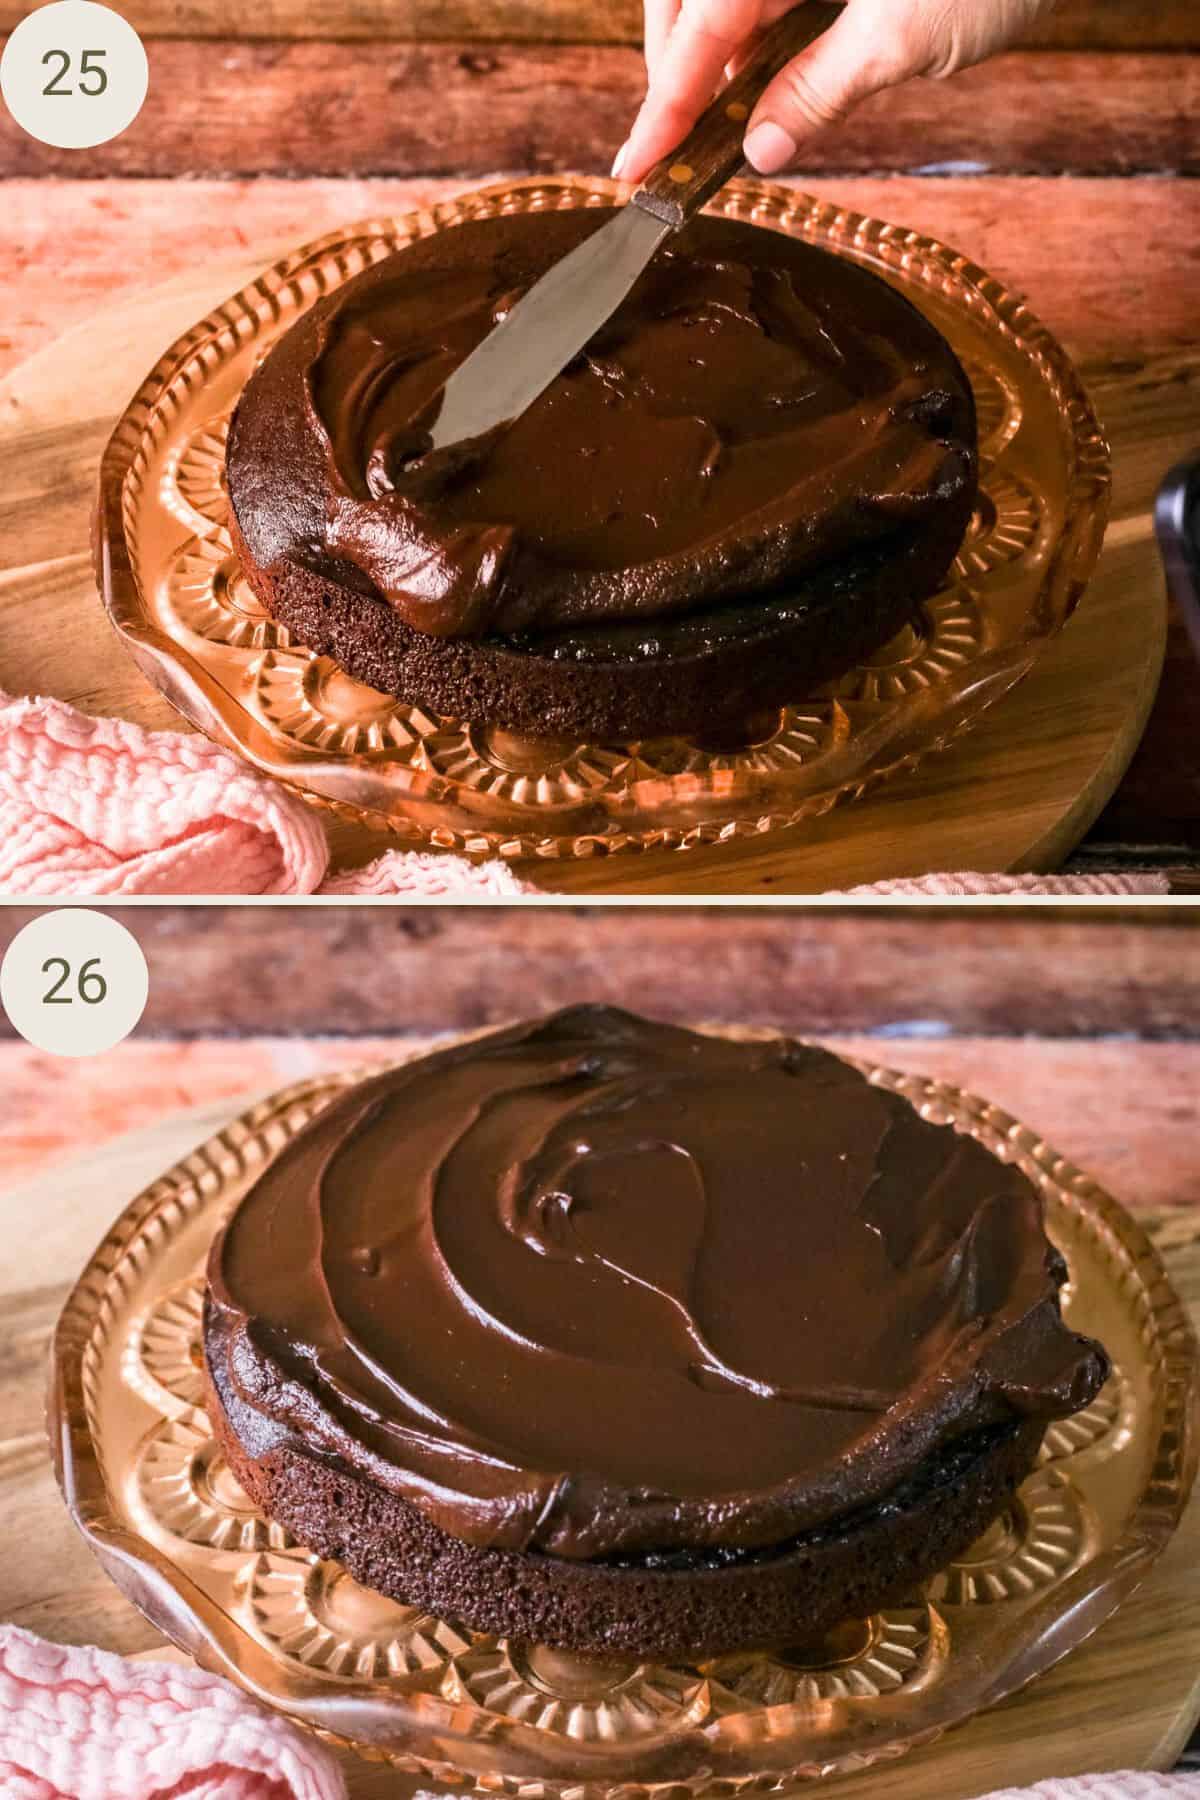
Place the second sponge on top and spread the rest of the ganache over the top and sides of the cake, swirling smoothly and evenly around.
Tips & Troubleshooting
The ganache will keep firming up after it’s made. After about 30 minutes it will probably be too firm to spread on the cake. If this happens then place the ganache in the microwave for 10 second bursts, stirring gently from the centre towards the outer bowl of the ganache. Make sure the ganache is warm before stirring.
If you are chilling the cake then make sure to remove it from the refrigerator about an hour before serving which allows the cake to come up to room temperature. Otherwise the ganache can be a little hard directly out of the fridge.
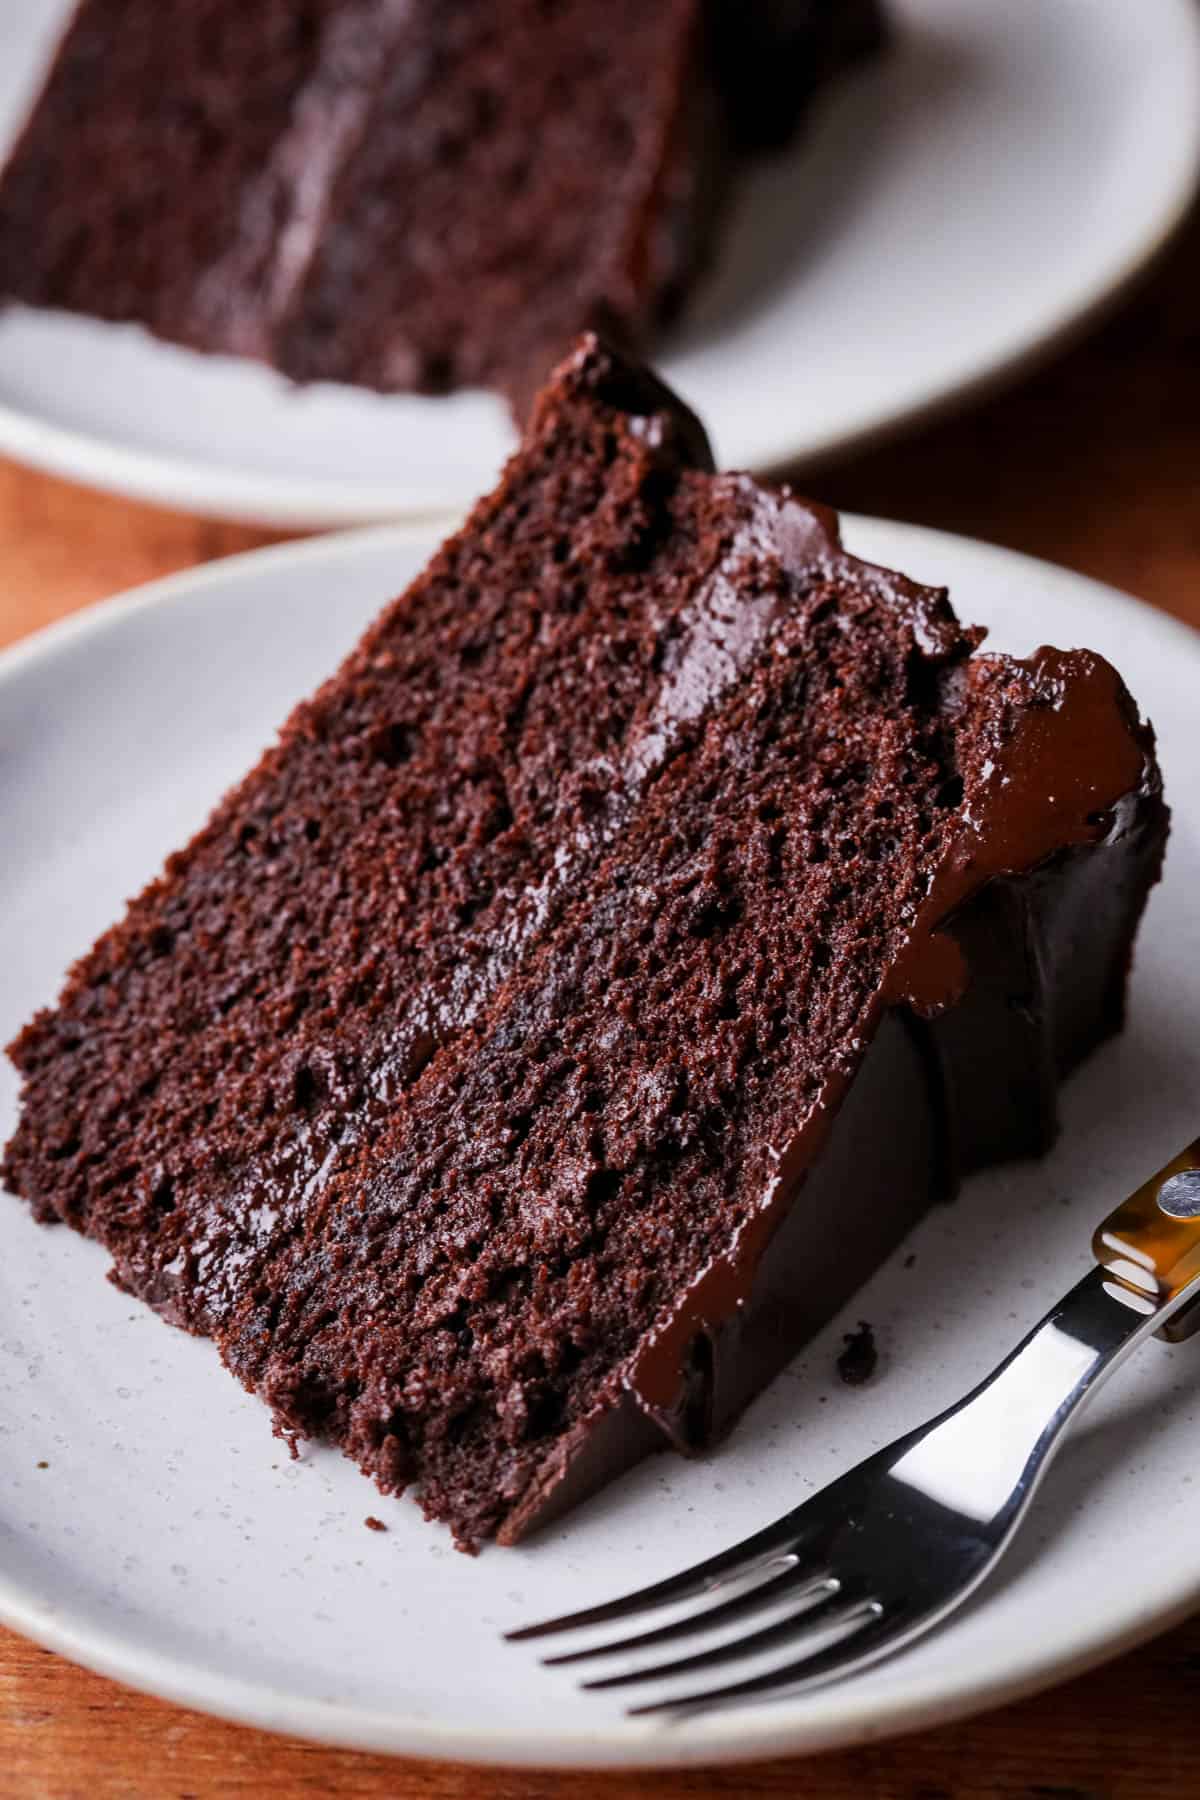
You can warm up the individual slices of the cake in the microwave for 10-20 seconds to soften and re-moisten the ganache and sponge.
For clear instructions and tips and troubleshooting on making the chocolate ganache then visit my Complete Guide To Chocolate Ganache which will help you if your ganache becomes grainy or splits.
Make Ahead
You can make the sponge cakes up to 2 days before assembling with chocolate ganache. Store the sponge cakes in an airtight container and keep in a cool dark place. Or freeze using the instructions below.
The whole cake can be made, including completely decorated, up to 2 days before serving. Store in an airtight container in a cool dark place.
Making the ganache ahead. You can make the ganache up to two days before frosting the cake. However, you will need to chill the ganache during this time. Bring it up to room temperature before microwaving in 10 second bursts to re-warm and return to a more spreadable texture.
Storing
You can store this cake at a cool room temperature for up to 24 hours. I’m in the UK and in the cooler months then it does just fine at room temperature. However, in the summer this cake will definitely need to be stored in the fridge. If your environment is warm then store this cake in the fridge as the ganache is made from fresh cream.
If you are storing for longer than 24 hours or your environment is warm then store the cake in an airtight container in the refrigerator for up to 5 days. The ganache is quite secure in making sure the sponge stays relatively moist. However, the longer the cake is in the fridge the drier it will become.
Bring the cake to room temperature before serving so you get the right texture and the full chocolate flavour.
Freezing
You can either freeze just the sponges (which can be easier to store) or the whole ganache frosted cake.
Just the sponges: You can freeze the sponge cakes successfully for up to 3 months before decorating. First wrap the cooled sponges tightly in cling film (plastic wrap) and then double wrap in aluminium foil. Don’t forget to label including the date. To enjoy, thaw at room temperature overnight, unwrap once thawed and fill and decorate with the
The whole cake: Flash freeze the whole cake for 6-8 hours, before double wrapping in cling film (plastic wrap) and aluminium foil then storing for up to 2 months.
Thaw overnight in the refrigerator before unwrapping when chilled. Bring up to room temperature to serve.
Individual Slices. You can also freeze leftover slices of the whole cake. It needs a little more care when freezing:
- Place the leftover cake slices on a tray and flash freeze for 6-8 hours, before wrapping each slice up individually in cling film (plastic wrap) and placing in an airtight container.
- To thaw, remove the cake slices individually, unwrap whilst frozen so not to disturb the glaze. They should take about 1-2 hour to fully thaw.
FAQs
This is a truly fudgy cake as it has a dense and moist texture from using melted chocolate and the boiling water in the sponge. The cake is also paired with a thick chocolate ganache making it a really fudgy indulgent cake.
This recipe can be easily made dairy-free as well as gluten-free by a simple swap in the ganache. You just need to use a plant-based cream option rather than double cream. I like Coconut Collab’s Double Cre&m.
You don’t need a stand mixer, in fact you could even get away without using electric beaters. A couple of bowls and a good balloon whisk would be absolutely fine.
You can omit the coffee from the recipe but keep the amount of hot water the same and add into the cake the same way as if you had included the coffee.
Flavour Variations
Milk chocolate ganache. My younger children prefer this cake with a milk chocolate ganache which is sweeter but absolutely delicious. Visit my chocolate ganache guide and follow the recipe for the milk chocolate ganache if you want to try this.
Chocolate Orange Fudge Cake. Add the zest of two oranges to the chocolate sponge batter and a drop of orange oil to the ganache in lieu of the vanilla extract.
Mint Chocolate Fudge Cake. Add a drop of peppermint extract to the ganache instead of the vanilla extract.
Serving Suggestions
The cake is delicious as it is but you can also transform it into more of a dessert option by warming up slices ever so slightly. Just 10-20 seconds in the microwave is all it needs. Then serve your warm slices with:
- A quenelle of crème fraiche.
- A scoop of very good vanilla ice cream.
- Fresh berries; raspberries, blueberries, blackberries and strawberries in particular.
- A drizzle of single cream.
More Gluten-Free Chocolate Cakes You’ll Love
This incredible Gluten-Free Chocolate Celebration Cake is rich with chocolate and will become your new go-to special occasion cake. It boasts moist and tender cake layers filled with a luxuriously silky chocolate buttercream frosting for the ultimate indulgence.
This Gluten-Free Chocolate School Cake is a very simple and economical chocolate cake which is ideal for serving to a crowd. Perfect for birthday parties and celebrations. The sponge is light and moist and made with cocoa powder for quick assembly and rich flavour.
These incredible Chocolate Cupcakes have a rich flavour and moist bakery-style texture. They are suitable for a wide range of allergies as they are dairy-free, egg-free, gluten-free, nut-free and soy-free. The perfect choice if you need an allergy-safe option for kids parties or a not-so humble weekend treat for friends and family.
Enter your email below to get this recipe sent to your inbox plus get new recipes, baking tips, and updates.

Gluten-Free Chocolate Fudge Cake
Ingredients
- 55 g dark chocolate
- 120 g homemade gluten-free flour - FTL Blend
- 50 g cocoa powder
- ¾ teaspoon baking powder
- ¼ teaspoon bicarbonate of soda
- ¼ teaspoon salt
- 3 eggs
- 150 g light brown sugar
- 90 g olive oil
- 1 teaspoon vanilla extract
- ¾ teaspoon espresso powder
- 180 g water
Chocolate Ganache
- 180 g double cream
- 1 tablespoon golden syrup
- ¾ teaspoon salt
- 180 g dark chocolate
- 1 tsp vanilla extract
Instructions
- Preheat the oven to 180°C / 160°C fan assisted / gas mark 4 / 350°F.
- Line and grease 2 x 18cm (7 inch) round cake tins.
- Melt the chocolate in a double boiler or a small bowl set over a pan of simmering water. Set aside whilst you prepare the rest of the batter.
- Sift together the flour, cocoa, bicarbonate of soda, baking powder and salt in a medium sized mixing bowl then set aside.
- Break the eggs into a large mixing bowl and add in the brown sugar, olive oil and vanilla extract. Whisk together until smooth.
- Pour the melted chocolate into the rest of the wet ingredients.
- Add in the flour mixture and mix to create a thick chocolate batter.
- Boil water in a kettle then measure out the right amount into a medium sized jug. Whisk in the espresso powder until dissolved.
- Pour the hot coffee mixture into the chocolate batter and mix until smoothly combined.
- Divide the chocolate batter into your prepared cake tins and bake for 25 minutes. Remove from the oven when the sponge is just starting to pull away from the sides of the tins and an inserted skewer comes out clean.
- Allow the sponges to rest for 5 minutes in the tin before carefully removing onto wire racks to completely cool before frosting.
Chocolate Ganache
- Grate or process your chocolate very finely in a food processor so it’s as small as possible and place in a heatproof bowl.
- Pour the cream, the golden syrup (if you’re making the dark chocolate version) and the salt into a medium sized saucepan. Heat very slowly and gently, stirring so the syrup and salt melt.
- The cream should just come to a gentle simmering boil so you are starting to see bubbles on the surface but don’t allow to boil properly.
- Remove from the heat then immediately pour the cream over the chocolate. Make sure the chocolate is completely submerged into the cream by poking down if necessary. Rest for 3-5 minutes.
- Stir from the centre or the bowl to the outer until the chocolate ganache has emulsified and is smooth and glossy.
- Add vanilla extract and stir to combine. The ganache should be thick and spreadable which means it is immediately ready to begin frosting your cake.
Assembly
- Place one of the chocolate sponges on a plate or cake board. Spread over ¼ of the ganache over the first cake layer until it evenly covers the surface.
- Place the second sponge on top and spread the rest of the ganache over the top and sides of the cake, swirling smoothly and evenly around.

I haven't tried this but I def will as I lost my 'perfect chocolate cake' recipe in the morass of YT and computer failure! It looks perfect and I was wondering if it is possible to freeze just the ganache? I know you have said the whole cake or slices can be so I am assuming that on its own the ganache should be ok but nervous to waste such expensive ingredients. Thank you so much for your wonderful recipes and inspiration, I particularly love the old classics from childhood.
Hi Christine, yes you can freeze the ganache and all the directions for freezing can be found in my specific ganache post here >>> Guide To Ganache.