Moist Vegan Gluten-Free Chocolate Cupcakes
This post contains affiliate links. Please read my disclosures.

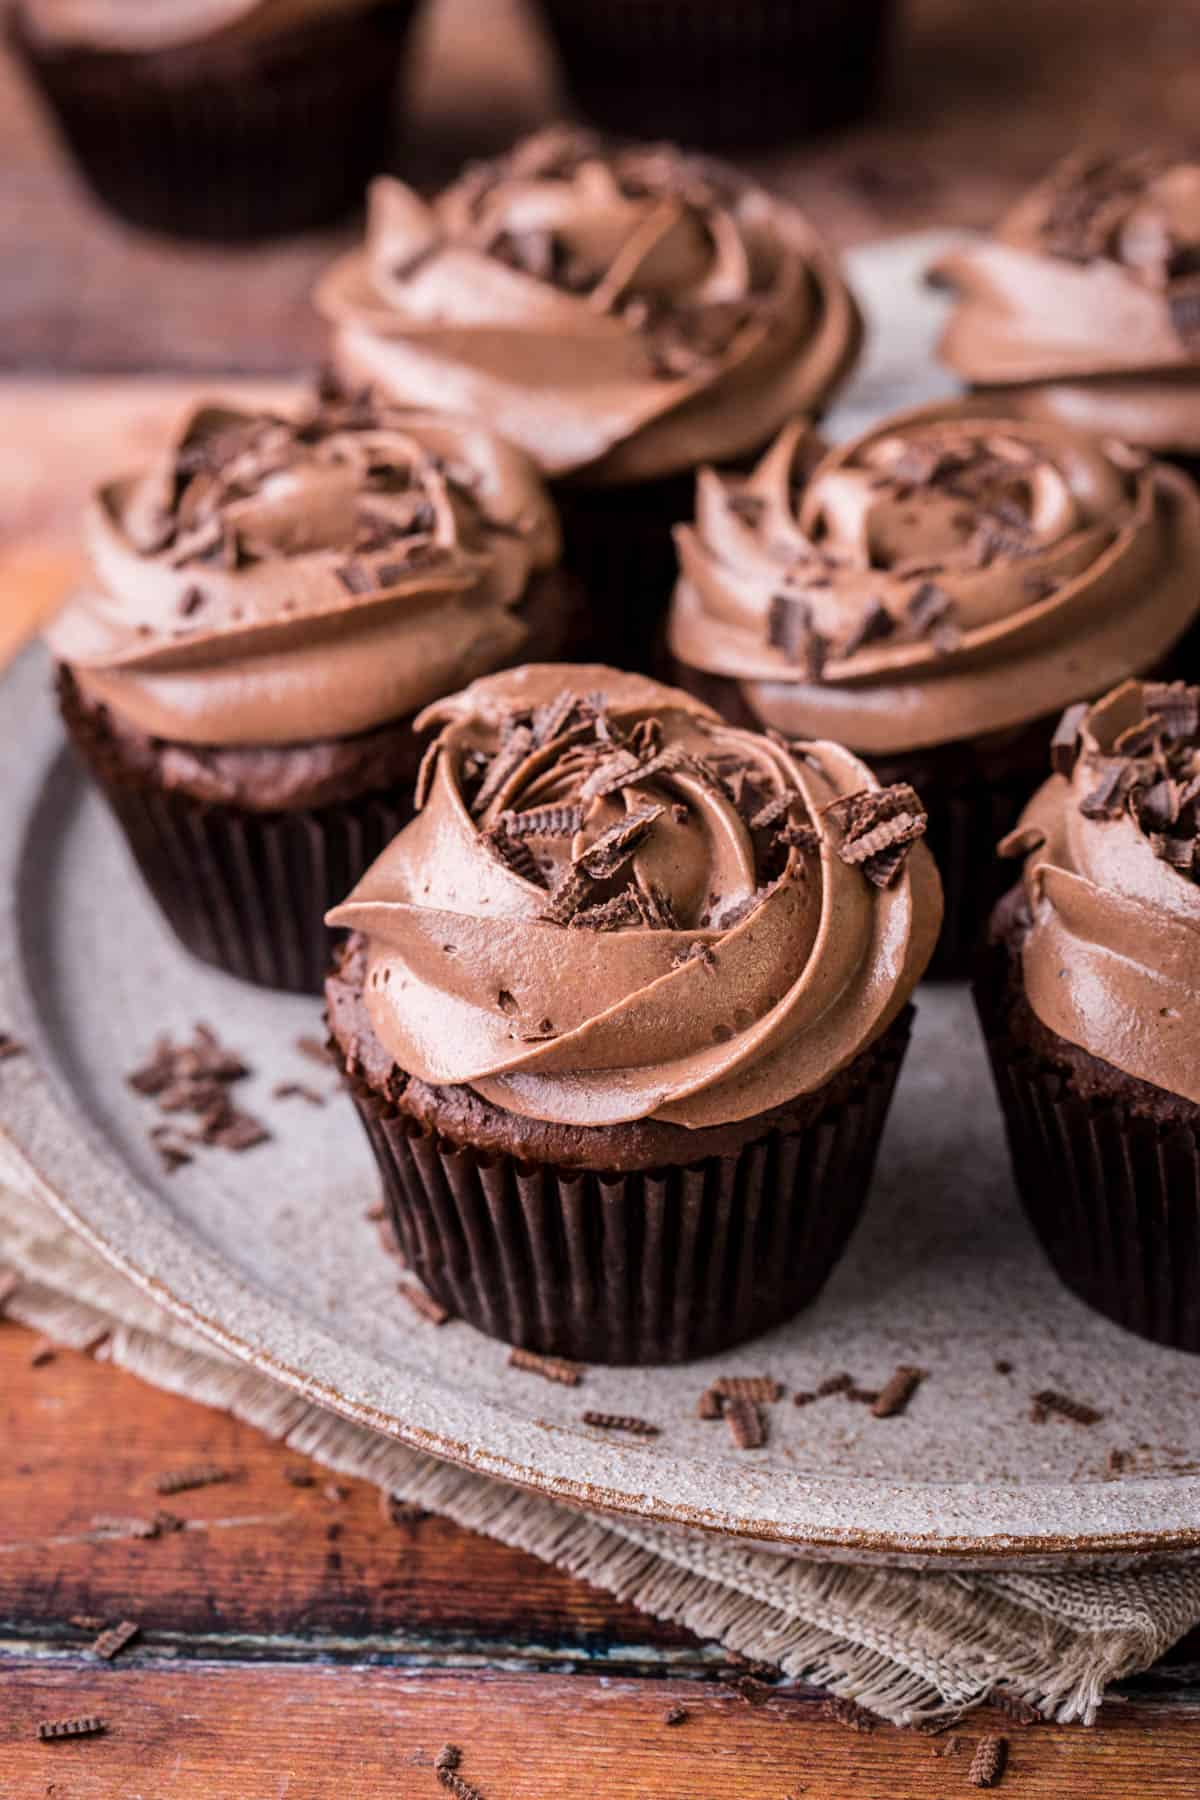
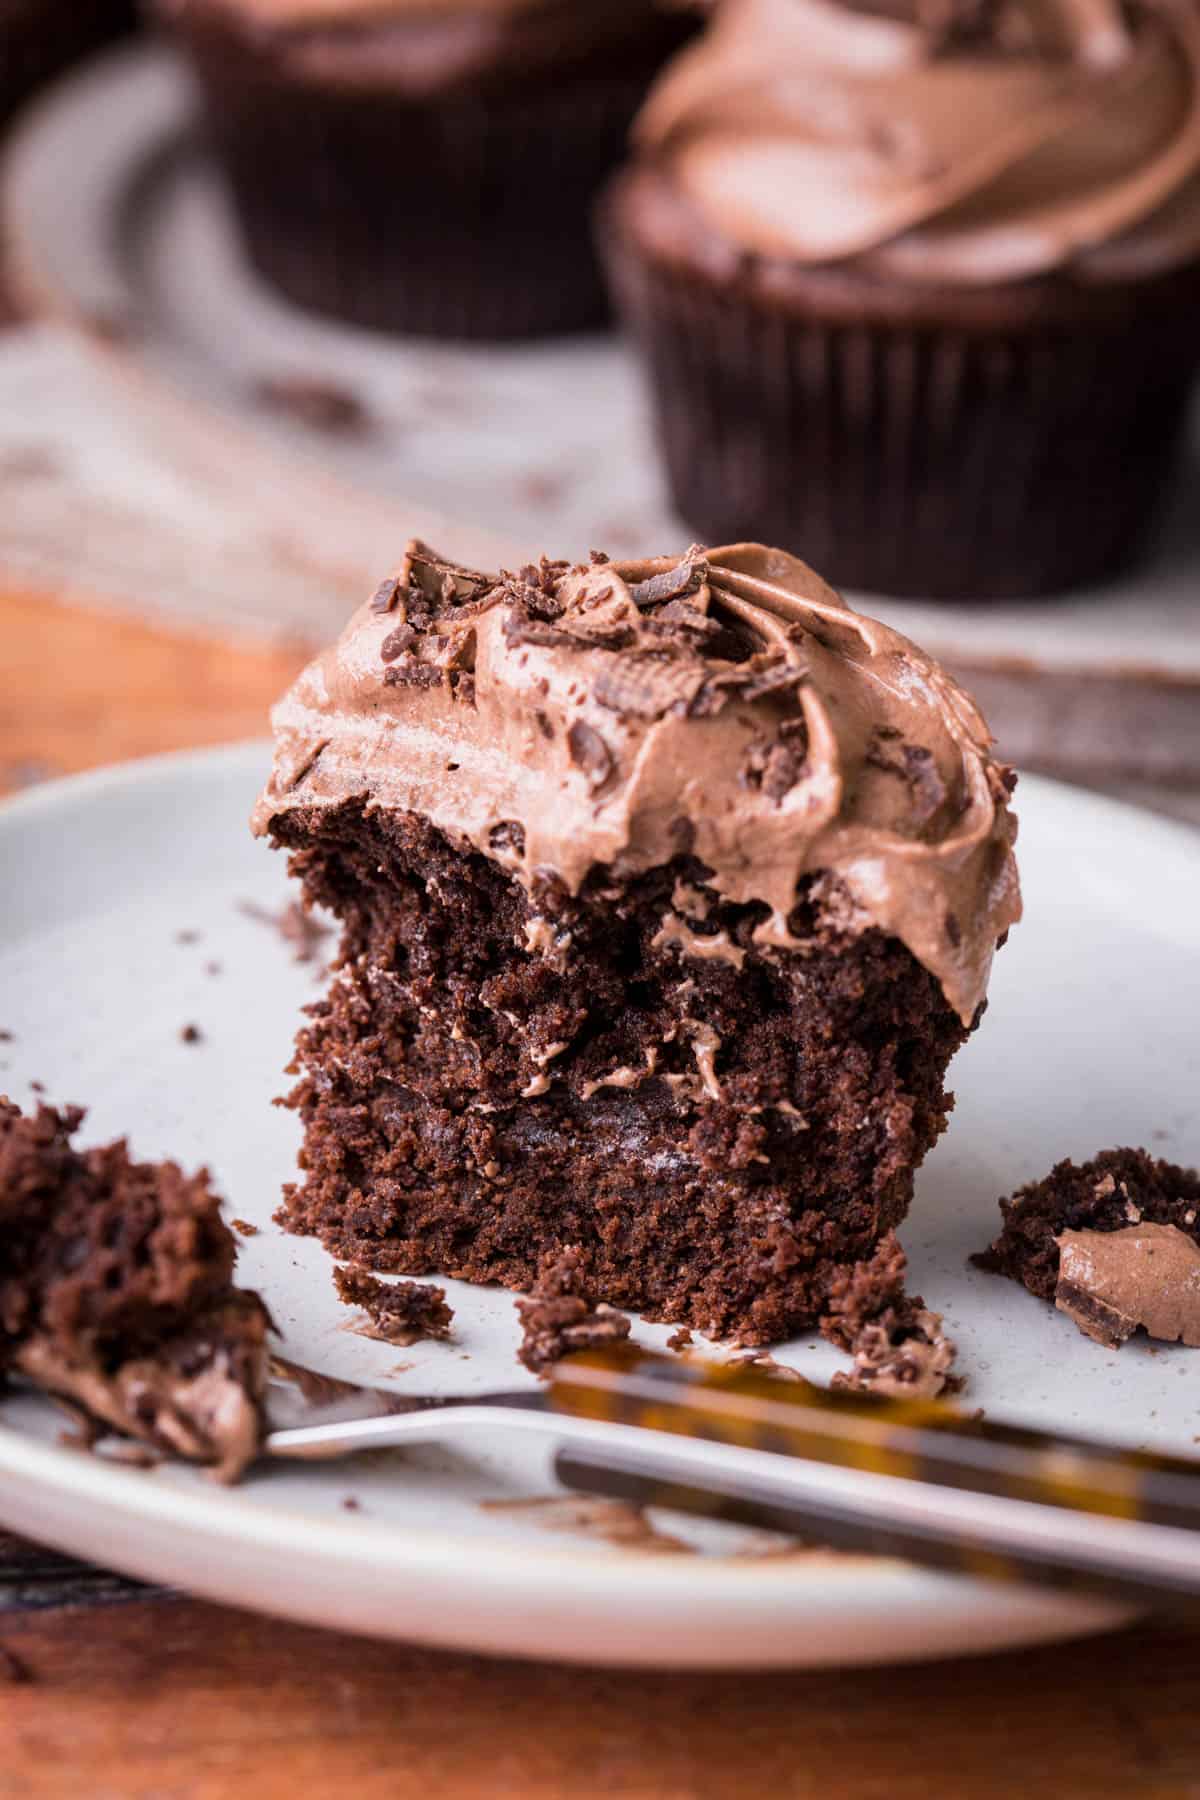
These incredible Chocolate Cupcakes have a rich flavour and moist bakery-style texture. They are suitable for a wide range of allergies as they are dairy-free, egg-free, gluten-free, nut-free and soy-free. The perfect choice if you need an allergy-safe option for kids parties or a not-so humble weekend treat for friends and family.
These Chocolate Cupcakes are such a great recipe to have up your sleeve if you need a delicious allergy-friendly treat (they are also nut-free and soy-free!). We have four kids and for all their birthday parties I always bake a quick and easy batch of these Vegan Gluten-Free Chocolate Cupcakes alongside the main birthday cake. To be honest they always fly off the table much quicker than the birthday cake itself. After all who can resist a chocolate cupcake?! And the children (who are always more discerning than the adults – although it might be that they have no filter and will happily let it be known if they don’t like something) have no idea that these are allergy friendly.
Of course they are not just for kids and I always make sure I keep one back so I can enjoy it later after all the kids have gone home.
These cupcakes work best with my Homemade Gluten-Free Flour Blend but all the other ingredients are easy to find dairy-free staples available in most UK supermarkets and you can see below for some of my favourite brands. I also like to use just cocoa powder for both the cupcake batter and the buttercream as I find true dairy-free chocolate which is great for baking sometimes tricky to find.
No special equipment is needed for this recipe, they mix up just fine using one bowl and a hand mixer. They bake really quickly and the buttercream is an absolute cinch to make. I’ll give you the best tips on how to decorate these easily, with or without a piping bag and how to manage the plant-based ingredients which can be more temperamental.

Why You’ll Love These Gluten-Free Vegan Chocolate Cupcakes
- Moist bakery style texture and crucially hold together perfectly with no crumbling!
- Very rich chocolatey flavour using cocoa powder (rather than chocolate).
- Gorgeous rise so they really look the part.
- Dairy-free, egg-free, gluten-free, nut-free and soy-free (phew!) so safe for a wide range of allergies.
- Made using my Homemade Gluten-Free Flour Blend (FTL Blend) so if you have a batch of this already made you will find this recipe very quick and easy.
- No xanthan gum needed.
Watch the Video
Sometimes it helps to see a visual of what I'm talking about. So watch the video to see what it looks like to make your Vegan Gluten-Free Chocolate Cupcakes.
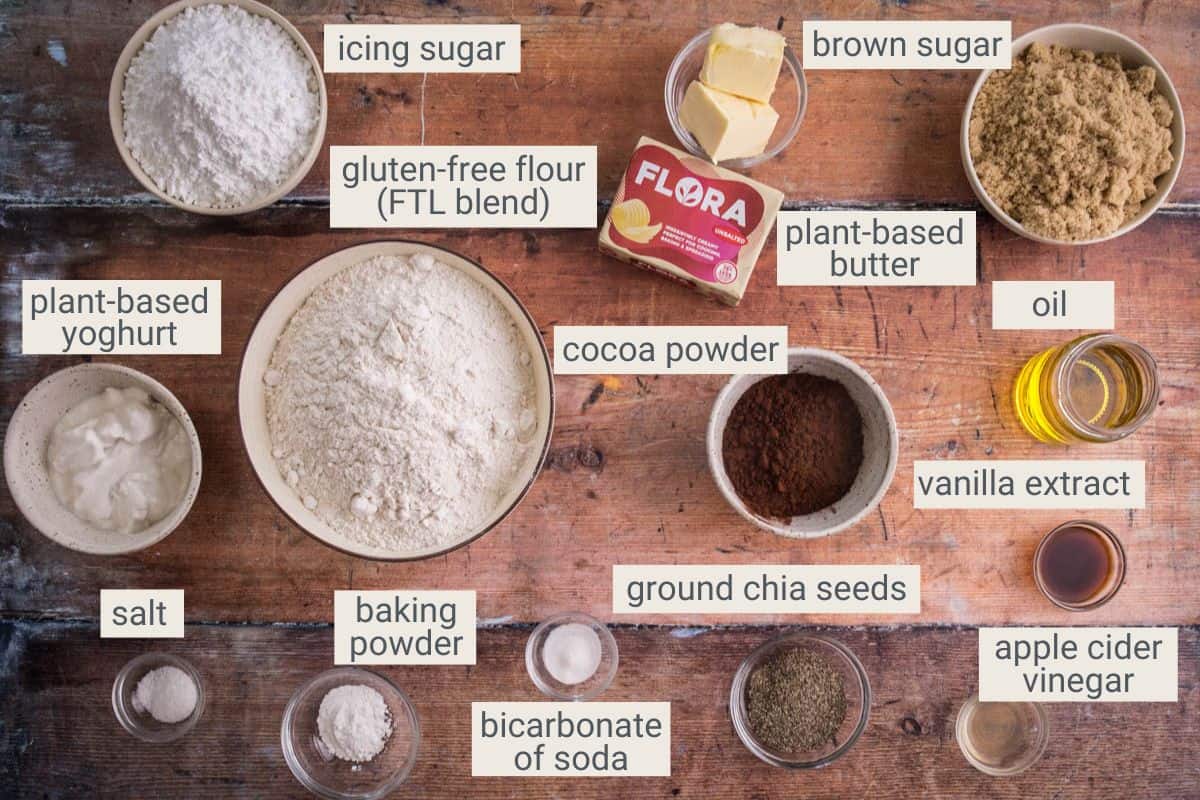
Ingredients Needed
Chocolate Cupcakes
Gluten-Free Flour – FTL Blend. This recipe uses my Homemade Gluten-Free All Purpose Flour which works really well here as the flour ratio has been carefully tested to ensure the mix between wholegrain flours and starchy flours is balanced. This also means we don’t need to use xanthan gum as the blend is strong enough and produces a well-structured and textured bake which can hold together without needing any extra binders.This flour blend is a mix of 4 different flours: sweet rice flour (glutinous rice flour), sorghum flour, oat flour, tapioca flour (tapioca starch).
Cocoa powder. Choose a high quality organic brand if possible. This recipe was tested with Dutch-processed cocoa powder which means it has been treated with an alkalizing agent to neutralize its acidity. This is the more common type in the UK – but do check the labels to make sure it is safe for your allergies. I find the best cocoa powder for vegan cupcakes should be quite rich, especially here where we are only using cocoa powder and not chocolate. Choose a brand which is quite dark in colour (I have been using a supermarket own brand which works very well) so you can have a buttercream with a strong chocolate colour. But honestly, use the brand that suits your budget and is available to you. Most UK brands (and supermarket own brands) work well, just make sure to check the ingredients always.
Olive oil. This is my preferred oil in cakes rather than vegetable oil or coconut oil. But to avoid a strong flavour use a flavourless mild and light olive oil.
Light Soft Brown Sugar. Using brown sugar adds a gentle molasses flavour and moisture to the batter, enhancing the depth of taste and providing a subtle caramel undertone, contributing to a more flavourful and moist bake.
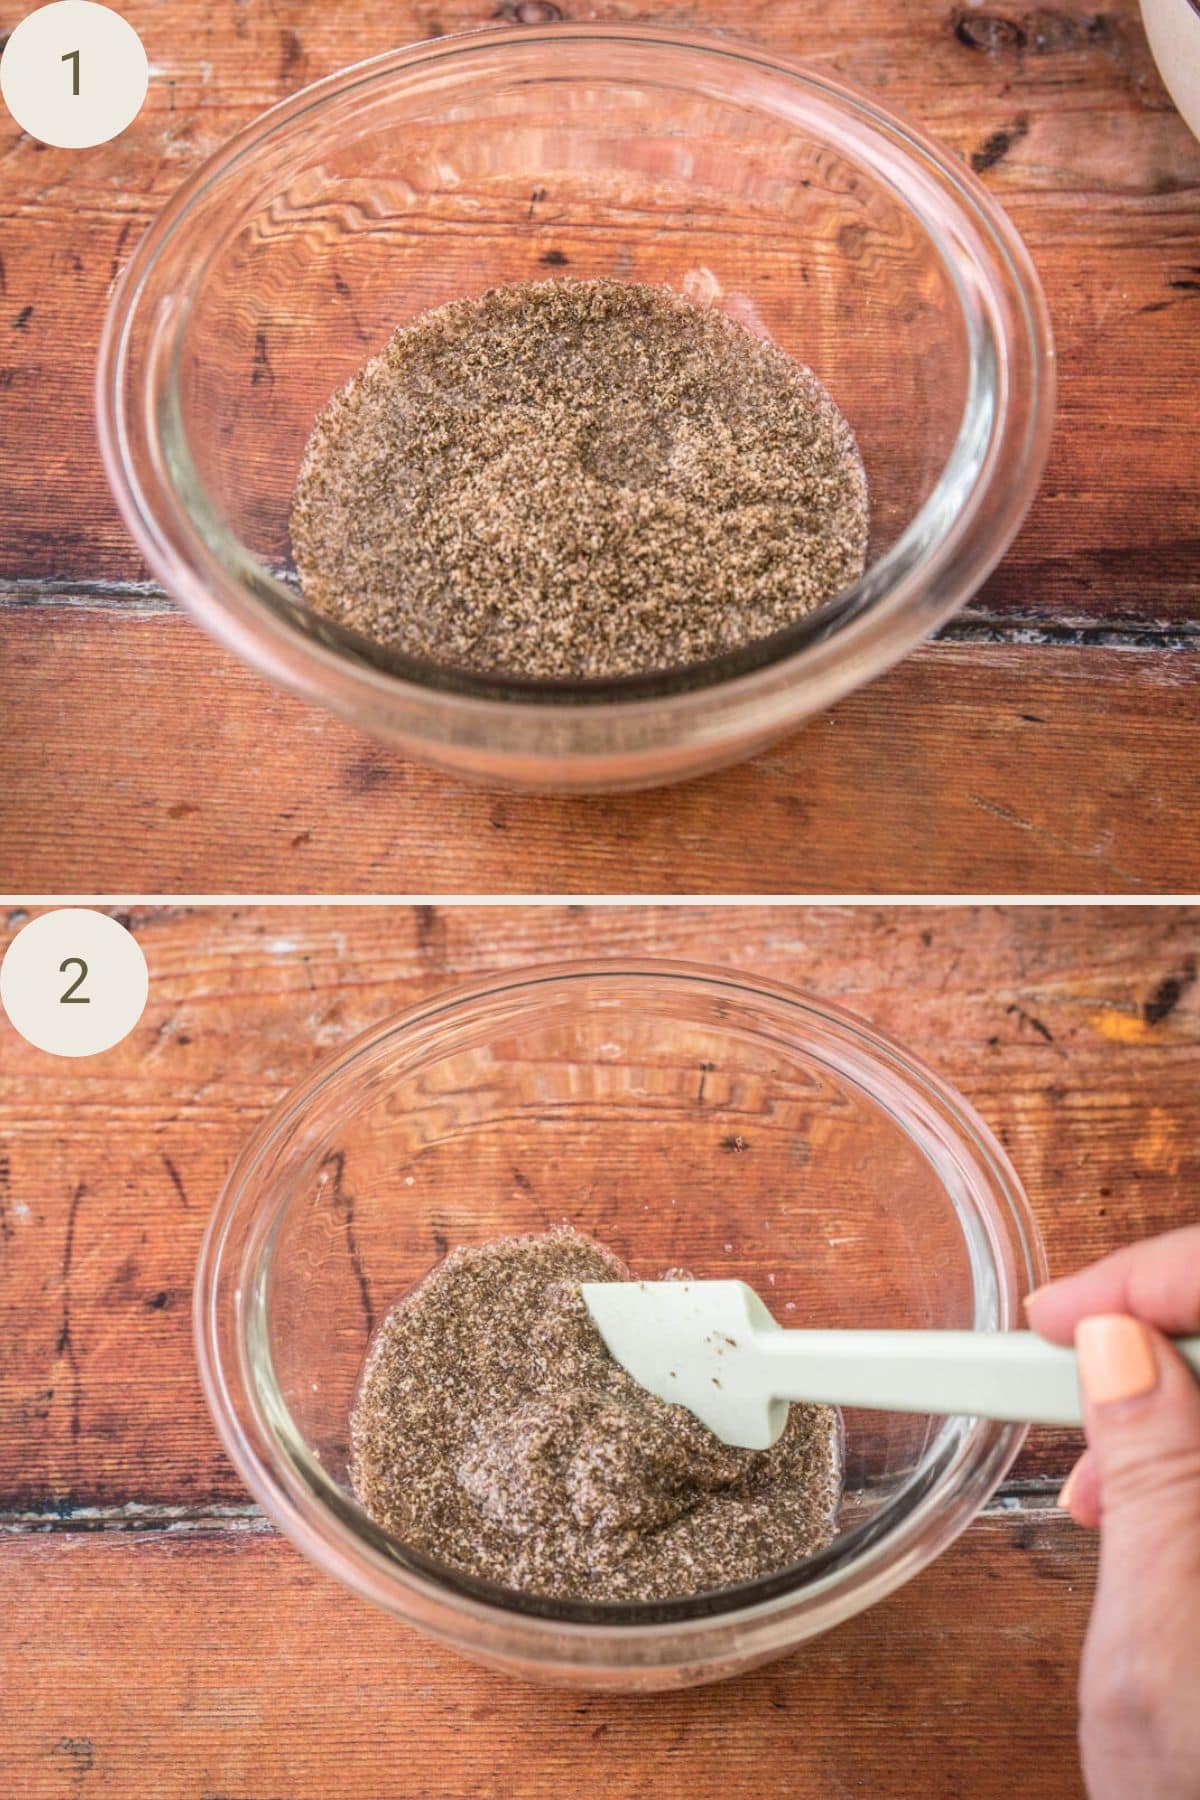
Milled (ground) chia seeds. Chia seeds are great to use in vegan recipes lieu of eggs as they absorb moisture and form a gel-like consistency when mixed with liquid (in this case – water), which means the sponge has a little more elasticity and a moist and tender texture. I prefer using milled chia seeds in my baking recipes as they are not as noticeable in the finished recipe and breaking them down allows them to be mixed more evenly into the cake batter.
Plant-based yoghurt. This recipe was made with The Coconut Collab’s Natural Yoghurt. It adds moisture, tenderness, and a subtle tangy flavour while contributing to the overall richness of the batter.
Vanilla extract. You don’t need to use the best quality vanilla extract here as there's already a lot going on with the flavours and it won't make a difference. A supermarket brand is just fine.
Apple cider vinegar. The acidity in the vinegar reacts with the bicarbonate of soda to help with the rise which is perfect for egg-free baking.
Baking powder. A leaving agent which causes the cake to rise and become light and fluffy. Do check your baking powder is gluten-free before use.
Bicarbonate of soda. Also known as baking soda, this is a white crystalline powder that is commonly used as a leavening agent in baking.
Salt. I like to use kosher salt in my baking as it has a round gentle flavour. Using salt in your baked goods lifts and sharpens all the other flavours.
Vegan Gluten-Free Chocolate Buttercream
Icing sugar. (powdered sugar). Icing sugar is preferred over white sugar in buttercream because it dissolves more easily, resulting in a smoother and less grainy texture, while also contributing to the desired consistency and sweetness of the buttercream.
Plant-based butter. I use the Flora Unsalted Block Butter Alternative for this buttercream. This recipe hasn’t been tested with an alternative but it’s quite a forgiving buttercream recipe so if you are confident in your usual dairy-free butter brand that it is suitable for buttercreams then you are welcome to use an alternative.
Cocoa powder. I choose to use cocoa powder only for this buttercream as it’s a larder staple in our house (and vegan chocolate isn’t), it keeps the cost down as well as vegan chocolate can be expensive. Plus it helps keep the buttercream more stable as the plant-based butter doesn’t hold its structure as well as real butter.
Vanilla extract. Again, like the cupcake itself I just use a supermarket own brand here as it’s just to enhance the cocoa not the main flavour.
Salt. A pinch of salt really helps offset the sweetness, I use kosher salt for its gentle flavour.
Dairy-free chocolate. (not pictured) I just use a little of this to create the chocolate curls to decorate the cupcakes. Totally optional.
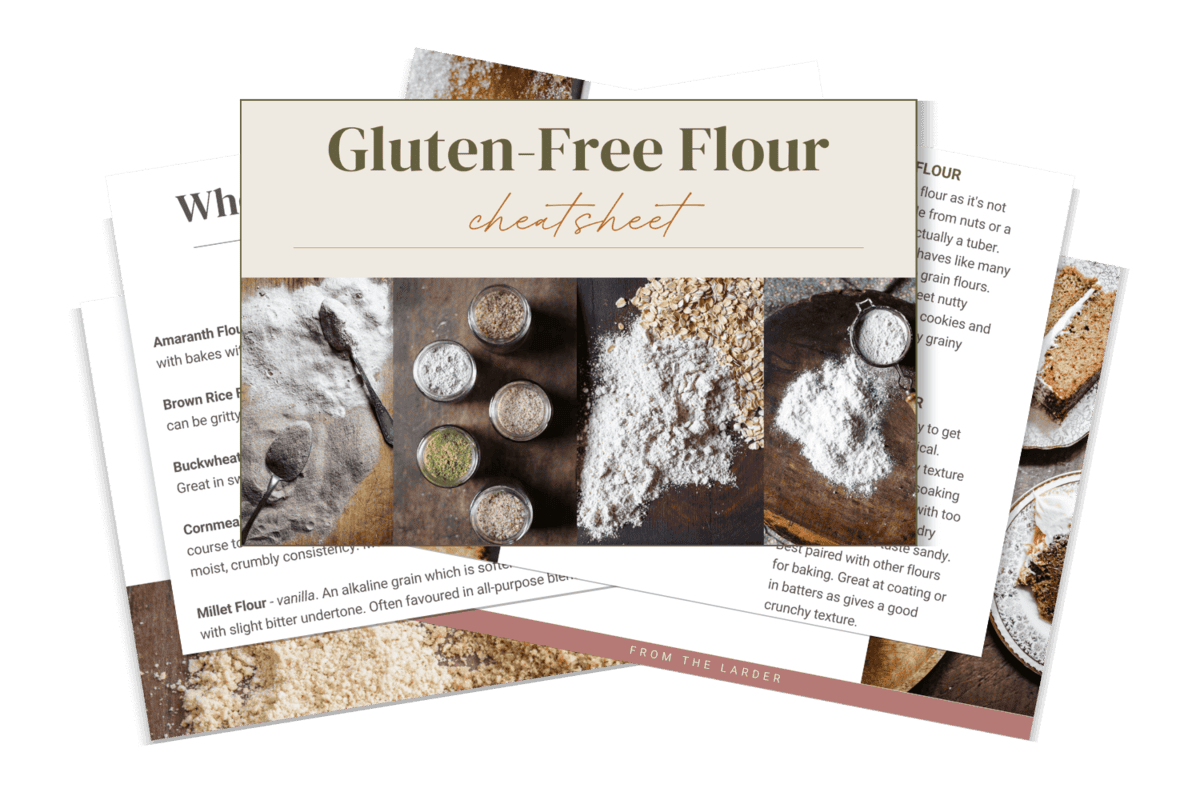
Gluten-Free Flour Cheatsheet
The Gluten-Free Flour Cheatsheet makes choosing the right flour easy, breaking down every option from sorghum to cassava into four simple categories. With nutritional info, flavour pairings, and a printable reference section, this guide cuts through the confusion so you can navigate gluten-free baking with clear flour choices.
Equipment Needed
All of these items are helpful for a smooth baking process, but you can easily substitute with whatever you have on hand.
- 1 large mixing bowl.
- Electric mixer (or whisk). Optional. If you have a stand mixer then they are great to use too.
- Silicone spatula for scraping the bowl.
- Trigger-release ice cream scoop to fill your cupcakes cases (optional – you can just spoon it in).
- 12-hole regular muffin tin for baking the cupcakes.
- Large cupcake liners (often called muffin liners). They measure 2 inches (5cm) at the base of of the liner and are about 1.25 inches (4cm) tall. I used these brown muffin cases.
- Wire rack for cooling the cupcakes.
- Sieve for sifting cocoa powder and icing sugar.
- Offset spatula / knife / teaspoon / piping bag and piping tip for applying buttercream.
Step-By-Step Method
For full recipe instructions go to the recipe card at the end of this post.
Making the Chia Egg: Mix chia seeds with water and set aside to gel.
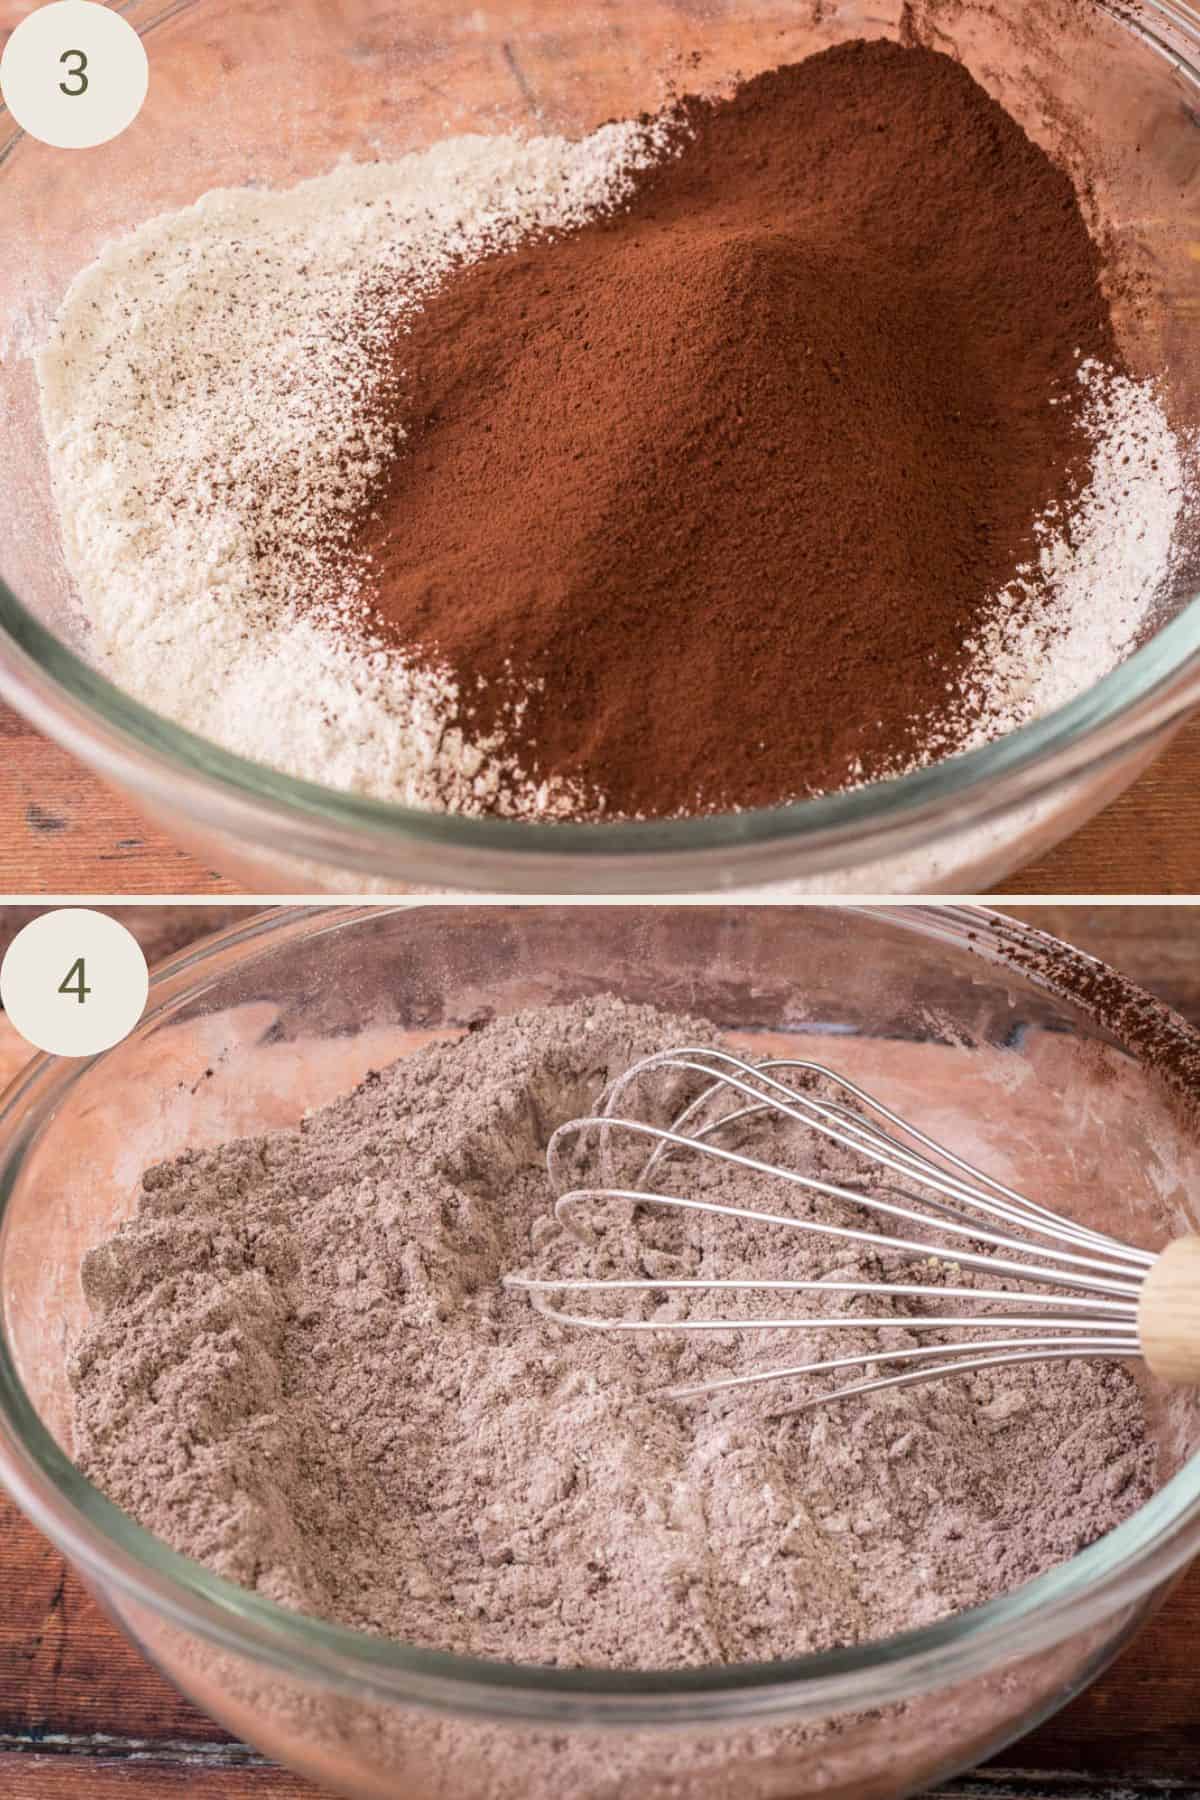
Dry Ingredients: In a large bowl, sift flour, cocoa, baking powder, bicarb, and salt.
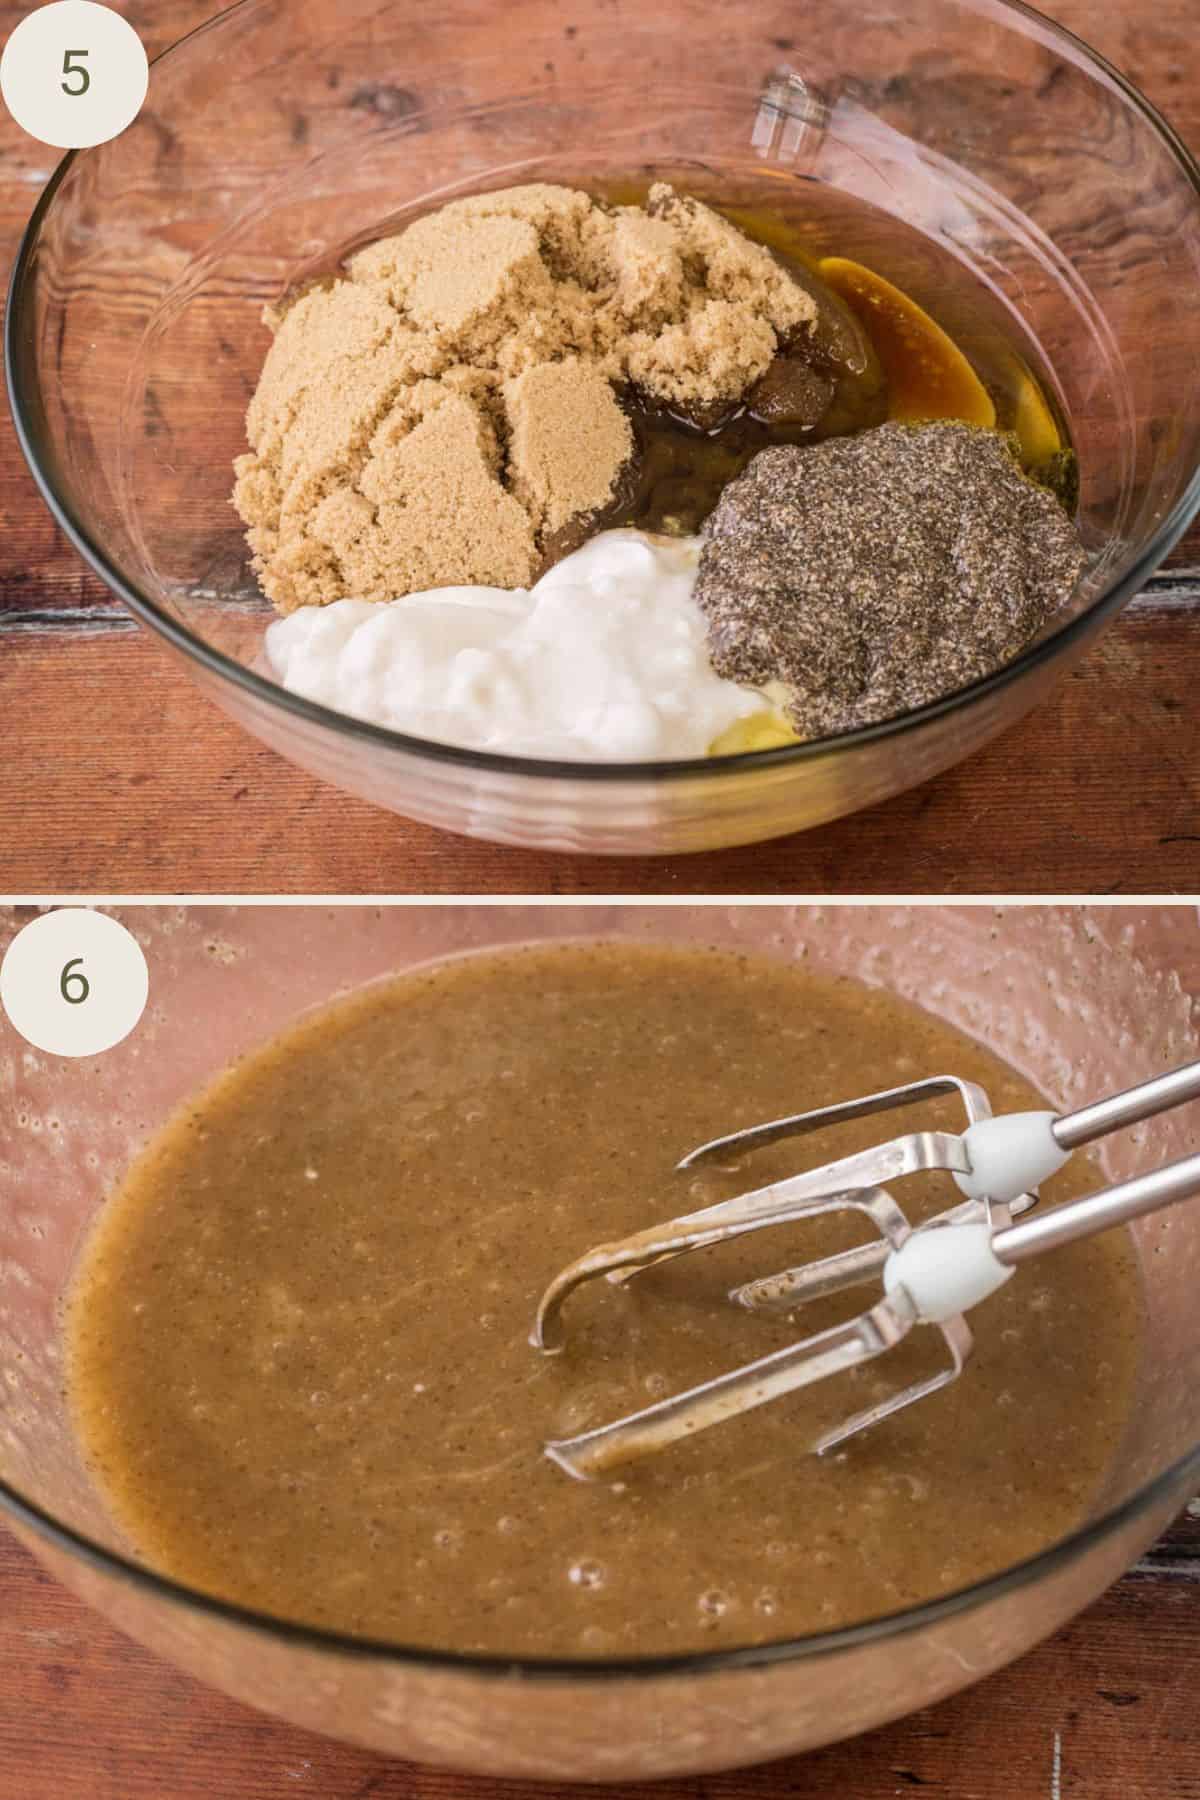
Wet Ingredients: In another large bowl, whisk oil, sugar, chia gel, yoghurt, vinegar, and vanilla.
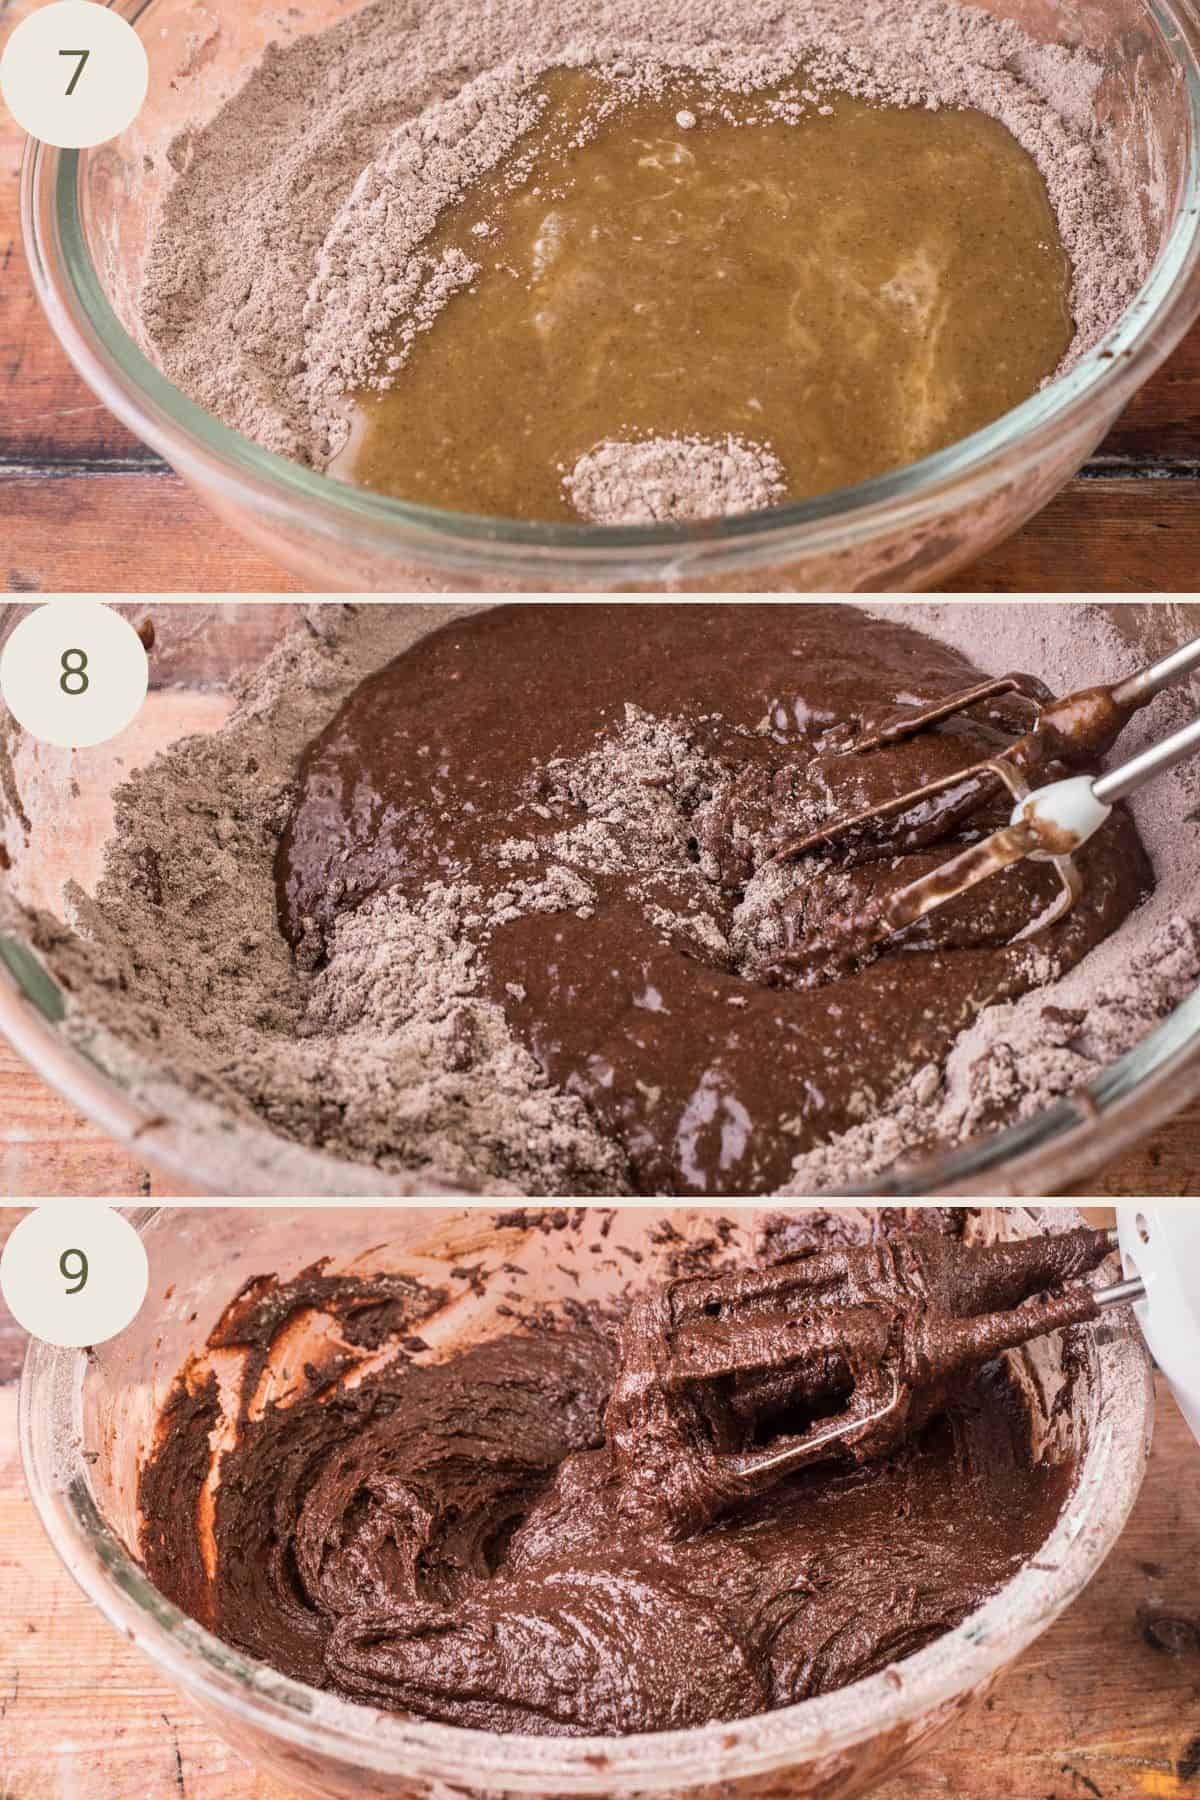
Combining Wet & Dry Ingredients: Mix wet ingredients into the dry ingredients until just fully combined.
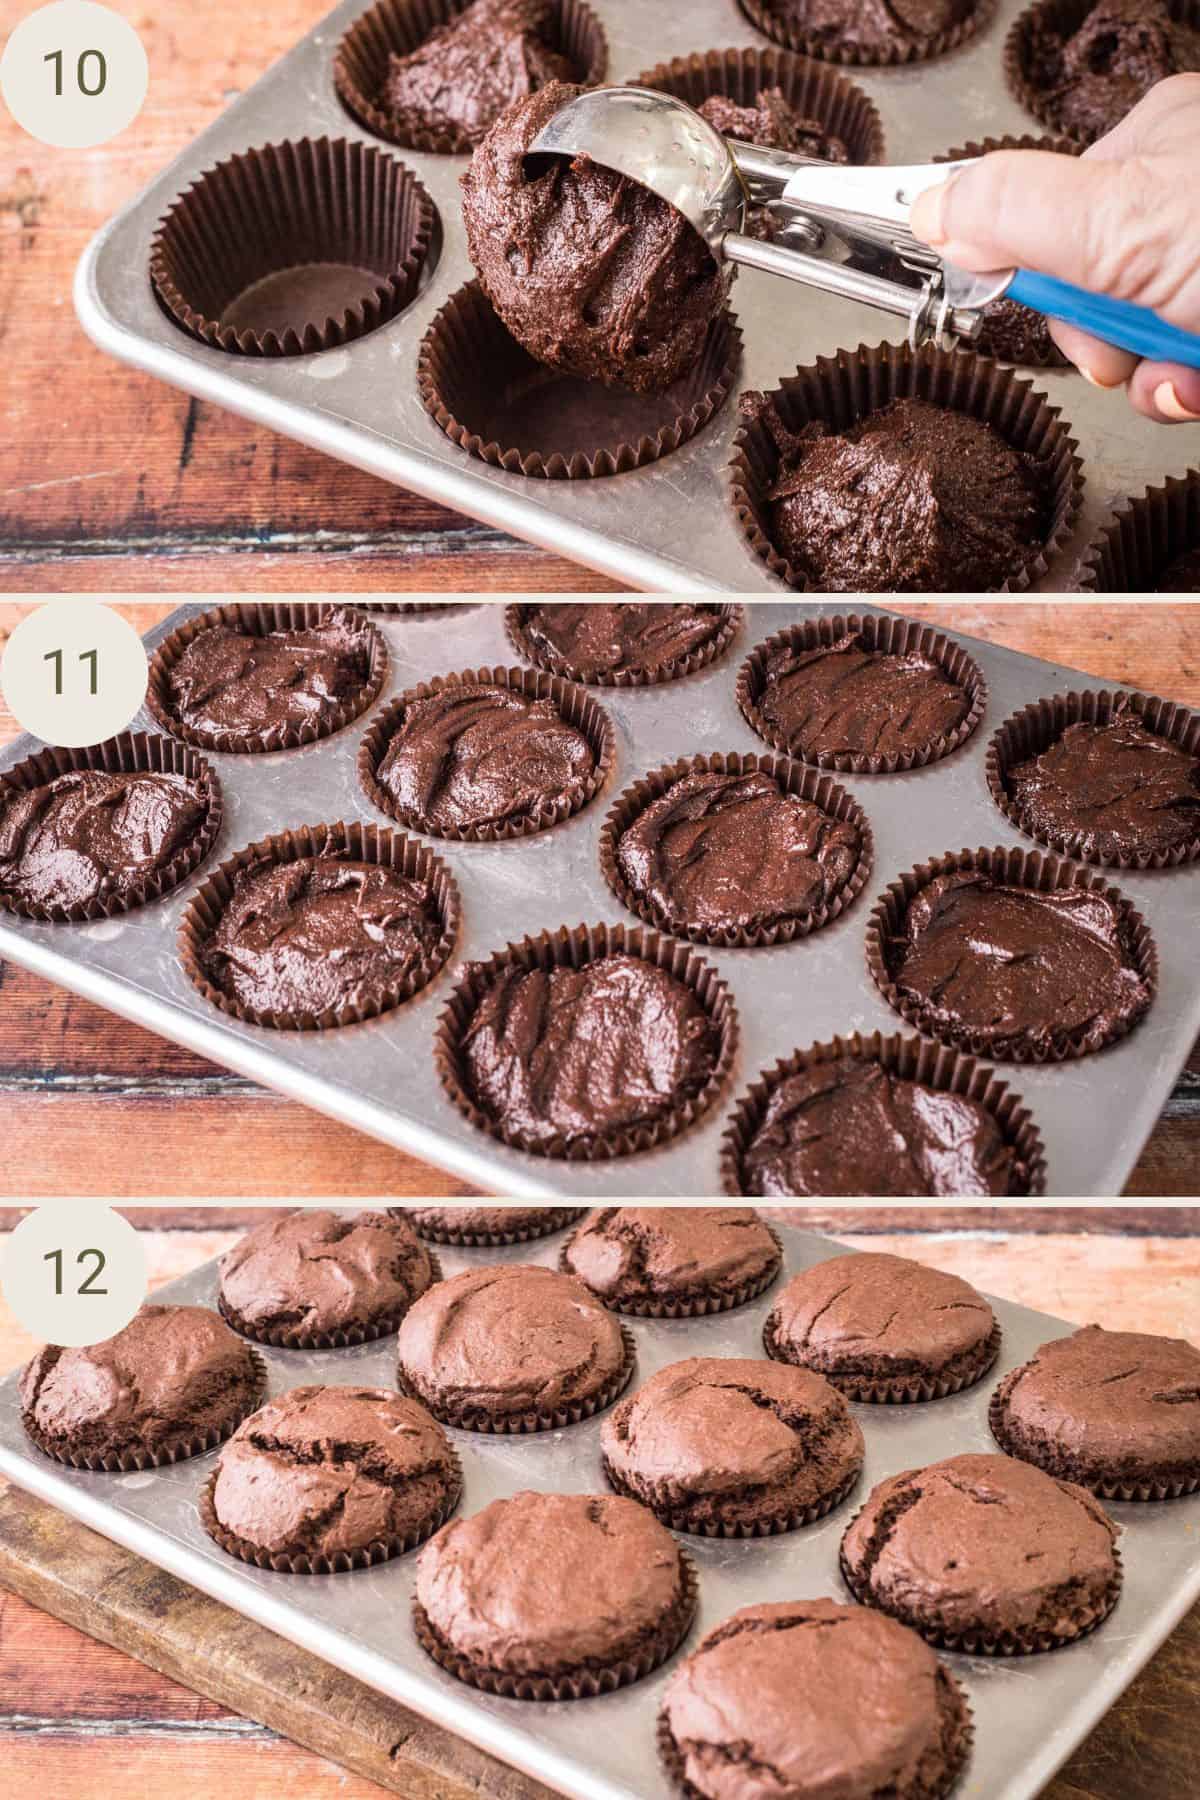
Fill Cases & Bake: Divide batter between cases and bake for 25 mins.
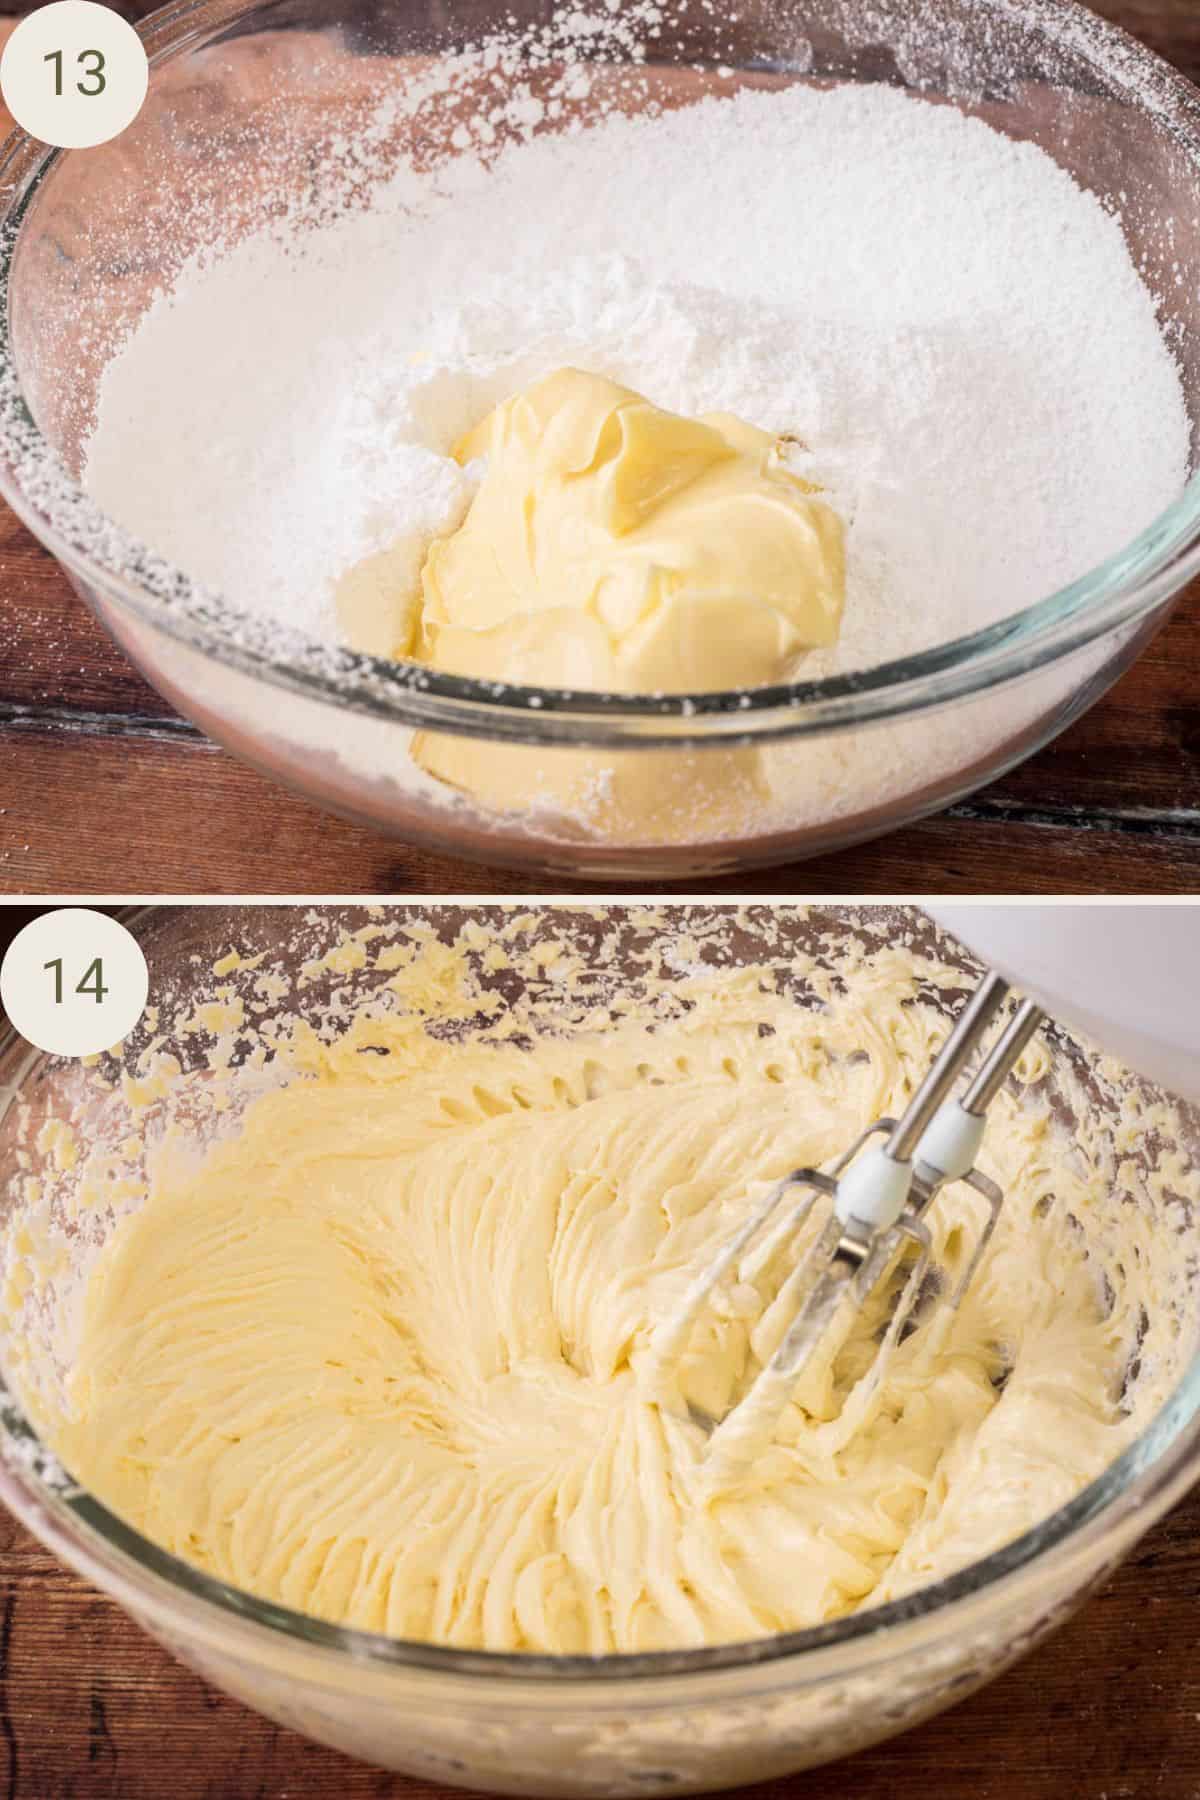
Buttercream: Beat plant based butter with icing sugar until creamy.
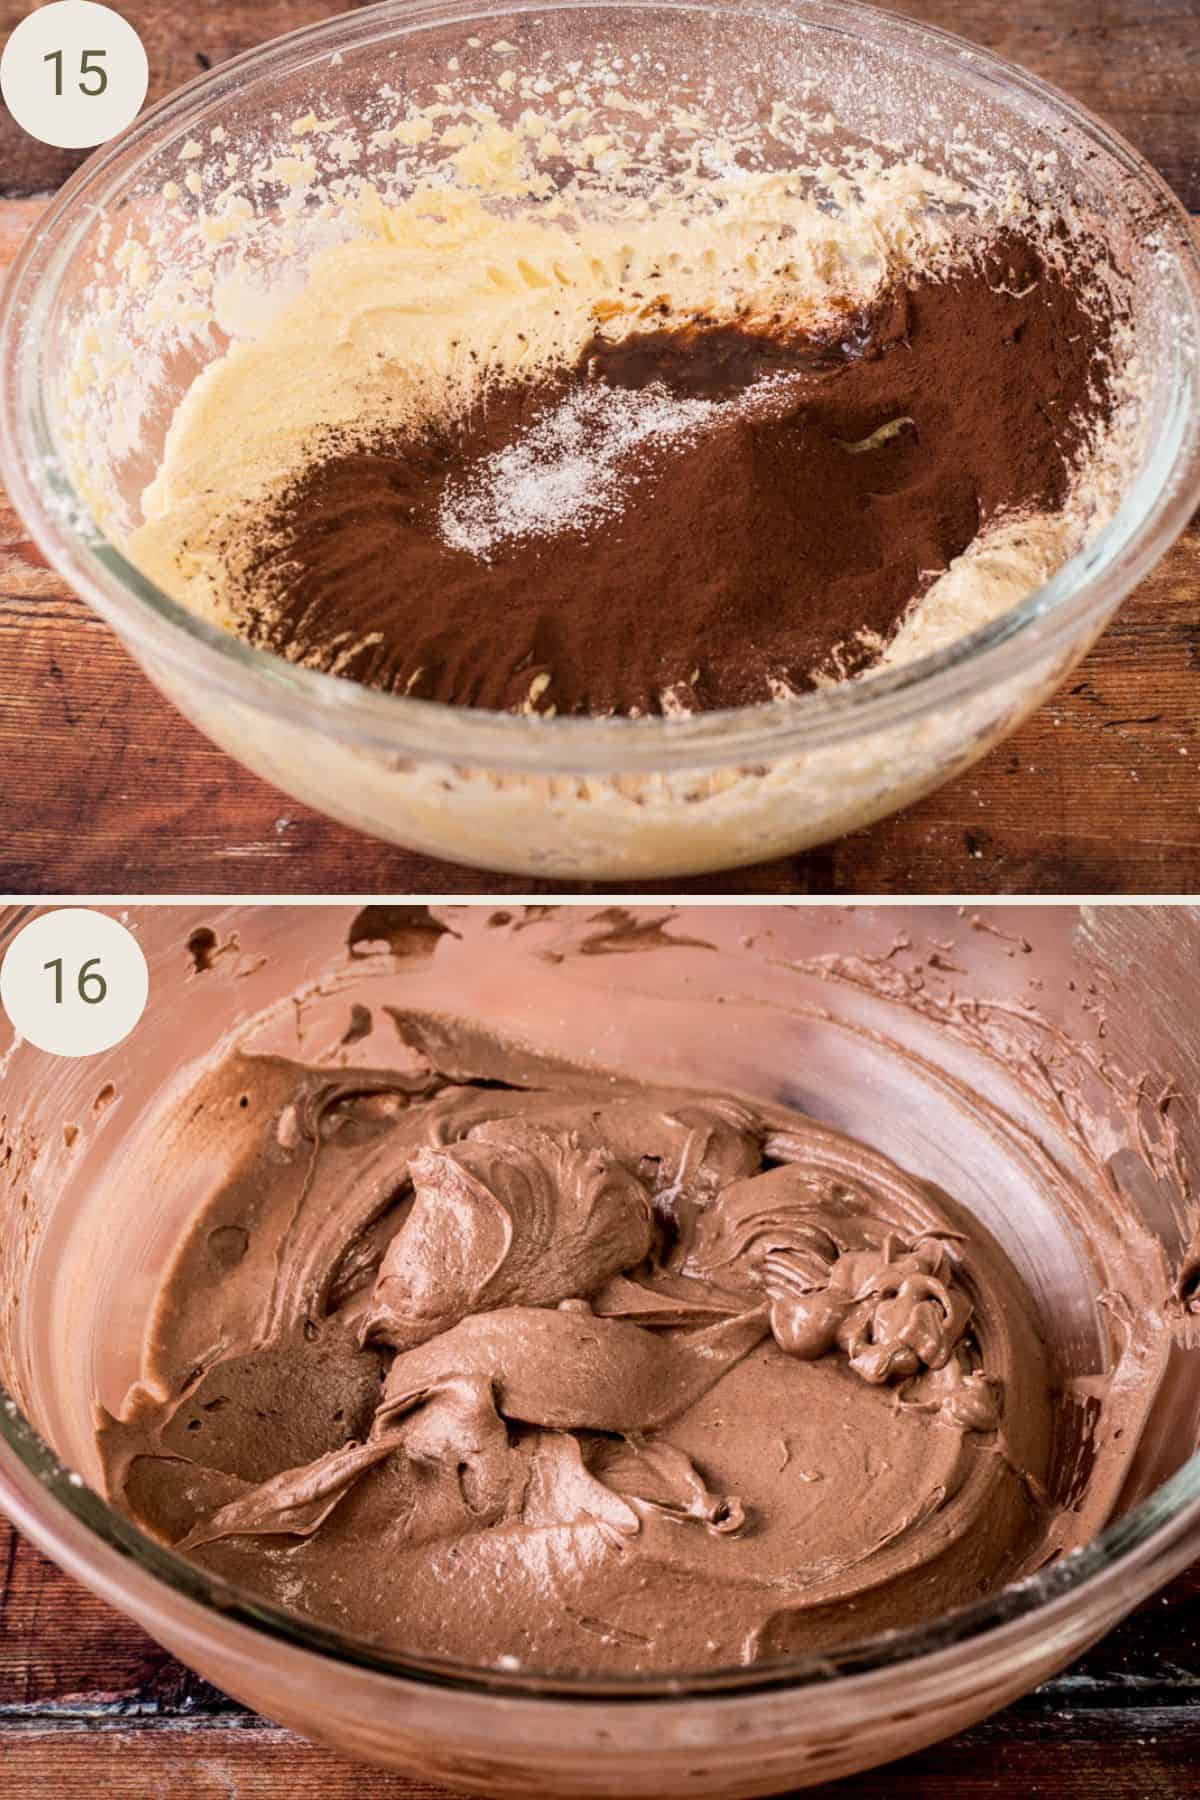
Sift in cocoa powder, vanilla and salt and beat again until light and fluffy. Use to frost the cooled cupcakes.
Expert Tips
The cupcake cases you choose do matter. They need to be the correct size and the better quality cases will improve the way your little cakes bake and help them stick to the cases. You don’t want them peeling away as they are cooling. This recipe is for a standard sized cupcake and the liners measure 2 inches (5cm) at the base of of the liner and are about 1.25 inches (4cm) tall. I used these brown muffin cases.
The cake batter is thick. Scoop the batter evenly into the cupcake cases, then smooth down the tops so they bake evenly.
Insert a skewer into the cupcakes to check they are done – it shouldn’t have any wet crumbs on when you remove it from the centre of your cupcakes.
Remove cupcakes from the tin as soon as they are baked.
Allow them to cool thoroughly before applying the buttercream frosting.
I have found plant-based butter to be more unstable than dairy butter. It melts quickly and doesn’t whip as firm. Bear this in mind when bringing your dairy-free butter to room temperature. If you have the time (and if your buttercream is a bit loose after whipping) then chill in the fridge for 30 minutes – 1 hour before briefly re-whipping and piping.
Always sift your cocoa powder and icing sugar. Believe me, when I can’t be bothered I always regret it (especially with the buttercream as you don’t want lumps!)
Work quickly when using this buttercream, make sure not to leave it out warming up on the side otherwise it will be too runny to use.
Your buttercream is the right consistency to use when you scoop some up with a spoon and hold the spoon on its side. The buttercream should take between 3-5 seconds to drop off the spoon.
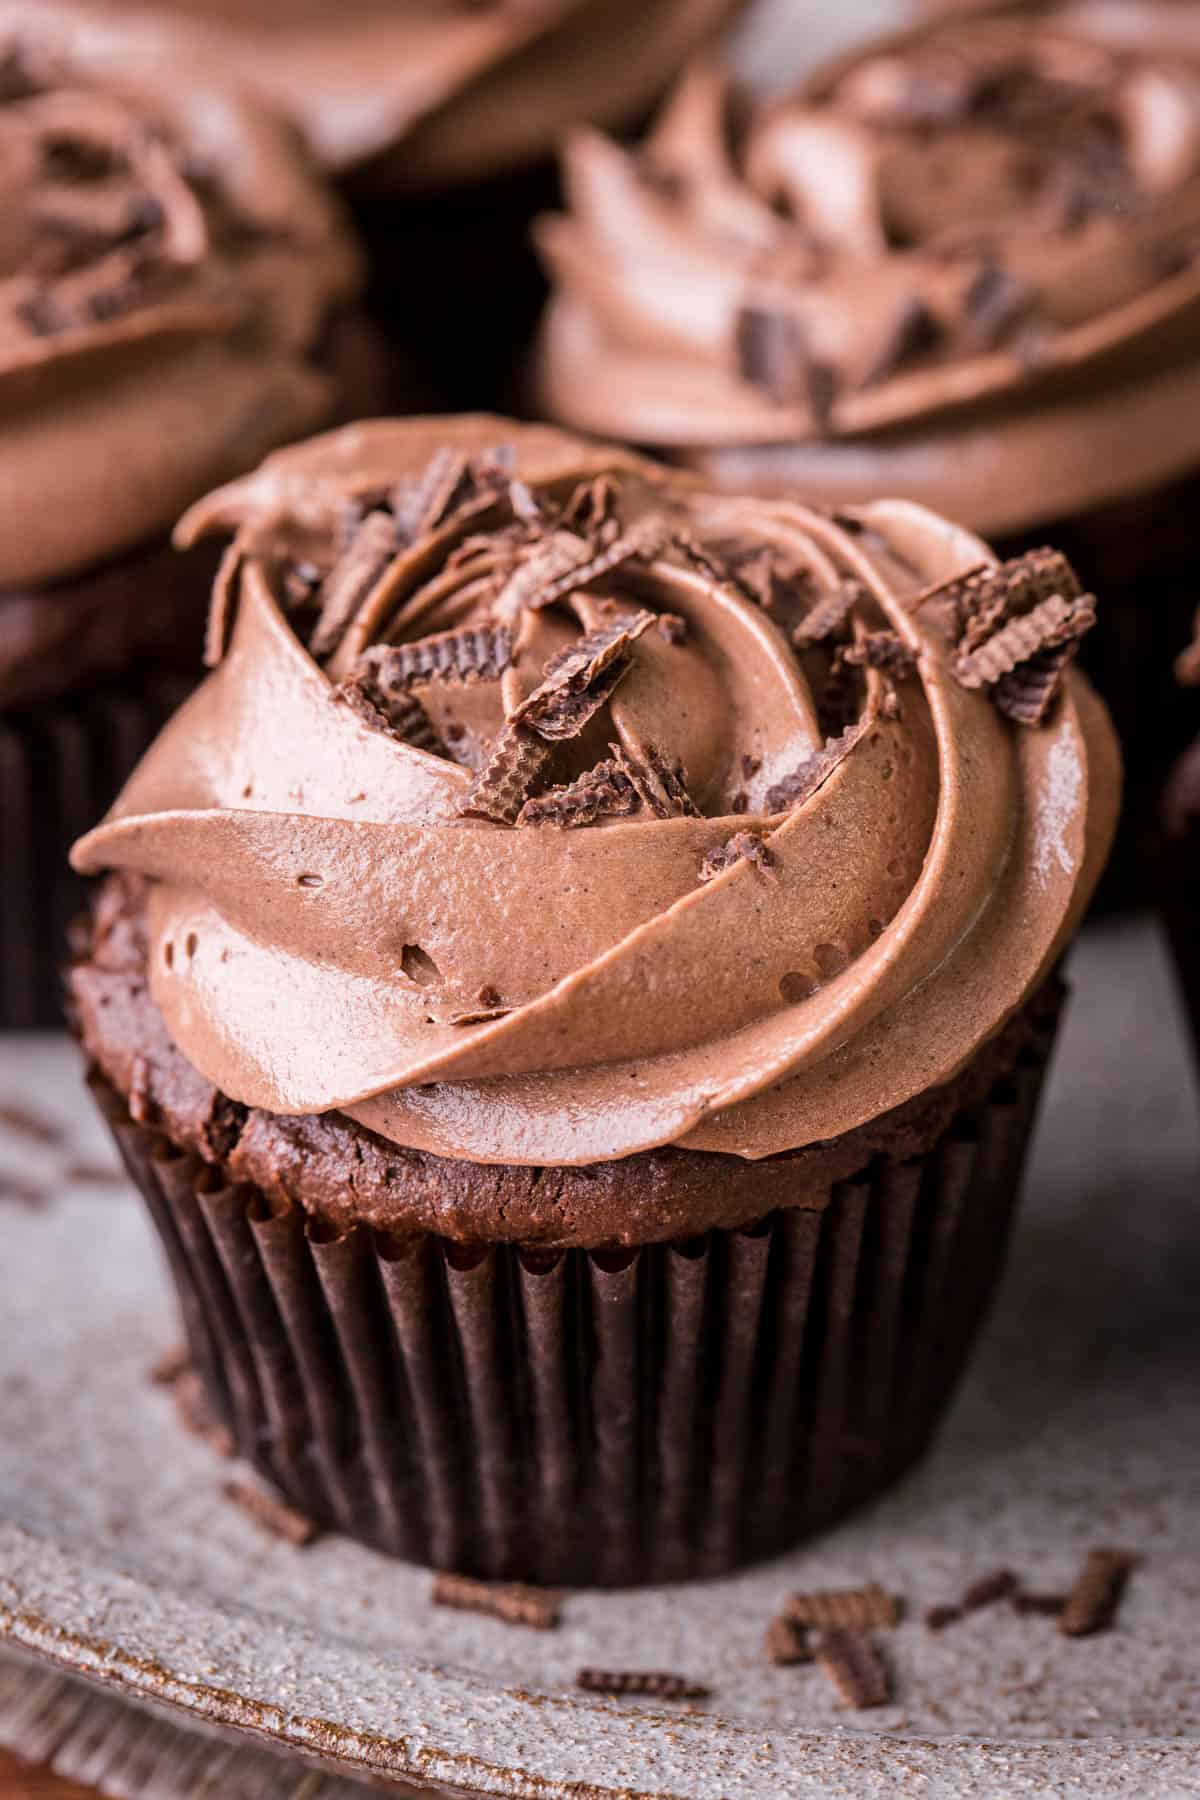
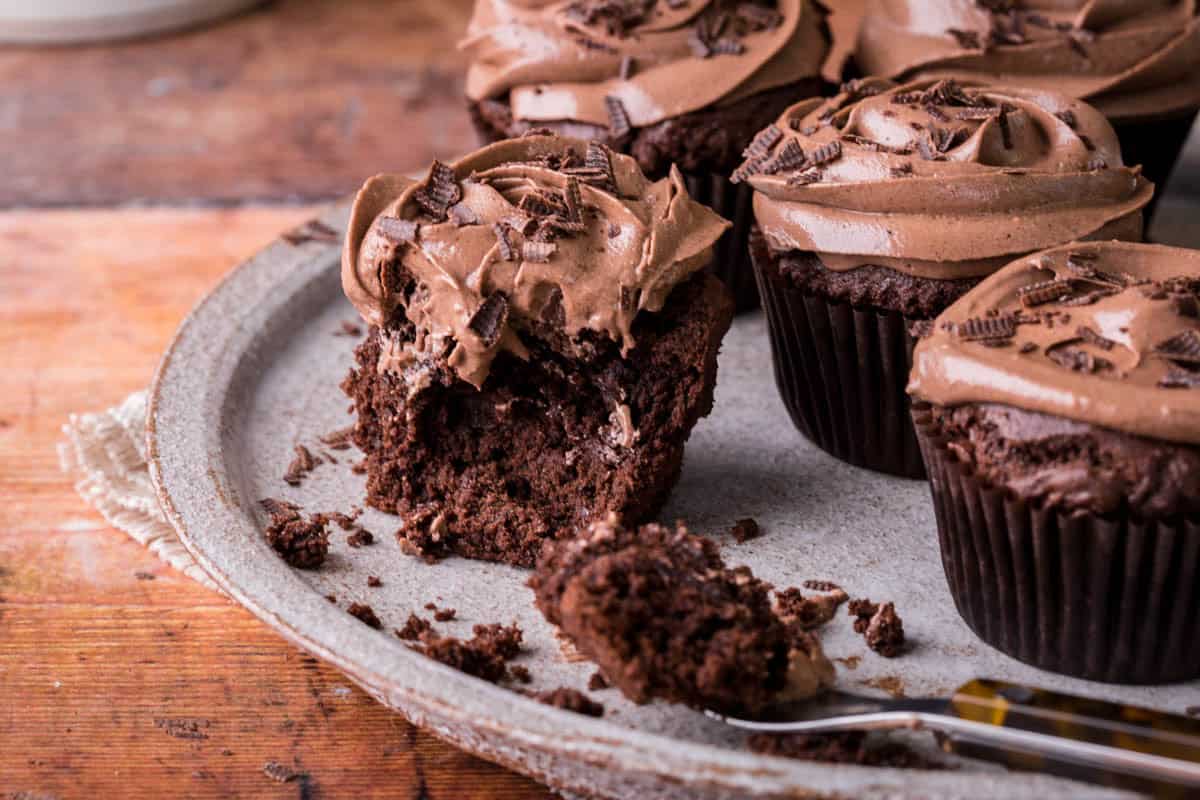
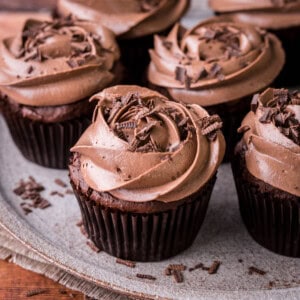
The chocolate curls that you can sprinkle over the buttercream piping are optional but they are a nice touch. To make chocolate curls, gently scrape a bar of dairy-free chocolate (at the thin edge) with a vegetable peeler using long, steady strokes.
Easy Cupcake Decorating Tips
Teaspoon Method
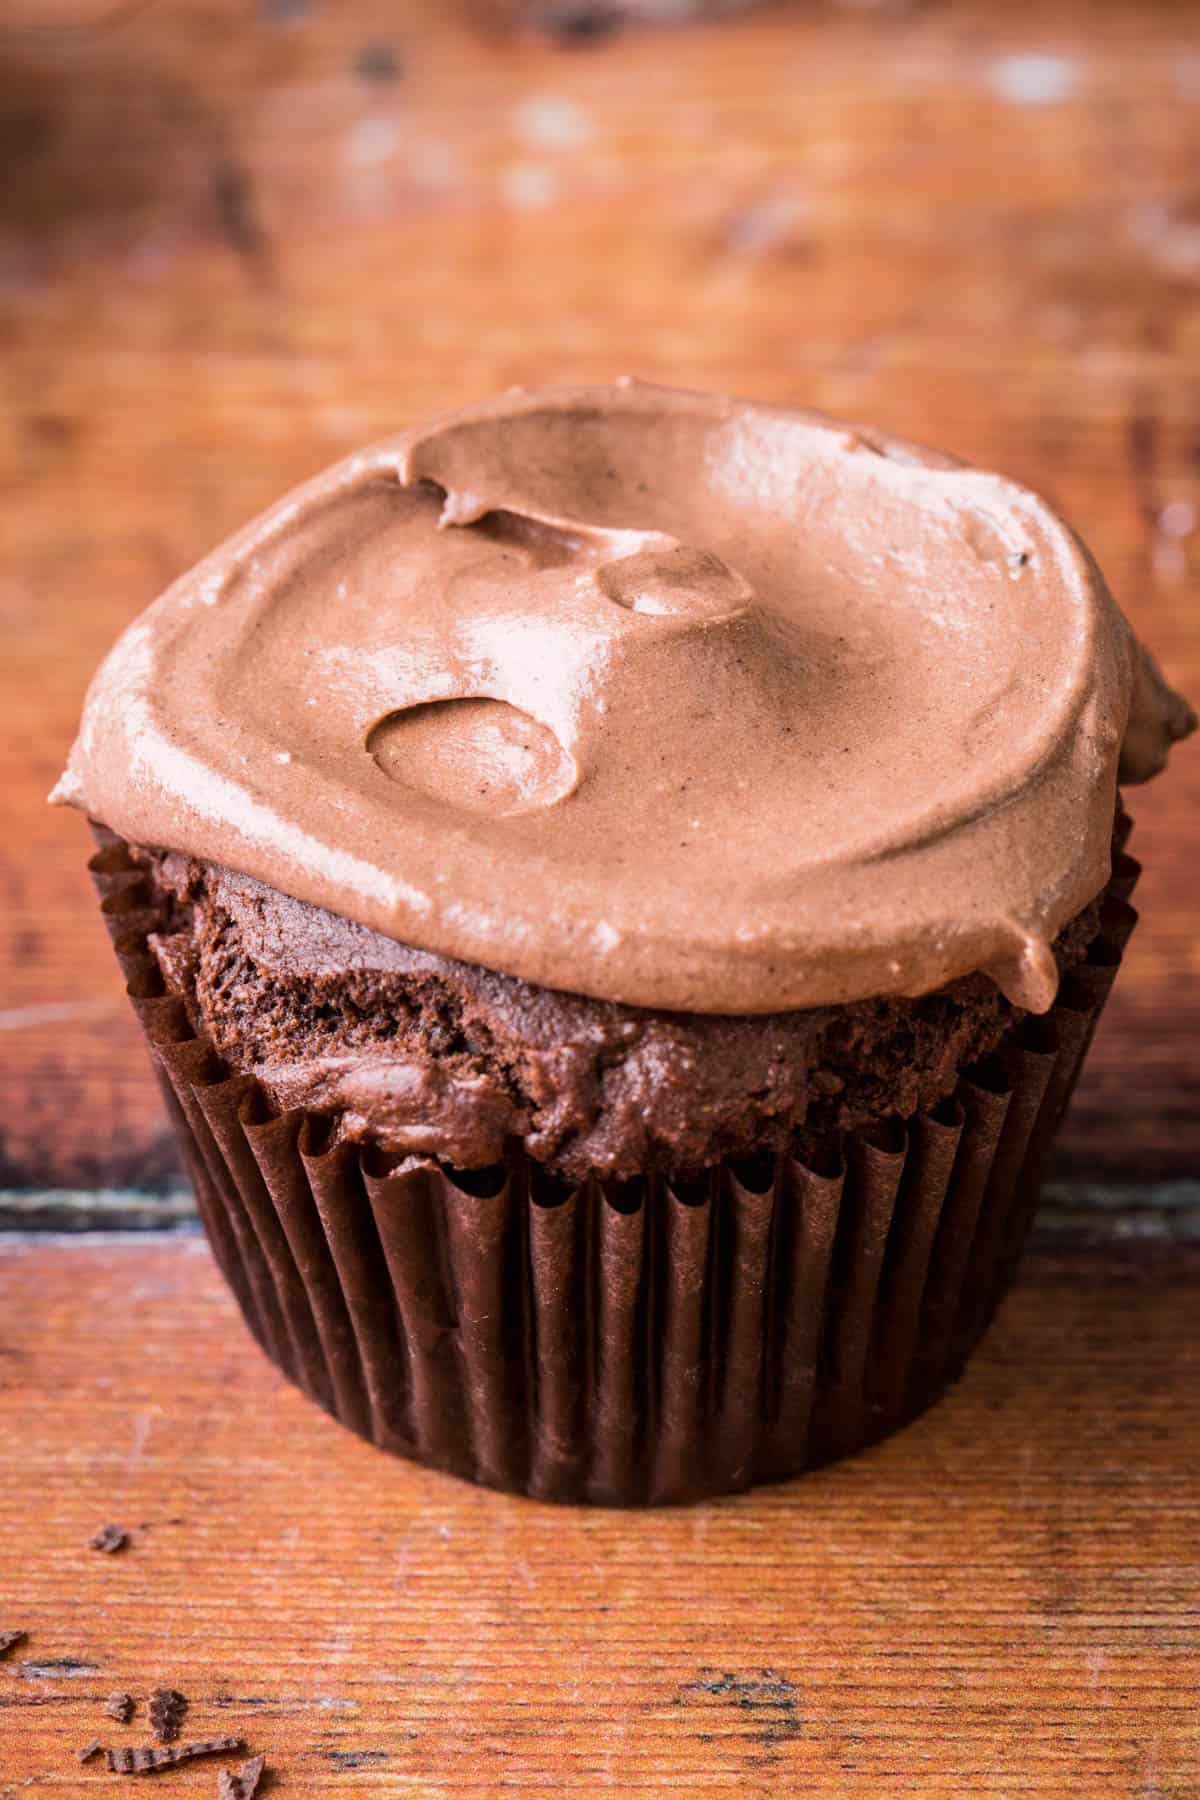
I decorated these in the image above without a piping bag and just a teaspoon to show you how easy it is to decorate these cupcakes without all the fancy equipment.
Just scoop a heaped teaspoon of buttercream onto the centre of each cupcake and use the back of the teaspoon to push the buttercream out towards the edges.
Piping Tips
If you only want to buy a couple of piping tip then my favourites are the open star piping tip 1M and the closed star piping tip 2D as you can use them to pipe so many different basic patterns. Although my 2D gets the most use.
Make sure you choose metal tips over plastic tips which will give much better results.
Here’s the two easiest techniques which you can do using either piping tip (although I prefer the look of the 2D with deeper more defined swirls which is the tip I used for these images):
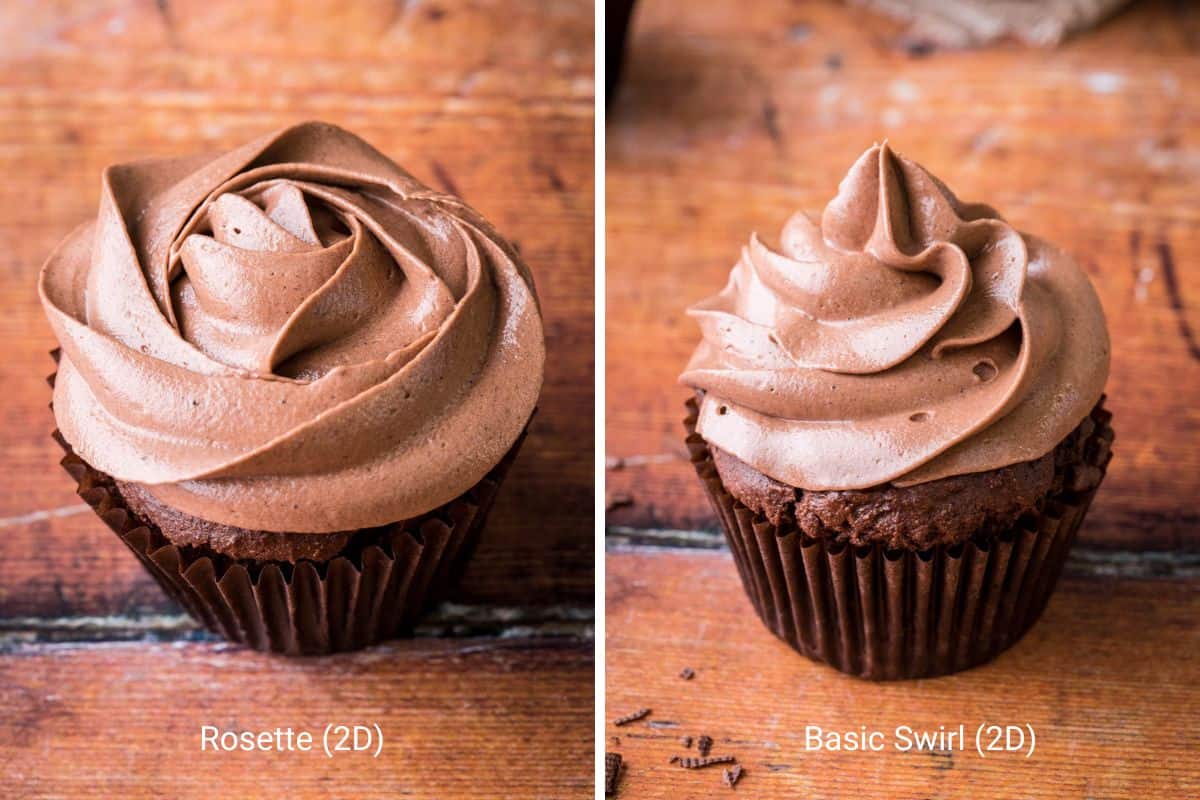
- Rosette. I think that this piping technique is easier to master than the basic swirl and looks more fancy. Start piping from the centre of the cupcake outwards in concentric circles until you reach the edges of the buttercream. Don’t pipe up, keep it all on one level. This technique uses less buttercream than the basic swirl.
- Basic Swirl. Start piping from the outside edge of the cupcake and pipe in concentric circles towards the centre of the cupcake, gently moving your piping bag up so the buttercream pipes high and swirly.
Just remember..
- Fill your piping bag then twist the end closed. Hold your piping bag with your dominant hand at this twist. All the buttercream is underneath your hand and you squeeze the bag from this position pushing the buttercream down gently and slowly. You can use your other hand to hold the bag steady nearer the tip if you like.
- Hold your piping bag directly above the cupcake and pointing down (not at an angle). It shouldn’t be touching the surface of the cake.
- Move the bag gently and slowly. I know I said that already but don’t rush it.
- And if you don’t have a piping bag then you can fashion something out of a ziplock bag but to be honest I find it a bit of a faff. It’s easier in this instance to just use the teaspoon method.
- If you are using the chocolate curls on top - they will cover any uneven piping and always make them look a little more pro.
FAQs
No you don’t and I have made these plenty of times without. However, this is a thick cake batter and when I use my electric hand mixer it is a lot stiffer to mix (which you can see in the video). So if you have a stand mixer you may find it easier to combine the ingredients but if not then don’t worry.
Store unfrosted cupcakes at room temperature in an airtight container in a cool dark place until ready for frosting. Once frosted with the buttercream you should store the cupcakes in the fridge until needed. Make sure the sponge cake is completely covered with the buttercream to avoid the cake drying out too much.
I recommend freezing the cupcakes prior to frosting. Allow to cool completely then store in a ziplock bag / airtight container for up to 3 months. They will thaw in 1-2 hours at room temperature.
This recipe is for a standard sized cupcake and the liners measure 2 inches (5cm) at the base of of the liner and are about 1.25 inches (4cm) tall. I used these brown muffin cases.
Use a 12-hole regular muffin tin or cupcake tin. I recommend using an aluminium baking tin which gives more even baking results. The one used in testing this recipe is 24.46 x 33.02 x 3.18 cm.
Recipe Variations
Vegan Chocolate Ganache. It’s totally viable to switch out the buttercream for a chocolate ganache topping. It’s a richer alternative and I prefer it if I’m serving the cupcakes to adults (I mean kids enjoy both but the ganache can be a more expensive option due to the price of vegan chocolate). Gently stir together 150g chopped dairy-free dark chocolate and 120ml hot full-fat coconut milk until smooth and glossy, then let cool until it’s thicken enough to onto the cupcakes.
Nutella-Style Chocolate Centre. Choose a dairy-free Nutella-style chocolate spread. Remove a little of the chocolate sponge centre from each baked and cooled cupcake using an apple corer. Spoon a teaspoon of the chocolate spread inside each cupcake, replace the removed sponge back on top and decorate with buttercream.
Chocolate Orange Cupcakes. Add zest of 1 orange to both the cake batter and the buttercream. Although if you have food grade orange oil then that is very nice in the buttercream as it doesn’t leave little lumpy bits of zest in the finished smooth result. Use ¼- ½ teaspoon in each. Orange extract is less concentrated and you can use about 1 – 1 ½ teaspoons. You can taste the batter before baking to ensure you are happy with the flavour.
More Vegan and Gluten-Free Cakes You’ll Love
This delicious fluffy Gluten-Free Vegan Vanilla Sponge Cake has layers of soft vanilla sponge filled with a whipped plant-based lemon cream and filled with fruity jam.
Vegan Chocolate Banana Bread with Coconut is a glorious rich gluten-free cake, intense with chocolate, chewy with coconut and beautifully moist from the banana. Covered with glossy chocolate and snowy with coconut flakes.
These soft and fluffy vegan Banana Peanut Butter Streusel Muffins are packed with flavour, sweet and nutty, and topped with a crunchy crumble—perfect for breakfast or snacking.
Enter your email below to get this recipe sent to your inbox plus get new recipes, baking tips, and updates.
Moist Vegan Gluten-Free Chocolate Cupcakes
Ingredients
- 2 tablespoons ground chia seeds
- 5 tablespoons water
- 360 g homemade gluten-free flour blend - FTL blend
- 70 g cocoa powder
- 2 teaspoons baking powder
- ¼ teaspoon bicarbonate of soda
- ½ teaspoon salt
- 300 g soft light brown sugar
- 160 g plant-based yoghurt
- 120 g olive oil
- 1 teaspoon apple cider vinegar
- 2 teaspoons vanilla extract
Dairy-Free Chocolate Buttercream Frosting
- 300 g icing sugar
- 300 g plant-based butter
- 25 g cocoa powder
- 1 teaspoon vanilla extract
- ¼ teaspoon salt
- 30 g dairy-free chocolate bar - optional – to make the chocolate curls
Instructions
- Pre-heat the oven to 180°C / 160°C fan assisted / gas mark 4 / 350°F.
- Line a 12-hole regular muffin tin with cupcake cases.
- Make the chia egg by combining the ground chia seeds with water in a small bowl. Stir, and set aside for about 5–10 minutes until the mixture thickens into a gel-like consistency.
- In a large mixing bowl, sift together the gluten-free flour blend, cocoa powder, baking powder, bicarbonate of soda, and salt. Set aside for a moment.
- In a separate bowl, whisk together the olive oil, soft light brown sugar, thickened chia mixture, plant-based yoghurt, apple cider vinegar, and vanilla extract. Mix until smooth.
- Pour the wet mixture into the dry ingredients and mix until the cake batter is thick and everything has fully incorporated
- Spoon the batter evenly into the prepared cupcake cases, smoothing down the top of the batter so the cupcakes bake evenly. Bake for 25 minutes, or until a skewer inserted into the centre of a cupcake comes out clean. Immediately transfer the cupcakes to a wire rack to cool completely before applying the buttercream frosting.
- To make the buttercream, mix the plant-based butter in a large bowl with the icing sugar until soft and creamy.
- Sift in the cocoa powder, then add the vanilla extract and salt. Start mixing on low speed to avoid a sugar cloud, then increase to medium-high and beat until fluffy and smooth. If your buttercream is too soft after mixing then place in the fridge for 30 minutes – 1 hour to firm up.
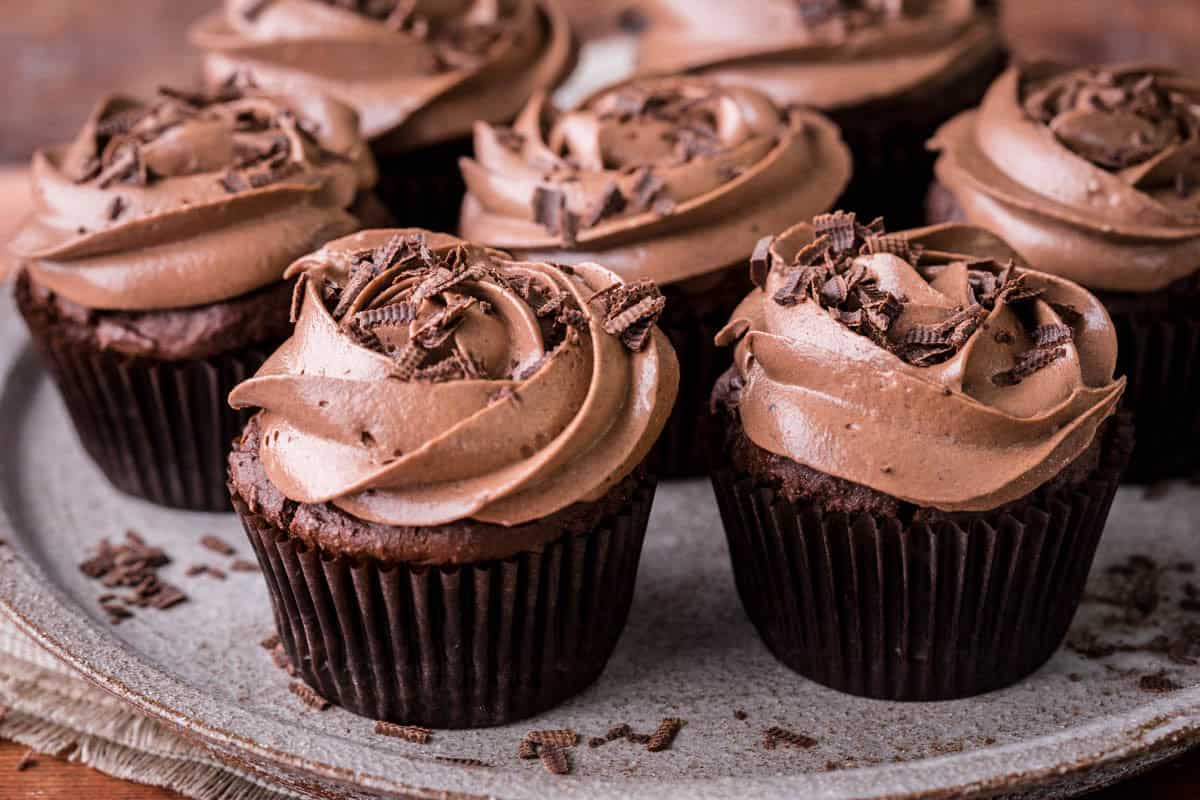
- Once the cupcakes are completely cool, pipe or spread the chocolate buttercream generously over the top. You can finish with a sprinkling of dairy-free chocolate curls if you like.
- To make the chocolate curls take the chocolate bar and, using a vegetable peeler, peel the chocolate from the thin edge. It will curl up as it falls away.
Video
Notes
- Gluten-Free Flour – FTL Blend: This recipe uses my Homemade Gluten-Free All-Purpose Flour and I don’t recommend substituting. It is a balanced mix of wholegrain and starchy flours, eliminating the need for xanthan gum. The blend includes sweet rice flour, sorghum flour, oat flour, and tapioca flour, providing structure and texture without extra binders. For substitution tips, check the original post for this flour mix.
- The cupcake batter is quite thick – that’s normal.
- When making the buttercream I have found plant-based butter to be more unstable than dairy butter. It melts quickly and doesn’t whip as firm. Bear this in mind when bringing your dairy-free butter to room temperature. If you have the time (and if your buttercream is a bit loose after whipping) then chill in the fridge for 30 minutes – 1 hour before piping.
- I've given you buttercream quantities for piping with the basic swirl which uses up more buttercream than the rosette design in the images. If you are doing the rosette design or the teaspoon method of decorating the cupcakes then you only need 250g of icing sugar and plant-based butter (you can keep the cocoa powder, vanilla and salt the same)
- These cupcakes were decorated with a 2D (large closed star tip).
