
No Bake Chocolate Energy Bars with Dates
This post contains affiliate links. Please read my disclosures.

These No Bake Chocolate Energy Bars are the perfect pick-me-up. Packed with dates, nuts and seeds these energy bars use only natural ingredients with no refined sugar in the chewy cereal filling, no gluten and no dairy for the ultimate salty-sweet treat.
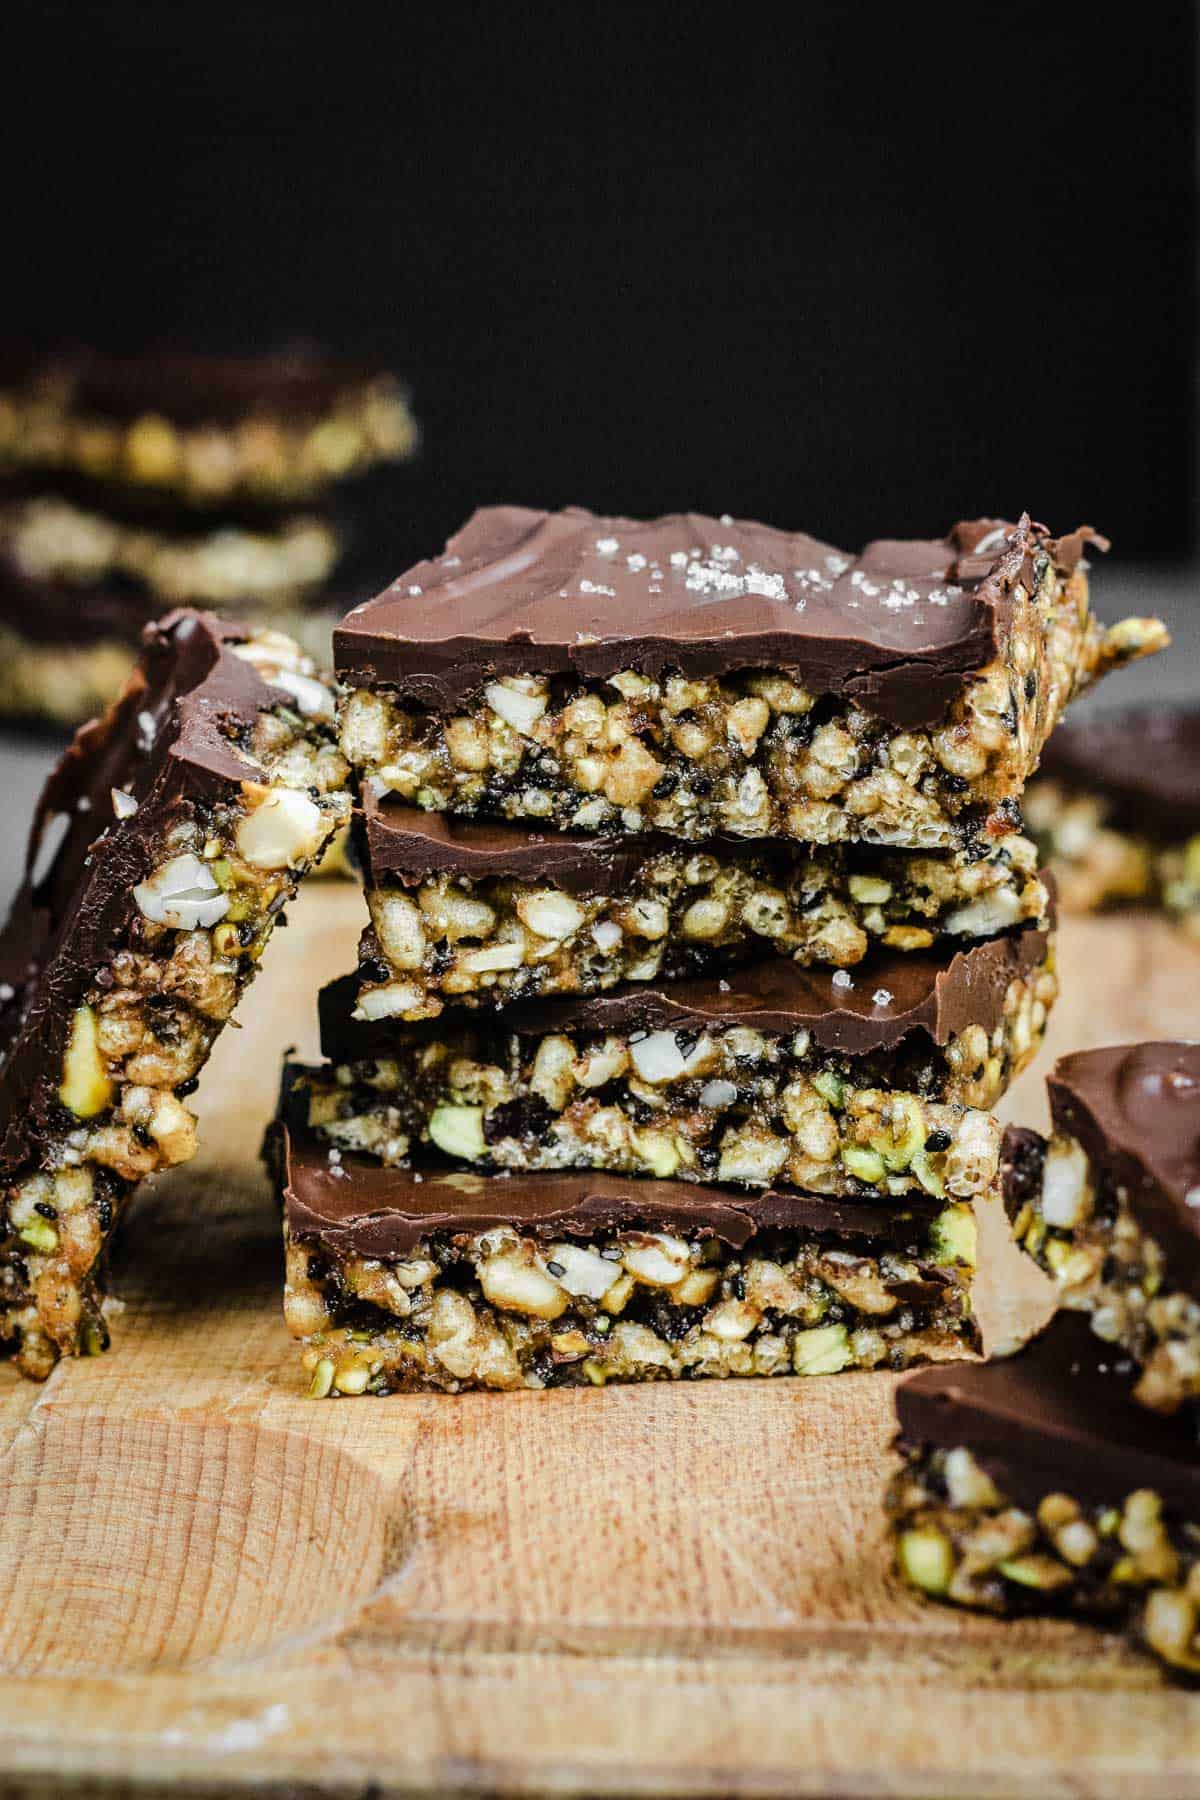
These no-baked chocolate energy bars with dates are chewy, nutty, naturally sweetened with medjool dates, with a crisp layer of dark chocolate and a sprinkle of sea salt to top. We use gluten-free crisped rice, nuts and seeds all crammed in for ultimate flavour. They are naturally vegan, gluten-free and dairy-free and like a slightly-better-for-you homemade chocolate bar.
No oven is needed and the bars can be made and stored in the freezer to grab and go. They can actually be eaten directly from the freezer so there's no forward thinking required.
I first developed this recipe when my eldest child was a toddler. They were my lifeline during 3am night-feeds and they are so quick and easy to make that it was easy to whip up batches of them during naptimes to stash in the freezer for emergencies. I seemed to find an excuse most days to treat myself to one.
We've got a slightly larger family now (four kids!) and these no bake energy bars with their naturally healthy ingredients still do some heavy lifting in the snacking department. They see us all through long stretches between meals, as breakfast bars or perfect energy boosting after school snacks.
You'll love this recipe if you're making packed lunches (although they are not nut-free) or if you need something delicious for travelling, picnics, hiking or you just want something satisfying for enjoying with a cup of tea from the comfort of your sofa at home.
Why You’ll Love These Chocolate Energy Bars
- It’s a no-bake recipe, so a total breeze to make.
- Effort-free. Just a minimal amount of chopping, a dash of soaking, a quick blend followed by stirring and setting.
- Vegan and naturally dairy-free.
- Gluten-free goodness. We use crisped rice with lots of nuts and seeds for the perfect chewy energy bar.
- Chocolate topping. It's what makes these cereal bars feel so special.
- Versatile. You can switch out the ingredients in these nut bars for your favourite nuts or seeds.
- Chewy. The cereal filling is gorgeously chewy, and a perfect texture contrast to the crisp chocolate topping.
Watch the video to see how to make them
Ingredients Needed
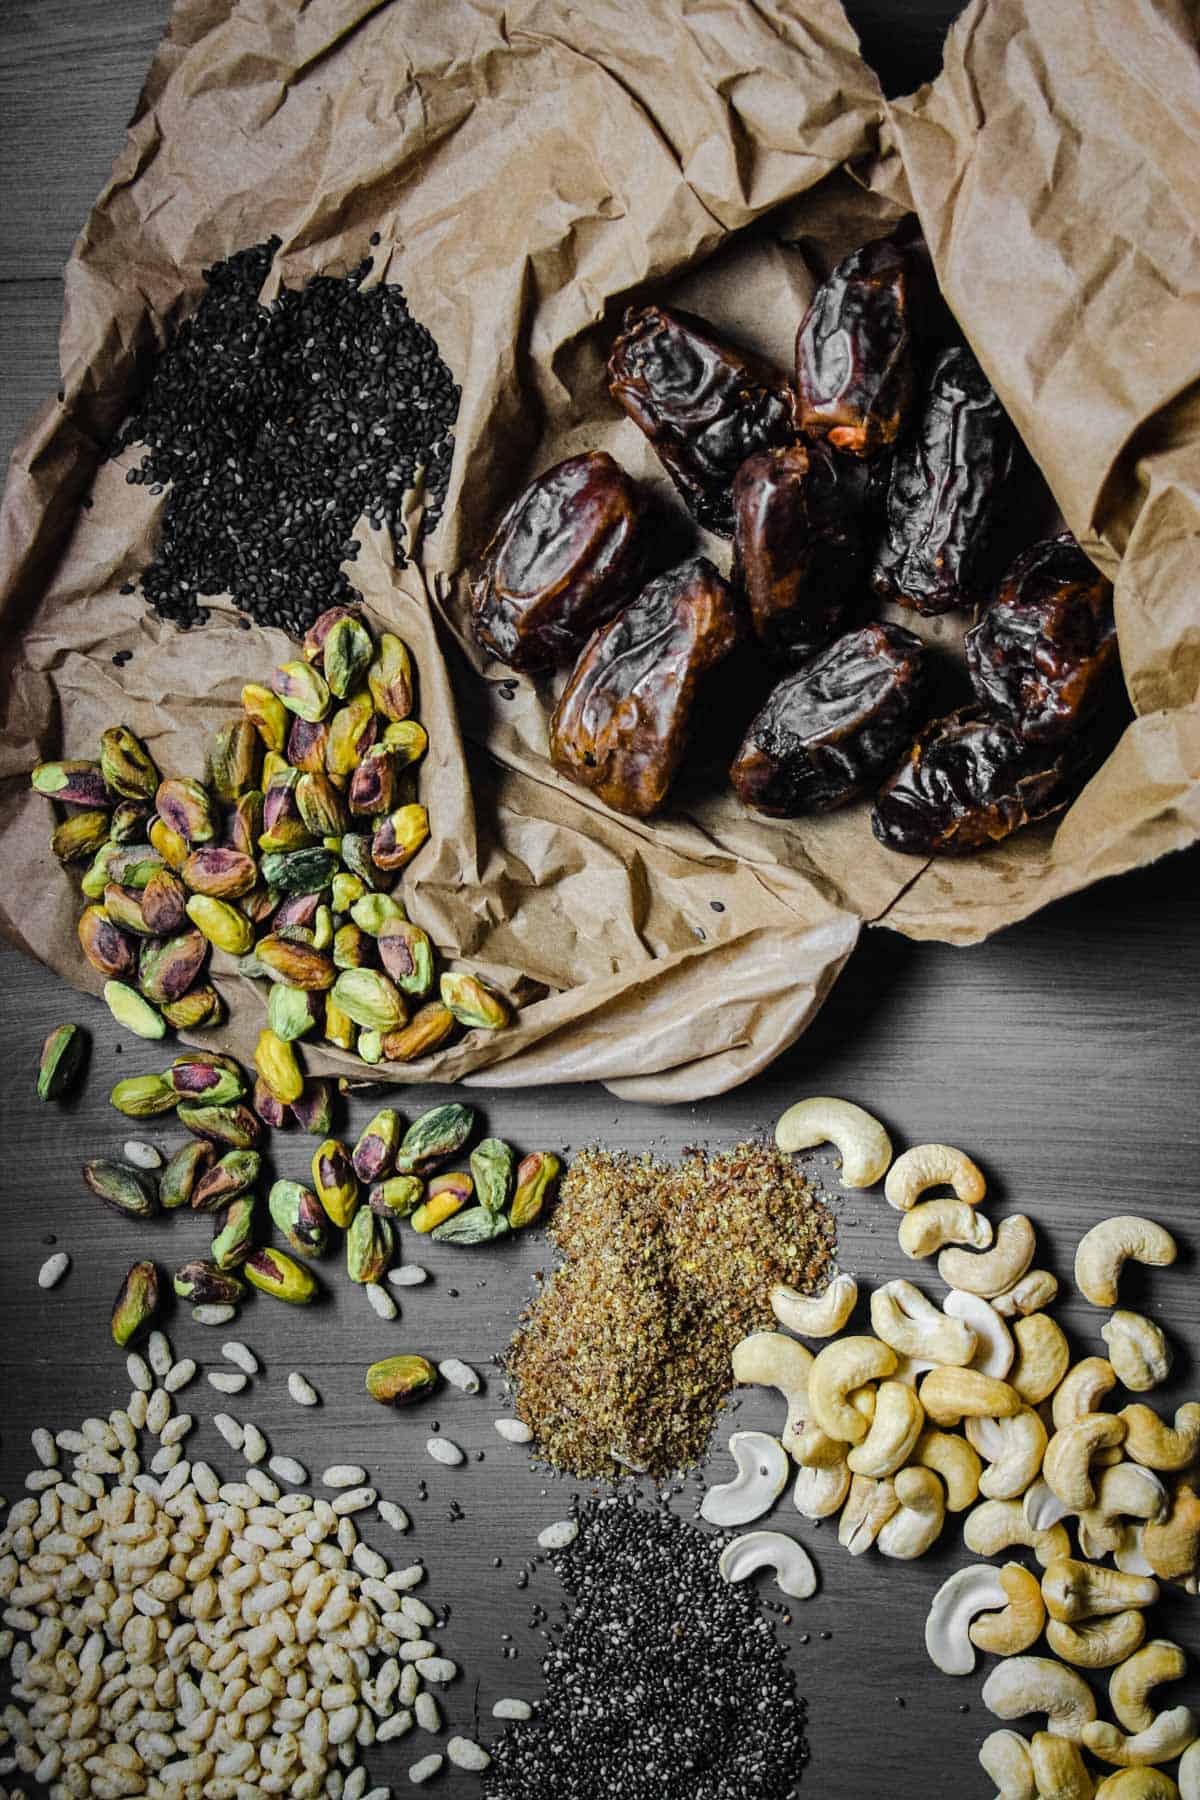
Dark chocolate. Choose a vegan chocolate if you need your energy bars to be dairy-free. Any percentage is fine but I use 72% dark chocolate.
Medjool dates. The soft caramelly texture of medjool dates are hard to beat. They are essential to this recipe as they provide natural sweetness plus their sticky texture holds the cereal filling together whilst creating their gorgeous chewy texture.
Gluten-free crisped rice. They lose their crispy texture in this recipe instead adding to the delicious chew of the bar. Be warned many brands of crisped rice often contain wheat so make sure the one you choose is gluten-free.
Nuts. It’s up to you which nuts you choose but cashews and pistachios work particularly well.
Seeds. Again, choose your favourites but I recommend sesame seeds, chia seeds and flaxseeds.
Almond butter. Adding gorgeous flavour and helps bind our cereals together. You can swap for cashew butter if you like.
Coconut oil. This not only helps to hold the ingredients together once you chill the bars, but is also added to the chocolate topping for a glossy crisp finish.
Vanilla extract. Here you can really use any vanilla extract - it doesn't have to be an expensive brand.
Salt. Using flaked sea salt in the bars themselves and a little bit sprinkled over the top is absolutely essential.
How To Make Chocolate Energy Bars
For full recipe instructions go to the recipe card at the end of this post.
- Dates. Soak the dates in just boiled water for half an hour.
- Dry ingredients. Mix the crisped rice, nuts and seeds in a large bowl.
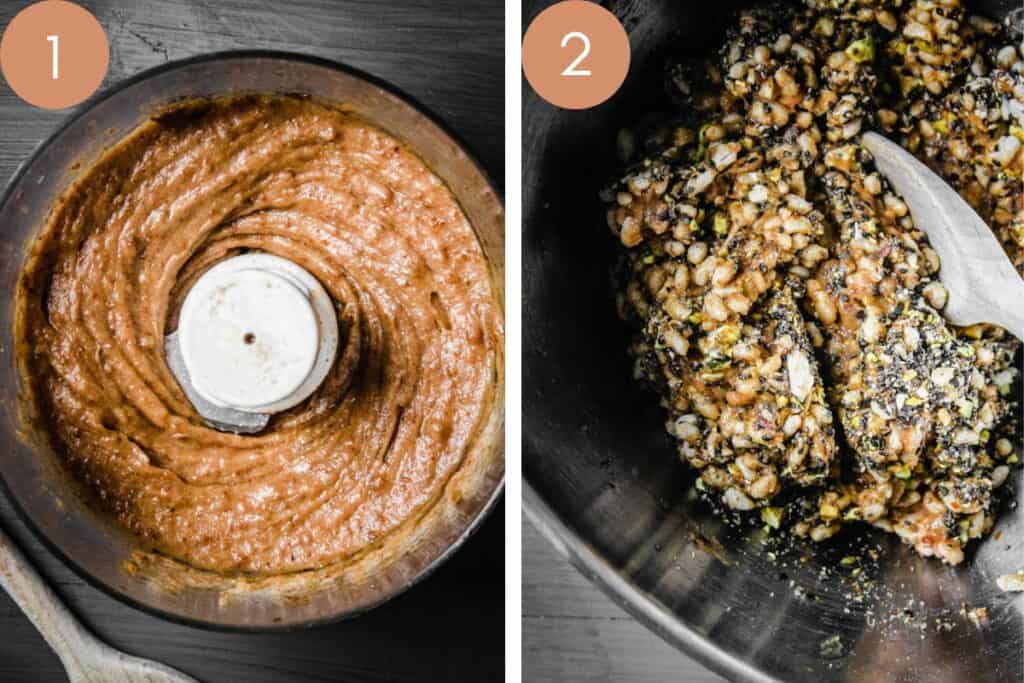
- Wet ingredients. Pour coconut oil, almond butter, vanilla and salt into the soaked dates and blend.
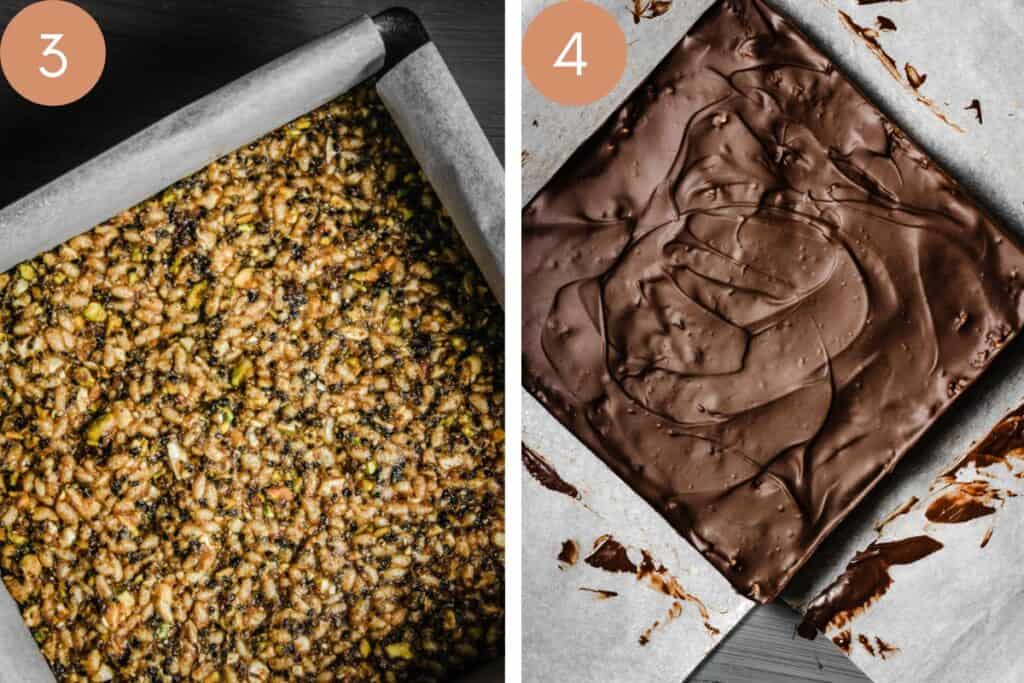
- Mix and set. Add the wet ingredients into the dry ingredients, mix and pour into baking tin lined with parchment. Chill.
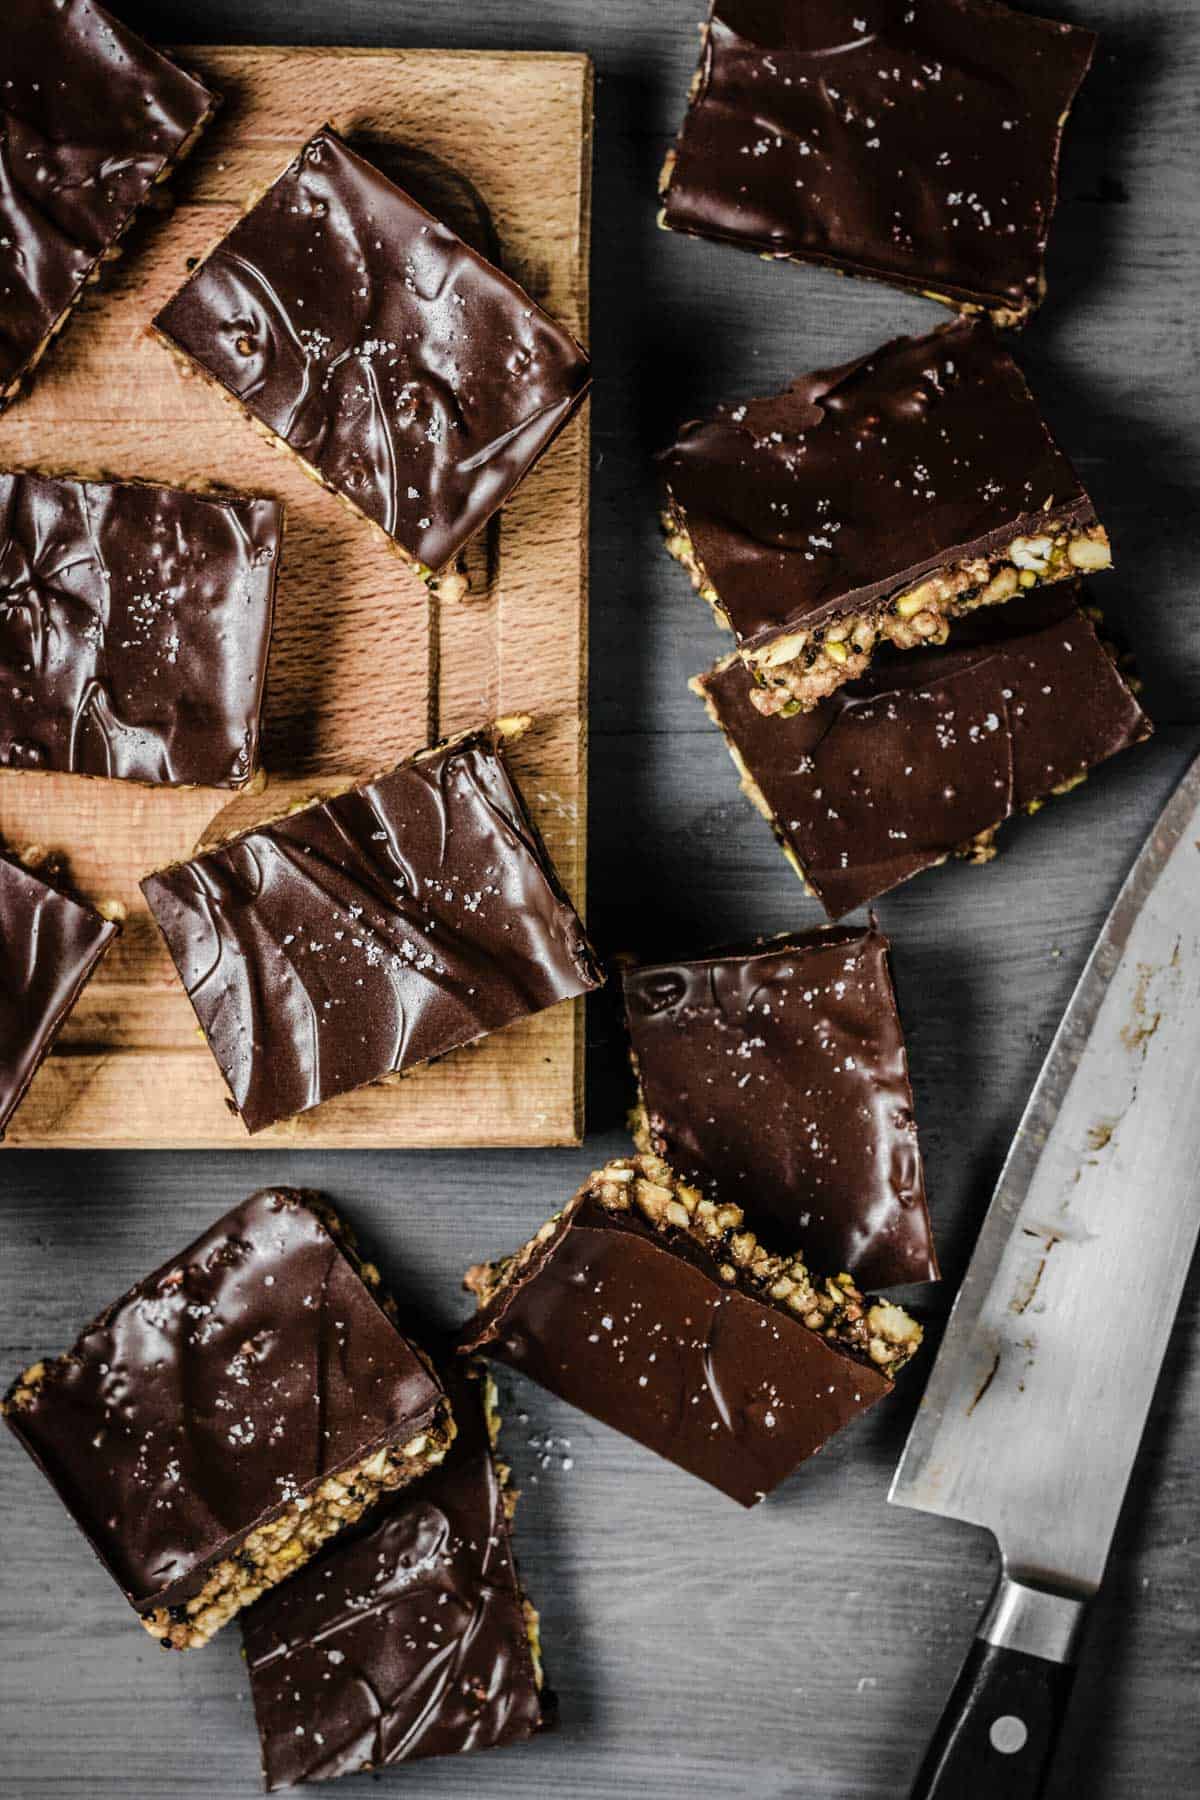
- Chocolate. Melt the chocolate with coconut oil and salt then pour over the set cereal bar mixture and spread out evenly with a rubber spatula.
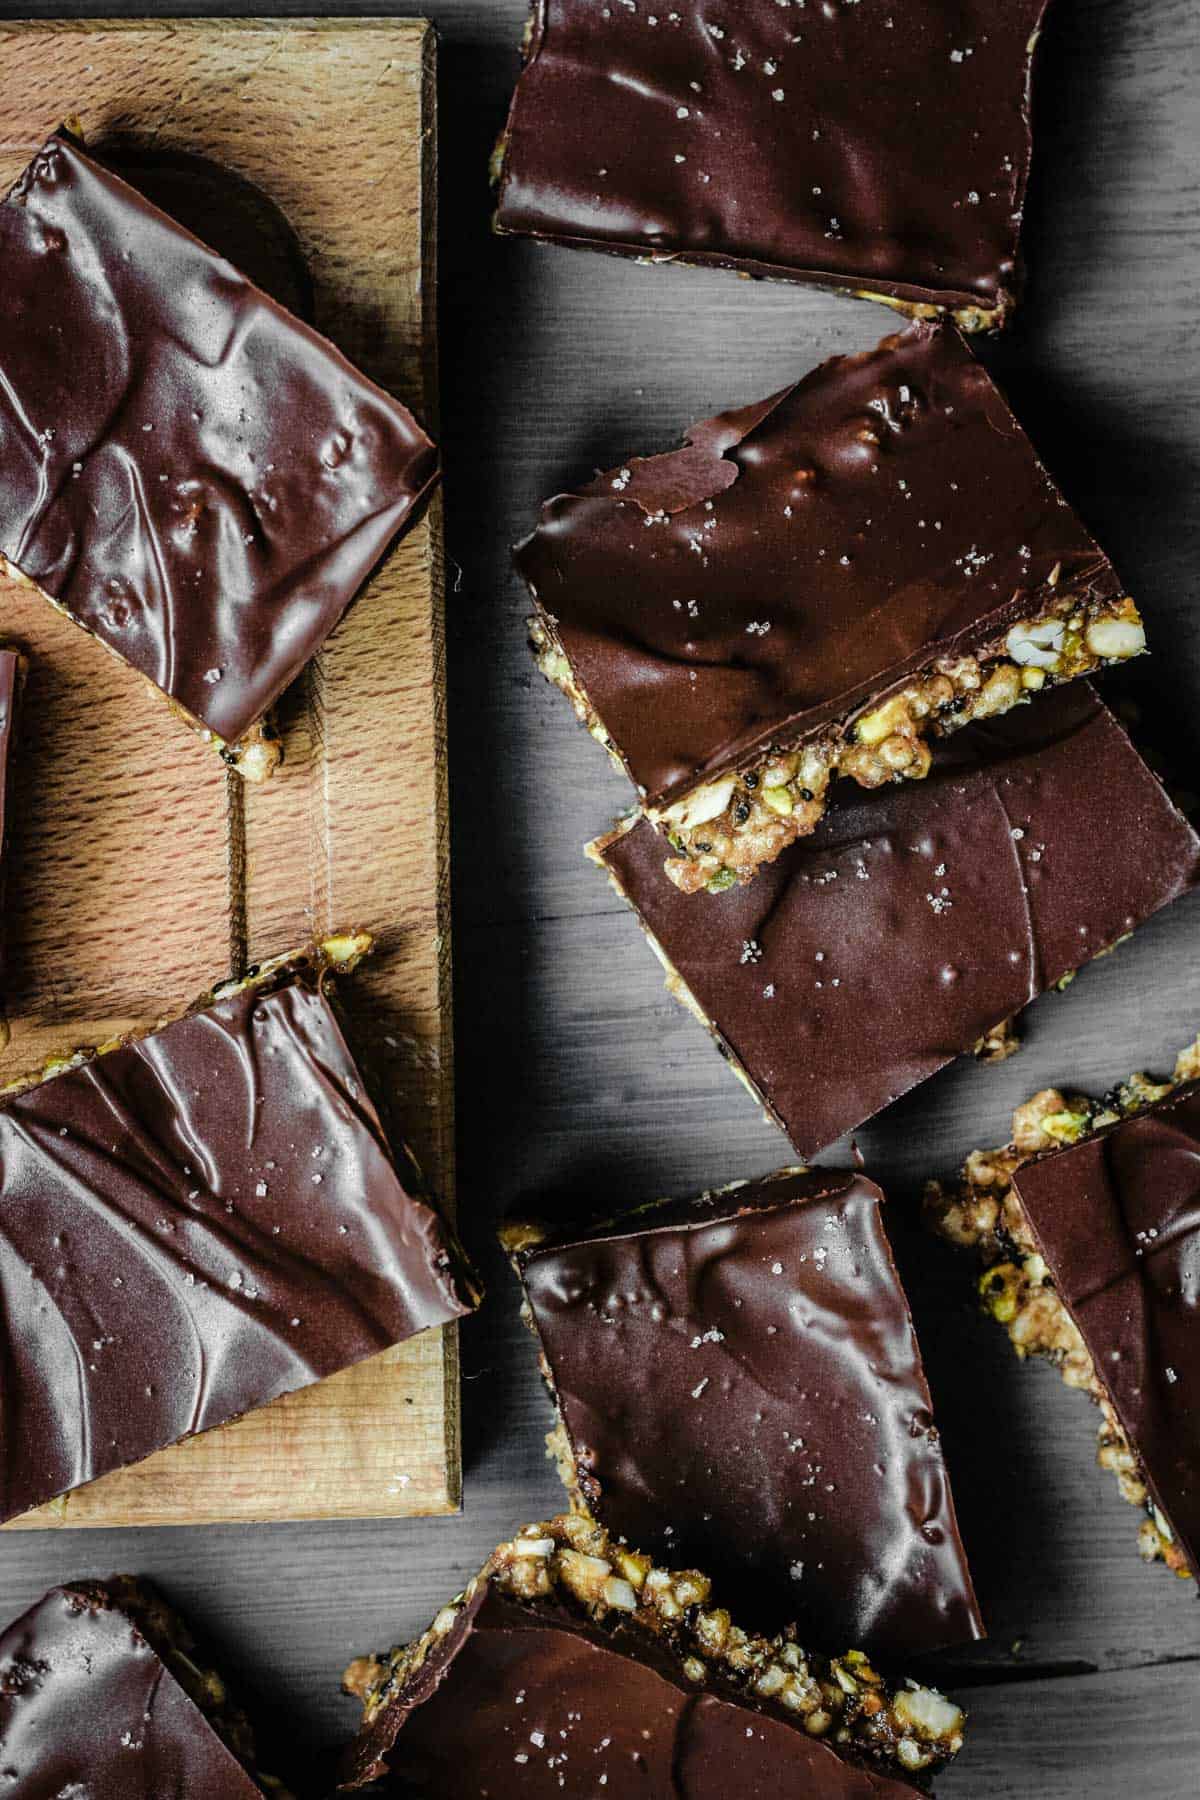
- Chill again then cut into bars.
Tips & Troubleshooting
Use a small-medium bowl to soak your dates in so that they will be submerged by the water as much as possible.
It’s easiest to use an immersion blender for mixing the wet ingredients as you can do it straight into the bowl with the soaked dates but if you don’t have one then you can pour your ingredients into a stand blender or use a food processor (the latter is what I used in the images above).
So that your bars don’t stick to the side of your tin, cut two long strips of baking parchment so you can line the tin along the bottom and up both sides of the tin. Clip the overhang of the parchment to the tin with foldback clips to secure (see video above for example).
The recipe recommends chilling the bars to let the layers set. If I’m honest I usually pop them straight into the freezer for 15 minutes so they set quicker.
How to store
These bars keep well in the fridge in an airtight container for up to 5 days. They don’t do so well at room temperature as they go a little soft and crumbly.
How to freeze
When I make a batch of these I usually cut them and place them straight into the freezer, stacked between baking parchment, in an airtight container.
You can eat these bars directly from the freezer. The chocolate is a little crisper but the chewy cereal part of the bar remains exactly the same.
You can keep them in the freezer for up to 2 months.
FAQs
You can use any nut butter you like. Peanut butter is a great choice and will create a definite flavour change. However, you could try cashew butter which is a more neutral nut butter which will allow all the other flavours to shine.
This recipe is gluten-free as long as you use gluten-free crisped rice. Many brands can have hidden wheat so just select carefully if you have specific dietary requirements.
You can use your favourite nuts and seeds in this recipe. As written, this is my favourite combination but work with what you already have or what you prefer.
These energy bars should be kept in the fridge for the best storage and will keep well for up to 5 days. If you store in the freezer though you can keep for up to 2 months.
These bars are naturally dairy-free / vegan as long as you use dairy-free dark chocolate for the topping.
Variations to try
There are all sorts of add ins you can include in your chocolate date bars. Here are some options..
- Pumpkin seeds and sunflower seeds. I like them roughly chopped and added into the cereal filling or scattered whole over the melted chocolate topping.
- Chocolate chips. If you want to make the bars quicker then add chocolate chips directly into the chewy cereal part rather than melting the chocolate into a topping.
- Peanut butter. Switch out the almond butter for peanut butter for a change in flavour.
- Quick oats. Add a couple of tablespoons of gluten-free oats to the cereal filling.
More Homemade Snacks You'll Love
- Homemade Granola Bars
- Green Banana Flour Chocolate Protein Balls
- Healthy Banana Flapjacks
- Healthy Coconut and Blueberry Bars
- Raw Cranberry Energy Bars
Enter your email below to get this recipe sent to your inbox plus get new recipes, baking tips, and updates.
No-Bake Chocolate Energy Bars
Ingredients
- 10 medjool dates - pitted and roughly chopped
- 50 g cashews - roughly chopped
- 50 g pistachios - roughly chopped
- 50 g gluten-free crisped rice
- 2 tablespoons sesame seeds
- 2 tablespoons chia seeds
- 1 tablespoon flaxseeds
- 2 tablespoons coconut oil - melted
- 50 g almond butter
- ½ teaspoon vanilla extract
- ½ teaspoon sea salt
Chocolate topping
- 175 g dark chocolate
- 1 tablespoon coconut oil
- ⅛ teaspoon sea salt + extra for sprinkling
Instructions
- Use two long strips of baking parchment to line a 20cm square tin. Cross them over in the middle and line them along the bottom and up the sides of the tin. Secure the overhang to the edges of the tin with foldback clips and grease the parchment.
- Place the dates in a small bowl with 75ml boiling water, pushing them down to make sure they are evenly submerged. Leave for half an hour to soak.
- Mix the crisped rice, cashews, pistachios, sesame seeds, chia seeds and ground flaxseed in a large bowl.
- Pour the coconut oil, almond butter, vanilla extract and salt into the bowl with the soaked dates and blend using a handheld blender until smooth.
- Pour the wet ingredients over the dry ingredients and stir well until everything is evenly combined.
- Press the mixture into the lined tin and flatten the surface with a rubber spatula so that it is nice and even then place in the fridge for at least an hour to set.
- Melt the chocolate, coconut oil and salt in a bain marie or bowl set over a saucepan of simmering water.
- Pour the melted chocolate over the set cereal mixture and spread out evenly with a palette knife.
- Place back in the fridge for at least an hour to set.
- Remove from the fridge, sprinkle over extra sea salt and cut into bars.
Video
Notes
- Switch out the nuts and seeds suggested in the recipe for your favourite nuts and seeds. See the post above for suggestions.
- If you don’t have a handheld blender then you can pour the wet ingredients into a stand blender instead.
- Please note that the nutrition information provided below is an estimate based on an online nutrition calculator. It will vary based on the specific ingredients you use. Please seek a professional nutritionist’s advice for further clarification.
- The nutrition serving is for 1 bar, assuming you portion the recipe into 12.
Look delicious. Where I live I have never see crisped rice! Is there an alternative? I can, for example, get gluten free granola.
Yes you can use the granola. The texture won't quite be the same as the crisped rice goes a little chewy in the mix but it will still be delicious!
Many thanks.
You are welcome!!
Hiya, I'm gonna try some of you recepies for energy bars, can you tell me please, are the calories "per bar" or for the full amount made?
Hi Susan, the calories are per bar. Let me know how they go!