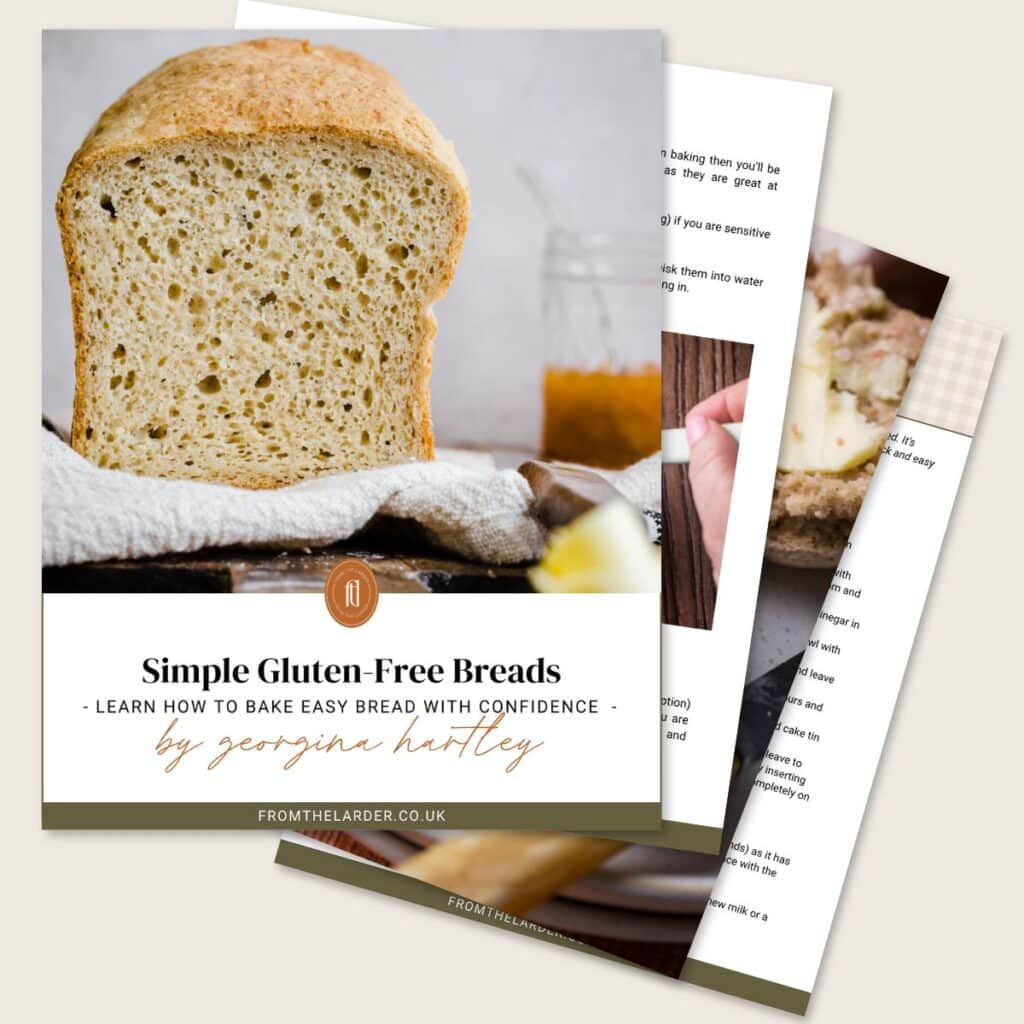
Gluten-Free Yeast-Free Bread Rolls (vegan)
This post contains affiliate links. Please read my disclosures.

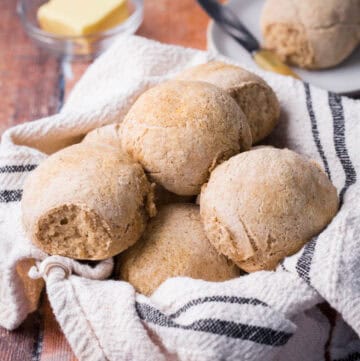
These Gluten-Free Yeast-Free Rolls are quick and easy to make and because they don’t have yeast there is no proofing or kneading. They have a lovely crust with soft and fluffy crumb and are delicious fresh from the oven slathered in your favourite buttery spread. This recipe also has no xanthan gum and is egg-free and dairy-free to suit those following a plant-based diet.

If you need to avoid yeast for dietary reasons or you just don’t have any in then you’ll be thrilled to hear that these no yeast bread rolls are really quick and easy to prepare. They take about 20 minutes to get them in the oven and then 50 minutes to bake, and unlike a lot of gluten-free bread options they are the perfect texture straight out of the oven so you can enjoy them straightaway.
Before you start I don’t want you to get carried away as if you are expecting exactly the same texture as a yeasted bread then lower your expectations a smidge as these rolls are a little more dense but they are still an excellent and delicious alternative.
If you find gluten-free bread dough a little intimidating, then don’t worry these gluten-free rolls are so simple and I’ll take you through the whole process including step-by-step images and a recipe video to build your confidence.

Recipe Highlights
Perfect beginners recipe. If you are new to baking gluten-free bread then this is an ideal introduction. It’s totally foolproof and will also allow you to get more comfortable baking with psyllium husk.
Psyllium husk. I use this ingredient in most of my gluten-free bread recipes. It’s so easy to use and gives gluten-free bread recipes a softness, bounce and delicious crumb texture.
Baking powder instead of yeast. No proofing is required, you just add your baking powder to the flour mix and away you go.
Gluten-Free Flour. This recipe uses my homemade flour blend (made up of oat flour, sorghum flour, sweet rice flour and tapioca flour) which has a more stable structure than a lot of branded blends. If you struggle with any of the flours within this blend there is plenty of substitution advice on the original post.
Egg-Free and Dairy-Free. This recipe is suitable for those with these dietary restrictions or are following a plant-based or vegan diet.
No xanthan gum. I don’t use xanthan gum in any of my gluten-free recipes (I have hundreds of very successful recipes on my website) and this recipe is no exception.
Watch the Video
Sometimes it helps to see a visual of what I'm talking about. So watch the video to see what it looks like to make your gluten-free bread rolls.
Ingredients Needed

Gluten-Free Flour – FTL Blend. This recipe uses my Homemade Gluten-Free All Purpose Flour which works really well here as the flour ratio has been carefully tested to ensure the mix between wholegrain flours and starchy flours is balanced. This also means we don’t need to use xanthan gum as the blend is strong enough and produces a well structured and textured bake which can hold together without needing any extra binders.
This flour blend is a mix of 4 different flours: Sweet rice flour (glutinous rice flour), sorghum flour, oat flour, tapioca flour (tapioca starch).
There are plenty of flour substitution tips ideas if you click on the original post for this homemade flour mix.
Baking powder. This recipe doesn’t use yeast but baking powder instead to provide a rise. Do check your baking powder is gluten-free before use. It uses a fair amount of baking powder but don’t worry that you’ll be able to taste it as the vinegar added to the dough helps to smooth out the flavour.
Light soft brown sugar. Using sugar in this recipe (even if there is no yeast for it to feed) enhances the flavour and helps the rolls achieve a more golden-brown crust. It also helps retain moisture and improve the texture, making the bread softer and not as dense.
Salt. I like to use kosher salt in my baking as it has a round gentle flavour. Using salt in your baked goods lifts and sharpens all the other flavours.
Milk. I developed this recipe to be dairy-free so I used almond milk here but you can use your favourite plant-based milk or even dairy milk if that suits your dietary requirements.
Psyllium husk. This is a common ingredient used in gluten-free baking as a binder and texturiser, mimicking the elastic properties of gluten found in traditional wheat flour. It is mixed with water here to form a gel-like substance before incorporating it into the recipe. This psyllium gel is used here to help bind the ingredients together, improve the texture, and add some elasticity to the dough. For this recipe I used whole psyllium husk (rather than ground). Currently I don’t have a substitution if you need to avoid psyllium husk.
Olive oil. This is my preferred oil in cakes rather than vegetable oil or coconut oil. But to avoid a strong flavour use a flavourless mild and light olive oil.
Apple cider vinegar. Vinegar is used in yeast-free bread to help activate the baking powder, improving the rise and texture. It also adds a slight tang that balances the flavour and helps tenderise the dough. You can swap for white wine vinegar if that’s what you have in.
Maple syrup. This is used mixed with a little olive oil to glaze the rolls and help achieve a more golden colour during the bake as otherwise the rolls look unappetisingly pale. I also like the slight sweetness it provides the top of the rolls. You can swap for honey or omit completely if you are finding the glaze a little too sweet.
Bake Gluten-Free Bread with Confidence
Discover easy, reliable recipes for soft, wholesome gluten-free breads. No complicated techniques, just great results every time. Tips, techniques, comprehensive ingredients and equipment info.
How To Make Gluten-Free Yeast-Free Bread Rolls
For full recipe instructions go to the recipe card at the end of this post.
Preheat the Oven: Preheat to 180°C (160°C fan-assisted, gas mark 4, 350°F).
Prepare Dry Ingredients: Whisk together the flour, salt, baking powder, and sugar in a large bowl (or bowl of stand mixer).
Prepare Wet Ingredients: Mix psyllium husk with water and let sit for 5 minutes to form a gel. Warm the milk to 38–46°C (100–115°F).

Combine Wet Ingredients into Dry Ingredients: Add the psyllium gel, warm milk, olive oil, and vinegar to the dry ingredients. Beat with an electric hand mixer (or in your stand mixer) until a soft dough forms.

Shape and Bake Balls: Divide the dough into 9 balls (about 125g each), place in a 9-inch baking dish, and brush with a mix of maple syrup and olive oil. Bake for 50 minutes, then remove from the oven, transfer to a rack, and let cool for 15 minutes before serving.


Expert Tips
This is a very easy recipe to prepare but a couple of things will ensure you bake these rolls perfectly first time:
Measure Ingredients Accurately. Use precise measurements for all ingredients, this is especially the case when working with gluten-free flours. And I urge you to use digital scales, any slight variation in measurements can alter the desired texture and consistency.
Shaping the rolls. For a really smooth finish I recommend shaping the rolls into lovely round balls against a smooth clean work surface (using your hands) to really iron out the dough creases. Place the rolls in the dish with the smoothest side on the top.
Glazing the rolls. The maple syrup and oil glaze is very runny so apply carefully so that it doesn’t drip all the way down the rolls, otherwise the rolls will be baking in a puddle of oil and sugar. You just want the tops of the rolls to be lightly glazed which helps with the colour of the rolls.
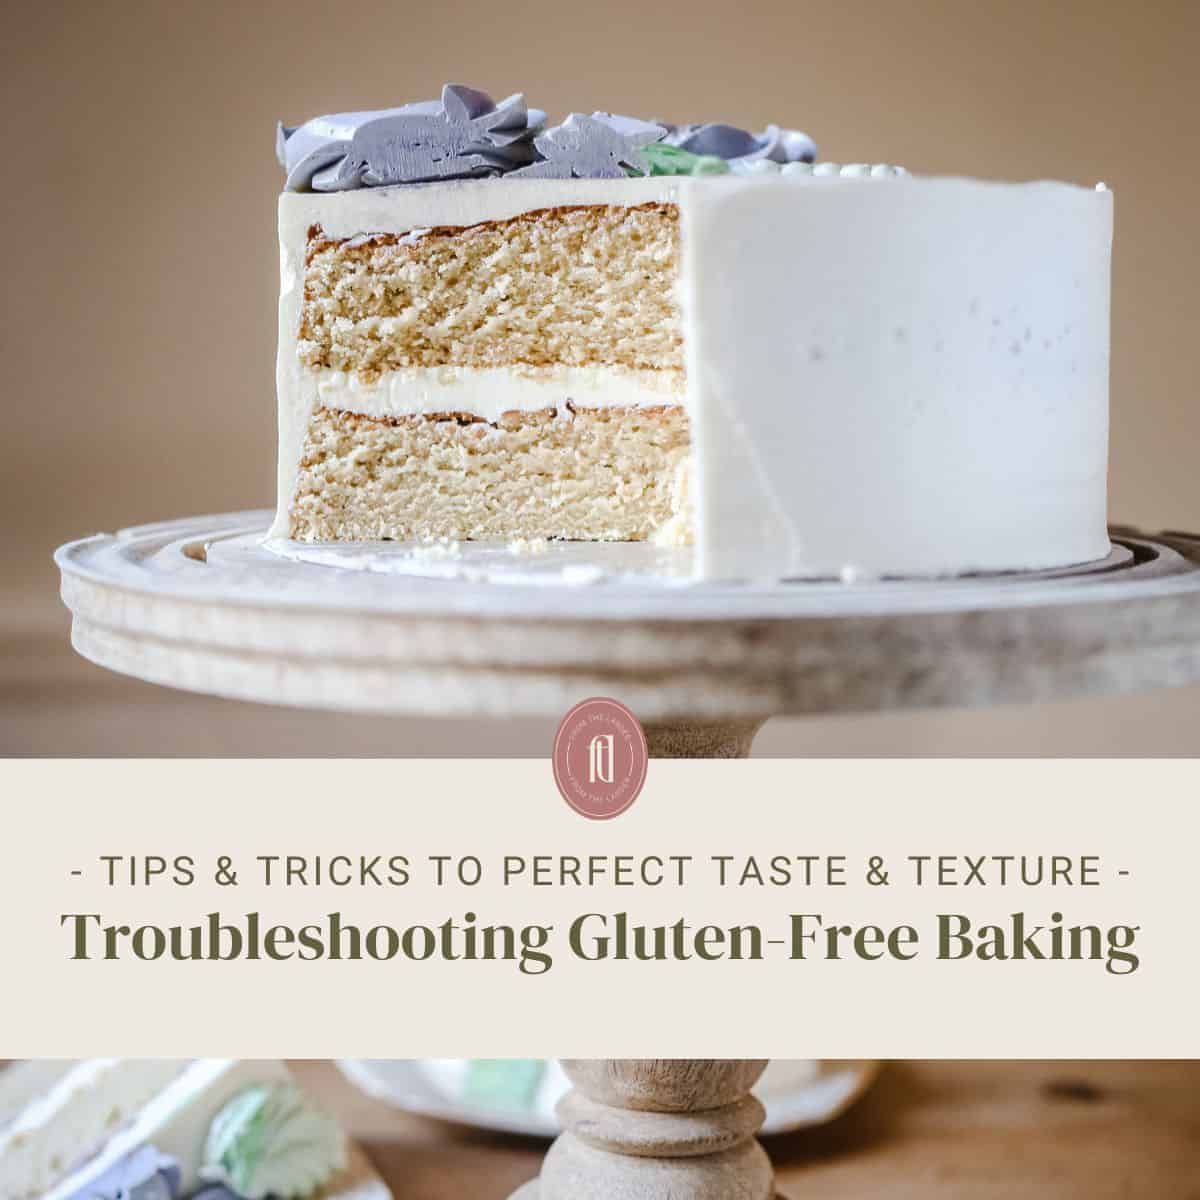
Troubleshooting Gluten-Free Baking
Say goodbye to dense, dry, crumbly bakes that taste weird with this Gluten-Free Baking Guide. You'll build confidence quickly as you apply these tips and tricks to your next bake and see the delicious difference!

Equipment Needed
All of these items are helpful for a smooth baking process, but you can easily substitute with whatever you have on hand.
Digital scales. This is the best and most accurate way to measure your ingredients. And it’s also helpful to divide the dough into equal portions (125g each).
Measuring spoons. These are fine to use for the smaller ingredient measurements.
Digital Thermometer. To ensure the milk is warmed to 100–115°F (38–46°C). It is optional – as you are aiming for lukewarm but if you have a thermometer then it’s nice and easy.
Mixing bowls. You need a large mixing bowl for preparing the dough. I prefer to use my stand mixer as the dough is easier to mix but you can just use the mixing bowl with an electric hand mixer (the dough is slightly more tricky to remove from the beaters). A small mixing bowl is perfect for preparing the psyllium gel and glaze.
Electric hand mixer. To beat the dough until smooth (unless you are using the stand mixer option).
9 inch baking dish. I use a glass dish which measures 23×23×5.8cm which ensure even baking.
Silicone pastry brush. To glaze the rolls with maple syrup and olive oil. The silicone pastry brushes are so much easier to clean.
Cooling rack. For cooling the rolls after baking.
FAQs
These rolls retain a lot of moisture so although they are best on the day they are baked they do last up to 3 days. Store in an airtight container (preferably not plastic) in a cool dark place.
To freeze, allow the rolls to cool completely after baking, then wrap them tightly in plastic wrap or aluminium foil. Place the wrapped rolls in a freezer-safe bag or container. When you're ready to eat them, simply thaw at room temperature or re-heat in the oven.

More Gluten-Free Bread recipes you’ll love
Gluten-Free Soda Bread. This is another yeast-free recipe which I think you’ll love. It also doesn’t have psyllium husk or xanthan gum. Plus it’s dairy-free and egg-free too so suitable for a lot of dietary restrictions!
Gluten-Free White Sandwich Bread. This is a great everyday white loaf. It has eggs and butter and yeast and has a lovely soft crumb.
Gluten-Free Flatbread. The bread is soft and fluffy and perfect for wraps, dipping, as a pizza base, making quesadillas. The uses are endless and we make this recipe most weeks for easy to prepare meal options. Only simple ingredients are required here – just two gluten-free flours, no psyllium husk, no xanthan gum and no yeast.
This Gluten-Free Brown Bread uses nutritious gluten-free flours that gives soft and rustic results. It’s egg-free, dairy-free and nut free with a delicious flavour which is simply glorious with a salted slather of your favourite spread.
Enter your email below to get this recipe sent to your inbox plus get new recipes, baking tips, and updates.
Gluten-Free Yeast-Free Bread Rolls (vegan)
Ingredients
- 500 g homemade gluten-free flour blend - FTL blend*
- 25 g baking powder
- 1 tablespoon light soft brown sugar
- 2 teaspoons salt
- 300 g milk - I used almond milk
- 30 g psyllium husk - not ground
- 200 g water
- 60 g olive oil
- 1 tablespoon apple cider vinegar
Glaze
- 2 teaspoons olive oil
- 2 teaspoons maple syrup
Instructions
Preheat the Oven:
- Preheat the oven to 180°C / 160°C fan assisted / gas mark 4 / 350°F.
Prepare the Dry Ingredients:
- In a large bowl (or bowl of a stand mixer), whisk together the homemade gluten-free flour blend, baking powder, sugar and salt until evenly combined.
Make the Psyllium Gel:
- Prepare the psyllium gel by mixing the psyllium husk with the water in a small bowl. Let it sit for 5 minutes until it thickens to a gel.
Warm the Milk:
- Gently warm the milk to a temperature of 38–46°C (100–115°F).
Combine Wet and Dry Ingredients:
- Add the warm milk, psyllium gel, olive oil, and vinegar to the dry ingredients. Use an electric hand beater (or the paddle attachment of your stand mixer) to mix until a soft dough forms.
Shape the Dough:
- Divide the dough into 9 equal portions, each weighing approximately 125g. Roll each portion using your hand against a clean work surface to achieve a really smooth ball.
Arrange in Baking Dish:
- Place the dough balls into a 9-inch baking dish, spacing them evenly.
Prepare the Glaze:
- In a small bowl, whisk together maple syrup and olive oil until well combined.
Brush the Rolls:
- Lightly brush the surface of each roll with the glaze, ensuring it doesn’t drip down the sides.
Bake the Rolls:
- Place the baking dish on the middle shelf of the pre-heated oven. Bake for 50 minutes until the rolls are golden and cooked through.
Cool and Serve:
- Remove the rolls from the oven and immediately transfer them out of the baking dish to cool on a wire rack. Allow them to cool for about 15 minutes before serving warm.

Due to various intolerances these rolls are a game changer for me! They are a staple in my kitchen and they are my everyday lunch. Great taste & texture! I can only say thank you to Georgina for making the recipe available.
You are so welcome Fiona - I'm so happy the rolls are working out so well for you.
Mine keep turning out like bricks I’m not sure what I am doing wrong but I need help!
I'm happy to troubleshoot with you. Firstly, did you change anything at all from the original recipe? Did you use the psyllium husk? Did you change the flours?
Can yuo substitute coconut sugar for brown sugar?
Yes you can.
In your opinion, would these be suitable for mini sandwich buns? Perhaps if they are shaped to be less round and spread out more on a baking sheet?
Are you looking to make them smaller? That's possible - the oven time might need to be shortened though.
I forgot to reply back until just now! I actually made them a bit bigger and slightly more flat in an attempt to make a sort of sandwich bun. They were quite yummy. Not the bready texture I was hoping for, but really quite good considering they had no yeast. The recipe video was very helpful, thank you Georgina!
You are welcome! I'm happy you enjoyed them.
My dough was sticky and I was afraid to add more flour.
I weighed everything exactly so I’m not sure why this happened.
Adding more flour would have been the solution here. I wonder if it's the brands of flours you are using in your flour mix. It's hard to say. Let me know if you try them again with more flour so the texture looks similar to the video/photos in the post and how you get on with it.
I have just made these this morning and I love them. Thanks Georgina!
You are so welcome!
I don't have maple syrup, we don't use it in our house! Can I substitute honey?
Yes, honey works just fine.
These are so good! And my kids loved them warm with butter! Thank you for the wonderful recipes you produce!
I'm so happy you enjoyed them! Thank you for sharing your feedback.