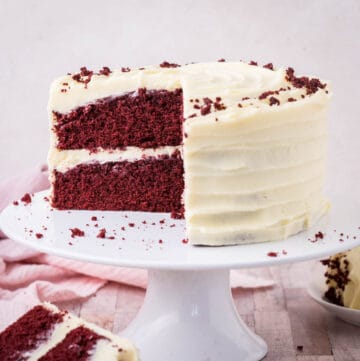
Gluten-Free Red Velvet Cake
This post contains affiliate links. Please read my disclosures.

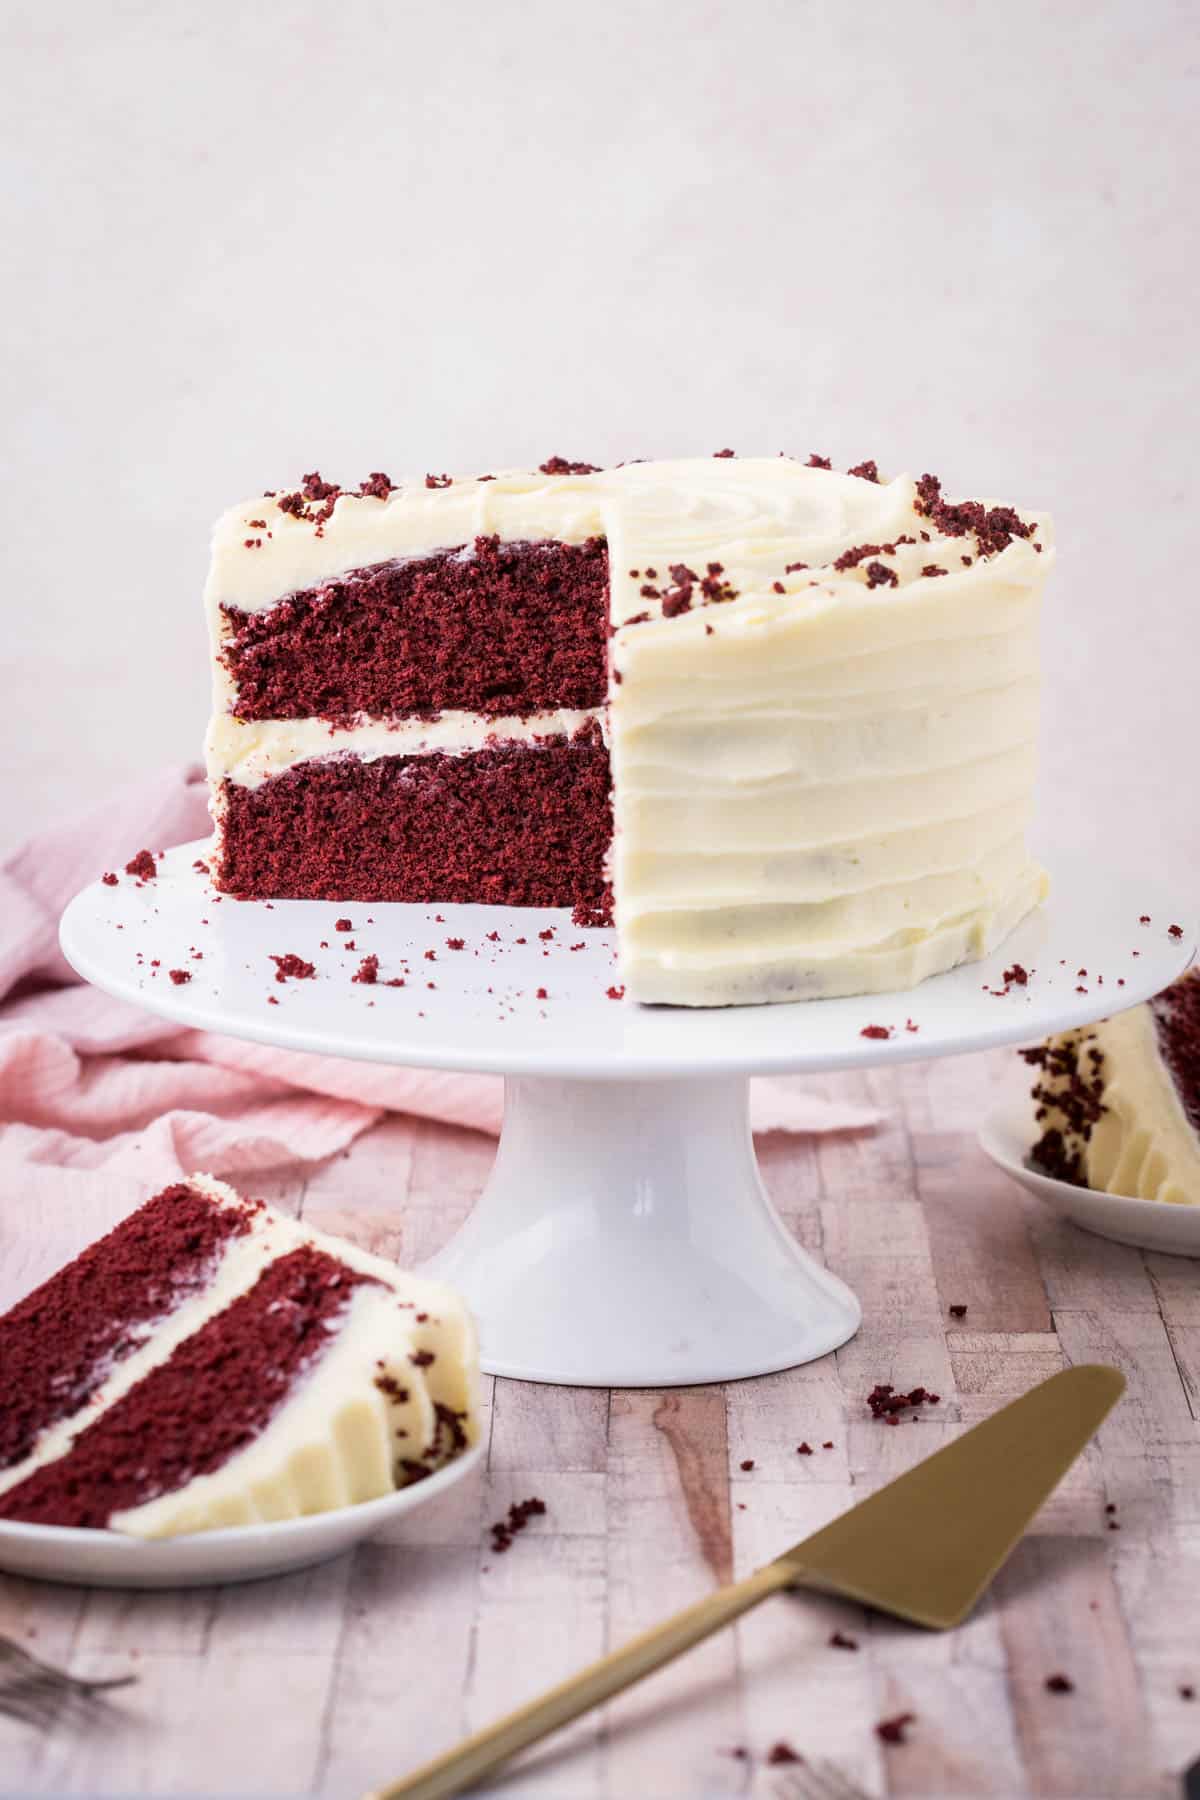
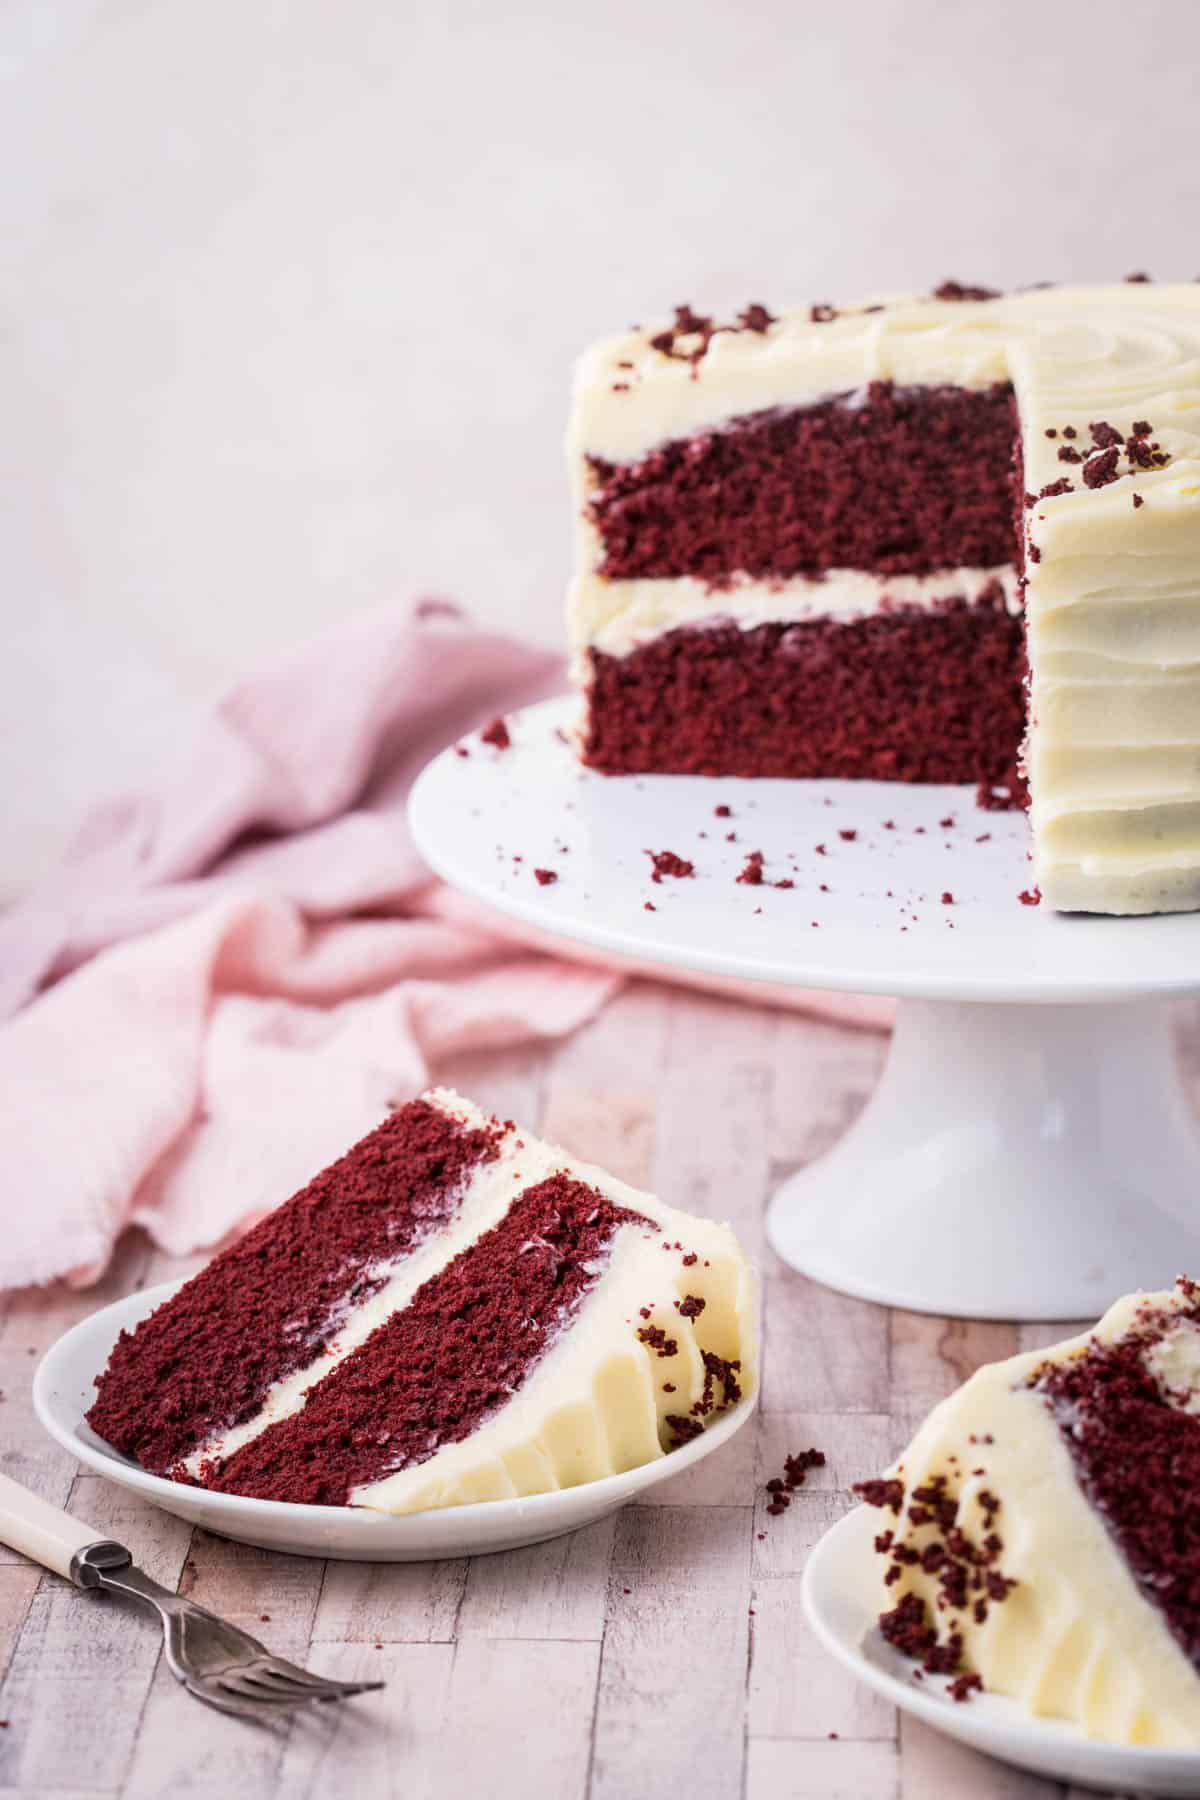
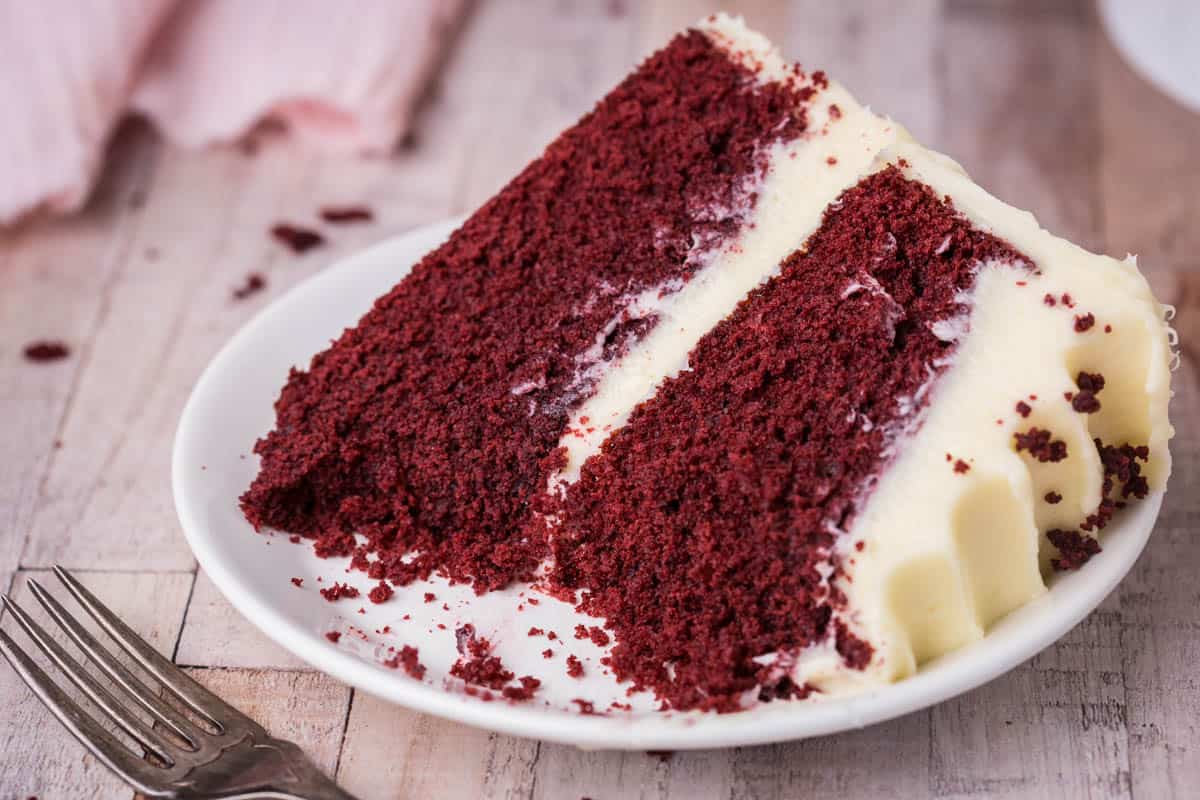
This is the best Gluten-Free Red Velvet Cake which knocks socks off its peers. It is light, fluffy and flavourful, made with carefully a chosen triumvirate of gluten-free flours. No xanthan gum is needed as the texture is soft and tender but still incredibly moist. The cake is then lavishly topped with a whipped vanilla enriched cream cheese buttercream. Don't just save this cake for Valentine's Day, it's incredible all year round.
The first time I tried a Red Velvet Cake was when the Hummingbird Bakery first opened its doors in Notting Hill. This style of American baking was very new to the UK. I trekked across London religiously for their addictive red velvet cupcakes. I scoured cookbooks for recipes and my obsession led me to discover food blogs which were in their infancy (yes this is a true origin story!)
I followed all the American baking bloggers I could find, consumed by the world of cake which had suddenly opened up. As soon as the Hummingbird Bakery published its first cookbook I put in my pre-order and when it arrived I thrillingly re-created its Red Velvet Cupcakes time and time again for friends, family and work colleagues. Over time I adapted the cake to suit my evolving tastes and of course when I became gluten-free more changes need to be made.
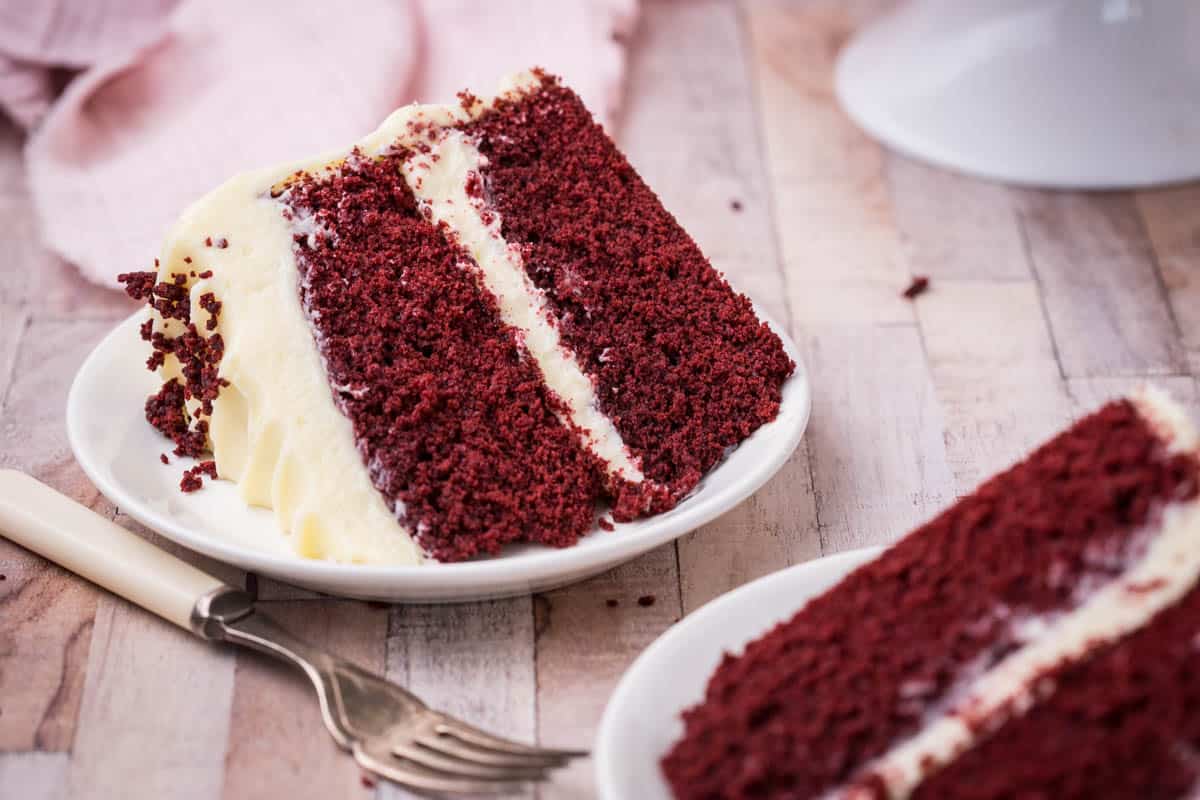
These days the Red Velvet Cake is nothing new and can often get overlooked. All too often the sponge itself can taste bland and the buttercream overly sweet. This version though is very close to my heart and is made with alternative gluten-free flours (as opposed to your normal bag of gluten-free flour). It is absolutely packed with flavour and boasts a gloriously tender velvety crumb. The cream cheese buttercream is rich light and smooth and kissed with vanilla for a perfect flavour compliment.
This Easy Red Velvet Cake Recipe will produce a perfect cake which is totally foolproof if you follow all my tips, the video and step-by-step photos for extra guidance.
I guarantee this Gluten-Free Red Velvet Cake recipe will reignite your fondness for this very special bake and confirm why it is such a classic cake these days on both sides of the Atlantic.
Why You’ll Love This Gluten Free Red Velvet Cake
- Gluten-free flour choice. A beautifully rich flavour, thanks to the oat flour, without any compromise on texture and moisture balance, thanks to the rice flour and tapioca flour.
- No xanthan gum. There is no need as we have balanced our texture and structure with our flour choice.
- Gloriously red. There is nothing worse than a muted red velvet cake. It’s all down to the quality of the food colouring. I recommend pastes or gels as you don’t need to add as much for a gorgeously deep red.
- That classic texture. The crumb is soft and tender from its signature buttermilk and vinegar combination.
- Best flavour. The taste of cocoa just peeks through so it’s not a chocolate cake but an amped up vanilla cake taking the richness from the cocoa.
- Tangy cream cheese frosting. This buttercream is the perfect accompaniment, it’s not too sweet and really rich and creamy. The secret is the pinch of salt and the vanilla extract which bring out all the flavour.
Watch The Video
Sometimes it helps to see a visual of what I'm talking about. So watch the video to see what it looks like to make your recipe.
What Is The Best Food Colouring For Red Velvet Cake?
With a Red Velvet Cake it’s all about the colour. I love a beautifully rich red, not too garish. The beauty of this cake being gluten-free is that you can’t overmix it so wait until the batter is completely ready before adding your colour then you can ensure the exact shade you want. If the colour isn’t rich enough for you then just add more.
My favourite colouring to use are good quality pastes and gels as you can control the colour more and you don’t have to add too much in. Plus you are not messing around with the moisture content of the cake.
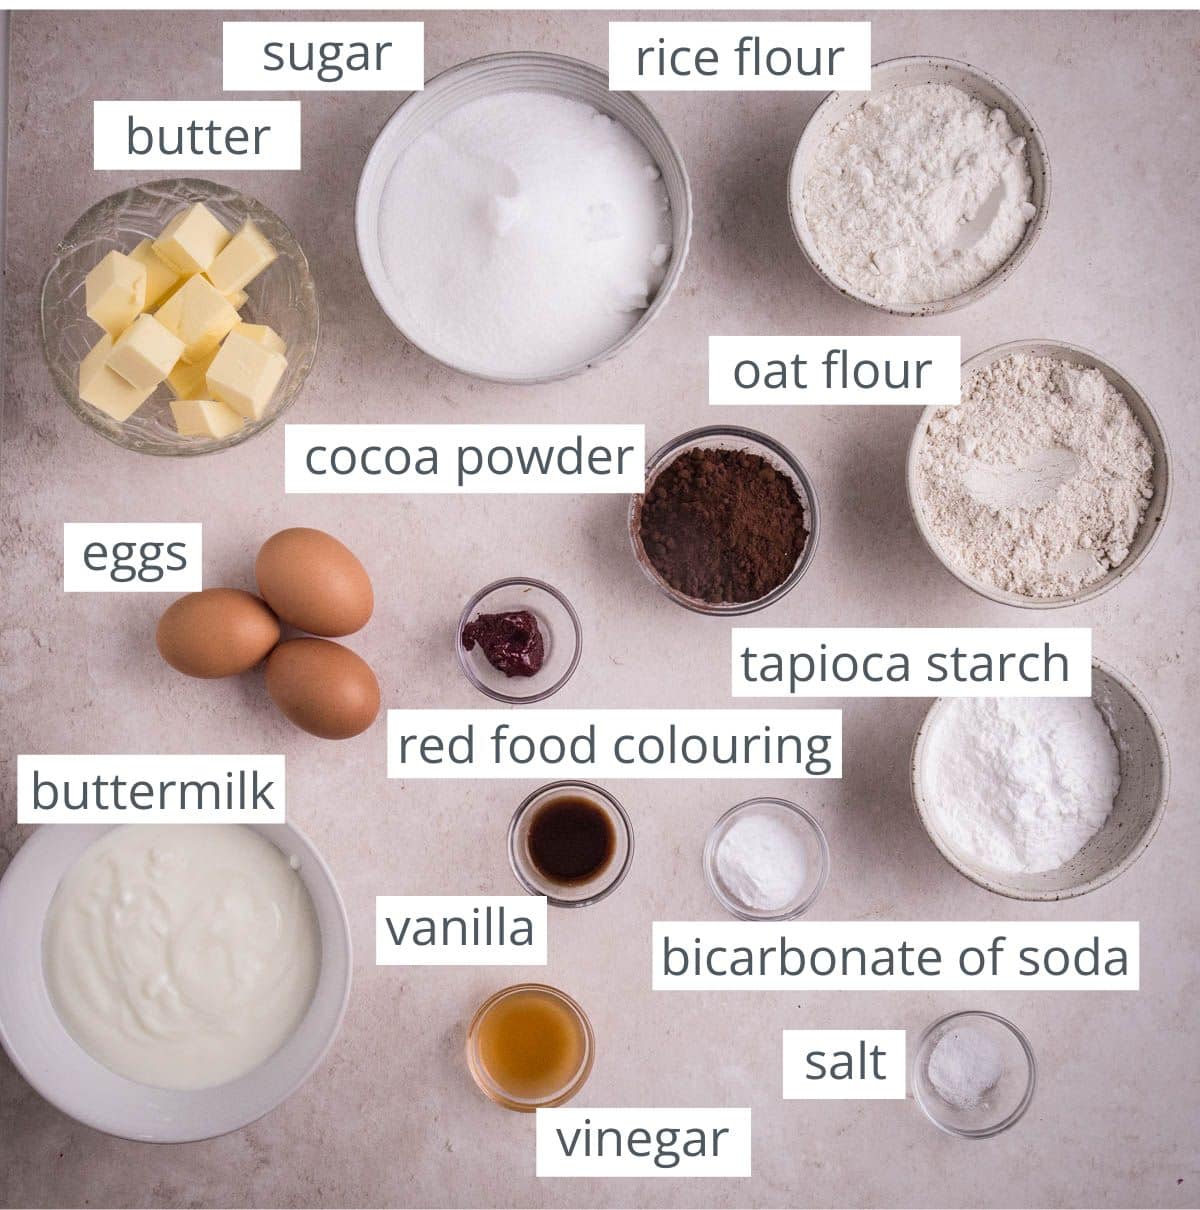
Ingredients and Notes
Gluten-Free Flours
We need 3 gluten-free flours to create the perfect blend for our Gluten-Free Red Velvet Cake.
Rice flour. This is a brilliantly economical gluten-free flour, it’s easily accessible and has a delicate light texture and flavour. You can use either white or brown rice flour here. However, used in excess it can be a little gritty depending on the brand so we do need to balance it out with another wholegrain flour and a starch to keep our cake together. Substitution. You can switch out the rice flour for sorghum flour.
Oat flour. Oat flour is used here for flavour. It has a lovely toasted vanilla flavour which compliments the cake beautifully. It also gives our cake fluffiness due to its unique texture. Substitution. You can switch the oat flour for sorghum flour or millet flour.
Tapioca flour (tapioca starch). We need this starchy flour to help bind our cake together, keep it light and give a softness to the bake. Substitution. You can switch the tapioca flour for another starch like potato starch.
✨I don't recommend substituting with a shop bought gluten-free all-purpose flour as it won't give the same results. However, you can swap all 3 flours out for my own Homemade Gluten-Free Flour Blend as it has the right balance of starchy and wholegrain flours which would also work in this red velvet cake.✨
Other Ingredients
Butter. We need the butter unsalted so we can control the salt content and at room temperature.
Sugar. We use caster sugar here which is a fine white baking sugar but you can use granulated.
Eggs. This recipe uses medium eggs, which are about 60g each. If you can’t get hold of the right sized eggs you can weigh them for the correct amount.
Red food colouring. A paste or gel is my recommendation.
Vanilla extract. Good vanilla extract is essential for the buttercream and a nice to have for the sponge itself.
Cocoa powder. Go for great quality unsweetened cocoa powder. I use Dutch Processed Cocoa powder which is usually what is available in the UK, although it can be hard to tell in the packaging. Green and Blacks is a good brand.
Buttermilk. This acidity of the buttermilk means you achieve a more tender cake. If you can’t get hold of buttermilk you can make your own if you whisk together 300ml whole milk with 1 ½ tablespoons vinegar (or lemon juice) and let stand for 10 minutes before using. To this you can then add the 1 tablespoon of vinegar that the recipe requires.
Vinegar. You can use either a neutral tasting white wine vinegar or apple cider vinegar.
Salt. It’s needed for both the sponge and the buttercream. Essential to enhance our flavours. Use sea salt or kosher salt though, not table salt which is far too harsh.
Bicarbonate of soda. For rise and an ultra tender crumb.
Cream Cheese Buttercream Ingredients
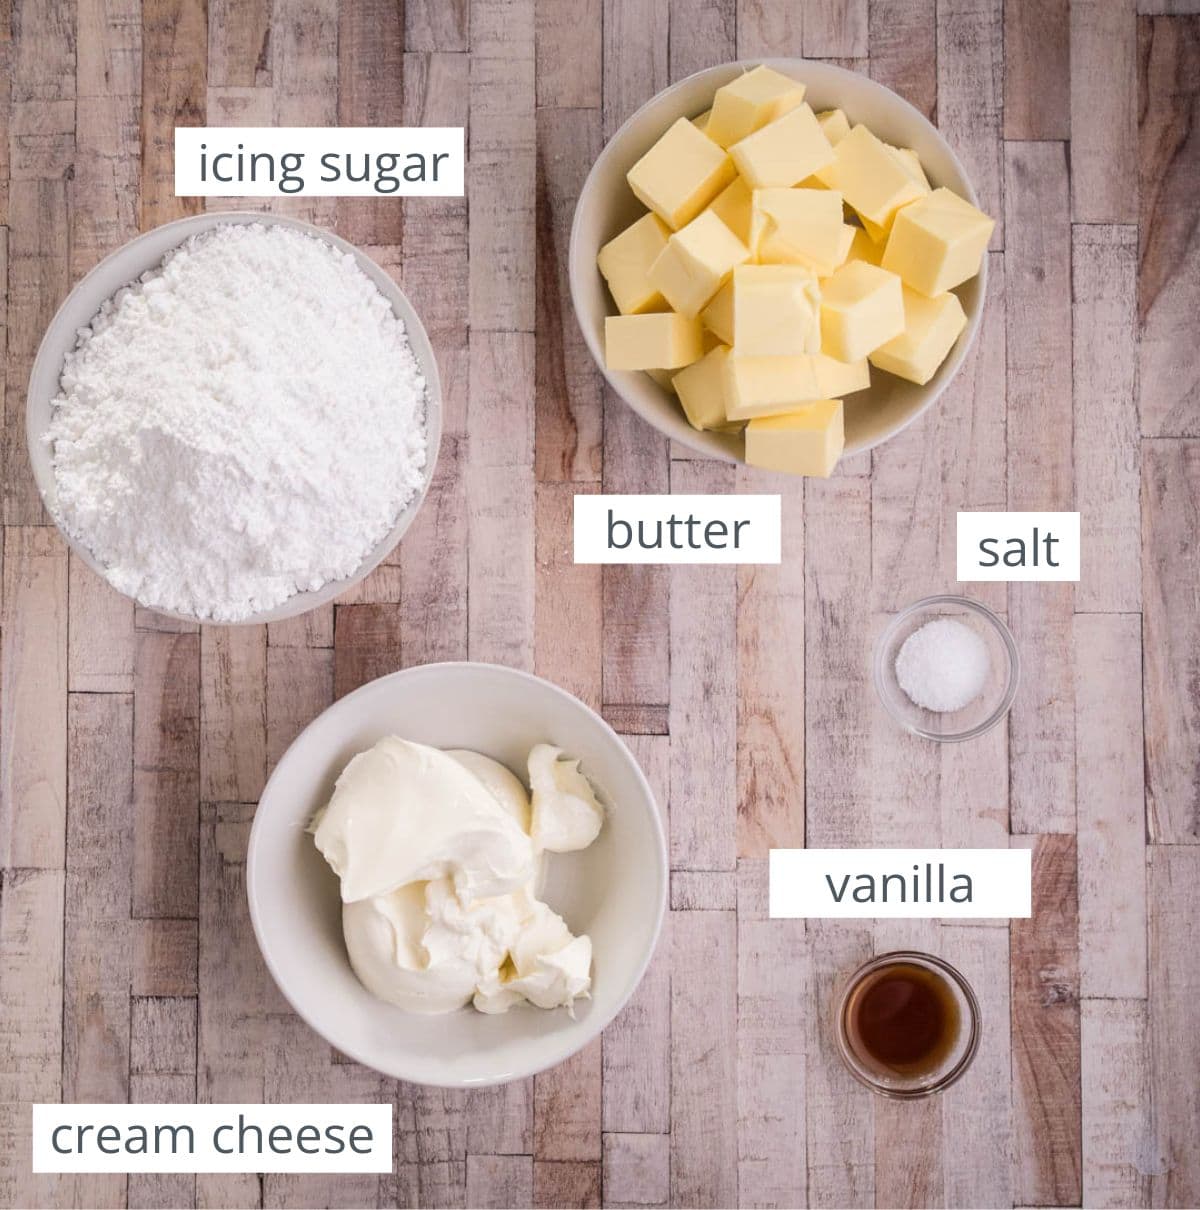
Icing sugar (powdered sugar). Icing sugar is preferred over white sugar in buttercream because it dissolves more easily, resulting in a smoother and less grainy texture, while also contributing to the desired consistency and sweetness of the buttercream.
Butter. We need the butter unsalted so we can control the salt content and at room temperature.
Cream cheese. I really recommend full fat for a better flavour and greater stability for the buttercream. My preferred brand is Philadelphia.
Vanilla extract. Good vanilla extract is essential for the buttercream and a nice to have for the sponge itself.
Salt. It’s needed for both the sponge and the buttercream. Essential to enhance our flavours. Use sea salt or kosher salt though, not table salt which is far too harsh.

How To Make Gluten-Free Red Velvet Cake
For full recipe instructions go to the recipe card at the end of this post.
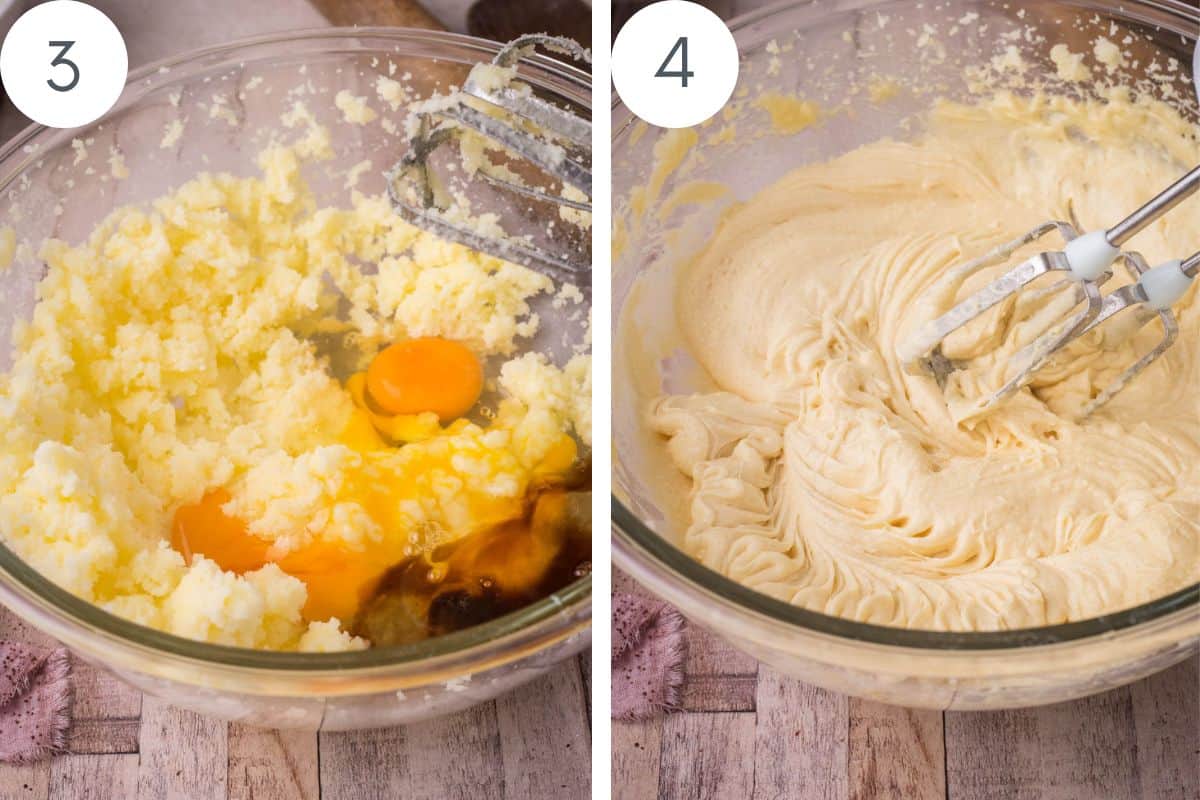
Cream the butter and sugar together, until well mixed.

Beat in the eggs one at a time, followed by the vanilla.
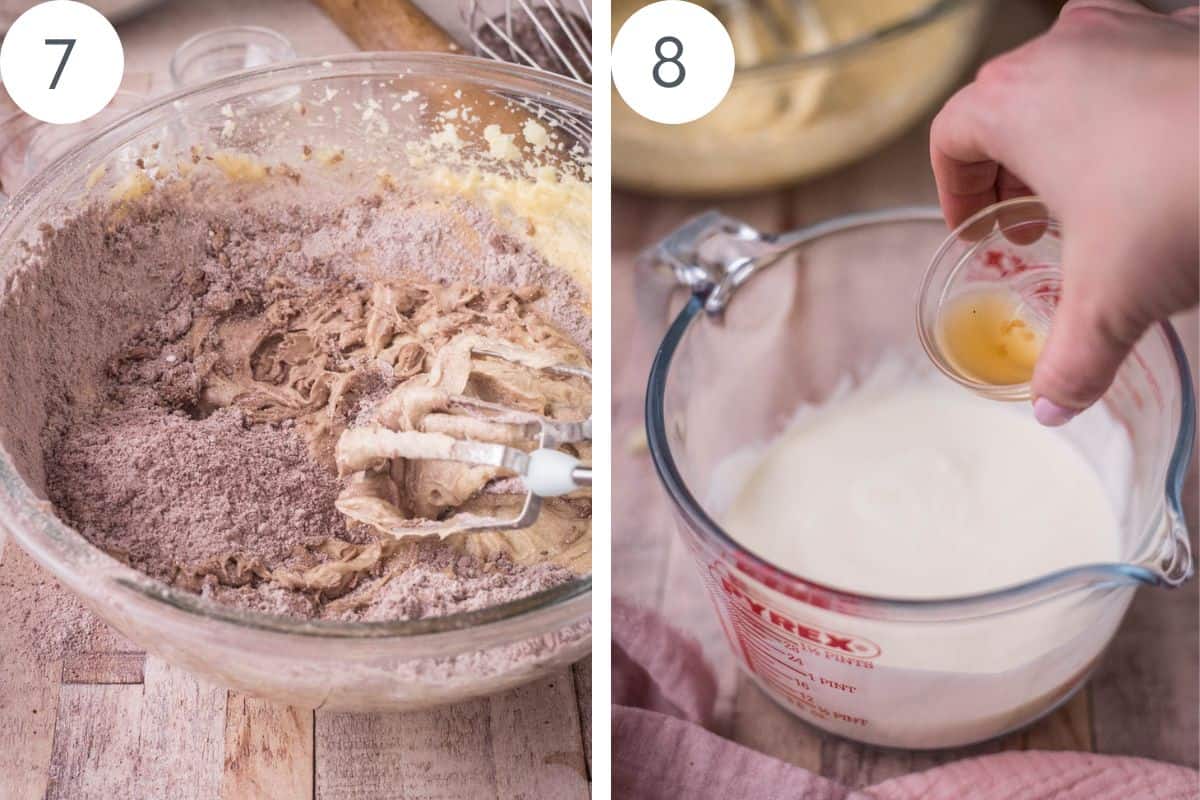
Sift together the cocoa powder, gluten-free flours, bicarbonate of soda and salt.

Mix together the buttermilk and vinegar in a jug.
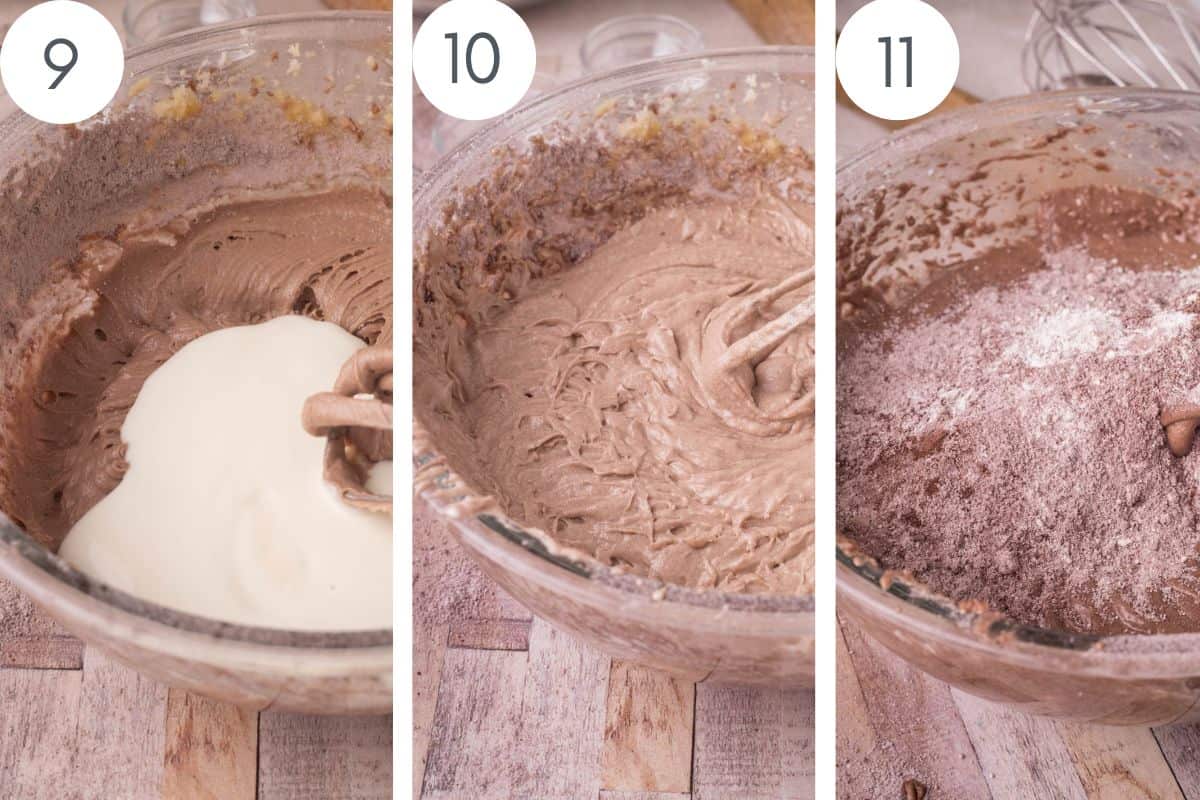
Add the flour mixture and the buttermilk in thirds, alternately into the cake batter.
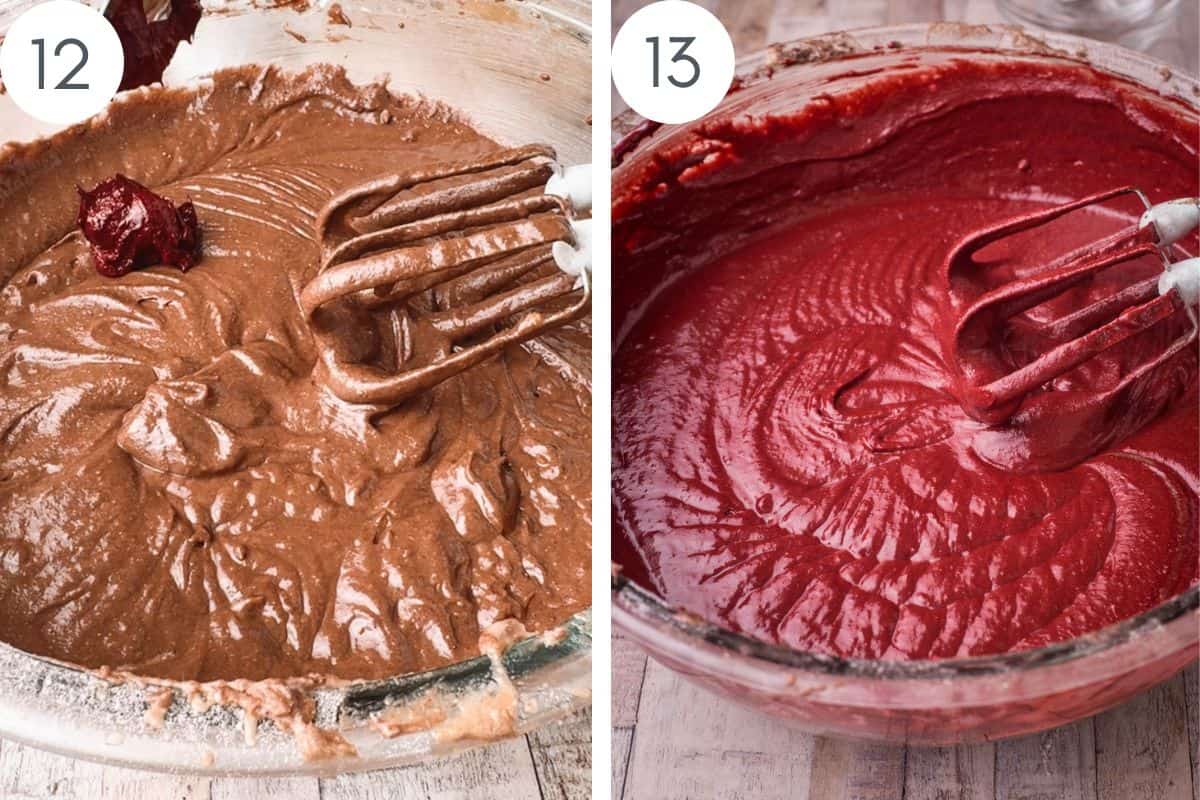
Add the food colouring.
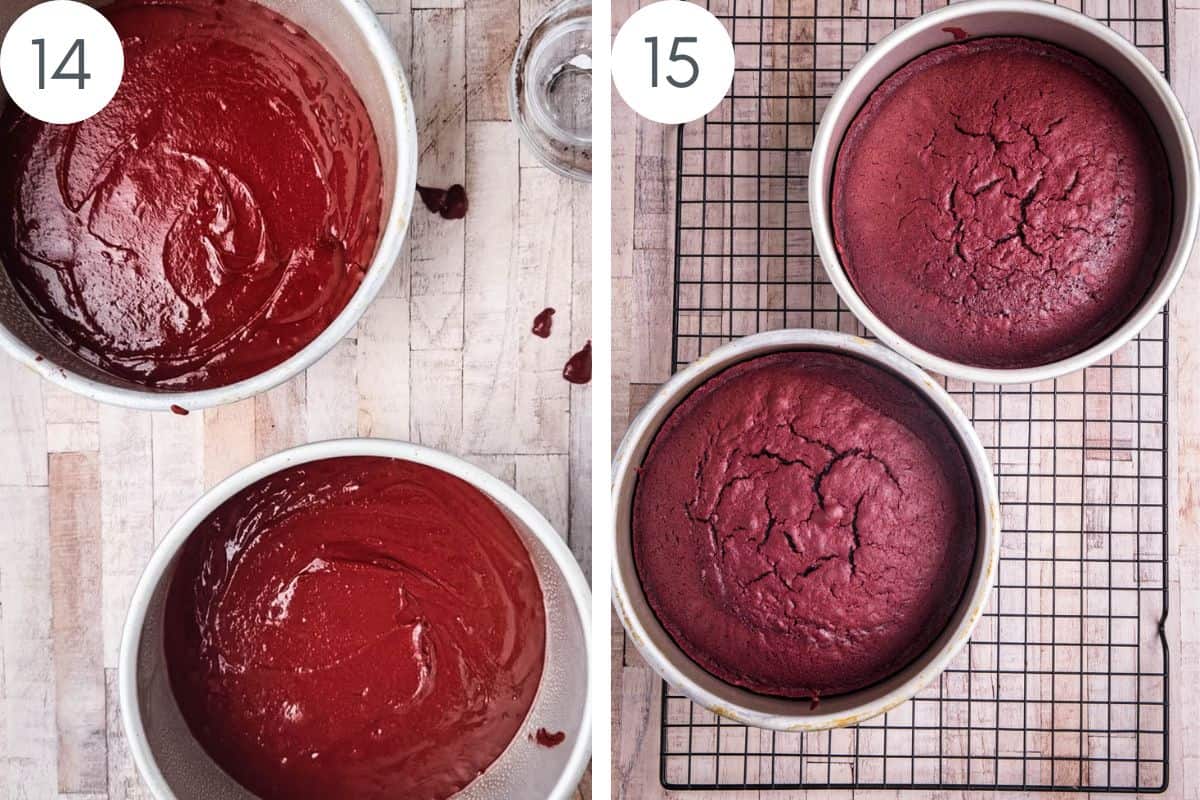
Pour into the cake tin and bake for 40 minutes.
Tips and Troubleshooting
Use room temperature ingredients, including the eggs. This will help the cake batter to emulsify better.
Pre-heat the oven at least 30 minutes before you start baking your cake. It takes a while for a lot of ovens to come up to the correct temperature.
Cream the butter and sugar together for a couple of minutes, scraping down the sides of the bowl regularly so it is evenly mixed.
Break the eggs into a separate bowl first in case of broken shell which is harder to pick out from cake batter. Add one at a time for a lighter batter.
Add your food colouring right at the end of making the cake batter for the best visual cue. Start with 1 teaspoon and add more as you see fit.
Rest the cake batter in the mixer for 15-20 minutes before giving a final mix and pouring into the cake tin. This flour blend contains rice flour and oat flour which both enjoy a little soak to absorb the liquid better.
Rest the baked sponges in the tins for 5 minutes before removing which allows them to relax and pull away from the sides of the tin.
Cool the cakes on a wire rack and make sure they have cooled to room temperature before assembling the cake.
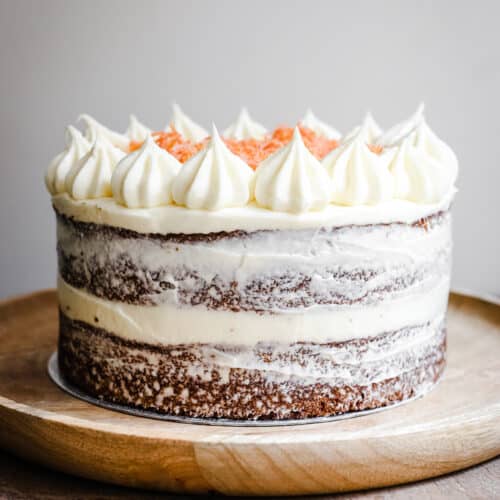
For the red velvet crumbs to decorate the cake, wait until the cakes have cooled and run a very sharp knife evenly across the top of one of the sponges (don’t go to the edges or it will be noticeable), removing a wafer thin slither of sponge. Crumble the sponge in the food processor to create lovely red crumbs for sprinkling over the top.
How to make the Cream Cheese Buttercream
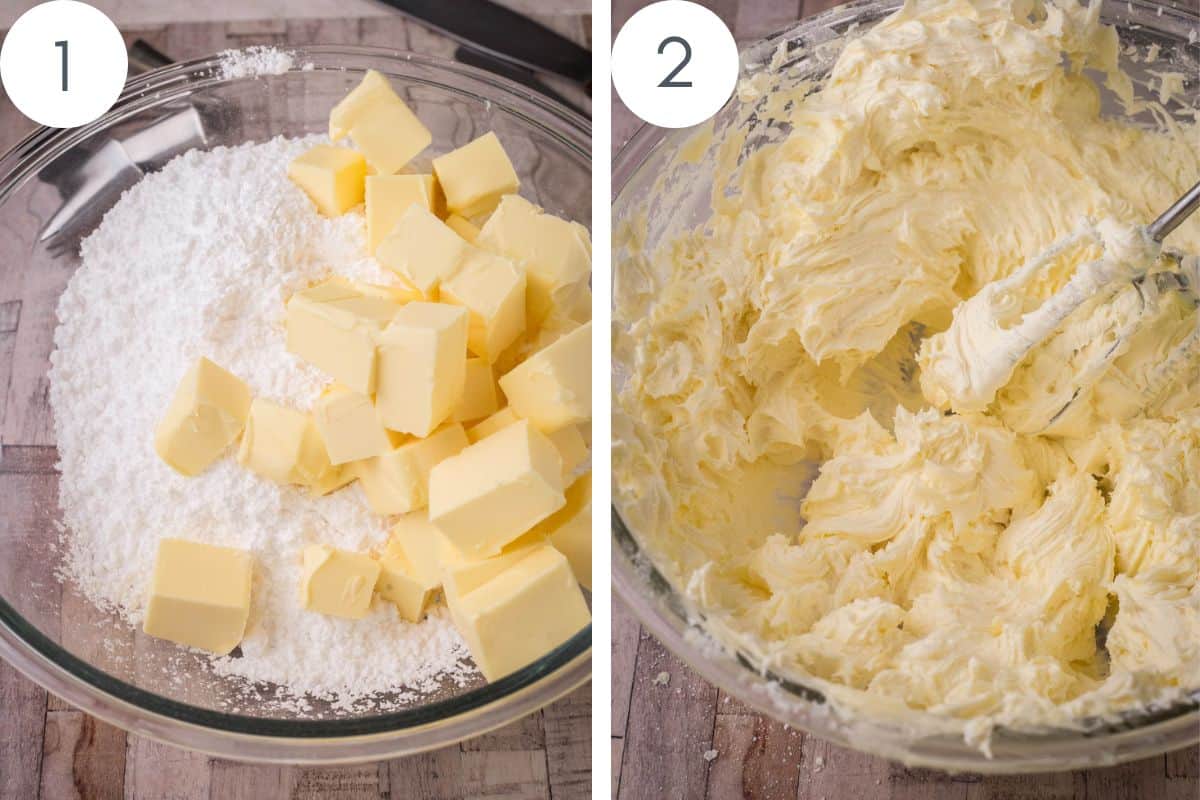
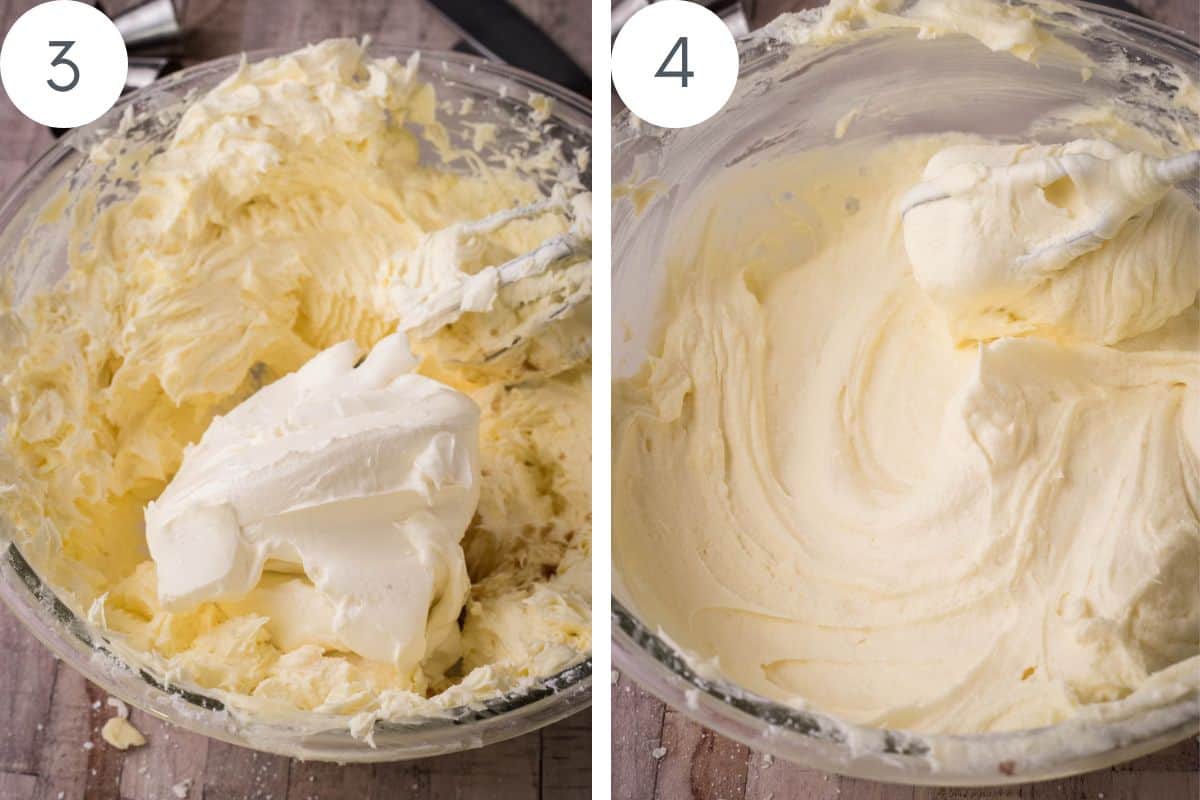
Cream the butter and icing sugar until very light and fluffy, about 5 minutes.
Add the salt, followed by the vanilla.
Finally beat in the cream cheese until the buttercream is smooth.
Buttercream Tips
In the UK we can only buy cream cheese which has added water content. This is great for spreading on bagels but not so much for cream cheese buttercream as it means our buttercream can be a little unstable. If you are using cream cheese from the UK keep the cream cheese in the fridge until the very last second. If you are based in the USA then you can bring your cream cheese to room temperature to soften.
Mix the cream cheese until just incorporated in the buttercream, try not to overmix as it will become too warm.
I've a full post on this Cream Cheese Buttercream if you want further tricks and tips.
How to Assemble the Red Velvet Cake
Prepare Cake Layers: Make sure your two 8-inch cake layers are completely cooled. You shouldn't need to level off these sponges as they bake quite evenly.
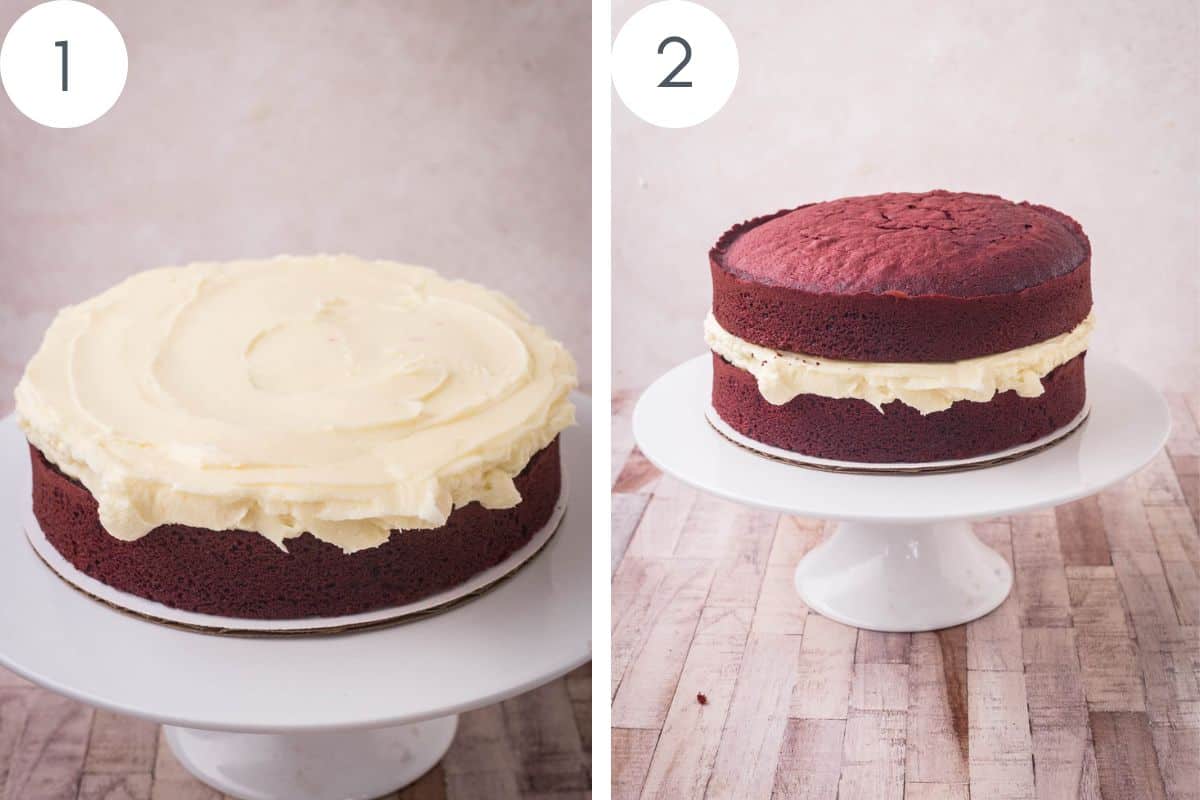
Place First Layer: Put the first cake layer on a serving plate or cake stand.
Add Buttercream: Spread ⅓ of the buttercream evenly over the top of the first layer.
Add Second Layer: Place the second cake layer on top of the buttercreamed first layer.
Cover Entire Cake with Buttercream: For a really professional finish you can apply a thin layer of buttercream over the entire cake to seal in crumbs (crumb coat). Chill for 15-30 minutes. For home baking I don't always bother with this.
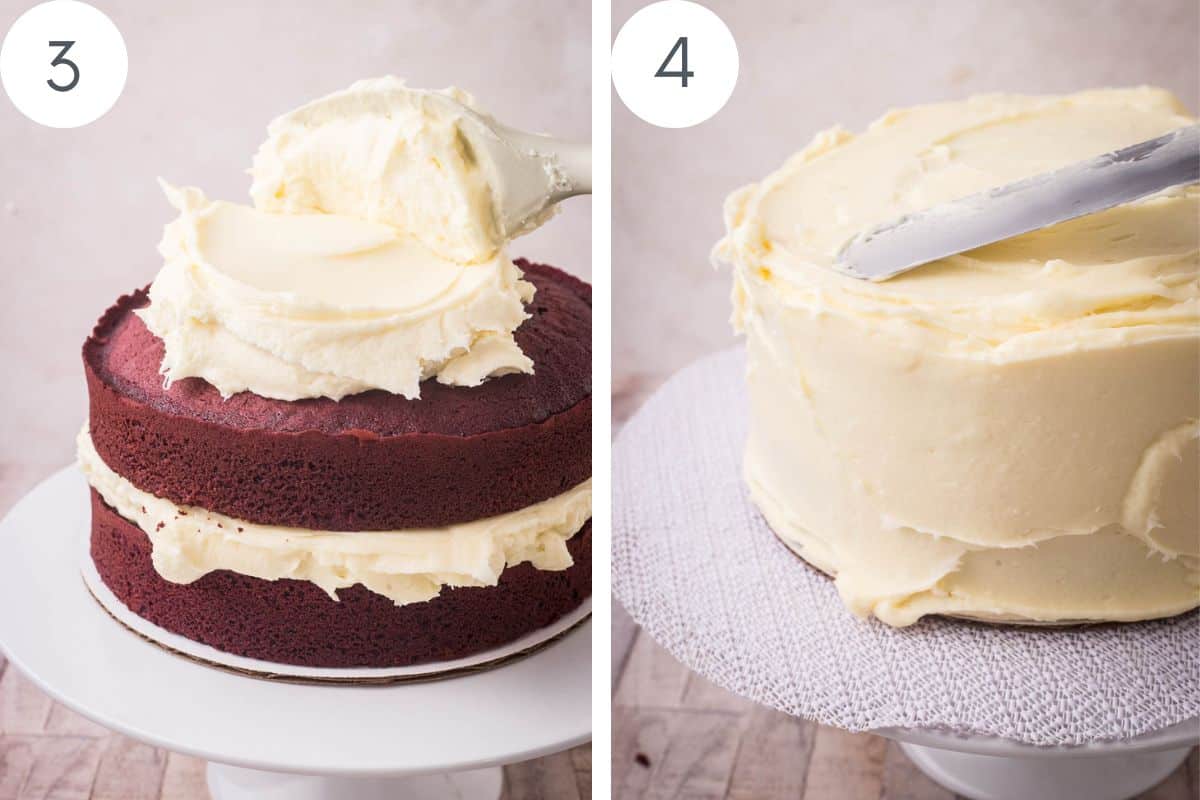
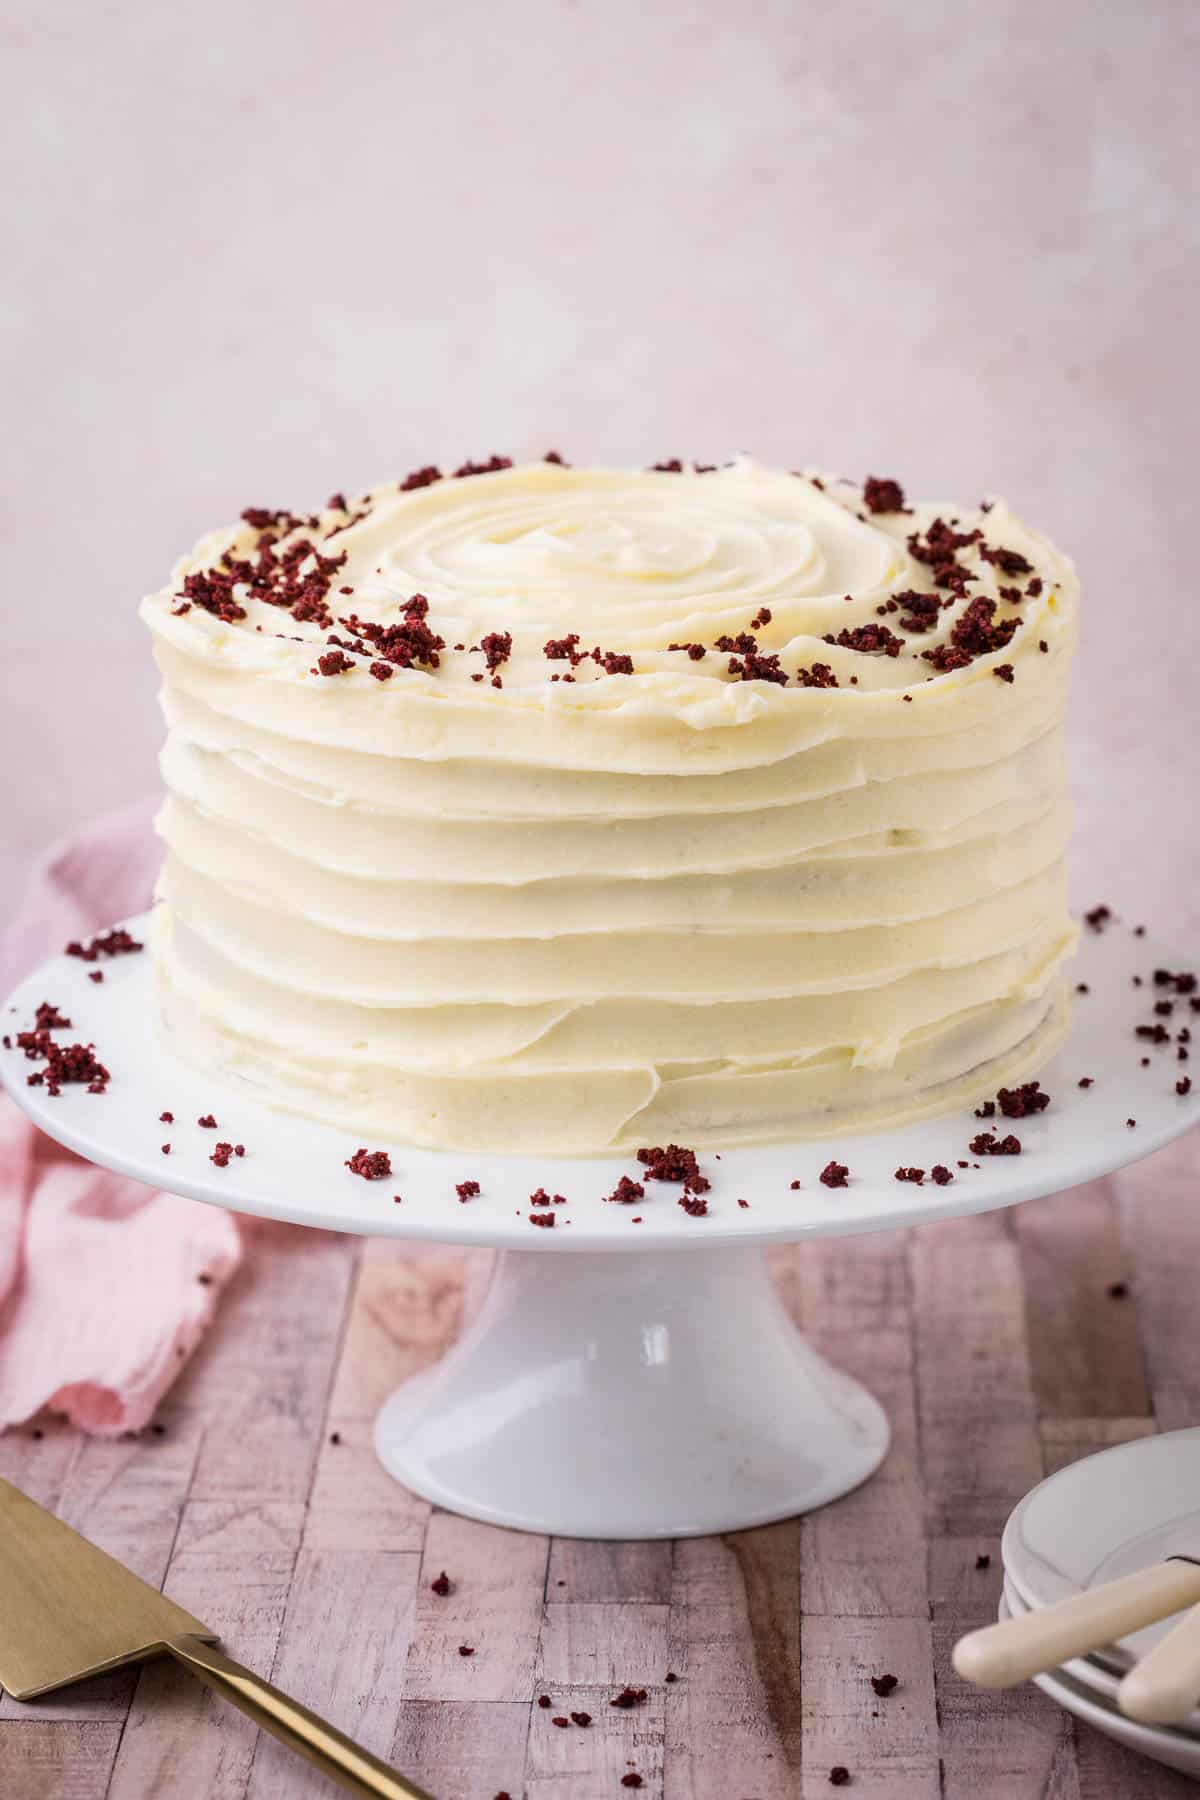
Apply Final Buttercream Frosting: Spread a thicker layer of frosting over the top and sides of the cake.
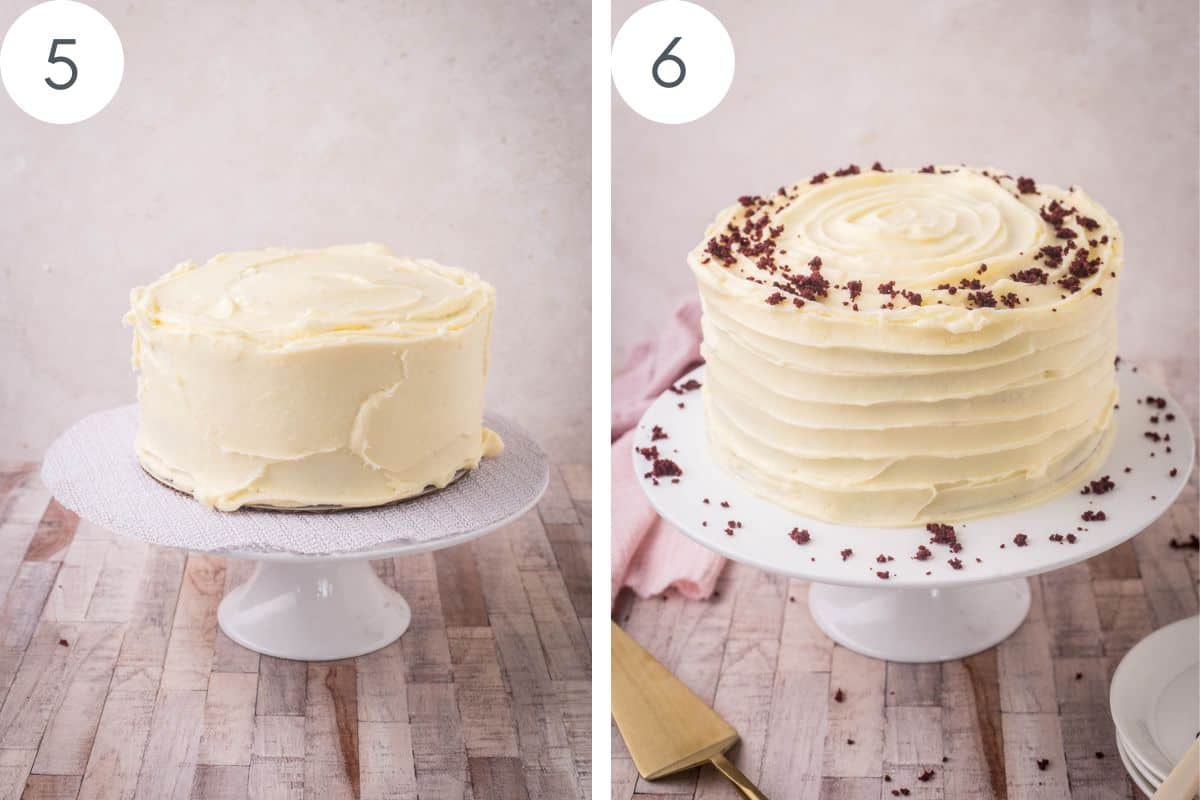
Decorate. For these photos I used a small offset spatula to create a swirl effect around the cake, you can decorate how you choose.
FAQs
You can store the undecorated cake in a cool dark place in an airtight container up to 2 days before decorating and serving.
Once decorated with buttercream the cake can be stored in the fridge in an airtight container for 1-2 days. However, the cake will start to dry out very quickly in the fridge.
For best results freeze the cake prior to decorating with buttercream. Wrap the whole sheet cake in plastic wrap and aluminium foil to avoid spoilage and store in the freezer for up to 2 months.
Allow to defrost fully at room temperature before unwrapping and decorating with buttercream.
You can also freeze leftover cake slices by wrapping up well in plastic wrap and aluminium foil and storing in the freezer. These slices only take an hour to defrost so are great if you are looking for a quick red velvet fix mid-week.
Absolutely. This recipe will provide enough batter to produce 18 cupcakes. Reduce the buttercream quantity down by ⅓.
I have used beet juice before when making this cake and it was still delicious but didn't give the same vibrant red colour I was looking for. But please swap if you feel more comfortable with more natural ingredients.
More Gluten-Free Cake Recipes You’ll Love!
Enter your email below to get this recipe sent to your inbox plus get new recipes, baking tips, and updates.
Gluten-Free Red Velvet Cake
Ingredients
- 150 g unsalted butter - room temperature
- 375 g caster sugar
- 4 eggs, medium - medium size, 60g each
- 1 ½ teaspoons vanilla extract
- 40 g cocoa powder
- 170 g rice flour
- 130 g oat flour
- 75 g tapioca flour - tapioca starch
- 1 ½ teaspoons bicarbonate of soda
- 300 ml buttermilk
- 1 tablespoon vinegar
- ¼ teaspoon kosher salt
- 1 tablespoon red food colouring
Cream Cheese Buttercream:
- 500 g unsalted butter - room temperature
- 600 g icing sugar
- ½ teaspoon salt
- 1 ½ teaspoons vanilla extract
- 360 g cream cheese
Instructions
- Pre-heat the oven to 180°C / 160°C fan assisted /gas mark 4 / 350°F and line and grease 2 x 8 inch (20cm) round cake tins (4cm depth).
- Beat the butter and caster sugar together in either a stand mixer or a large bowl with an electric beater for about 2 minutes until well mixed, scraping down the sides of the bowl every so often.
- Add the eggs one at a time and beat well. Follow with the vanilla extract.
- Sift together the cocoa powder, gluten-free flours, bicarbonate of soda and salt into a bowl and set aside for a moment.
- Mix together the buttermilk and vinegar in a jug.
- Add the flour mixture and buttermilk into the rest of the cake batter alternately. Mixing well after each addition. Add the flour in 3 additions and the buttermilk in 2 additions, starting and ending with the flour.
- Stir in the food colouring and mix until the colour is as desired.
- Allow the cake batter to rest for 20-30 minutes before giving a final stir and pour into the prepared cake tins.
- Bake for 40 minutes or until an inserted cocktail stick comes out clean.
- Remove from the oven then rest the sponges for 5 minutes in the tins to allow them to retract from the sides of the tin.
- Carefully remove the sponges from the tins to finish cooling on a wire rack.
- Using a very sharp knife, cut a very small wafer thin slice of the sponge away (not up to the edges of the cake to avoid it being noticed) and whizz up to cake crumbs in the food processor for decoration.
Cream Cheese Buttercream
- Cream the butter until soft then add the icing sugar and mix for about 5-6 minutes, in either a stand mixer or with an electric beater, until very light and fluffy and pale in colour. Scrape the sides of the bowl down every so often.
- Add the salt and vanilla and mix again to combine.
- Beat in the cream cheese until the buttercream is smooth.
Cake Assembly
- Place the first cake layer on a serving plate or cake stand.
- Spread ⅓ of the buttercream evenly over the top of the first layer.
- Place the second cake layer on top of the buttercream first layer.
- For a really professional finish you can apply a thin layer of buttercream over the entire cake to seal in crumbs (crumb coat). Chill for 15-30 minutes. For home baking I don't always bother with this.
- Spread a thicker layer of frosting over the top and sides of the cake.
- Decorate the buttercream as you choose.
- Sprinkle the red velvet crumbs over the buttercream. Serve immediately or chill until ready to serve.
Video
Notes
- Eggs. The eggs used in this recipe are medium size, 60g with shell and 50g without shell. If you can't get hold of medium eggs I suggest you weigh the amount.
- Flours. You can use either white or brown rice flour. You can substitute the rice flour or the oat flour for sorghum flour or millet flour. You can substitute the tapioca flour for potato starch. I do not recommend using a plain gluten-free flour or cup-for-cup flour for this recipe. However you can swap all 3 flours for my Homemade Gluten-Free Flour Blend.
- Buttermilk. You can make your own by whisking 300ml whole milk with 1 ½ tablespoons vinegar. Let stand for 10 minutes before using. To this you can then add the 1 tablespoon of white vinegar that the recipe requires.
- Red food colouring. How much red food colouring you use is completely dependent on the brand. I recommend using either a good quality paste or a gel as you will need only a minimal amount and it will not affect the moisture content of the cake.
- I've a full post on this Cream Cheese Buttercream if you want further tricks and tips.

Fabulous moist cake . I make this in loaf tins with liners and find it cooks better plus easier to slice . Thank you .
I'm so happy you like this recipe - and thank you for letting us know how you adapt it to work for you - that's brilliant.
I enjoyed making this recipe, it was very straightforward. Having never eaten a red velvet cake before we didn’t know what to expect. It’s delicious, lovely texture and you wouldn’t know it was gluten free. Thank you.
That's great Annie - thank you for your lovely feedback!
Baked this cake for my birthday and it was an absolute hit! So moist and tasty. Thank you for doing what you do
It's always my pleasure! Thank you and Happy Birthday!
What a fantastic blog. I am new to the gluten free world and have learnt so much from reading your posts. I am about to try your red velvet cake recipe for the first time and wondered if I could substitute the oat flour with almond flour. Unfortunately the person I'm making this for cannot tolerate oats. Alternatively would I be best to just substitute for more rice flour.
Thank you Anna! Oat flour is a wholegrain flour so you would be best to substitute it with another wholegrain flour. The almond flour will have too much protein and the rice flour is a starchy flour and can be a little gummy if you use too much. Teff flour would be my recommendation for a substitution here as it has a similar textural consistency to oat flour and the flavour of it would go exceptionally well with the cocoa in the red velvet. Let me know how it goes!!
HI There,
Can this be made with GF flour instead of oat and rice flour?
Hi Sara. Which brand of GF flour were you planning on using? I would not recommend making this cake with Doves' Farm as it already contains tapioca flour so there would be far too much starch and the cake would become quite gluey. If you were to replace all 3 flours with Doves' Farm then it would not work either as this GF flour is not appropriate for 1:1 substitution - this cake would become too dry and crumbly. However, if you were to replace all 3 flours with Bob's 1 to 1 Baking Flour then you might have a more successful result. I have not tried this flour but I imagine the taste and texture to be slightly different than if you were to follow the original recipe. Please note though Bob's 1 to 1 does contain xanthan gum so if you are intolerant then that would not be the right flour choice for you.
My husband cant have vinegar, would it be ok to leave out, or do you suggest using another substitute?
Hi Shannon, that's no problem but you do need to substitute it as it's the acid reacting with the buttermilk and bicarb that give the red velvet its lovely soft crumb. Swap in for the same amount of lemon juice.
Hello. I am so happy to have found your blog which doesn't have GF recipes with gums in. For me, gums are as bad as gluten. I would like to make this cake but the recipe calls for rice flour but in the section underneath it says you used sweet rice flour (with a link to purchase). Could you confirm whether it is plain white rice flour or sweet rice flour we are meant to be using to make the red velvet sheet cake. Thank you and best wishes.
Hi Mel, I agree about the gums - I do not tolerate them well at all!! Thank you so much for pointing out the discrepancy. The ingredients list is correct - it is white rice flour which is needed for this recipe and I have amended the link to purchase for the correct flour. Happy baking!
Hi Georgina,
Would it be possible to change out the oat flour for more of the rice flour or tapioca flour or something else entirely?
I am new to Gluten free baking and have been asked to make a wedding cake for a client who has Coeliac disease. From what I've read this often means they can't eat oats either...
Thanks in advance
Emma
Hi Emma. Yes you can switch out the oat flour. I haven't tested the recipe with any flour alternatives but you might like to choose swapping it out with either white rice flour, teff flour or millet flour. You will probably need to test it out before diving straight into the wedding cake though. Hope this helps. Thanks!
How would you adapt the cook time to make these cupcakes?
Hi Kelcie, I haven't made this red velvet cake recipe as cupcakes yet but I would start baking the cupcakes for 20 minutes at 170C. Check them at that point. I doubt they would take longer than 25 minutes though. As soon as I have tested it I will confirm here. Thanks!
First of all thank you for all the beautiful recipes and photos! 🙂
I also love you've so many recipes gluten and dairy free, i have a quite big list of food restrictions so it's nice to find so many good recipes and ideas.
I would like to bake this one for sure and so i could eat it too, i was thinking if we could make it dairy free? What's your opinion? Could the buttermilk be replaced for something else?
Thanks for your time 🙂
joana
Thank you for your lovely comment Joana! The buttermilk can easily be replaced for a dairy-free substitute. Just pour 400ml of dairy-free milk of your choice (I usually use a 50/50 mix of almond milk and coconut milk) into a jug with 2 tablespoons white vinegar or lemon juice and whisk together. The mixture will slightly curdle but that's okay. Leave for 10 minutes then use exactly the same as you would the buttermilk. I hope that helps - let me know how it goes!
Thank you so much! My birthday is coming up so i'll bake it to bring to the people in the lab.
I will 😉
It's a perfect birthday cake for sure!!
I Georgina I have a client that is Gluten free, Dairy free plus allergic to nuts. You mentioned using almond milk and coconut milk, as a dairy free option. Any substitution for the almond milk?
Thank you!
Mary
For this Red Velvet Cake? I haven't mentioned a dairy-free alternative in this recipe I don't think.. However, depending on the recipe then oat milk can be substituted for the almond milk.
So pleased you revisited Red Velvet Cake, I remember it well from your first cake stalls. Sooooo delicious! Looking forward to trying the gluten free variety soon.
Thanks Gill! I'm looking forward to getting back to the cake stall!