A Complete Guide To Chocolate Ganache (Dark, Milk and White)
This post contains affiliate links. Please read my disclosures.

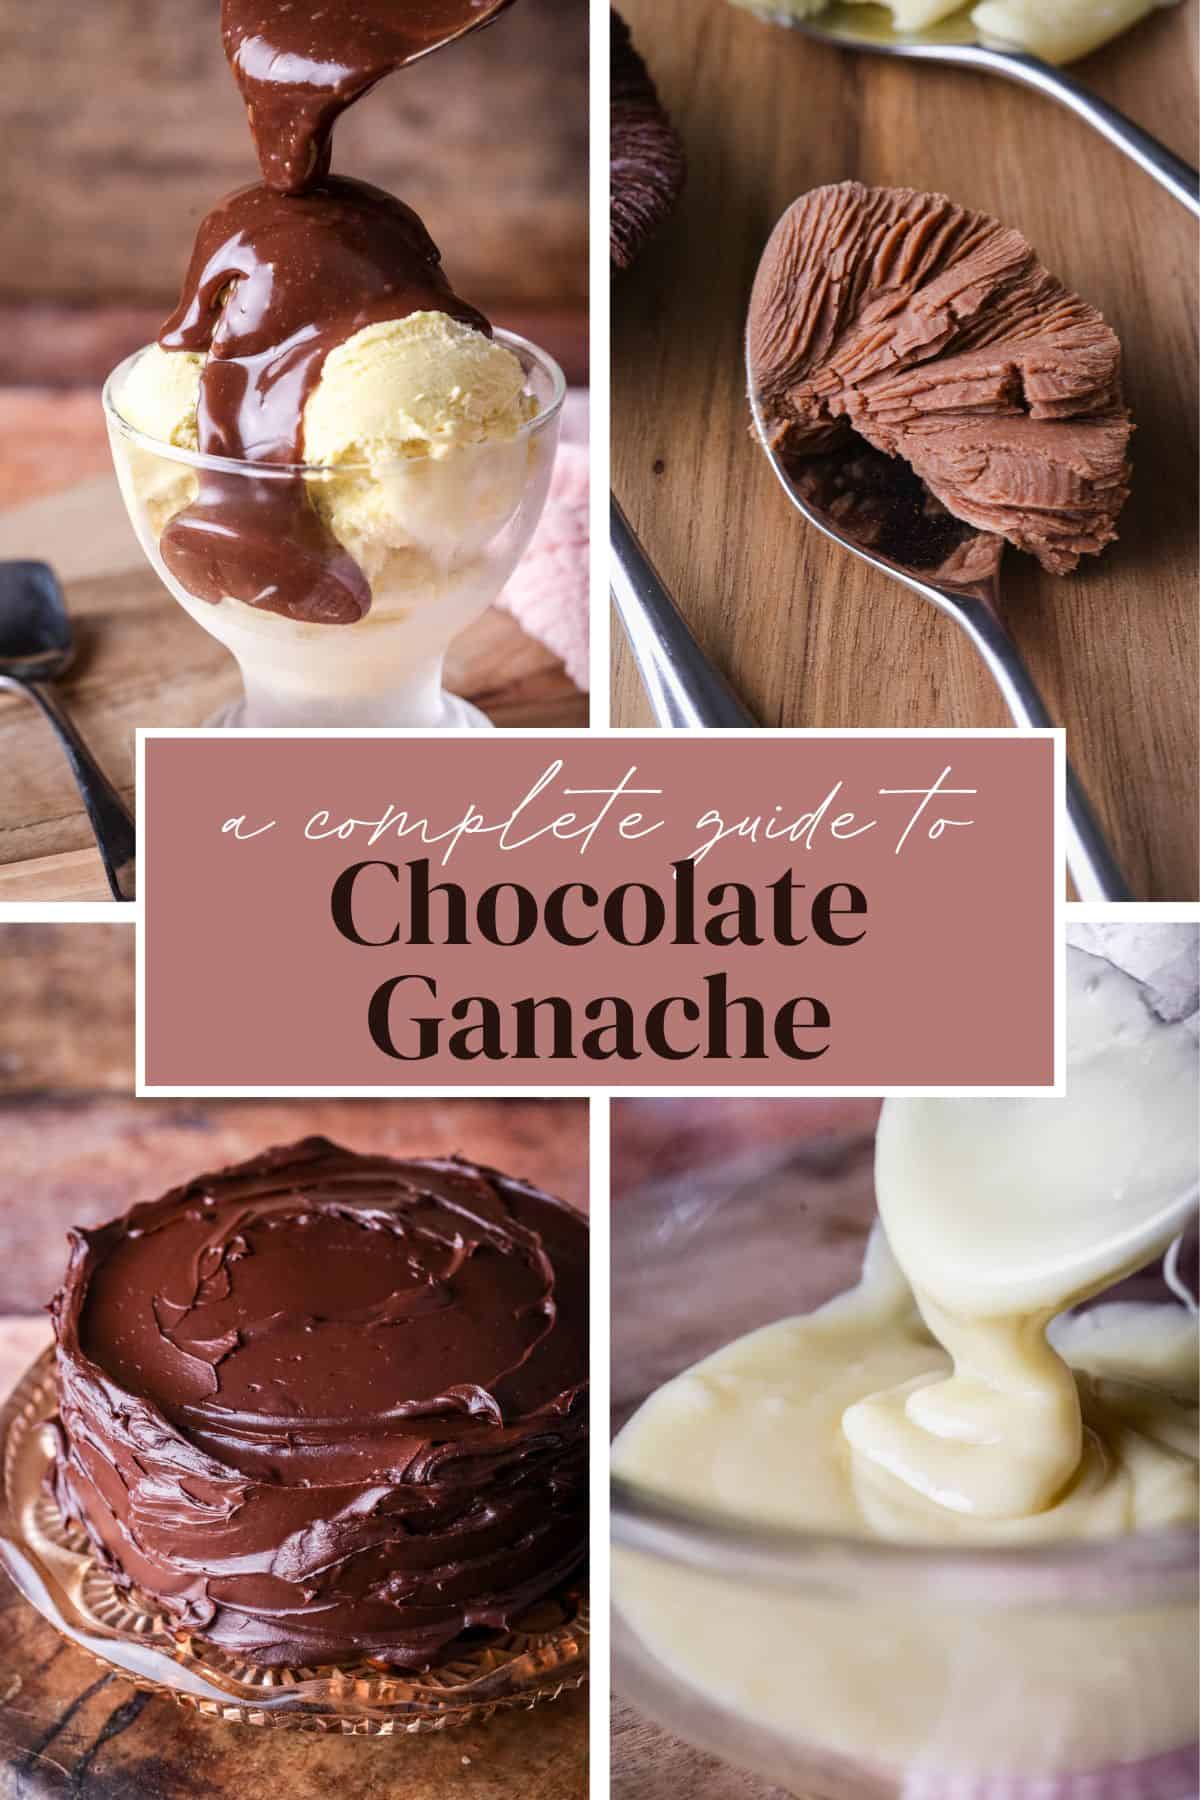
This recipe is for making a velvety smooth ganache that is perfect for truffles, covering cakes, filling baked goods or pouring over a drip cake or ice cream. We’re digging deep in how to make foolproof dark chocolate, milk chocolate and white chocolate ganache with plenty of tips to avoid (or fix!) split ganache.
I like to think of myself as a bit of a chocolate connoisseur but ganache had been driving me crazy recently. Even though I had read in detail all the chocolate recipe books leftover from that time I wanted to be a chocolatier and I had been through so many internet recipes, still every time I needed to make a ‘super easy no fuss ganache’ the chocolate + cream I was making in my own kitchen was splitting every single time.
It turns out it’s not always as easy as pouring warm cream over chocolate and mixing together. A lot can go wrong in this simple process.
So I spent a month in chocolate heaven; deep diving, re-reading, re-testing, making truffles, fudge cakes, drip cakes, ice cream sauce, whipped ganache, creating gorgeously smooth ganache and inevitably splitting but also fixing many a batch too. I have been there done that with dark chocolate, milk chocolate and white chocolate and come up with a method and troubleshooting path that has now been working consistently for whatever use I throw at it.
I take slight umbrage at the fact that so many people call ganache ‘easy,’ when actually it makes you feel a bit useless when the easiest two ingredient recipe in your baking repertoire doesn’t behave like the internet says it should.
So if you have ever had a problem with ganache that doesn’t melt or sets too quickly, splits and can’t be fixed (despite so much troubleshooting) then I really hope that this will be your last stop before producing consistency smooth and creamy ganache every time.
Top 3 Ganache Tips
We’ll really get into the minutia of ganache making below but there are some key things we must not take for granted before we start.
- Chop (or grate) the chocolate as small as possible. (especially if using milk chocolate or white chocolate.
- Gentle and slow melting.
- Gentle and slow stirring.
Oh, and patience. I have found that ganache does not want to be made in a chaotic, hot kitchen when I am juggling several other components of my recipe. Take your time and try and work in a cool space (if you can help it). Making ahead of time is really worthwhile here.
Aside from the troubleshooting I’ll help you produce a great all-purpose ganache for dark chocolate, milk chocolate and white chocolate which are fantastic to use for chocolate fudge frosting, making easy chocolate truffles and filling meringue cookies, sandwich biscuits or even pouring over cakes to create a drip technique or used in an ice cream sundae. The possibilities are endless and really it all starts with a bit of chocolate and cream.
Why You’ll Love This Chocolate Ganache
- We just have one recipe and ratio of ingredients for dark chocolate. You can use it however you like with clear timings on when it’s ready to use for different purposes.
- There’s a separate recipe for milk and a separate one for white chocolate. I’ll explain why below.
- Easy science to suit someone with an English degree who dropped science like a hot potato immediately after GCSEs. We’re keeping it super simple, with just enough information so we understand why our ganache is working (or why it isn’t).
- Clear technique with guidance every step of the way so you can recognise and nip in the bud when things might be turning awry.
- Step-by-step split ganache troubleshooting plan so you have a definitive route through the drama rather than lots of ideas of how you might fix it.
- Lots of ideas for using our finished ganache. Lots.
What Is Ganache?
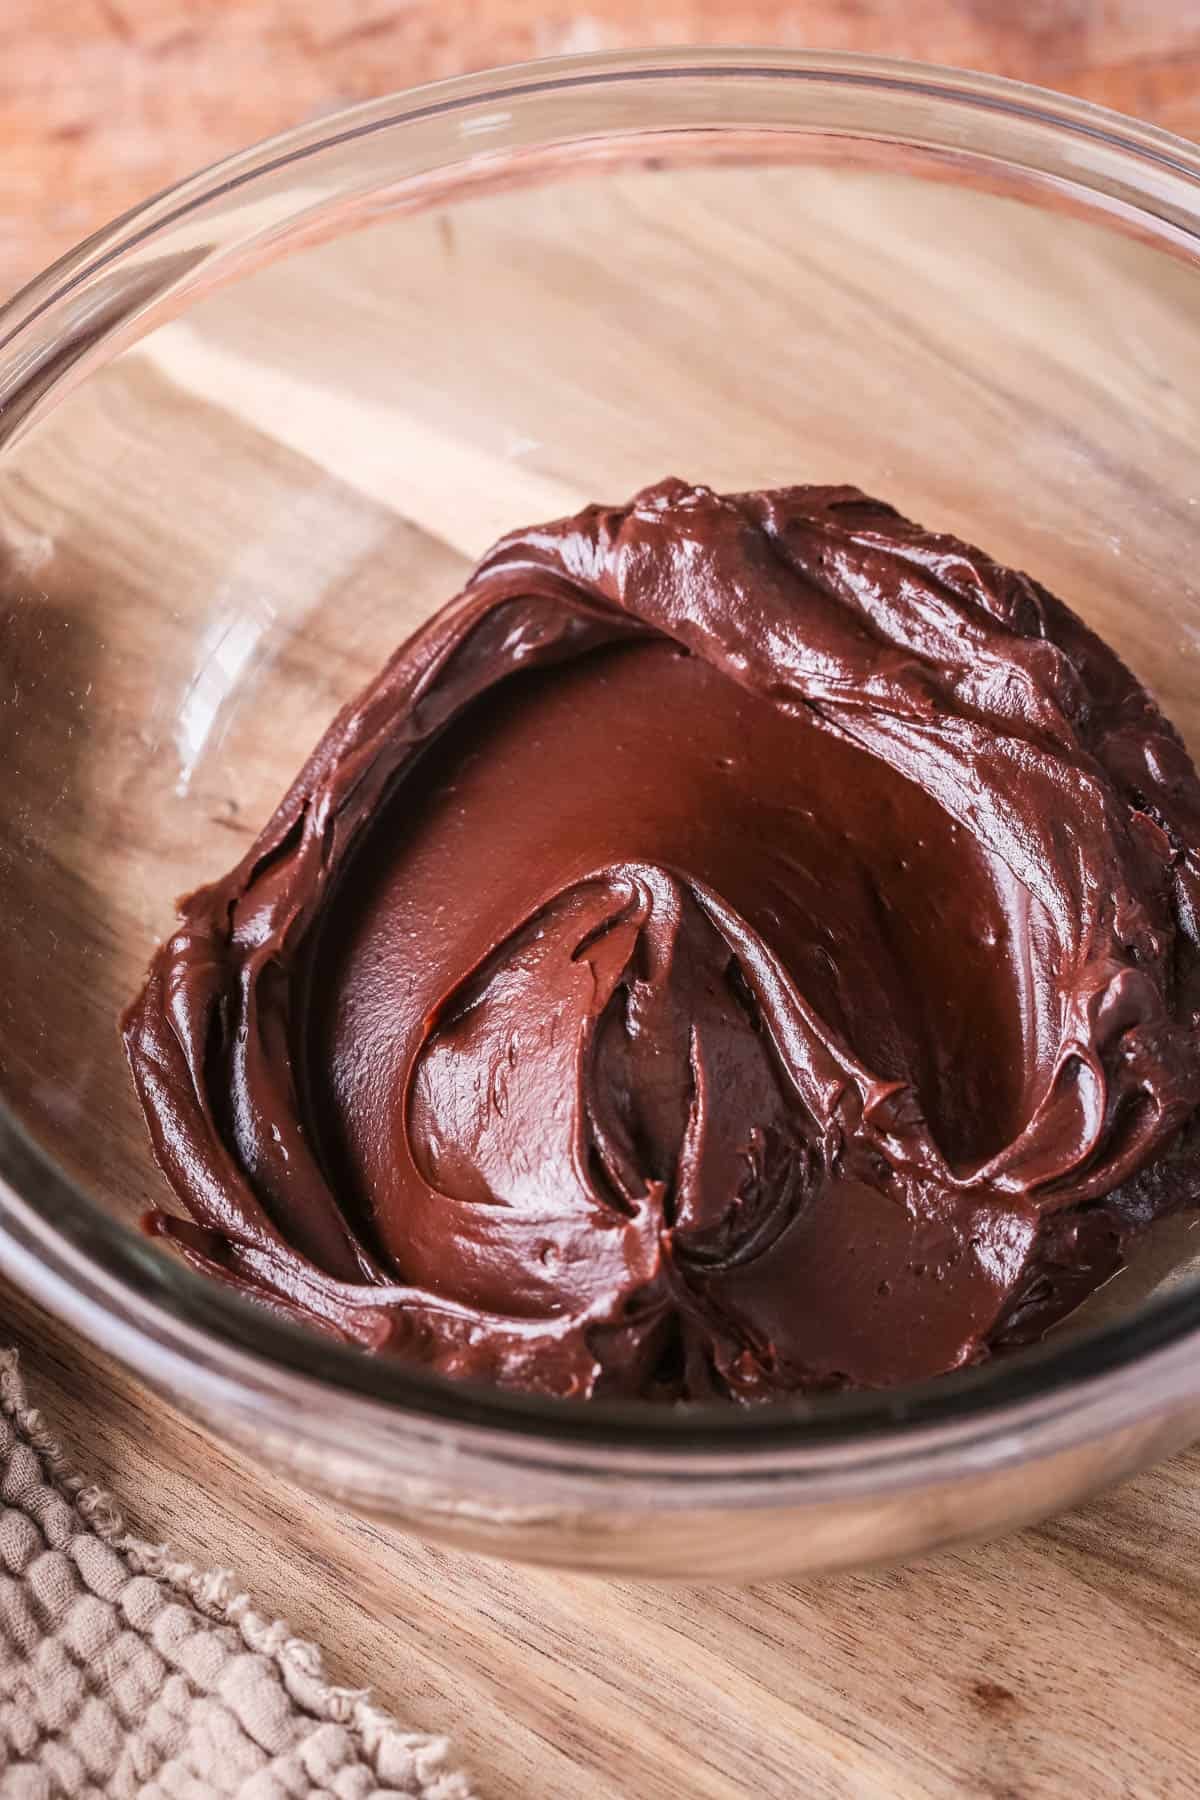
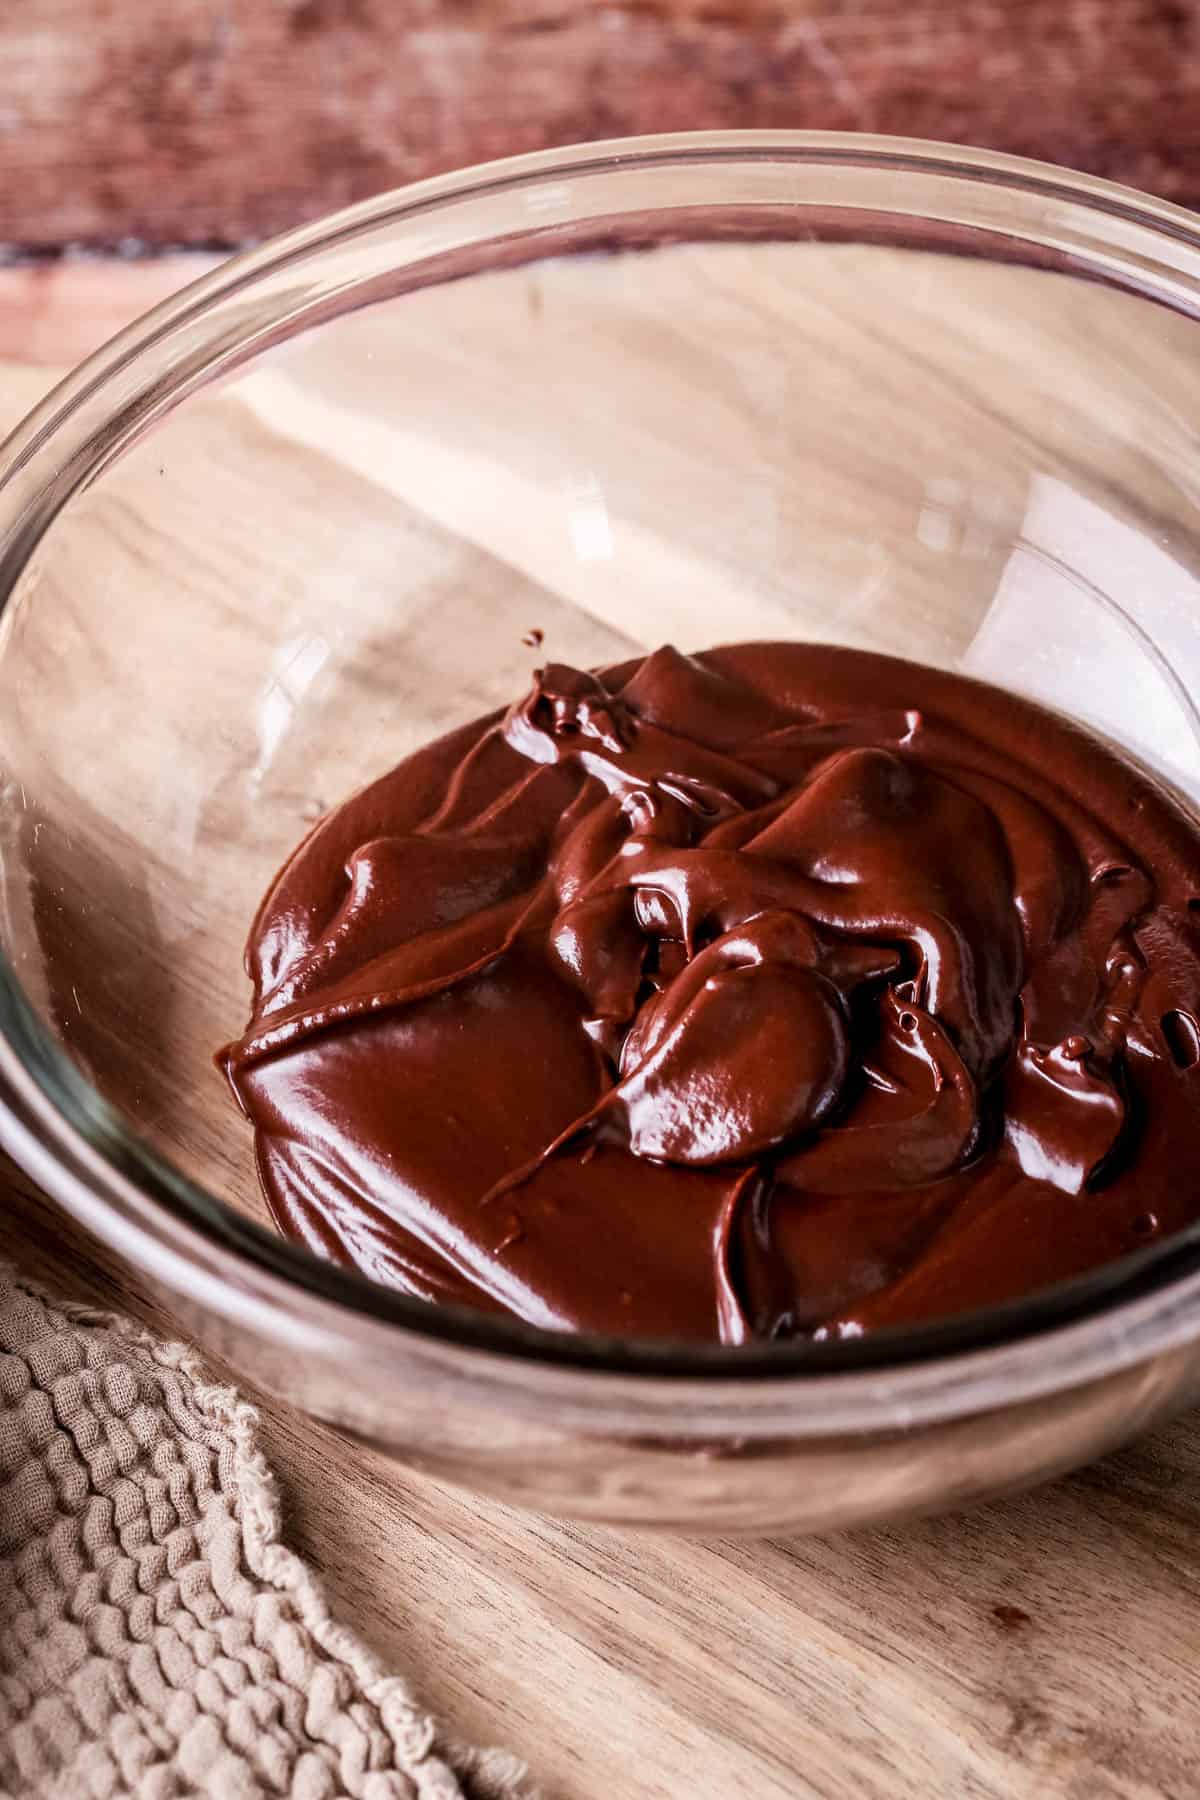
At its core chocolate ganache is an emulsion made from chocolate and liquid (usually cream), gently melted together to create a smooth glossy mixture. Unlike tempered chocolate, ganache doesn’t set with a firm snap because the added cream disrupts the cocoa butter’s crystal structure. Instead it sets softly and can either be beautifully pourable or smooth and fudgy depending on the chocolate to cream ratio or how long you rest it after the melting process.
You don’t need to use cream, although that’s what we traditionally think of when making a ganache, you could even use water or another liquid. You can experiment with different ganache flavours using all kinds of liquids, ratios of ingredients to create a plethora of delicious ganaches. Although I recommend you do that once you understand the science, the ratios of the ingredients and have this simple recipe consistently made under your belt.
This recipe here is a traditional ganache using chocolate + cream.
The Science Bit
For its minimal ingredients the structure of the ganache is complex and requires correct handling and understanding of ratios and temperature.
Ratios
A ganache is a fat-in-water emulsion. The fat comes from both the cocoa butter and the cream. The water comes from the cream.
The fat droplets need to be suspended and dispersed evenly within the water content of the ingredients for a smooth texture.
If there is too much fat in the ratios then the fat droplets will gather together and become difficult to disperse which is why your ganache can become oily.
Temperature
The chocolate and cream need to be stirred together at a warm temperature preferably between 40-45°C (104-113°F) which is when the chocolate has fully melted.
If the ingredients are stirred at a hotter temperature then the fat droplets will become unstable in their liquid form and be more likely to gather together, again your ganache will look oily.
If the ingredients are stirred at a cooler temperature then the cocoa butter will start recrystallising as it cools which means the fat cannot disperse evenly into the liquid, they will gather together and become oily.
Why This Ganache Recipe Works
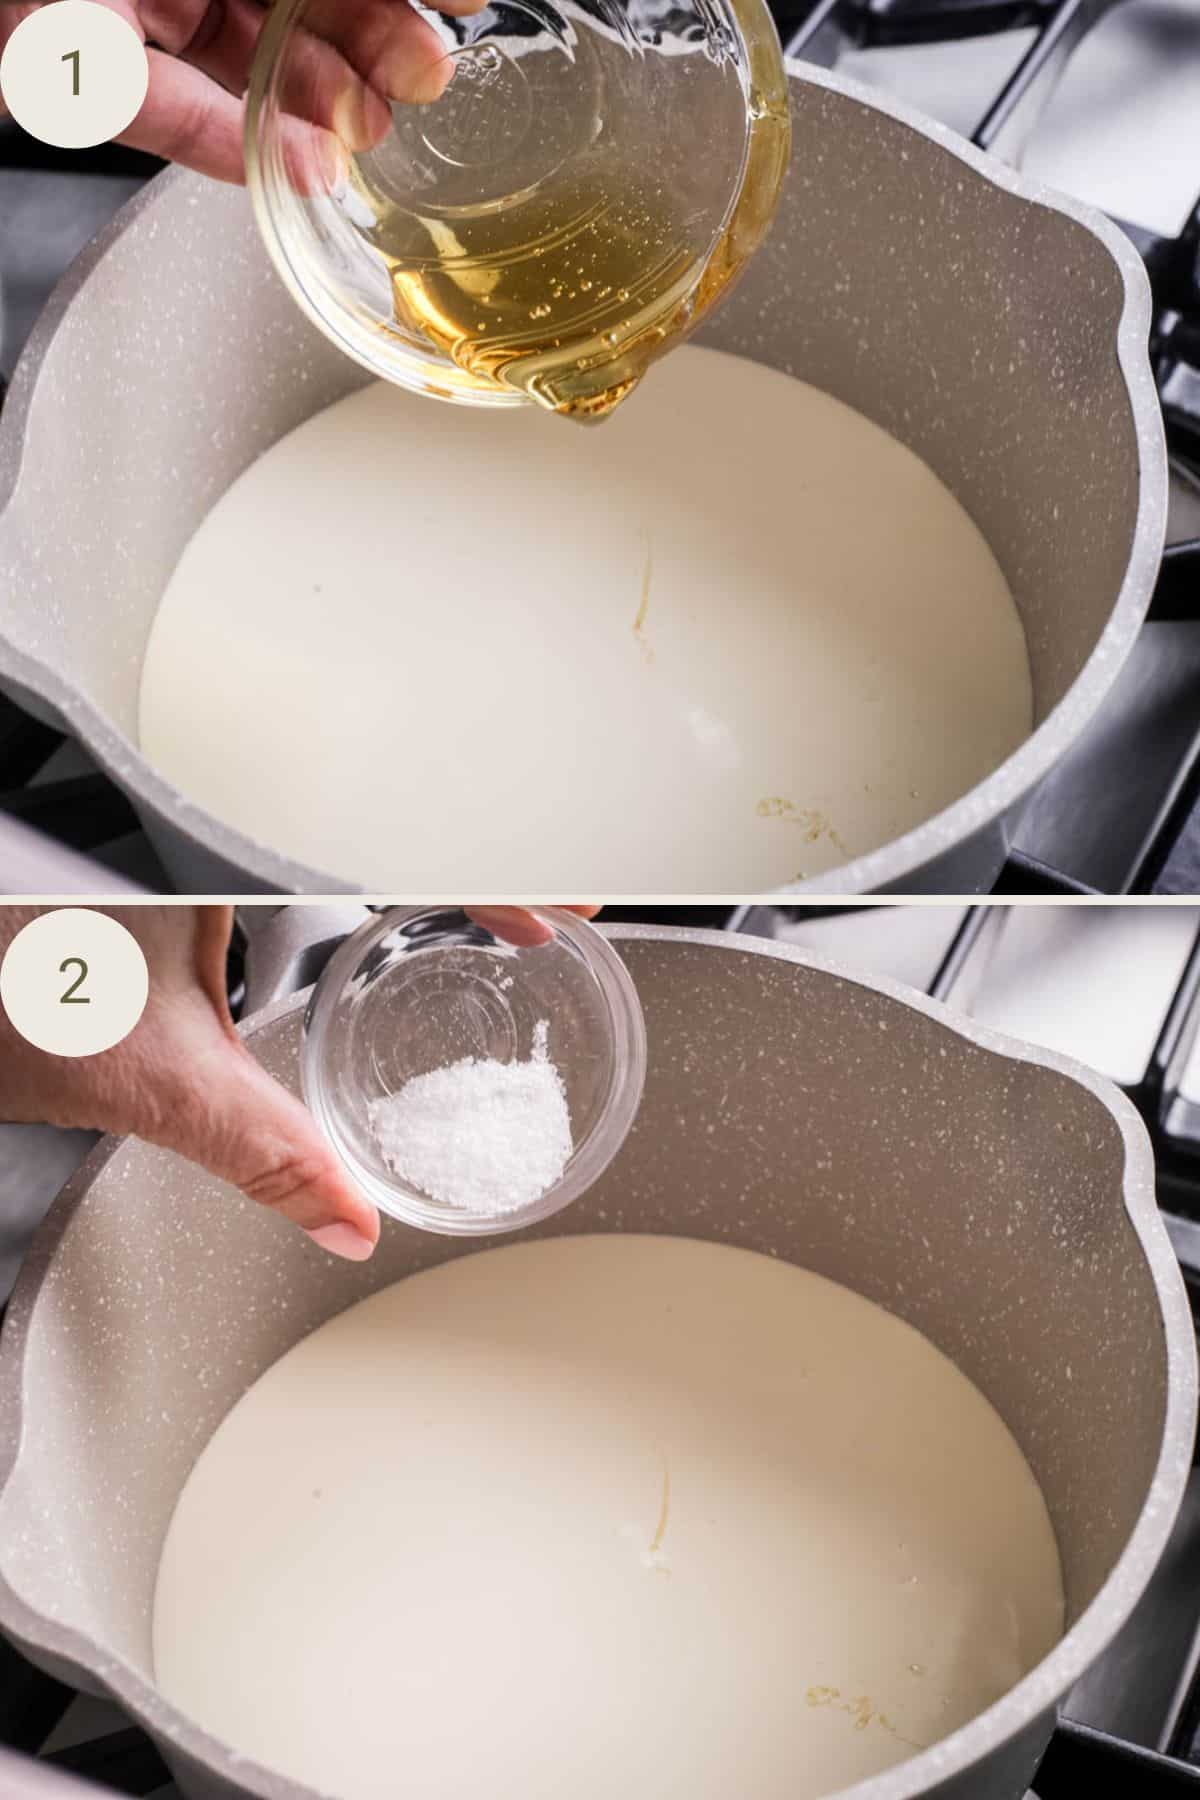
Firstly the cream is heated to just about boiling – about 80°C (176°F). It will be just simmering at the edges.
You don’t want to add any extra water content into this cream as this will unbalance the emulsion.
We only add golden syrup which will help add stability to the emulsion.
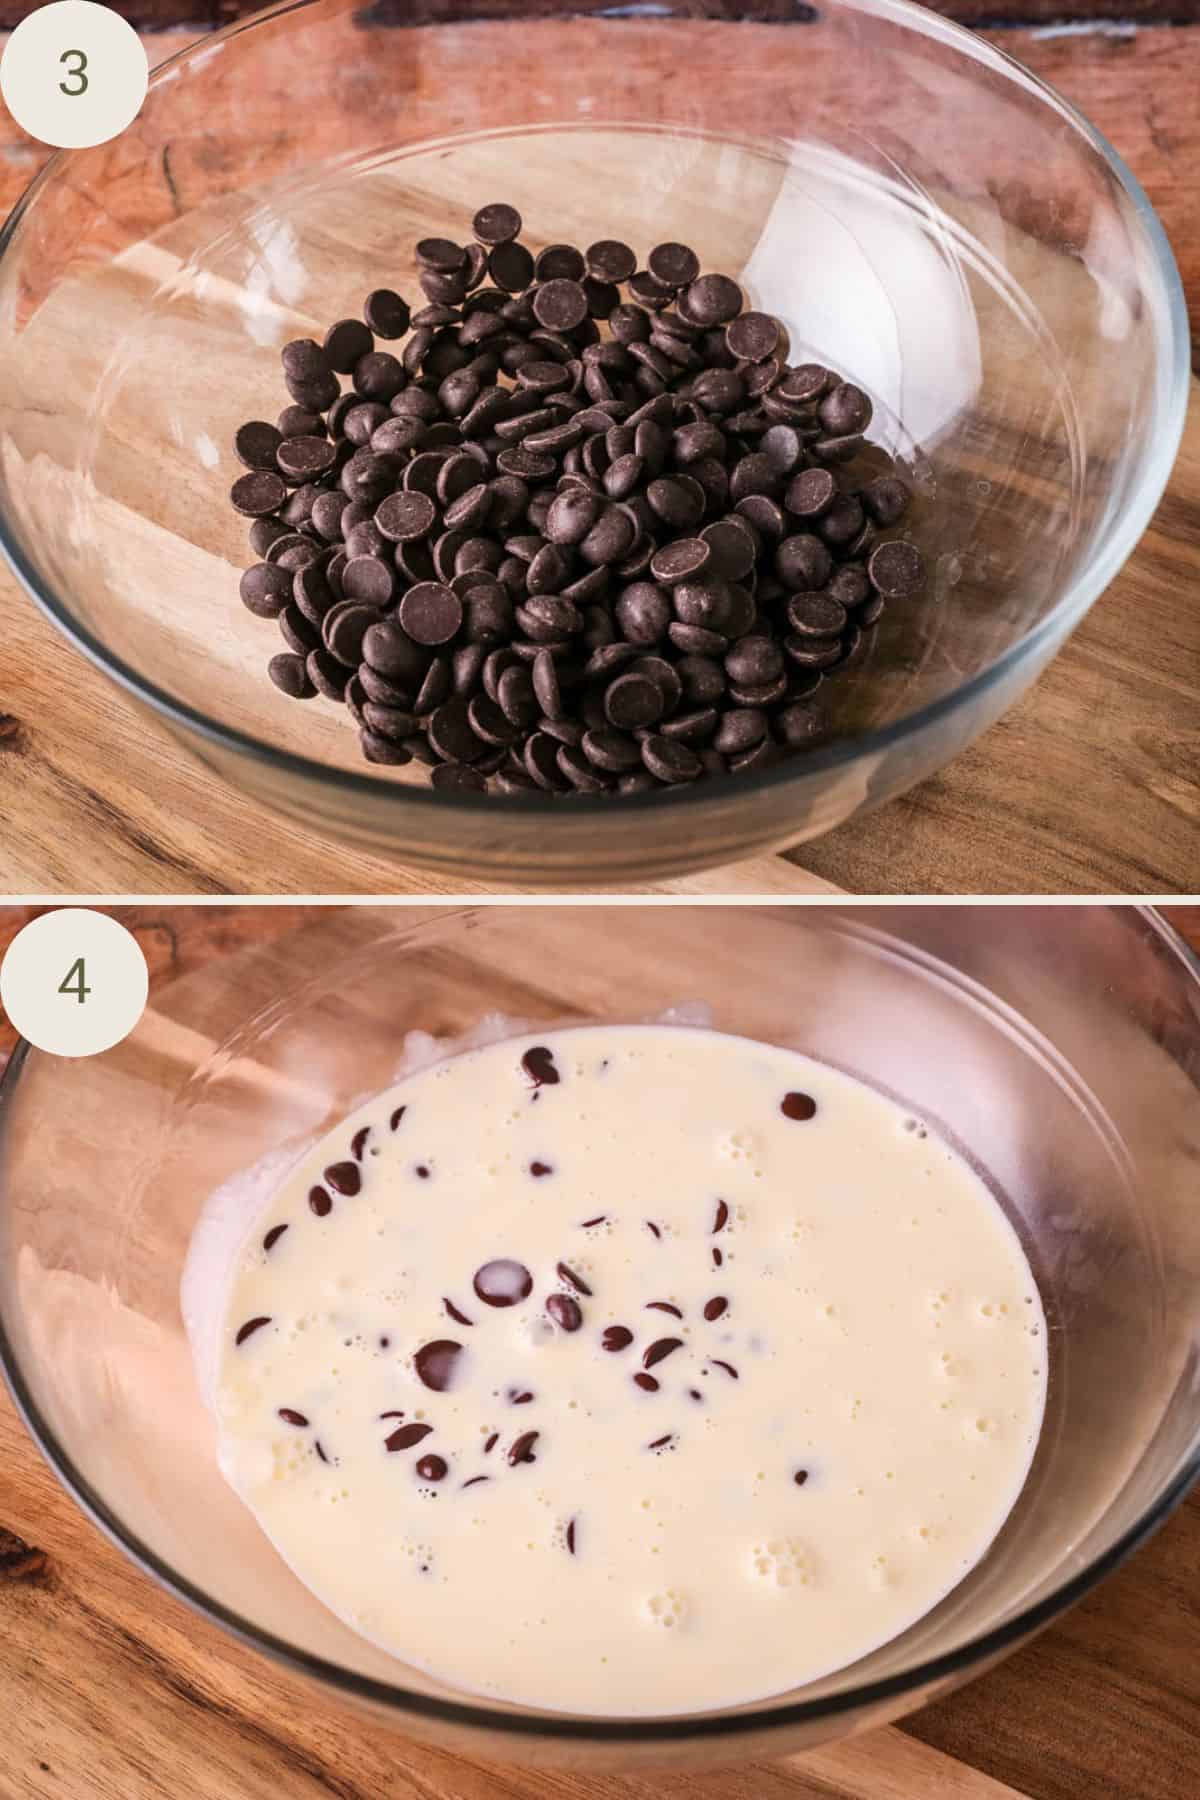
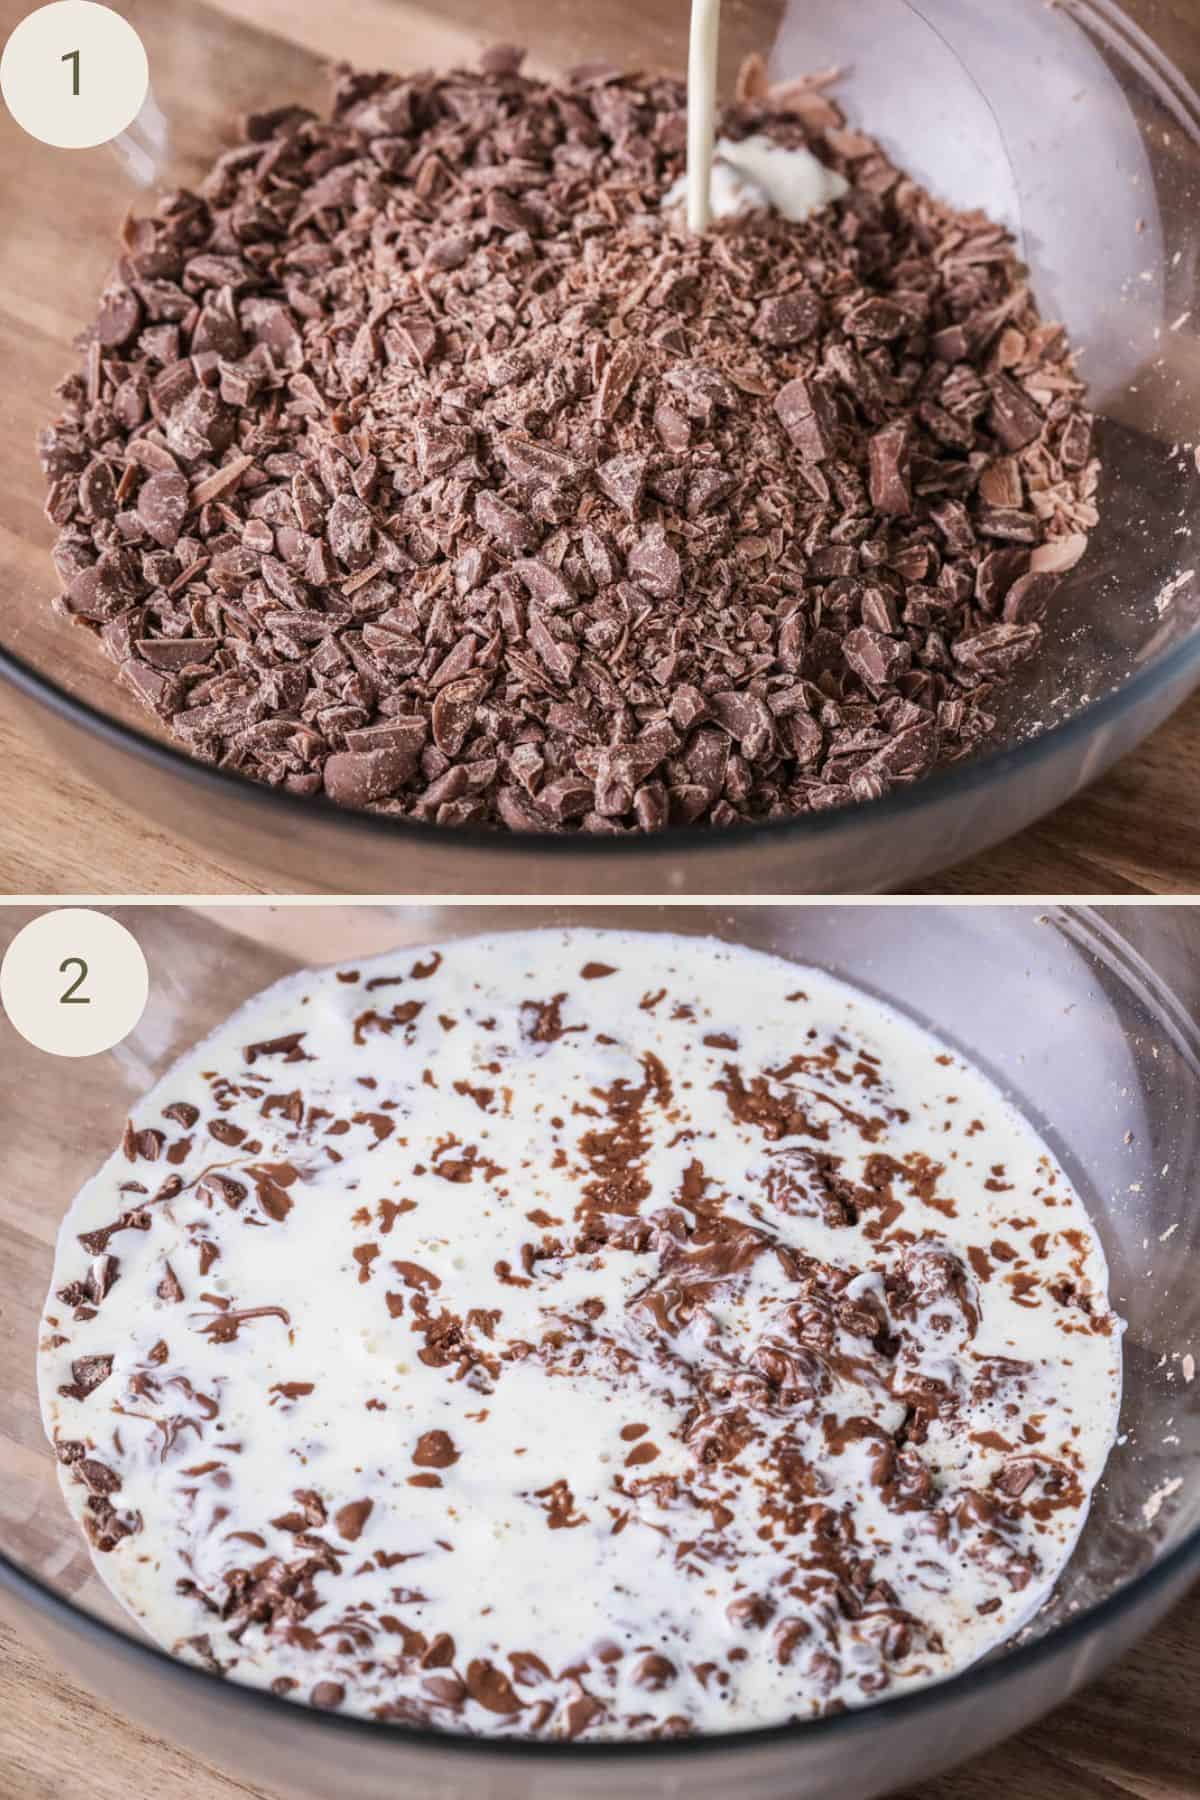
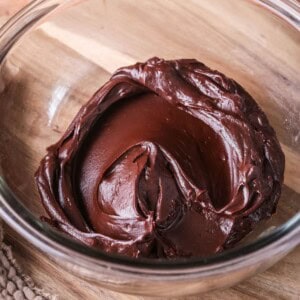
The cream is poured over very finely chopped chocolate in a heatproof bowl then allowed to rest. This means the chocolate will melt slowly in the cream without agitation. You’ll leave the mixture for 3-5 minutes (honestly how long will depend on the temperature of your kitchen and how fine you chopped your chocolate). This gives the mixture time to cool slightly and the chocolate to melt fully.
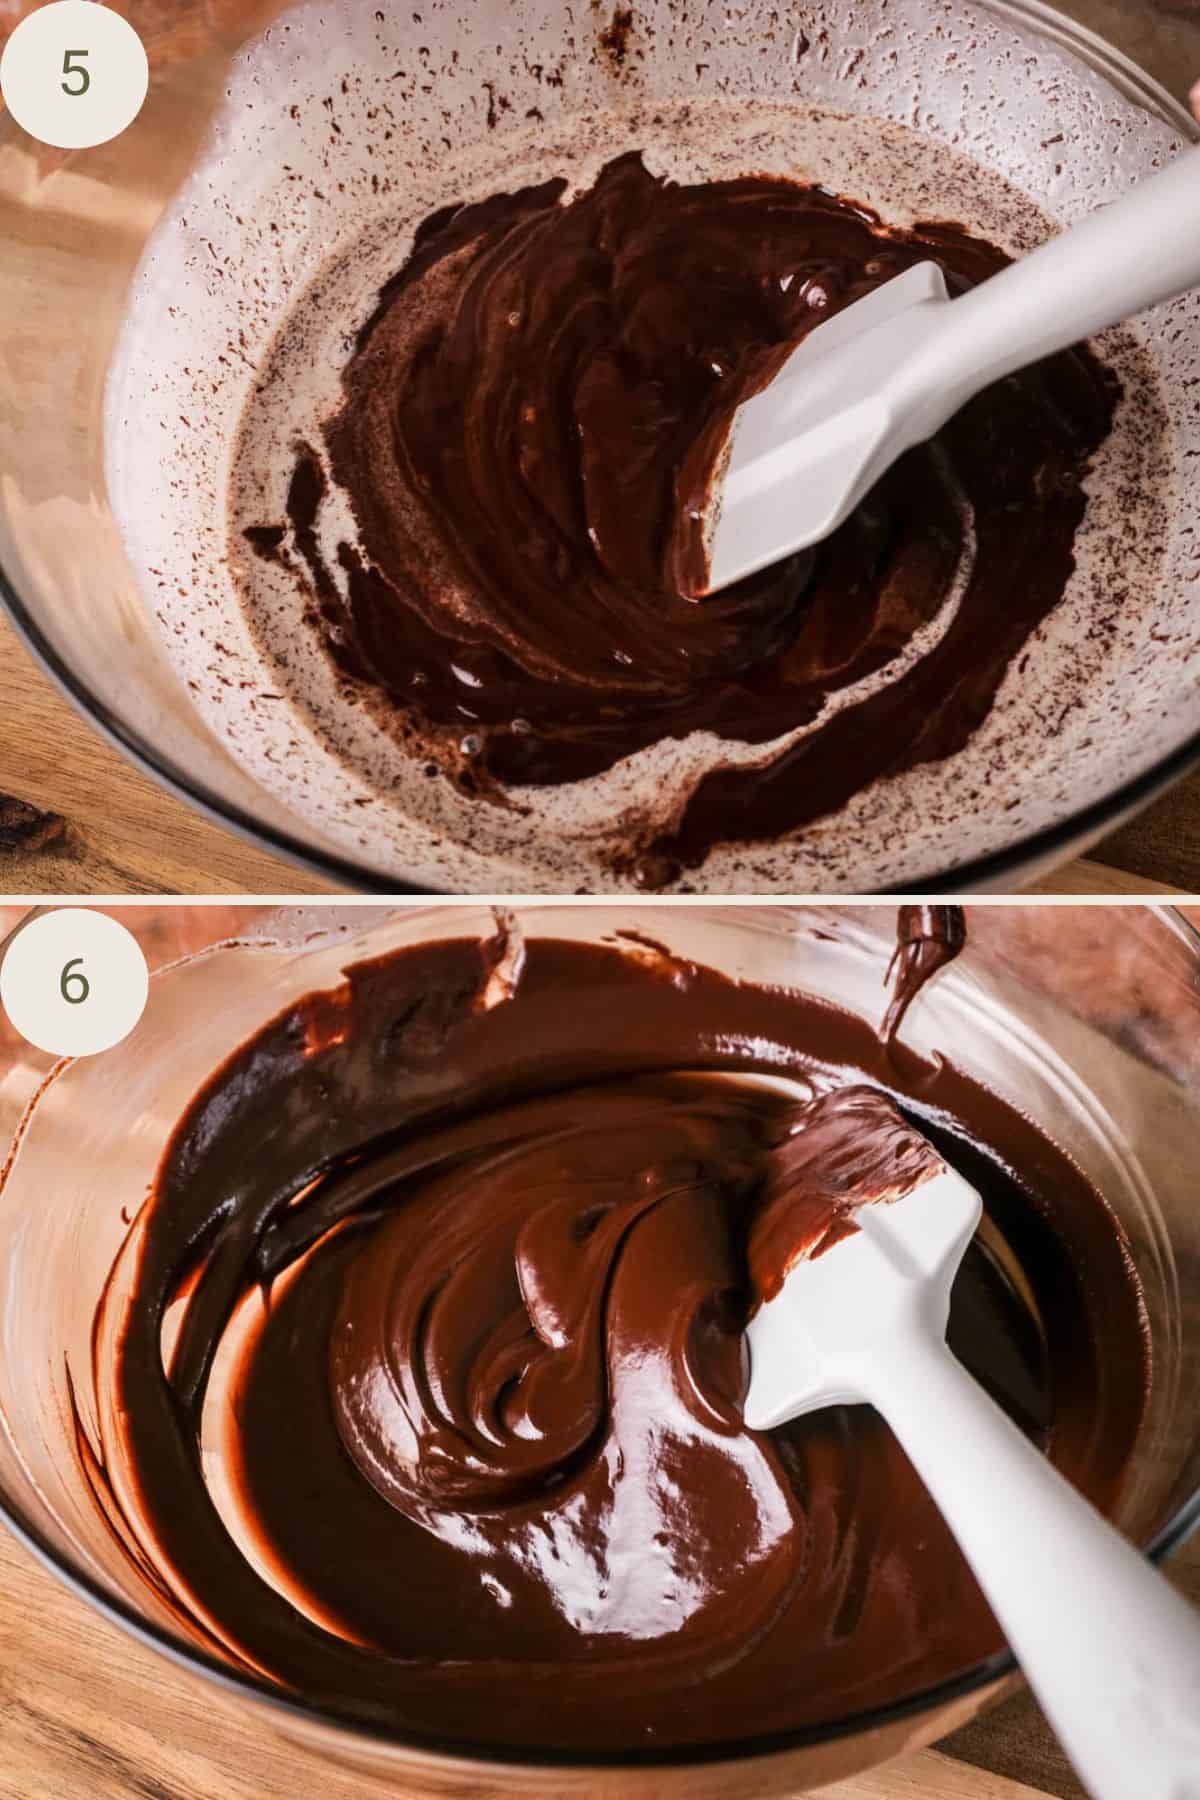
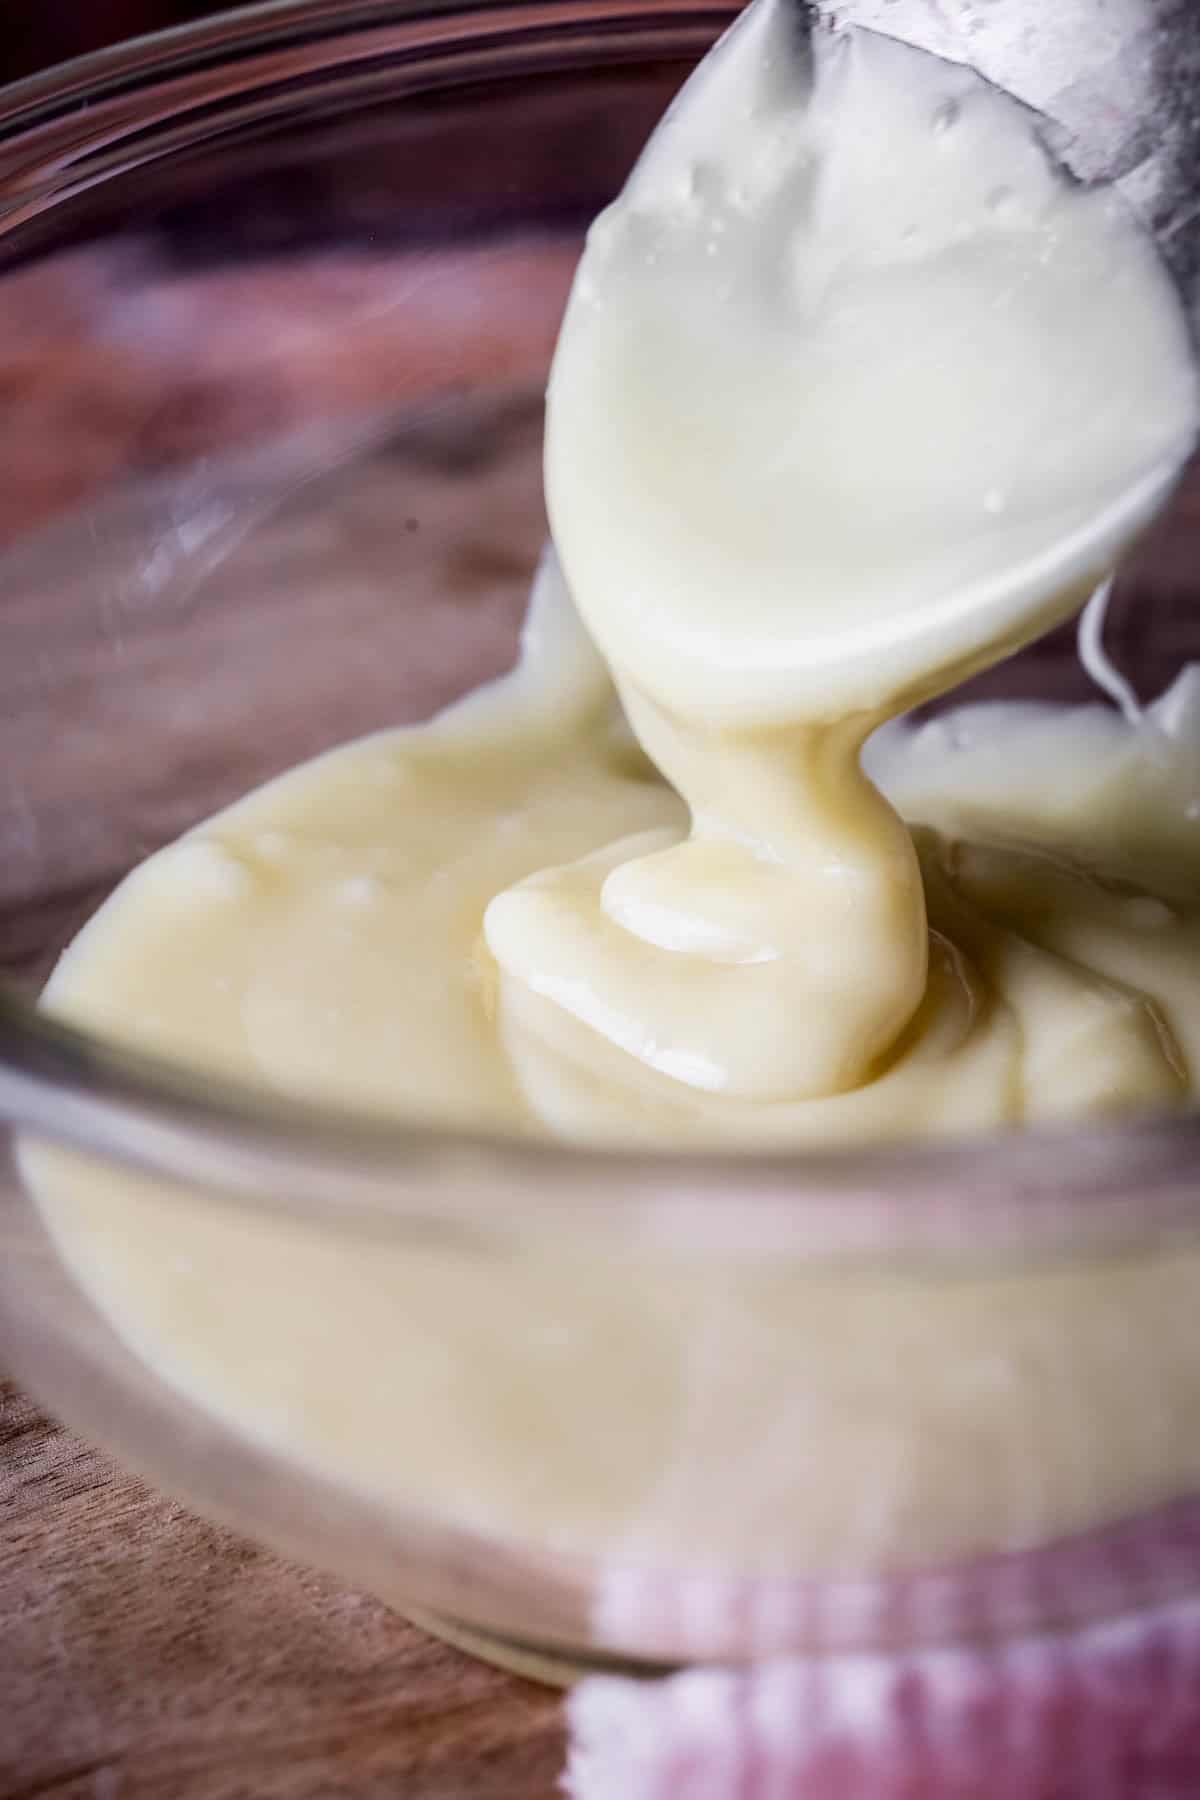
Stir the mixture slowly from the centre moving outwards, the chocolate and cream should emulsify as you stir and your ganache should be lusciously silky and creamy.
If it’s not, then there’s plenty of troubleshooting below as lots can go wrong in this simple process.
Ingredients Needed
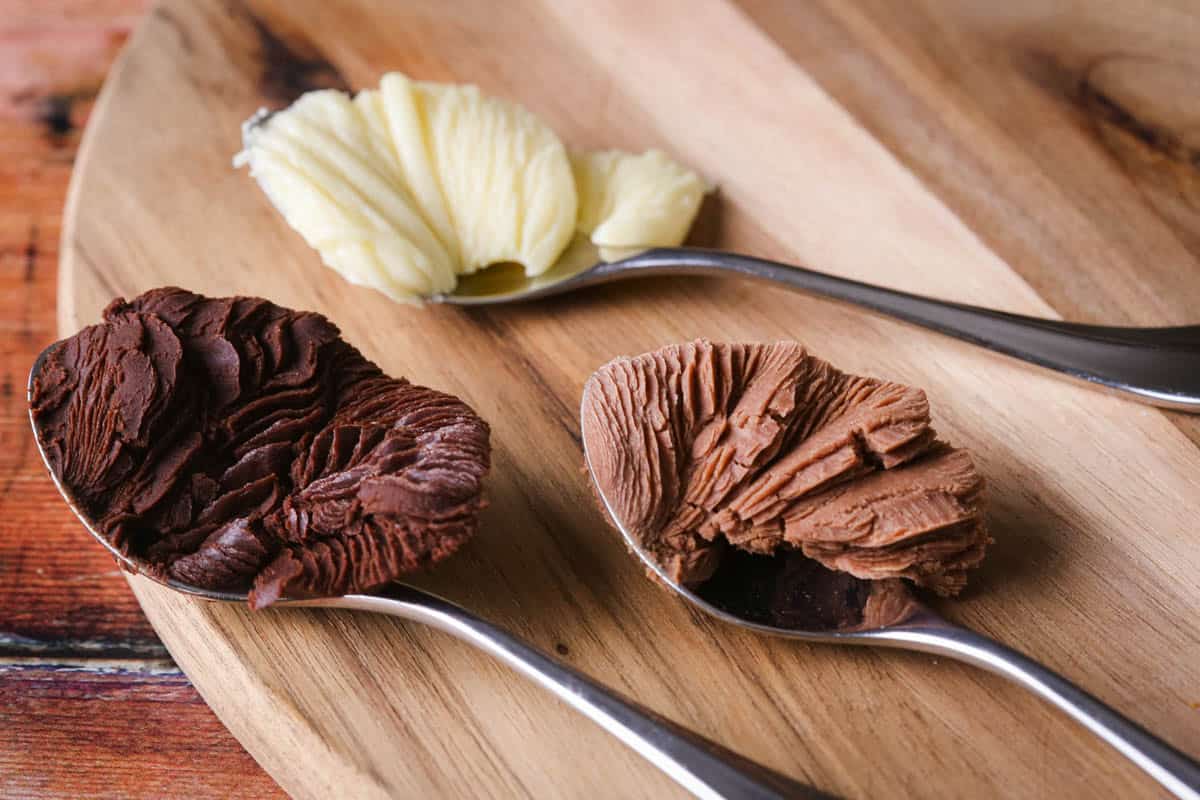
Dark Chocolate Ganache
This is our classic ganache, the one you will probably make most often and the easiest due to its stability. You can make it sweeter if that’s what might put you off by adding more golden syrup, or you can add more cream to make it creamier, although this does create a softer ganache which might not be suitable for truffle making.
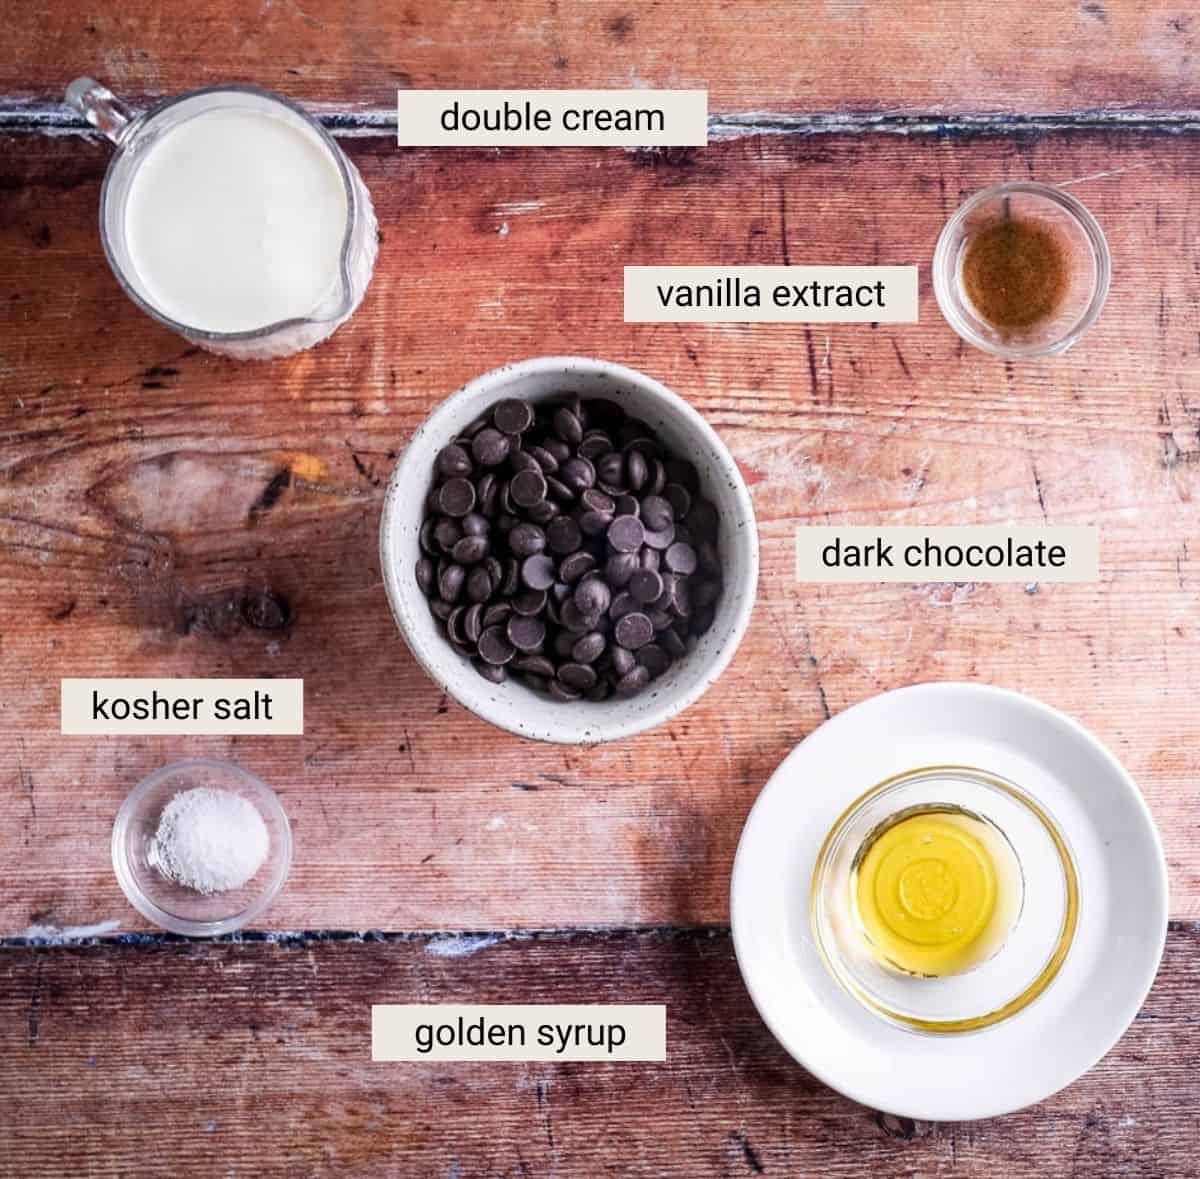
Chocolate. We’re using 70% dark chocolate here. A bar of your favourite good quality supermarket chocolate works just fine but I like to use Callebaut due to the superior flavour. For this exact recipe to work the percentage of cocoa solids is important. You can use a chocolate using a lower percentage of cocoa solids but then you might need a different ratio of cream depending on what your purpose is. For example a 50-60% dark chocolate will require slightly less cream to achieve the same fudgy texture.
Cream. Ideally you need the fat content of your cream to be at least 30% fat content for a stable ganache. The higher the fat the better. This means double cream is perfect to use (at 48%-50%) and whipping cream is okay too and will create a lighter ganache (at 35%-38%). Single cream is around 18%-20% isn’t as stable. You can create a ganache with any liquid (even water) so single cream will work but if you are just getting started with ganache and want a recipe that’s reliable then stick to a higher fat content.
Golden syrup. This isn’t just used for sweetness but provides a lovely shine to the ganache. It also helps with the stability of the emulsion as it lowers the water-activity level and prevents the re-crystallisation of the sugar.
Vanilla extract. Now this is totally optional but we simply add it for flavour and I like a bit of vanilla with my dark chocolate ganache. It’s not necessary for the milk or white chocolate as the vanilla could become overpowering.
Salt. I need salt with my chocolate, it’s just a fact. I use kosher salt here (and for all my baking) as it has a soft gentle flavour.
Milk Chocolate Ganache
The ingredients are pretty similar to the dark chocolate ganache. We are not using golden syrup (as it becomes too sweet) or vanilla extract as the flavour becomes unbalanced.
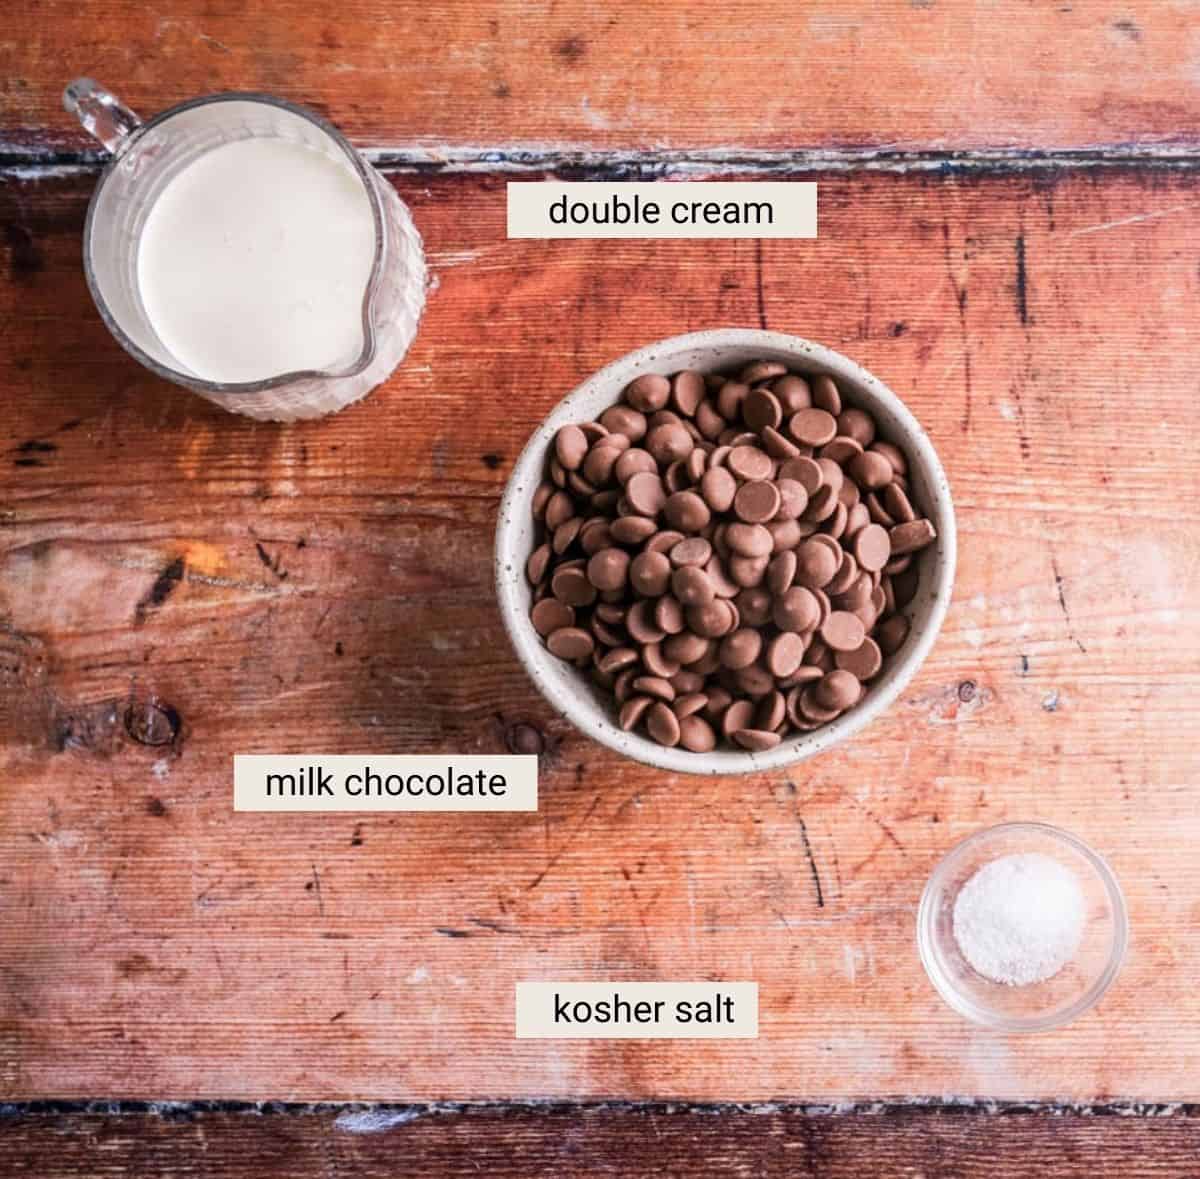
Chocolate. Choose a very good quality milk chocolate between 30-40% cocoa solids. Again, I love Callebaut Milk Chocolate Chips as the flavour is well balanced but I have made this with Lindt’s Classic Recipe Milk which is available in supermarkets and I’m a sucker for Lindt chocolate so I love this ganache, although I know some find it quite sweet. Supermarket’s own brand of milk chocolate is fine to use but I have yet to find one I truly love the flavour of, although I hear Aldi chocolate is very good. I do not recommend choosing Cadburys Dairy Milk unfortunately as the cocoa solids these days hang around 20%.
Double cream. We use less cream than dark chocolate as there are more milk solids in the chocolate itself so the ganache would be too soft if we were to use the same amount. This amount of cream means you can use it for the exact same purposes as the dark chocolate ganache with the same consistency. It does take a little bit longer to set – 20 instead of 10 minutes.
Salt. What is chocolate without salt (is my opinion)? We use less than the dark chocolate though.
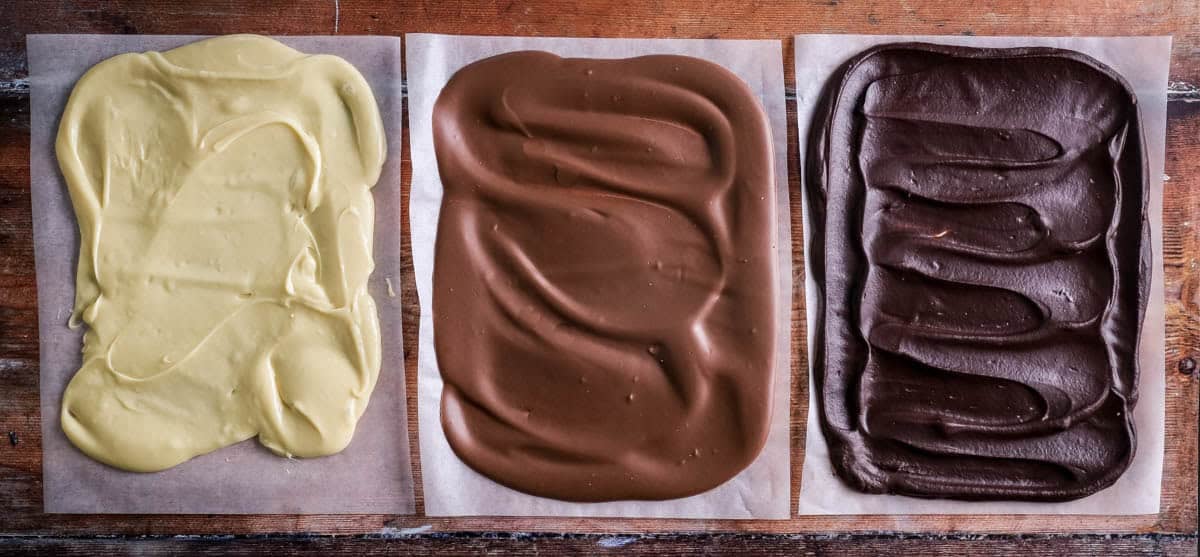
White Chocolate Ganache
We use the same ingredients as the milk chocolate which means no golden syrup or vanilla, just chocolate, cream and salt.
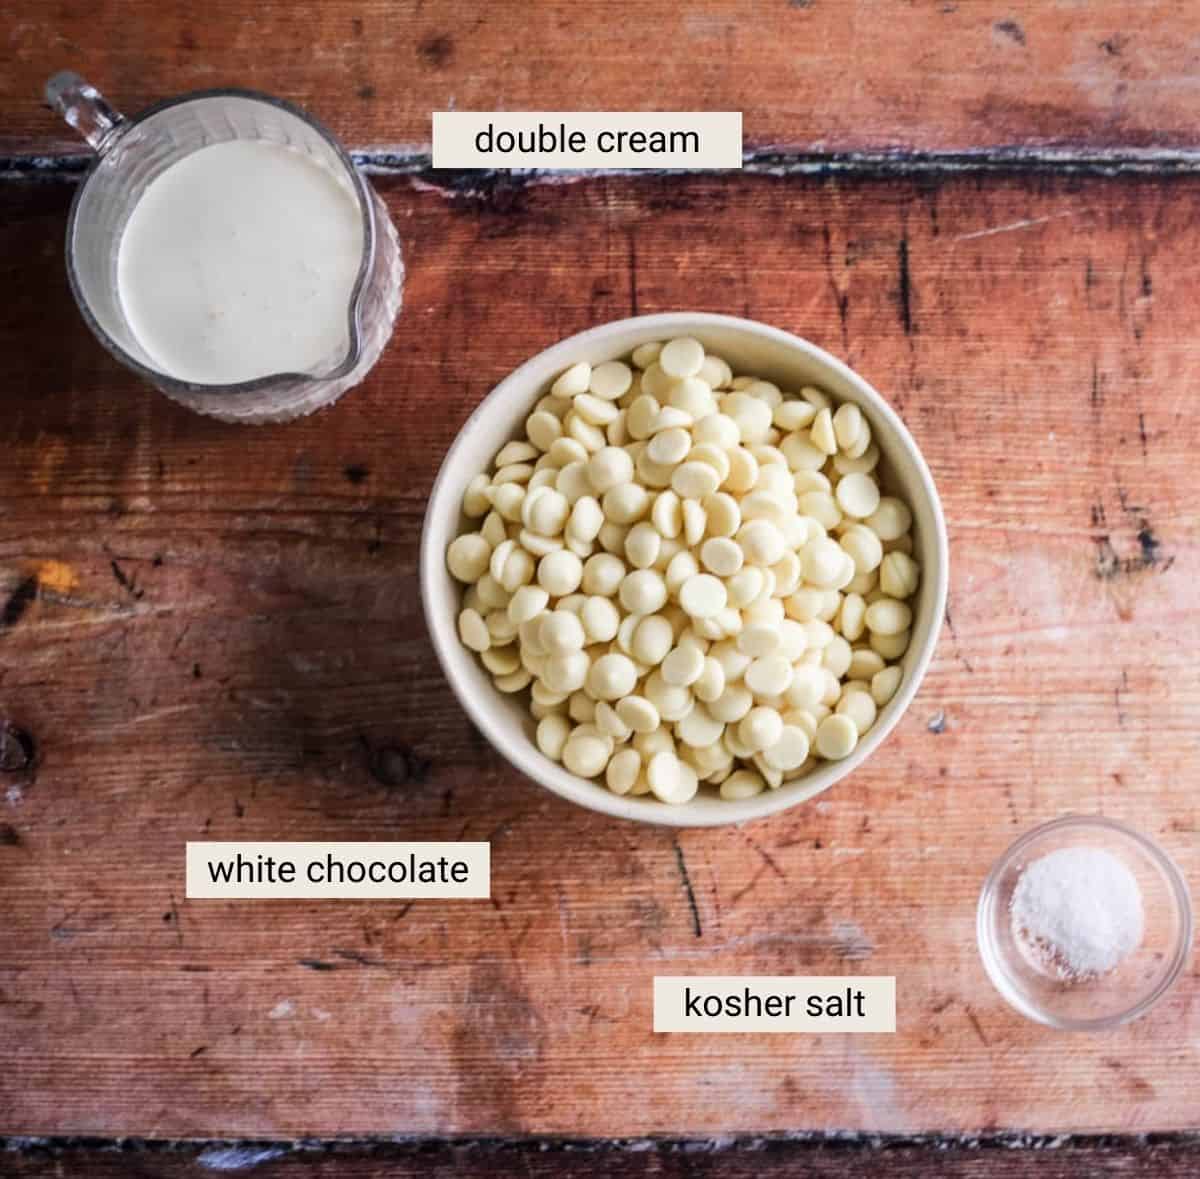
White Chocolate. Choose a very good white chocolate as quality really matters here. I will not waiver from Callebaut White Chocolate Chips which sits at 28% cocoa solids and uses high quality cocoa butter. Bear in mind that for white chocolate the cocoa solids present are mostly cocoa butter (for milk and dark chocolate the cocoa solids also include cocoa powder). If you are buying from the supermarket then choose Green & Blacks which is an excellent choice at 30% cocoa and a well balanced flavour which is deep with vanilla and not too sweet.
Cream. Choose double cream for the stability. We are reducing the quantity again, compared to the dark and milk chocolate, so we can achieve a good set that works for truffles, frostings or fillings.
Salt. Now you may choose to skip the salt in the white cream version but I do think it’s necessary to balance the sweetness. White chocolate ganache is very rich and sweet.
How To Make Chocolate Ganache
Dark Chocolate
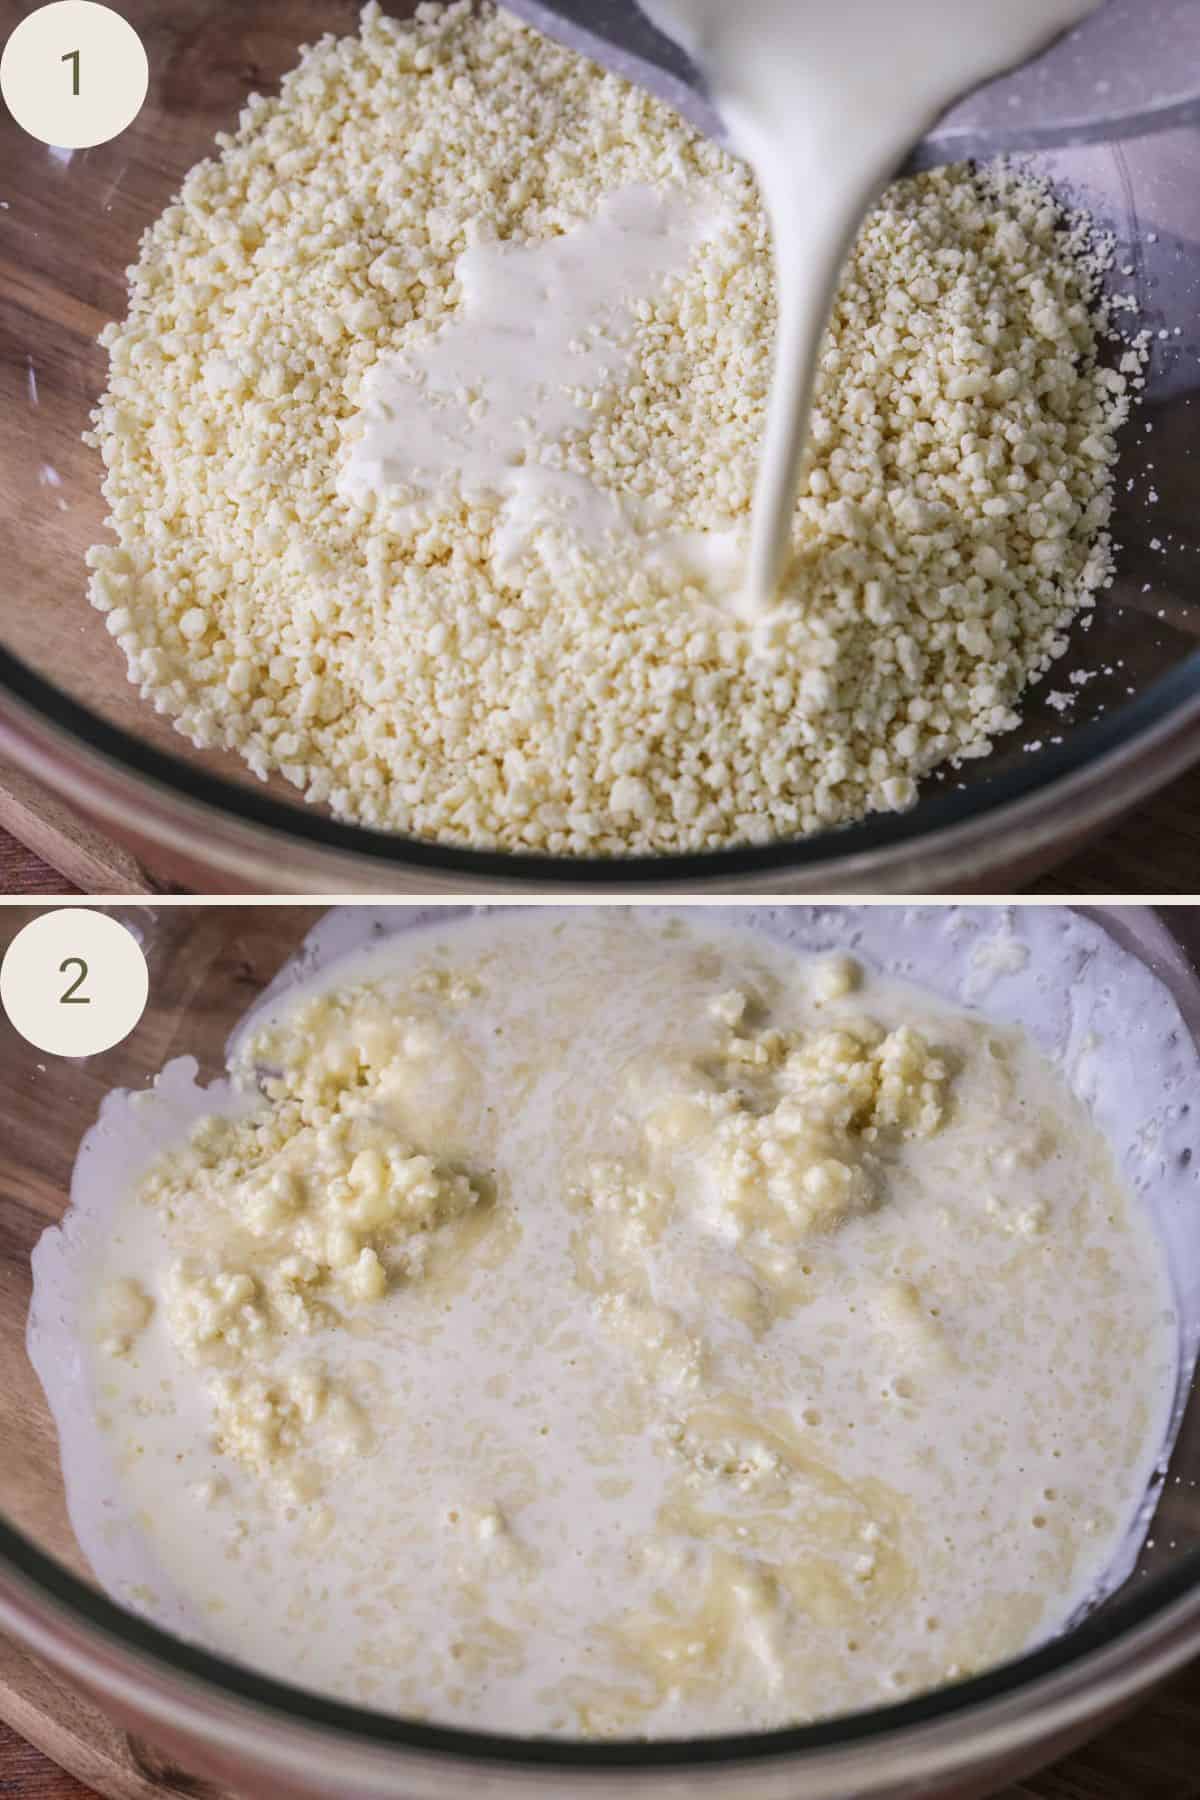
Get your bowl of chocolate ready before you start warming up the cream.
Warm up the cream in a saucepan along with the golden syrup and salt. It’s ready when it just about comes to a boil. You will see the bubbles forming around the edges of the pan. Immediately remove from the heat.
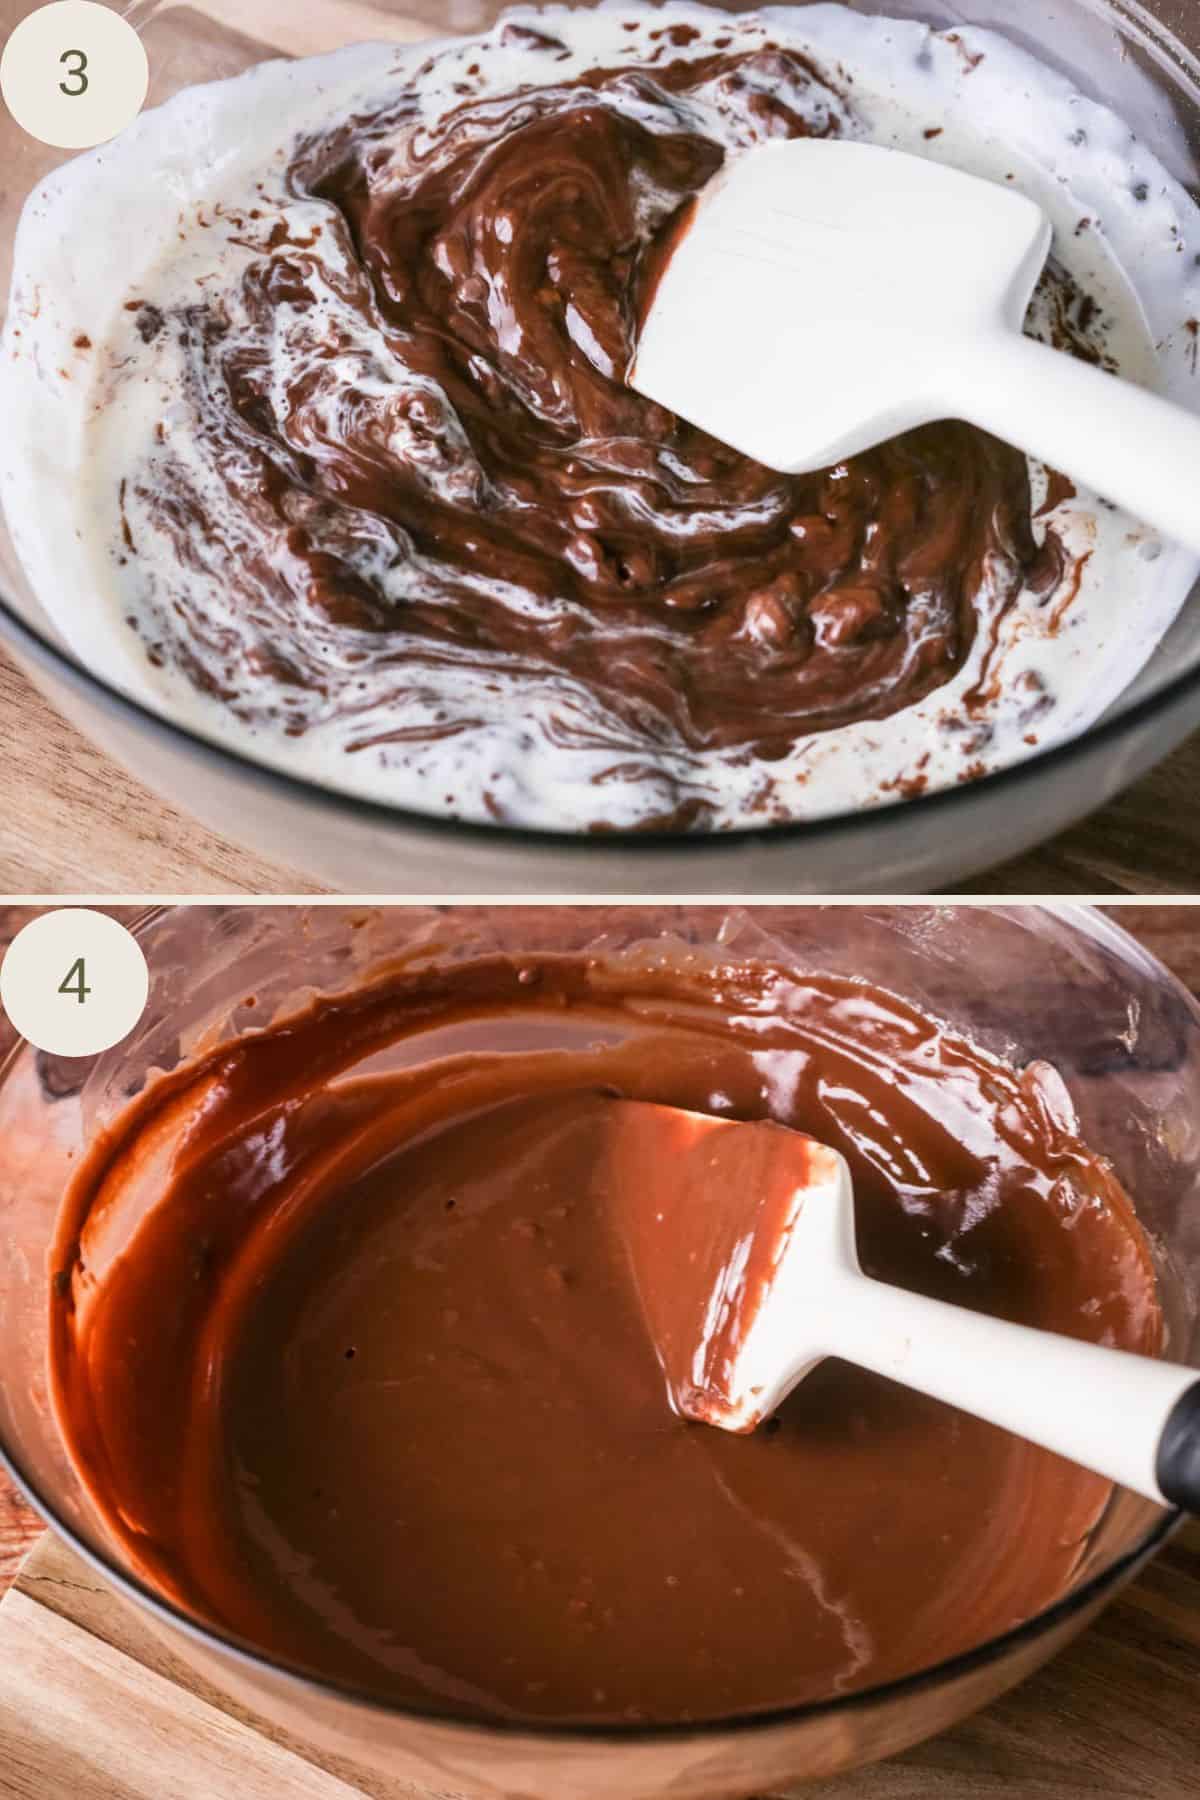
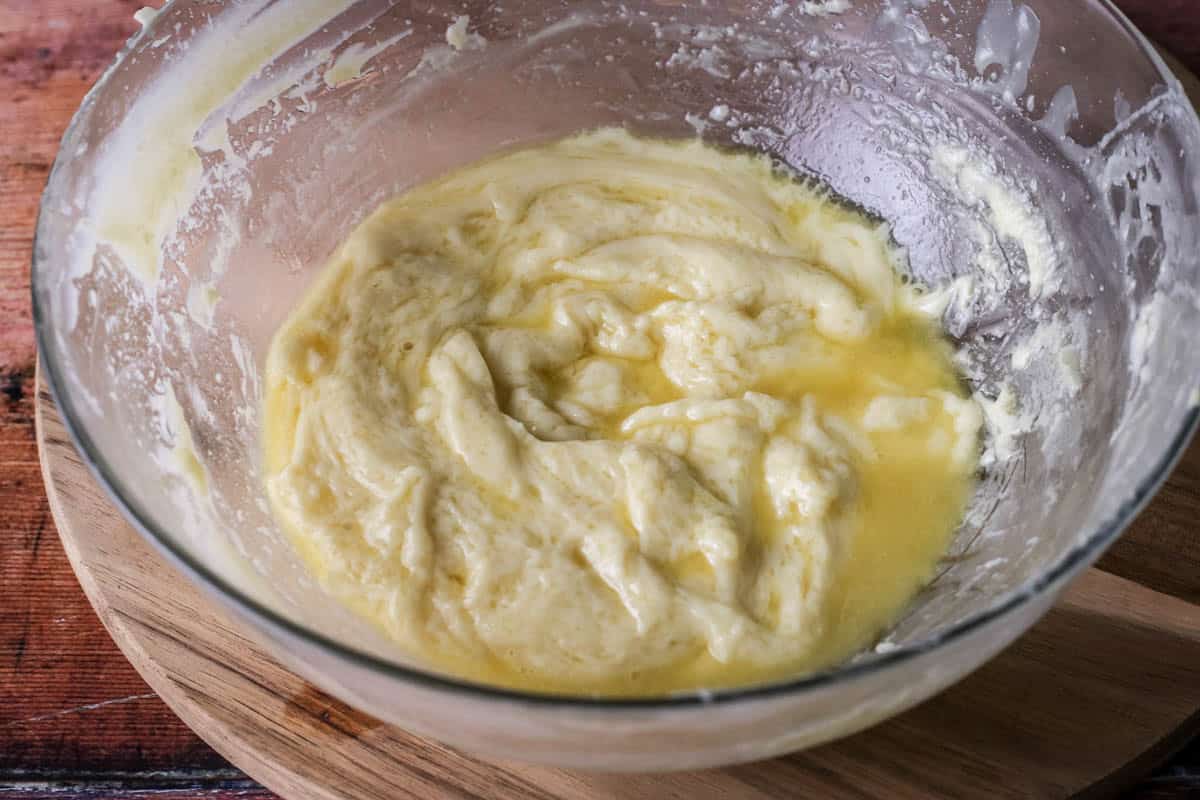
I pour the cream directly over the chocolate without delay, making sure to pour it evenly over the chocolate.
You can see I am using the Callebaut dark chocolate chips here and I chose not to chop them up more finely to make the dark chocolate ganache. It’s fine and the chocolate just about melts into the cream. If I were you or were to take these photos again I would chop the chocolate up even more as this will really ensure a good melt.
Make sure all the chocolate is submerged beneath the cream by poking it through if necessary. Wait and do not touch it for 3-5 minutes. My kitchen is cold and here the chocolate wasn’t chopped up as finely so I waited the full 5 minutes.
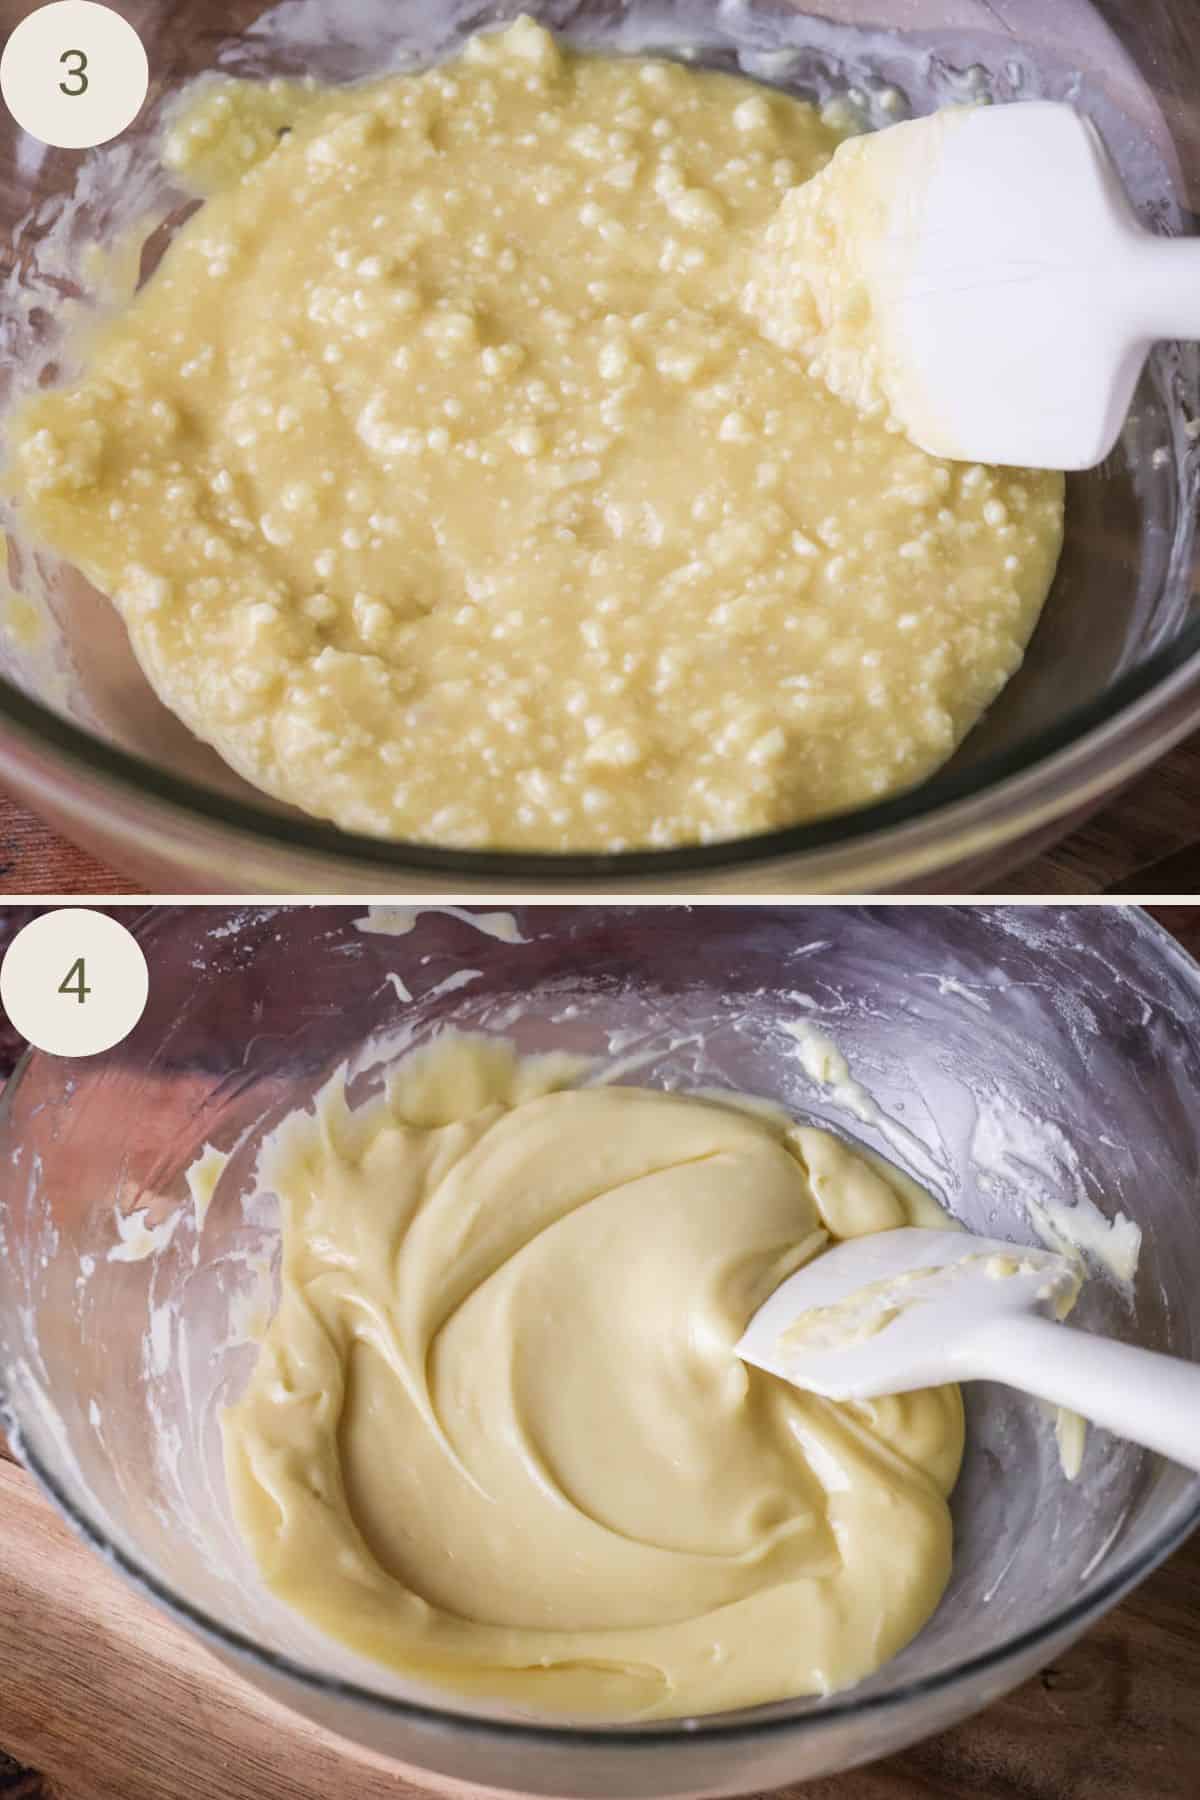
Once the waiting time is up then stir the chocolate gently, moving from the centre of the bowl and moving outwards until the ganache is smooth and creamy. At this point stir in the vanilla if you are using.
Milk Chocolate
This is the same method as the dark chocolate but we are not adding the golden syrup to the warming cream.
Make sure the chocolate is chopped as fine as you can. Grate it or use a food processor to break it right down into rubble if you like.
There is much less cream than the dark chocolate so make sure to really poke that chocolate down into the cream.
Rest the chocolate in the cream for 5 minutes.
If your chocolate is not melting into the cream even after 5 minutes of resting then stirring then go to the troubleshooting section below for guidance.
White Chocolate
We follow the exact same method as the milk chocolate but we have even less cream so getting that white chocolate to melt into the cream even after 5 minutes resting time is nigh impossible. I pretty much always have to troubleshoot the melting process. Short of adding more cream which will lead to a softer ganache which I don’t want then this can’t be helped.
Pour the warm cream into the finely diced chocolate. Poke the chocolate down into the cream as much as you can. Wait 5 minutes.
Stir the chocolate gently, moving from the centre of the bowl and moving outwards until the ganache is smooth and creamy. If the chocolate is not melting see the troubleshooting section below.
Troubleshooting: Chocolate Ganache Not Melting
If the chocolate has not melted into the cream once you’ve stirred it completely do not keep stirring as it will eventually cool too much and lead to a broken emulsion. You need to add more heat to rise the temperature of the ganache but very slowly to avoid a temperature shock. You also cannot raise the temperature by too much.
So either:
- Add warm cream into the centre of the bowl, 1 teaspoon at a time, stirring gently from the centre towards the outer ganache in the bowl. This introduces heat slowly into the ganache.
- Place the bowl in the microwave for 10 second bursts. Stir gently from the centre of the bowl for up to 30 seconds in between bursts.
If there are still some last remaining pieces of chocolate but you don’t want to risk another burst in the microwave then you can also cover the bowl with a plate or aluminium foil to see if the residual heat in the bowl will melt those last few strands of chocolate. I find this very effective.
Avoid, heating for longer bursts in the microwave and avoid melting it over a pan of simmering water as the temperature rises too quickly.
You will find this can happen frequently if you are making milk or white chocolate as not as much cream is used in these ganache recipes so it is often not enough to fully melt the chocolate.
Troubleshooting: Chocolate Ganache Split
A smooth chocolate ganache is a fat-in-water emulsion. When the fat droplets are not suspended evenly in the water then the emulsion can break.
Why Does Ganache Separate?
Ganache separates when the emulsion breaks and this can happen because of two main reasons:
- Fat has not properly dispersed evenly in the liquid so the fat droplets gather together and rise up.
- The mixture was too hot or too cold when stirred which means the cocoa butter split from the cream.
A ganache may split directly when the cream is added to the chocolate if it is too hot. The temperature shock of the cream will increase the fluidity of the fat so it’s more likely the fat droplets will merge and separate.
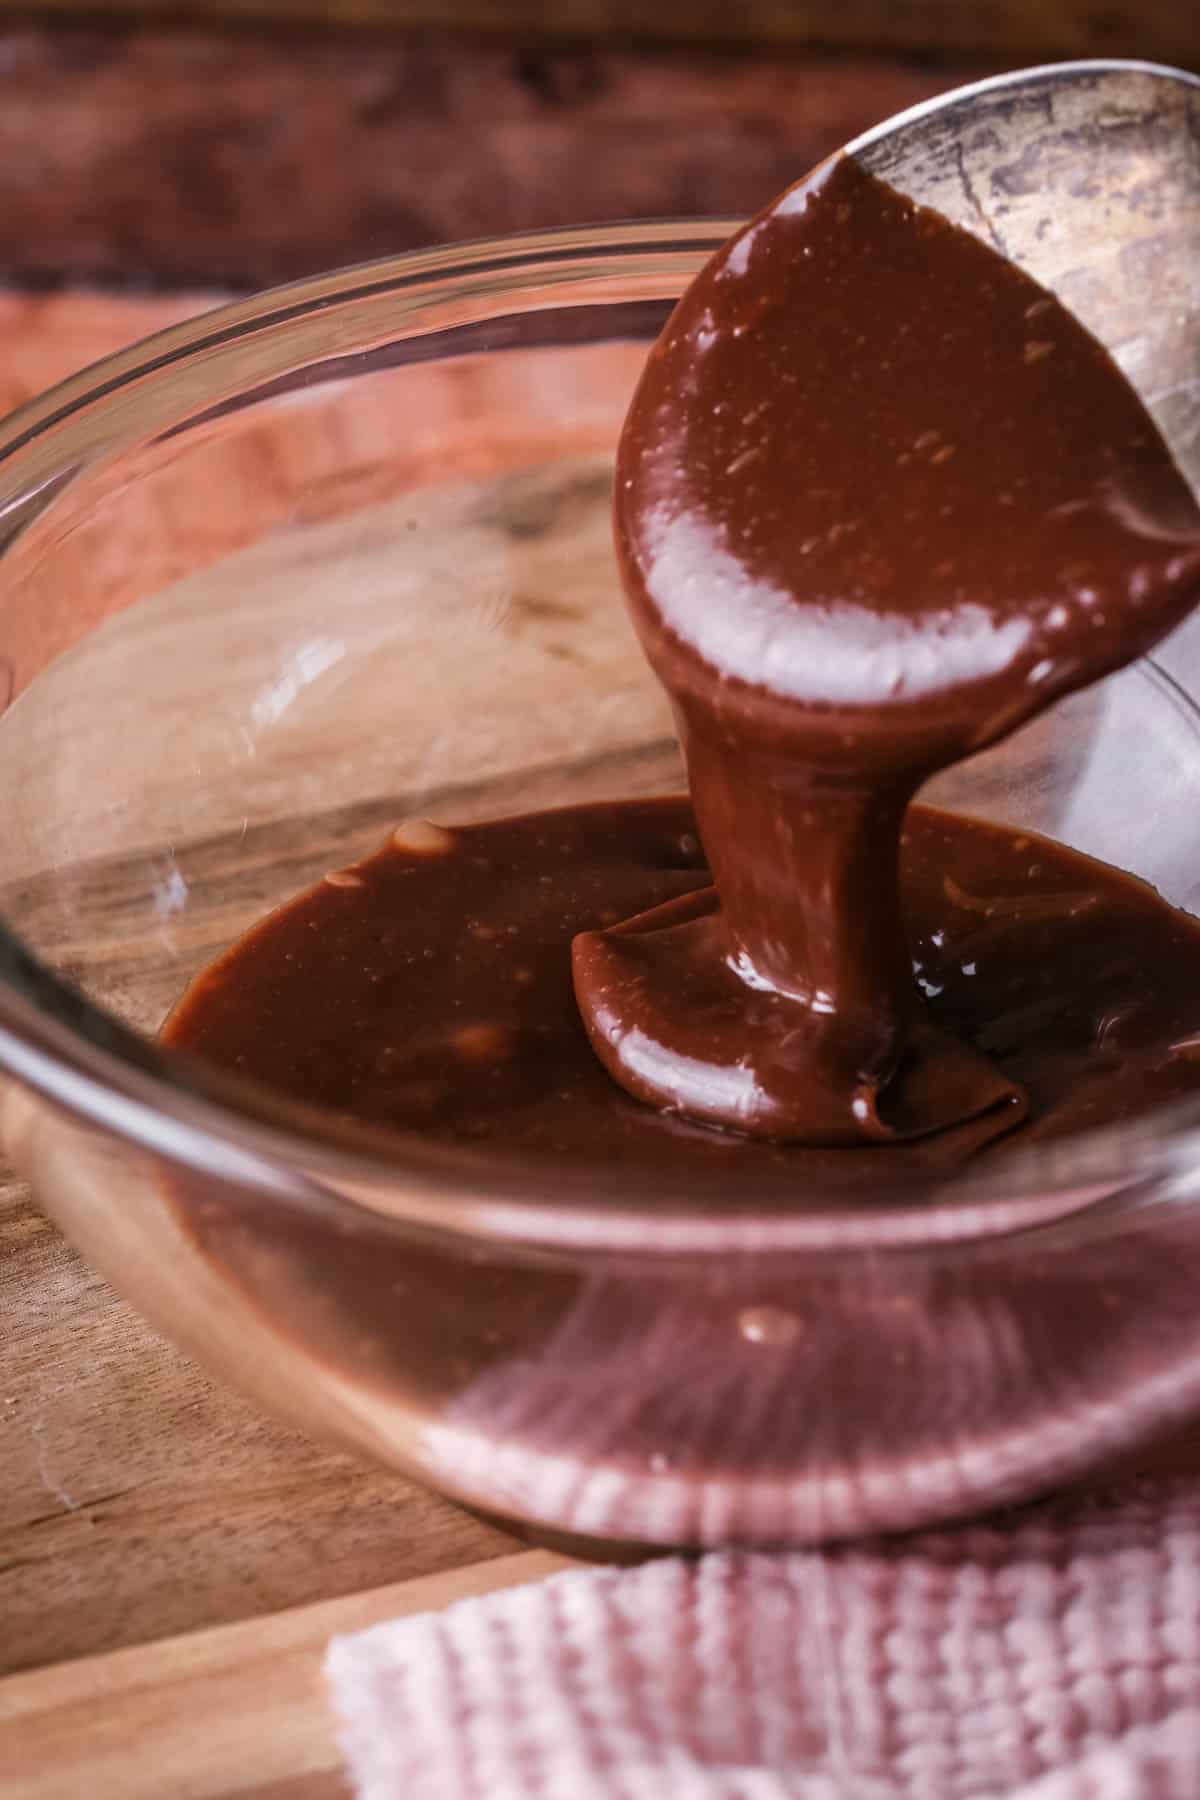
Grainy ganache. You might notice the beginnings of a split ganache (broken emulsion) as you’re stirring it. This is when the ganache is starting to look less smooth, shiny and a bit more granular. If you catch it at the stage stop stirring immediately as it can be quickly fixed.
This may have happened if your ganache has cooled too much so the cocoa butter is recrystallising faster than it can stay emulsified in the cream, causing the fat to separate from the liquid
If you carry on stirring you’ll notice that the fat will continue to break away from the rest of the ingredients, rising to the top and the whole ganache will look very greasy. We can still fix it, not to worry.
A ganache can also split as the mixture has been agitated too vigorously. Always aim for slow and gentle stirring.
How To Fix Split Ganache
To catch and fix a split ganache it’s best to work slowly from the start then you will notice immediately when the texture is moving away from its smooth state.
This is what you want to do:
Step 1: First make sure the ganache is at the right temperature for stable stirring which is above 32-34°C (90-93°F). You will know it’s a temperature issue if your ganache is drastically below that so you will need to warm it up.
Warm the ganache slowly so it’s at a more stable temperature for stirring. I don’t recommend warming it up over a double boiler as I find this can raise the temperature too rapidly. Instead warm the ganache in the microwave in 10 second bursts, stirring gently yet thoroughly in between bursts. The emulsion should come back together when it reaches a stable temperature.
If this does not work that means the fat is being stubborn about dispersing in the water content so move onto step 2:
Step 2: Introduce warm liquid into the ganache to allow the fat droplets more opportunity to disperse. You can use cream, I have and it has worked on occasion. However, science says it’s best to choose a liquid which is low in fat as introducing more fat is counterintuitive so water or an alcohol (vodka is ideal) are better choices. If you choose water do bear in mind that this can affect the shelf life of the ganache but that’s not really a problem for home use.
Pour the warm liquid into the centre of the ganache 1 teaspoon at a time and stir gently from the inside working out. The emulsion should come back together. You want to add as little extra liquid as possible.
If you are still having no luck and your ganache remains stubbornly split then you can try a hand blender to break up the fat droplets. Honestly I have not found this method consistently reliable so I mention it only as a last resort and it may work for you. It's worth the try as next I'm afraid I'm offering you...
..the opportunity to make Split Ganache Brownies. They always turn out very delicious and that means you don't have to bin your ganache you are not wasting chocolate. Oh, these have been a favourite in my kitchen in the past. I will post a recipe in due course just in case.
Next-Time Ganache Tip: Add Extra Cream
This solution if you really want to avoid a split ganache and is for next time you are making ganache if you don’t mind a softer result. This isn’t my ganache of choice as it’s too loose for truffles but it will work for frostings and fillings.
If you add more cream to dark chocolate recipe, for example 240g to 180g chocolate it will make the ganache more stable and less prone to potential splitting. This is because the additional warm cream at the beginning of the process means it’s easier for the chocolate to melt so you are not stirring the chocolate in past the point of re-crystallisation. Plus there is more water content leading to the fat droplets being easier to disperse more evenly.
Making Ahead
You can rest assured that ganache is perfect for making ahead of time.
This is especially true of chocolate truffles which requires a few hours of resting time (and even benefits from chilling time).
If you are making ahead for any other reason than truffles then you can keep your ganache in the bowl you initially made it in, cover and store in the fridge for up to five days. That is true for this exact recipe, more cream in a ganache recipe will have a shorter shelf life.
Freezing
Ganache freezes very successfully. Transfer to an airtight container and you can store in the fridge for up to three months. Thaw the ganache overnight in the fridge before bringing up to room temperature so there is no sudden temperature change.
How To Use Ganache From Chilled
If you want to use your ganache for sharding and creating cake decoration then you can use directly from chilled.
If you want to use your ganache for a whipped chocolate frosting then you can also whisk it directly from chilled, it will soften and whip up in no time.
If you need your ganache more malleable as you are using it for covering a cake or even pourable then you can bring up to room temperature and then melt again in the microwave if need be.
Microwave for 10 second bursts mixing gently but thoroughly with a spatula in between bursts. Always mix from the centre of the bowl moving outwards. The ganache might only need about 20-30 seconds to warm up enough to a consistency to cover a cake.
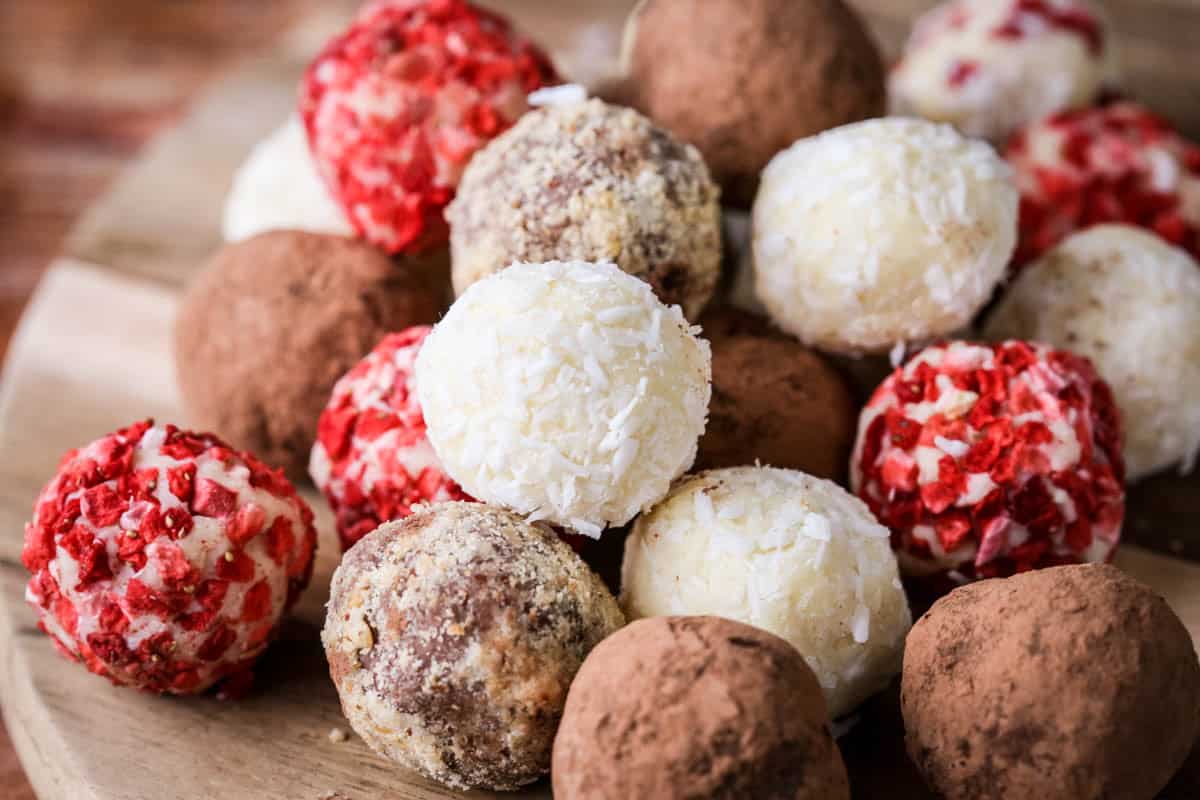
Favourite Ganache Uses
Dipping
This works best when the ganache is freshly made and very loose. Dip fresh fruit (strawberries are a lovely choice), biscuits, doughnuts. Work quickly with the dark chocolate ganache as it thickens up fast, you will have much more time with milk and white chocolate as they stay pourable for longer.
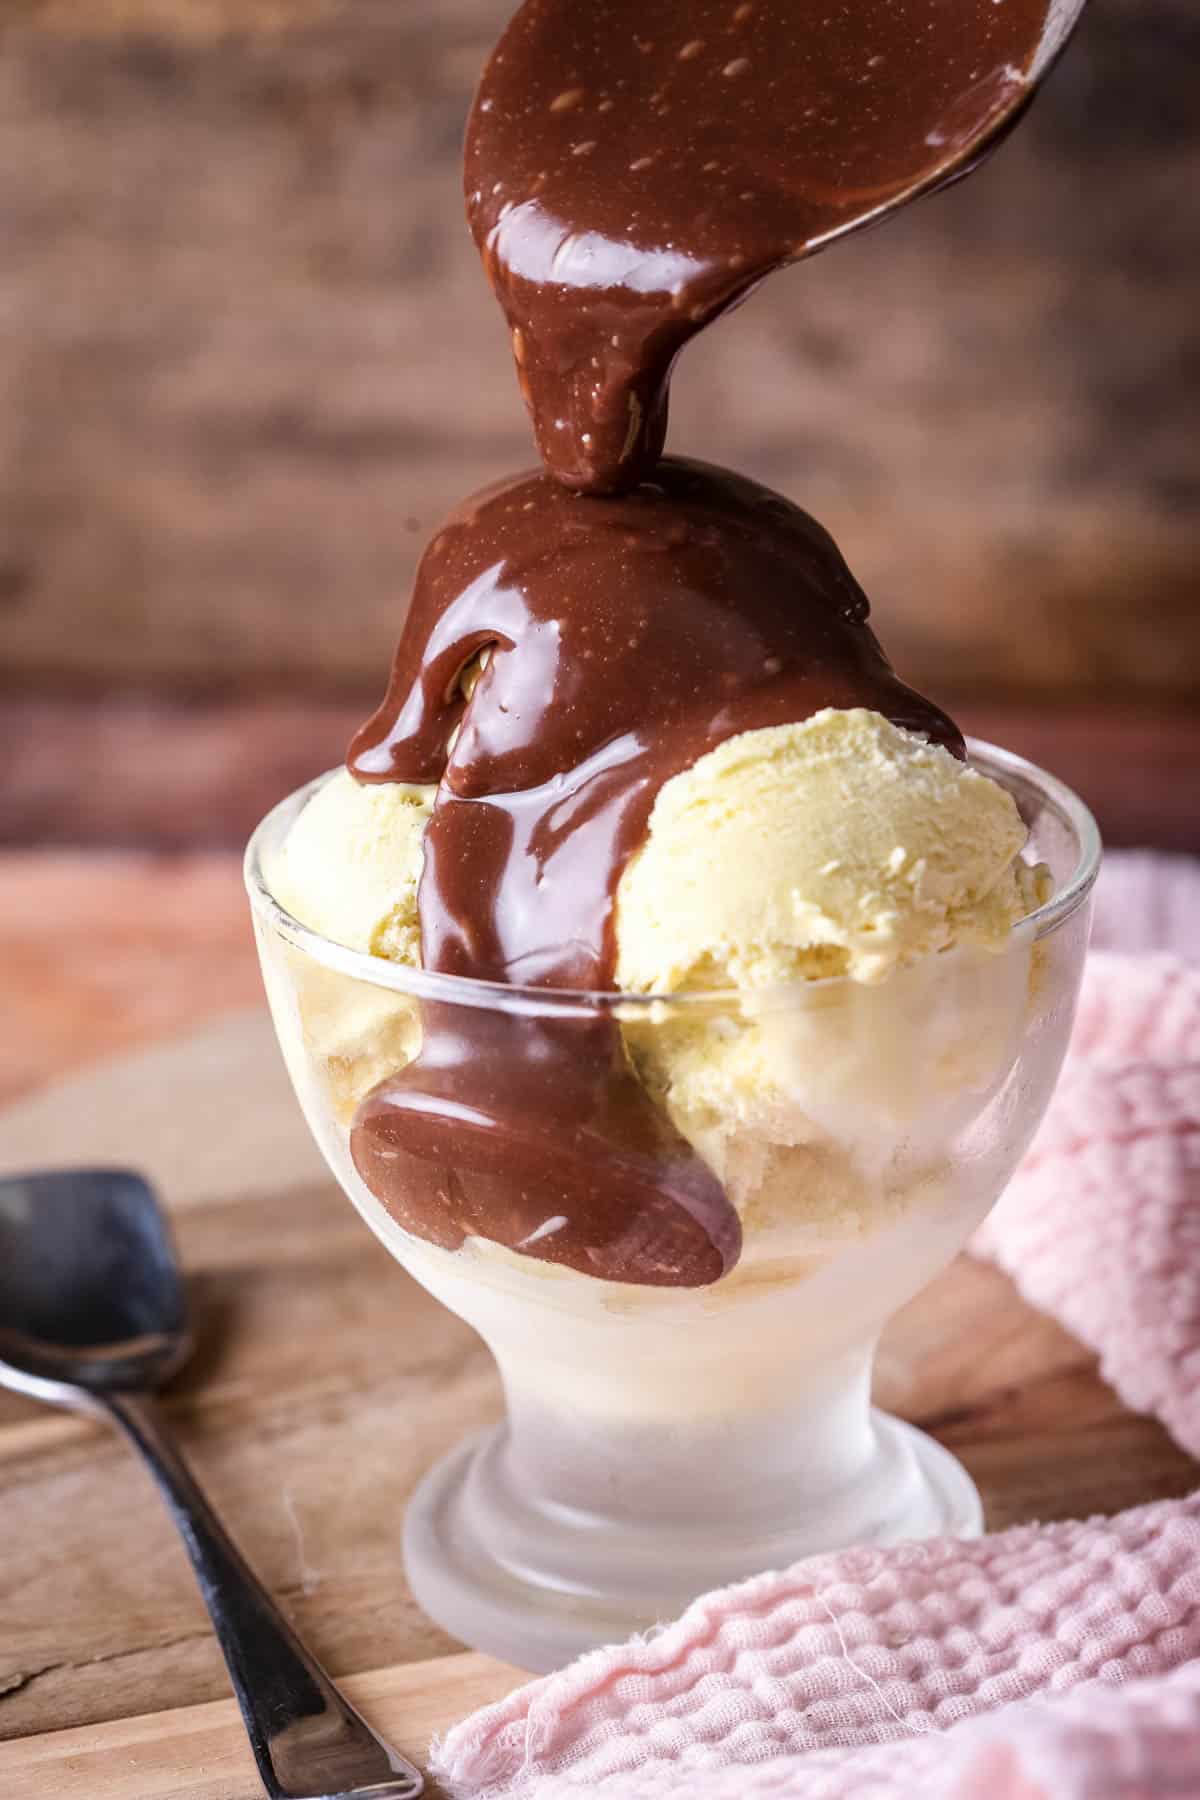
Pouring / Drip Cakes
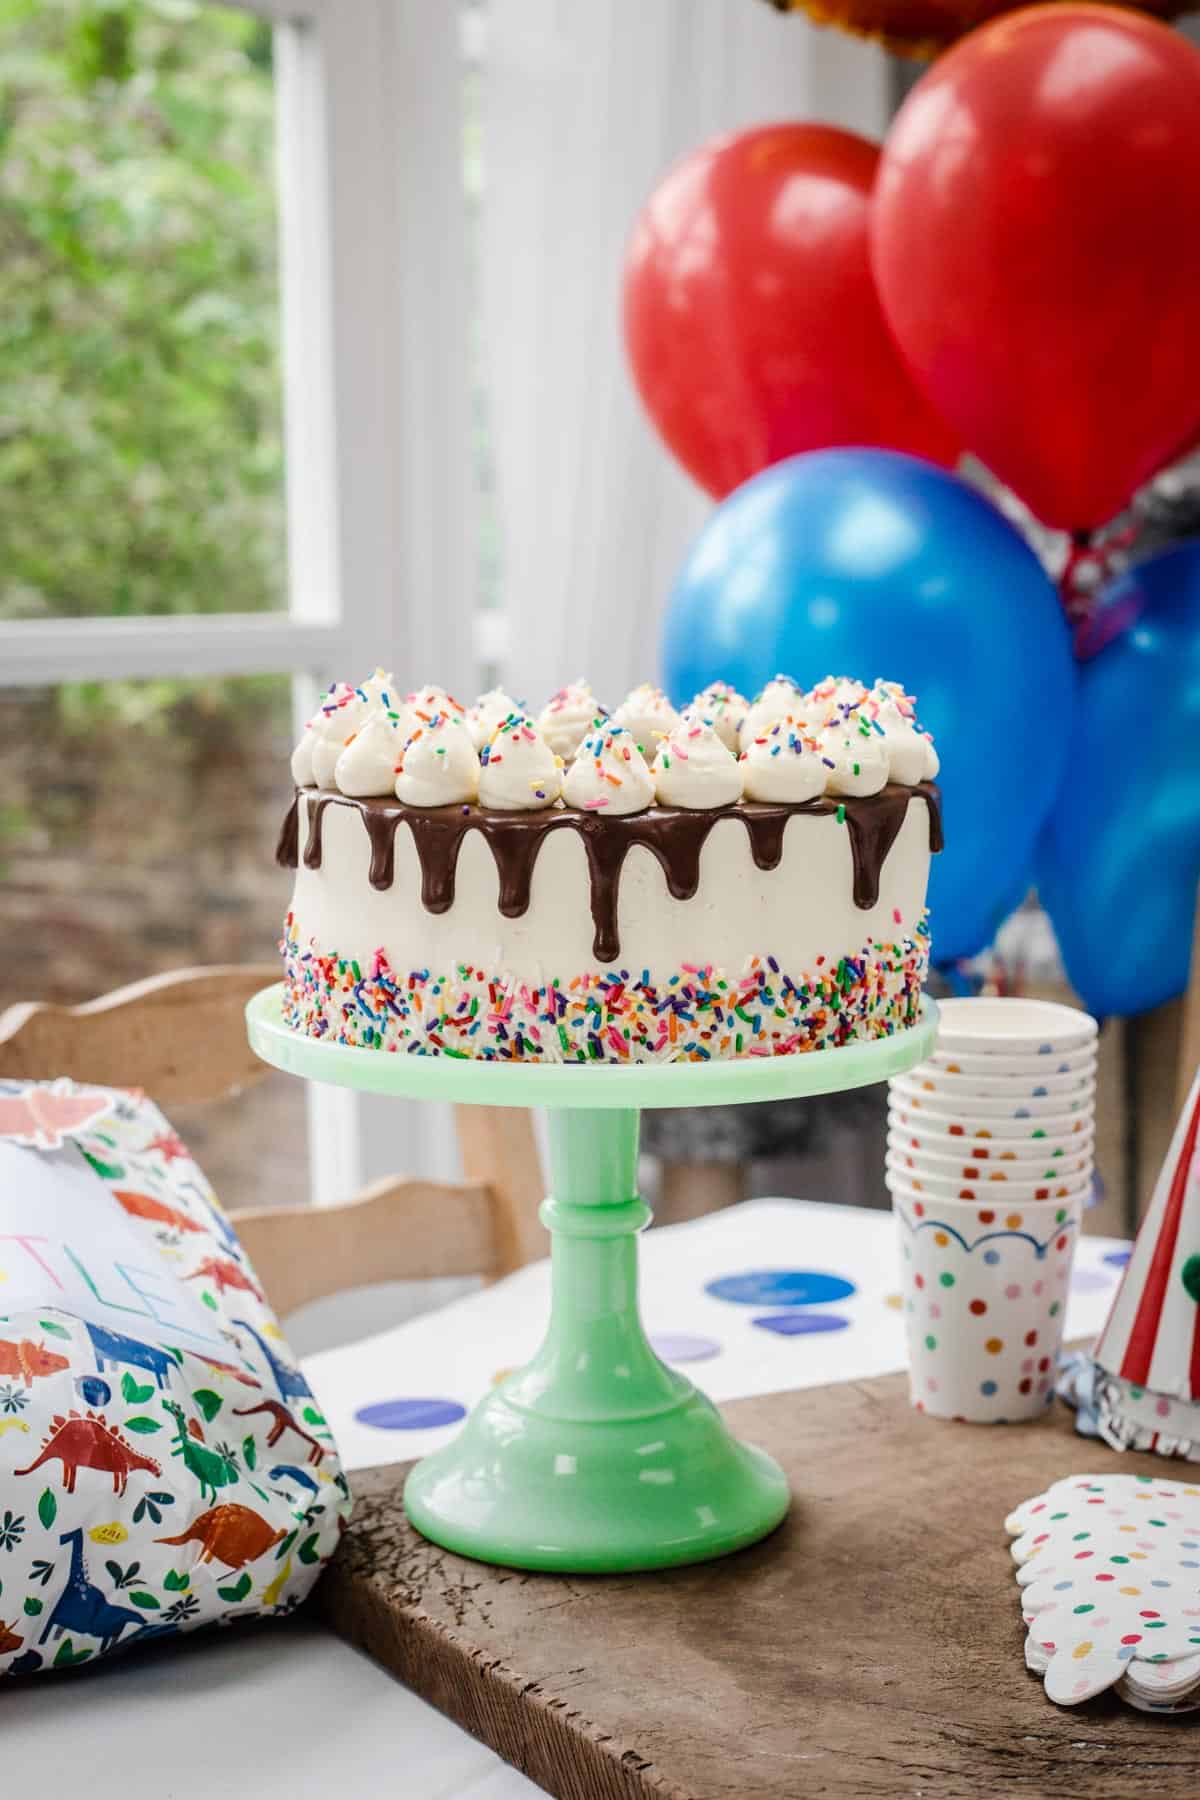
You can use the ganache to use as the drip in a drip cake or pour over ice cream. Again, for the dark chocolate you have a small window of when it’s the right temperature. However, you can easily melt again for 10 second bursts in the microwave if it’s thickening up too much.
Frosting
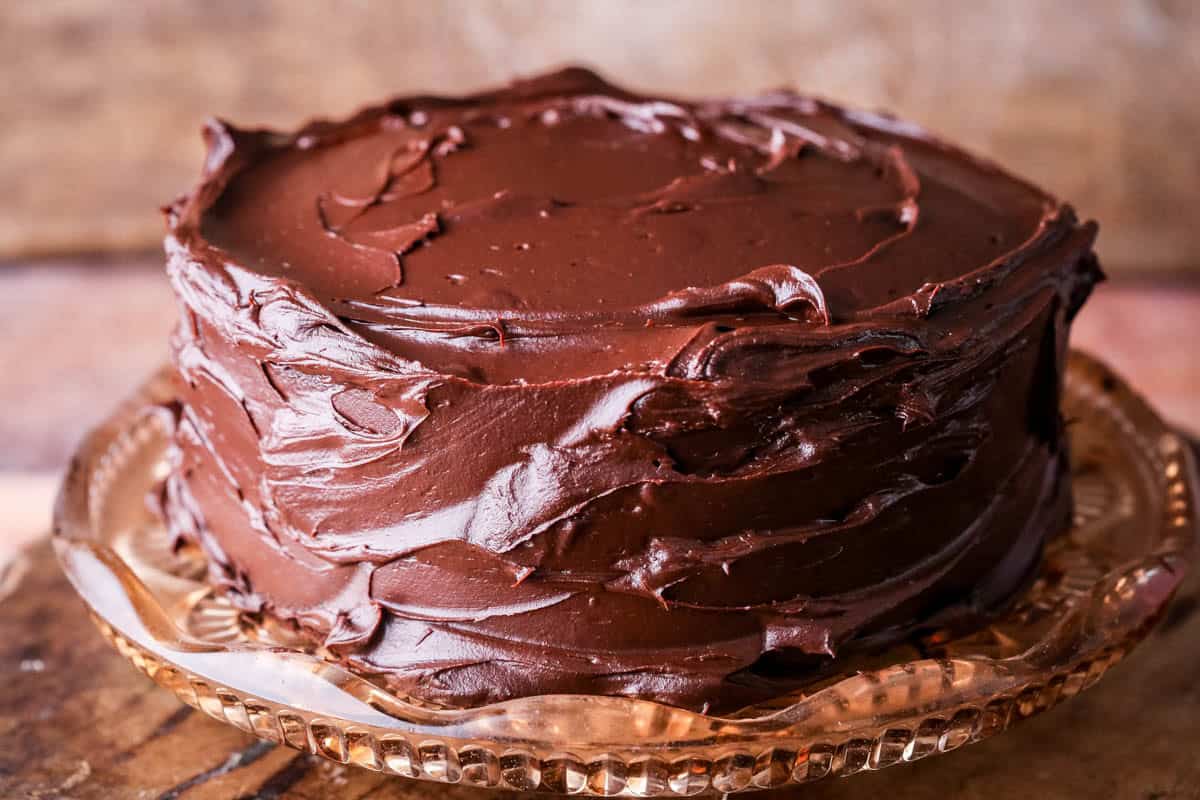
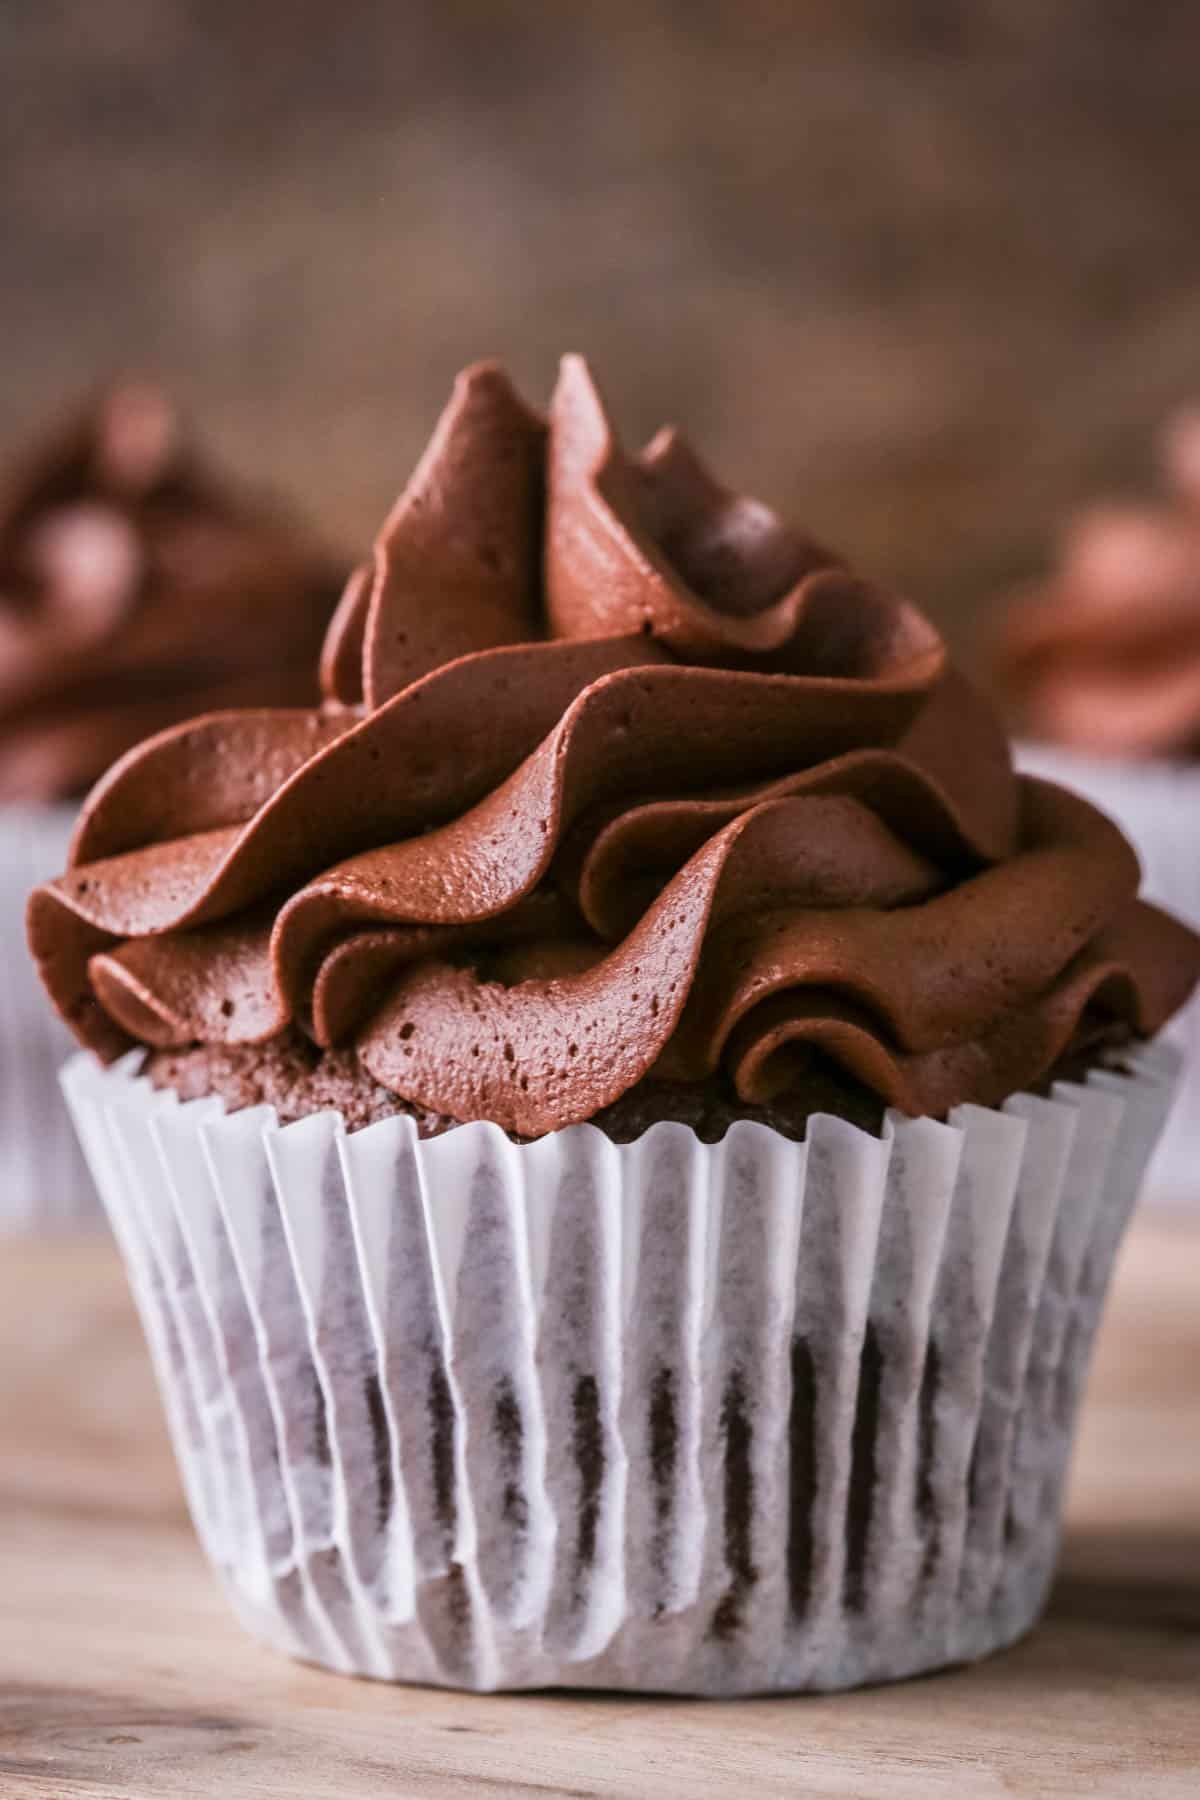
You need the ganache to be a thicker consistency so you can swirl it and spread it without it running off the cake. The dark chocolate ganache is ready pretty much straight away but the milk chocolate and white chocolate ganache need about 20 minutes resting time at room temperature before they are ready for frosting. I use this dark chocolate in my favourite Chocolate Fudge Cake but you can use any of ganaches for frosting brownies, cookies, madeleines or any baked good.
Filling
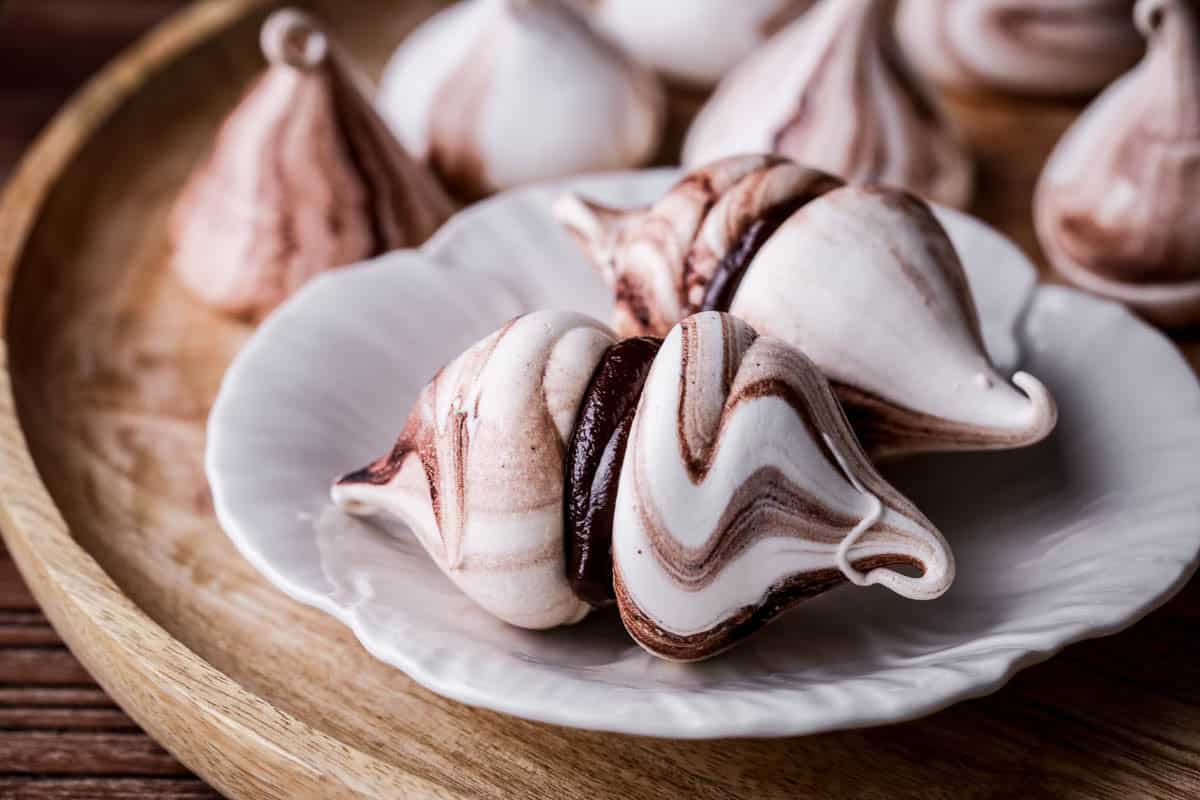
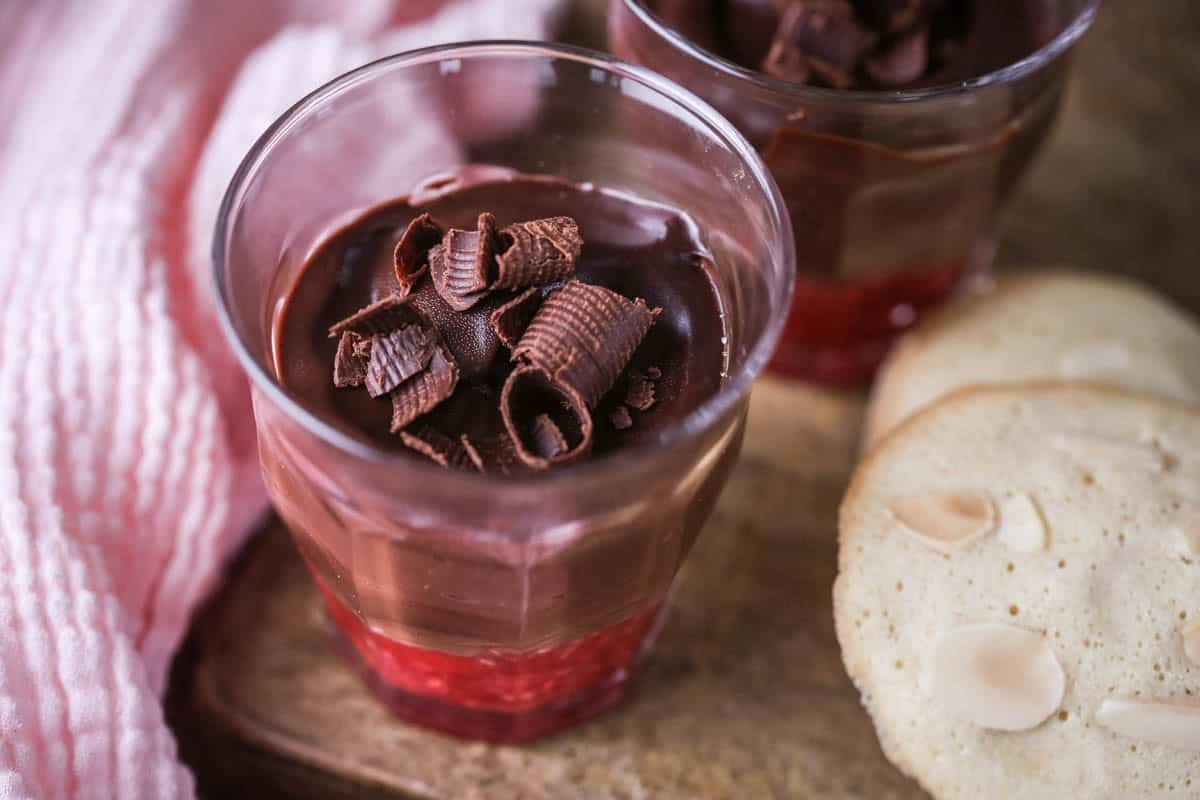
The ganache can be used for sandwiching together your favourite cookies, meringue kisses or for filling doughnuts, choux buns or using in no-bake chocolate tarts.
Whipped Ganache
Allow the ganache to rest for about an hour at room temperature so it’s pretty firm. Then you can whisk up in a stand mixer or using a handheld whisk. It takes about 2-3 minutes before it reaches a really light creamy consistency which is perfect for piping onto cupcakes.
Decoration
Chocolate curls. Chill the ganache thoroughly then use a peeler to scrape down a shard of firm ganache to create little chocolate curls which are lovely for decorating desserts or cakes.
Chocolate Truffles
I have a detailed post on how to use this recipe for rolled chocolate truffles which you can check out for all the tips on flavouring, rolling, covering and storing. However, you can also use this recipe for piping and filling homemade chocolates.
FAQs
You can use either dark, milk or white chocolate to make a good ganache. The better quality chocolate usually contains more cocoa solids which will lead to a more stable ganache, so use the best you can afford.
For beginners at ganache I recommend choosing double cream which has about 48-50% fat and will contribute a good stability for your ganache. Whipping cream would be my second choice at 35-38% and will give a lighter result.
As long as you choose a dairy-free dark chocolate then it’s possible to make a good dairy-free ganache. Depending on what you mix it with, whether it’s a plant-based double cream, coconut cream or another liquid then it probably won’t be as stable as traditional double cream so make sure to keep the troubleshooting notes handy.
Ganache splits when the emulsion breaks. It happens when the fat droplets are not evenly dispersed in the water content of the emulsion, they collect together and rise to the surface of the ganache leading to oily results. This could be because the ganache has become too warm or too cold or because there was too much fat in the emulsion.
This ganache is good to use as the fat and chocolate have recombined and it is ready to frost or fill baked goods or even set this ganache further for truffles. However, if you need the ganache at a more pourable state then you will need to add more warm cream to loosen. Try a tablespoon of warm cream at a time, stirring gently from the inside moving out.
A grainy ganache is the sign of an unstable emulsion. It’s either the beginning of a split ganache (it will soon turn oily if you keep stirring) or it’s just that the cocoa butter has recrystallised (cooled down) before all the fat had been evenly dispersed in the ganache. It can happen if you stir too much at an unstable temperature. Stop stirring as soon as it’s smooth and creamy. The fix-its are the same as the solutions to a split ganache, as above in the troubleshooting section.
If you follow this recipe exactly using good quality white chocolate with high cocoa solids then you should avoid this problem. With white chocolate you are relying on cocoa butter to set ganache so if the cocoa butter (cocoa solids) content is low then you may have a trickier time setting your ganache.
You can use this ganache recipe as it is for any of these purposes, just follow the instructions in the recipe card below for usage. However, if you would like your ganache to be a more pourable consistency for longer then use more cream in the recipe. If you want a firmer set ganache for your truffles then use more chocolate.
Flavouring Ganache
The possibilities for flavouring chocolate ganache are endless. But let’s assume we are using this basic recipe and just want to make a few easy adjustments rather than switching out our liquid which will mean changing our chocolate ratios.
For the best most stable results you can either choose to infuse the cream without changing the water or fat content. For example infusing the cream with mint leaves or orange zest.
Or you can add the flavourings at the end when you have achieved a stable ganache emulsion.
Mint Chocolate Ganache. Add ⅛ teaspoon peppermint extract to the ganache once emulsified.
Orange Chocolate Ganache. Add either the zest of an orange to the cream to infuse or ¼ teaspoon orange extract to the ganache after it’s emulsified.
Coffee Ganache. Add 1 teaspoon espresso powder to the cream to infuse with coffee flavour.
Liqueur Ganache. Stir in about 1 tablespoon of rum, brandy, Amaretto or Frangelico at the very end of the recipe.
More Chocolate Recipes You’ll Love
- Hot Chocolate Sauce for Ice Cream
- How To Temper Chocolate At Home
- Easy Chocolate Truffles
Enter your email below to get this recipe sent to your inbox plus get new recipes, baking tips, and updates.
Chocolate Ganache
Ingredients
Dark Chocolate Ganache
- 180 g double cream
- 1 tablespoon golden syrup
- ½ teaspoon salt
- 180 g dark chocolate
- ¾ teaspoon vanilla extract
Milk Chocolate Ganache
- 120 g double cream
- ¼ teaspoon salt
- 250 g milk chocolate
White Chocolate Ganache
- 100 g double cream
- ¼ teaspoon salt
- 260 g white chocolate
Instructions
- Grate or process your chocolate very finely in a food processor so it’s as small as possible and place in a heatproof bowl.
- Pour the cream, the golden syrup (if you’re making the dark chocolate version) and the salt into a medium sized saucepan. Heat very slowly and gently, stirring so the syrup and salt melt.
- The cream should just come to a gentle simmering boil so you are starting to see bubbles on the surface but don’t allow to boil properly.
- Remove from the heat then immediately pour the cream over the chocolate. Make sure the chocolate is completely submerged into the cream by poking down if necessary. Rest for 3-5 minutes.
- Stir from the centre or the bowl to the outer until the chocolate ganache has emulsified and is smooth and glossy.
- Add vanilla extract if you are making the dark chocolate version.
Next steps
- Pouring or dipping. Immediately after making the ganache is ready for pouring as this is when it is in its most liquid state. Perfect for drip cakes or using as a sauce or as a dip for fruit.
- Frosting: Rest the ganache for about 10 minutes (dark chocolate) or 20-30 minutes (milk or white chocolate) in the bowl at room temperature before covering or filling a cake or other baked goods.
- Making truffles: Pour into lined baking tray to cool down for 1-2 hours before rolling into truffles. You can also chill at this point for less sticky rolling. See my detailed recipe on how to make easy truffles.
Notes
- Choose high quality chocolate for your ganache as this will mean it has more cocoa solids and will make a more stable ganache.
- The golden syrup can be substituted for or liquid glucose or corn syrup.
- I recommend reading the article above for detailed troubleshooting on melting the chocolate in the cream and dealing with a split ganache.
- Milk chocolate and white chocolate ganache don’t have very much cream so it’s more difficult for it to melt just in the cream.
- If after you’re sure the chocolate isn’t going to melt in the cream any longer then microwave for 10 second bursts mixing extremely well in between to encourage the chocolate to melt in the cream.
